Microsoft Edge has come a long way from its early days as a relatively unstable and niche browser. With a switch to a Chromium base in 2019 alongside integration with operating system features and AI enhancement, Edge has a feature suite that’s almost on par with Chrome. At the same time, it’s one of the least memory-demanding browsers. So, if you’re thinking of ditching Chrome and moving to Edge to reap those benefits, you’re hardly the only one.
But the stock Edge leaves a bit to be desired if you plan to use it for heavily. Using these Microsoft Edge productivity tricks will help you fine-tune your experience.
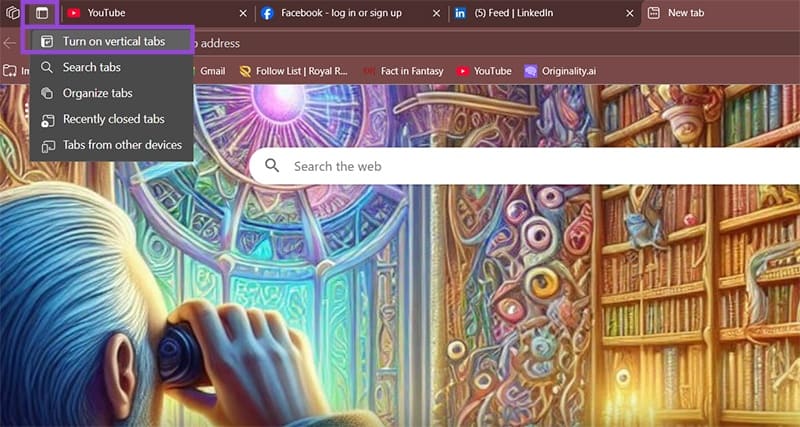
Tip 1 – Use Vertical Tabs
When working with multiple projects or researching various topics, traditional horizontal tabs can become cluttered and hard to navigate.
Step 1. Click on the “Tab actions menu,” which is located directly to the left of the left-most tab.
Step 2. Select “Turn on vertical tabs.” You can also use the shortcut “Ctrl + Shift + , (comma)” for the same effect.
Your tabs will now appear as a top-down list. You can click the “Pin pane” option in the sidebar to show tab titles or leave them as icons on the left sidebar.
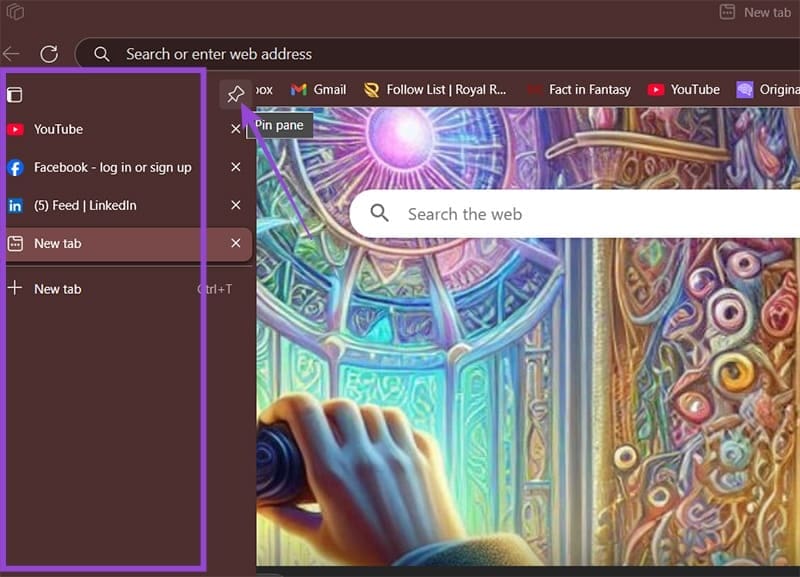
The vertical layout is particularly useful on widescreen monitors, as it makes the most of the added horizontal space. You can easily switch back to horizontal tabs by clicking the same icon if you prefer the classic layout.
Tip 2 – Use Tab Groups
You can also organize tabs to make them easier to navigate.
Step 1. Right-click on any tab and select “Add tab to new group.”

Step 2. Give your group a meaningful name and choose a color to help identify it.

You can collapse and expand tab groups by clicking the group name, making it easier to focus on specific projects while keeping other tabs accessible.
To make creating groups easier when you have a lot of them, you can have Copilot perform automatic grouping to get you started.
Step 1. Click on the “Tab actions menu” and select “Organize tabs.”
Step 2. Copilot will provide a generated list of groups and recommended names. Use the thumbs up or down buttons to provide more context for Copilot. Additionally, you can edit the group names or manually move tabs around by pressing on the “Edit” icon (the pencil) on each group. Click on “Group Tabs” to let the configuration be applied.

Tip 3 – Use Collections
Collections take bookmarking to the next level by allowing you to save not just links, but also images, notes, and text snippets in organized groups.
Step 1. Click on the “Collections” icon in the toolbar (it looks like a folder with a plus sign) or press “Ctrl + Shift + Y.” If you can’t find the button, it can be enabled in the “Appearance” section of Edge Settings.
Step 2. Use “Start new collection” and give it a descriptive name related to your project or research topic.

Step 3. You can drag and drop links, images, or text directly into the collection panel to add them. Alternatively, right-click on any webpage element and select “More tools” then “Add to Collections” and chose the collection you’re adding to.

Step 4. Add notes to your collection by clicking the “Add a note” button (under “More”) within any collection. This is perfect for jotting down thoughts, ideas, or important points related to your research.

Collections sync across all your devices when signed in with your Microsoft account, allowing you to add to them on the fly. You can also export collections to Word documents or Excel spreadsheets for sharing with colleagues or further editing.
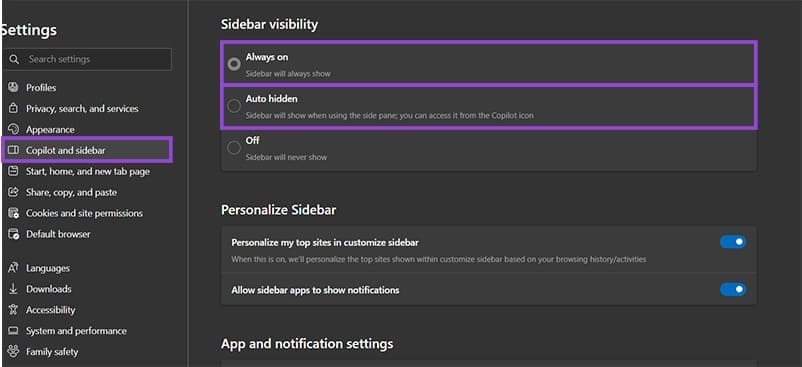
Tip 4 – Streamline Workflow With Sidebar Apps
Edge’s sidebar provides quick access to frequently used tools and applications without leaving your current webpage.
Step 1. To enable the sidebar, go to “Settings” then to “Copilot and Sidebar,” and choose “Always on” or “Auto hidden.”
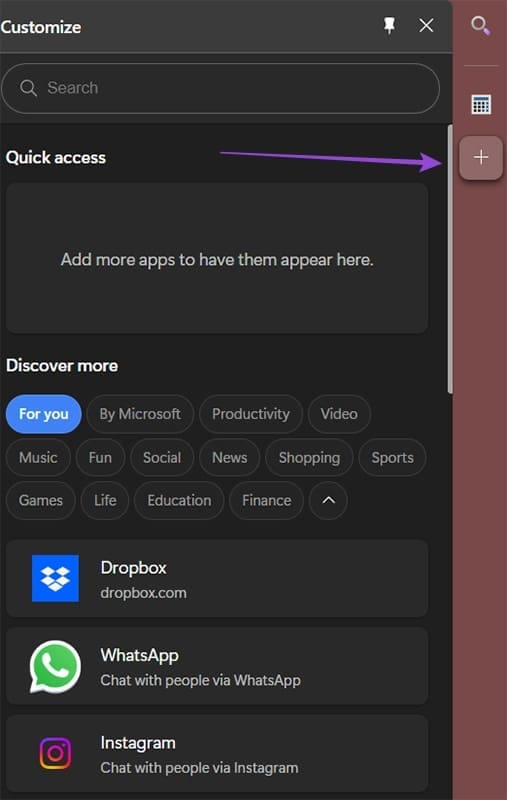
Step 2. To add custom apps, click the “+” button on the sidebar. You can pin websites like Gmail, Trello, or any web-based tool you use regularly and can even search through choices.
The sidebar keeps your essential tools one click away while keeping the main website in full view, sort of like having side-by-side tabs open without switching them.
Tip 5 – Optimize Performance
Edge includes several features designed to improve performance and reduce system resource usage, especially important for users with multiple tabs and limited system resources.
Step 1. Go to Settings and choose “System and performance” to access Edge’s performance optimization tools. Use the “Performance” option to delve into tab-related settings.
Step 2. Use “Save resources with sleeping tabs” to automatically put inactive tabs to sleep after a specified time period. This lowers the amount of RAM they use until you go back to the tab.
Step 3. Adjust the sleeping timer based on your workflow. If you frequently switch between tabs, set a longer timer (in hours). For casual browsing, 15-30 minutes works well.

Step 4. You can prevent a tab that goes to a particular website from going to sleep with a custom exceptions list (“Never put these sites to sleep”).
Step 5. For laptop users, you can enable “Efficiency mode” to extend battery life. Choose between “Balanced savings” or “Maximum savings” which will automatically turn on when the laptop is unplugged.
Tip 6 – Leverage AI-Powered Features
Edge integrates Microsoft’s AI capabilities to enhance productivity and provide intelligent assistance while browsing.
Option 1. Access Copilot through the sidebar for AI-powered assistance with webpage content. You can ask it to summarize articles, explain complex topics, or answer questions about the current page.

Option 2. Use Bing Visual Search by right-clicking on any image and selecting “Visual Search” to find similar images, identify objects, or get more information about visual content.

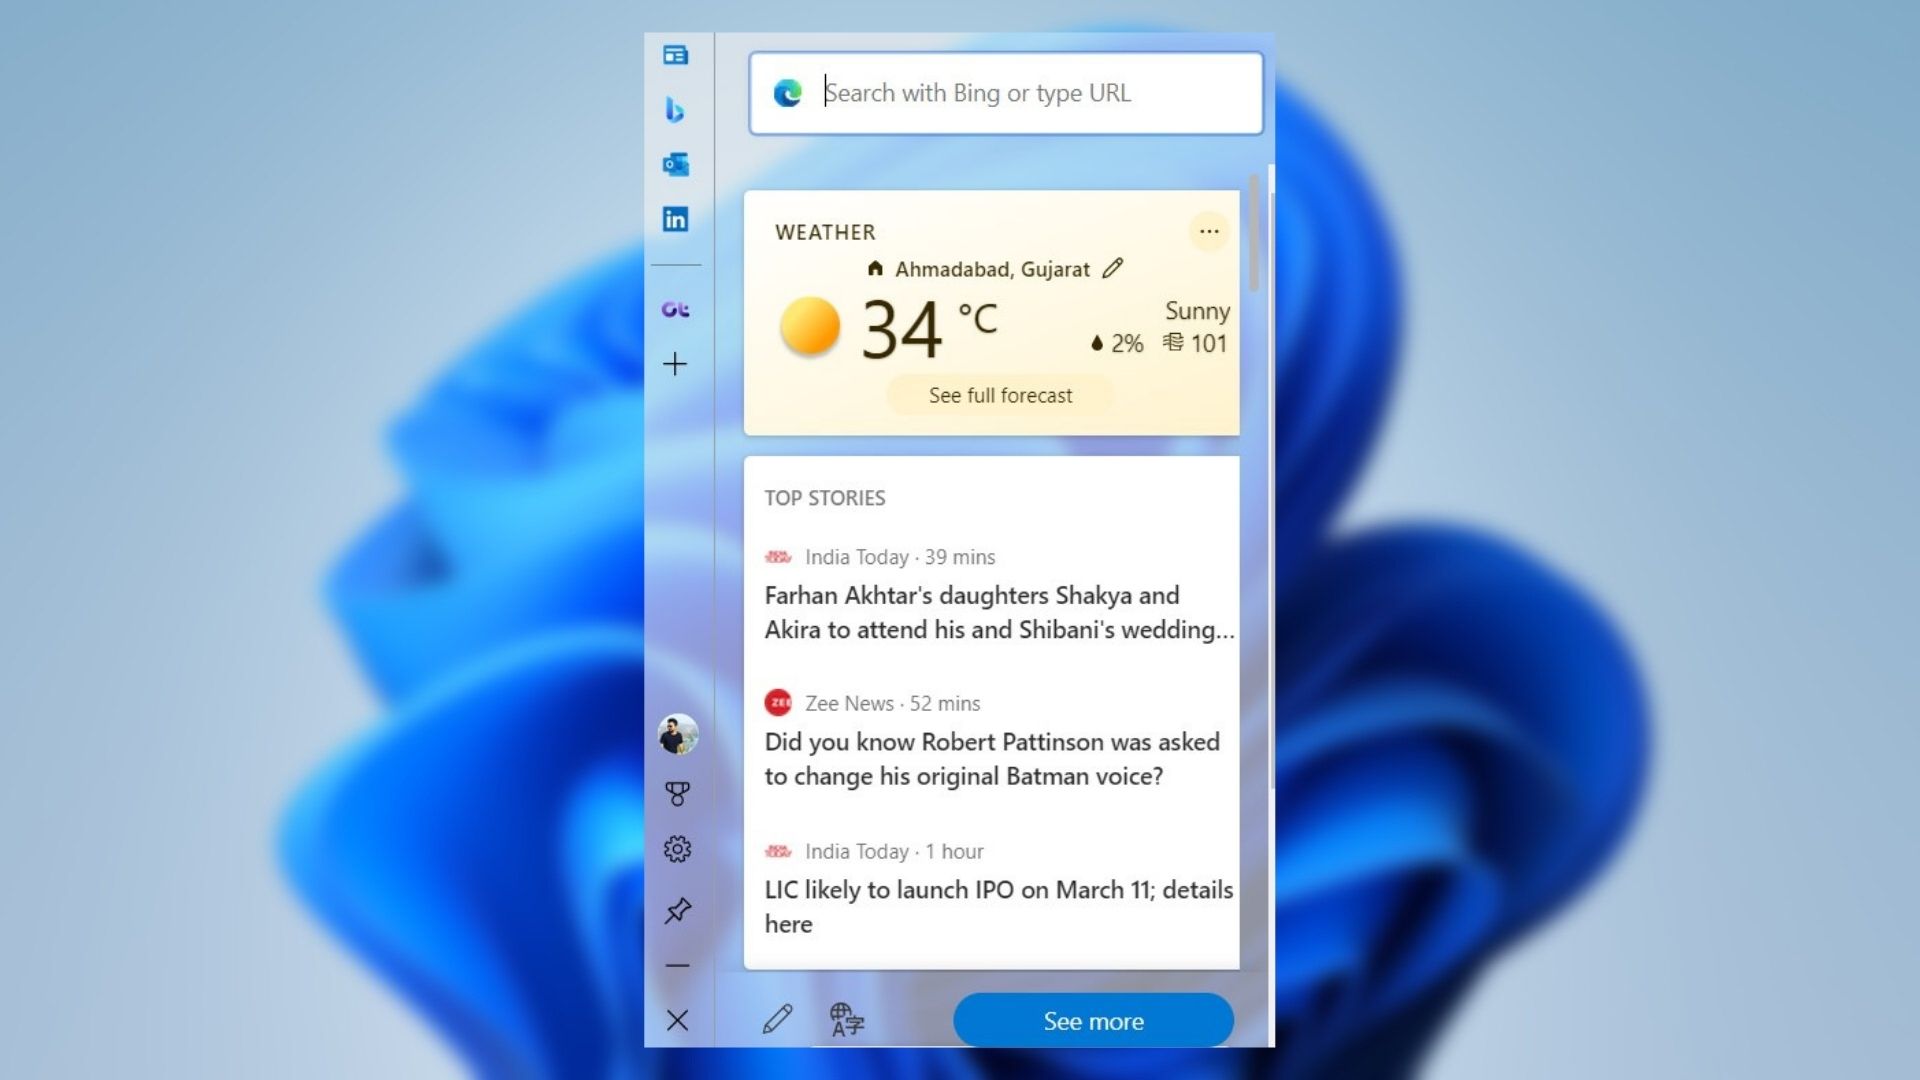
Tip 7 – Customize Your New Tab Experience
Edge’s new tab page can be extensively customized to serve as a productivity dashboard.
Step 1. Open a new tab and click the gear icon in the top-right corner to access customization options.

Step 2. Add quick links to frequently visited sites by clicking the “+” icon in the quick links section.
Step 3. Enable widgets like weather, to-do lists, or stock prices to create a personalized dashboard that provides useful information at a glance. Additionally, use “Show feed” to get news on topics that interest you.
Step 4. Personalize your news feed by clicking “Personalize” at the bottom of the page and selecting topics that interest you.
Was this helpful?
Last updated on 17 June, 2025
Read Next
 Microsoft Loop vs. Notion: Which Productivity Tool Is Better
Microsoft Loop vs.
Microsoft Loop vs. Notion: Which Productivity Tool Is Better
Microsoft Loop vs.
 Top 20 POCO Launcher Tips and Tricks to Increase Your Productivity
A launcher plays an important role in Android phones.
Top 20 POCO Launcher Tips and Tricks to Increase Your Productivity
A launcher plays an important role in Android phones.
 9 Best Microsoft Whiteboard Keyboard Shortcuts to Boost Productivity
Whiteboards are super useful to brainstorm with your team, collect ideas, or draw a plan.
9 Best Microsoft Whiteboard Keyboard Shortcuts to Boost Productivity
Whiteboards are super useful to brainstorm with your team, collect ideas, or draw a plan.
 6 Google Meet Extensions to Increase Your Productivity
1.
6 Google Meet Extensions to Increase Your Productivity
1.
 How to Use the Edge Bar in Microsoft Edge on Windows 11
How to Enable Edge Bar in Microsoft Edge Step 1: Launch Microsoft Edge on your PC > click the three-dot menu icon at the top right > select Settings.
How to Use the Edge Bar in Microsoft Edge on Windows 11
How to Enable Edge Bar in Microsoft Edge Step 1: Launch Microsoft Edge on your PC > click the three-dot menu icon at the top right > select Settings.
 21 OneNote Keyboard Shortcuts to Improve Your Productivity
1.
21 OneNote Keyboard Shortcuts to Improve Your Productivity
1.
 3 Ways You Can Use Windows Focus to Improve Your Productivity
Whether you’re studying, working, or simply trying to organize your personal emails, distractions can take their toll.
3 Ways You Can Use Windows Focus to Improve Your Productivity
Whether you’re studying, working, or simply trying to organize your personal emails, distractions can take their toll.
 How to Clear Cache and Cookies on Microsoft Edge
Clear Microsoft Edge Cache and Cookies in Windows and Mac Here are all the ways to clear your Microsoft Edge cache and cookies on Windows and Mac.
How to Clear Cache and Cookies on Microsoft Edge
Clear Microsoft Edge Cache and Cookies in Windows and Mac Here are all the ways to clear your Microsoft Edge cache and cookies on Windows and Mac.
The article above may contain affiliate links which help support Guiding Tech. The content remains unbiased and authentic and will never affect our editorial integrity.