Backing up your files from time to time is always a good idea; you never know when disaster is going to strike. But what if the disaster strikes during the actual process itself? In this article, we’ll be looking at what to do with a Windows Backup and Restore Stuck issue with a few fixes.
Windows Backup and Restore Stuck – Fixes to Try
Backup and Restore goes all the way back to Windows 7 and helps users make backups of everything from files, folders, to entire images of a disk. It’s old software in a new operating system (10 and 11) and can sometimes freeze. If you’ve been looking at the numbers 12%, 58%, or 97% for longer than you should, it might be Windows Restore stuck. We’ve got some fixes below to help you out:
Restart the Backup Service
A good first call is to restart the service itself and try again. You can do this through Services:
Step 1. Open the Run Dialog (Win + R).
Step 2. Enter “services.msc” and hit “Enter.”
Step 3. In Services, locate “Windows Backup” and right-click it.
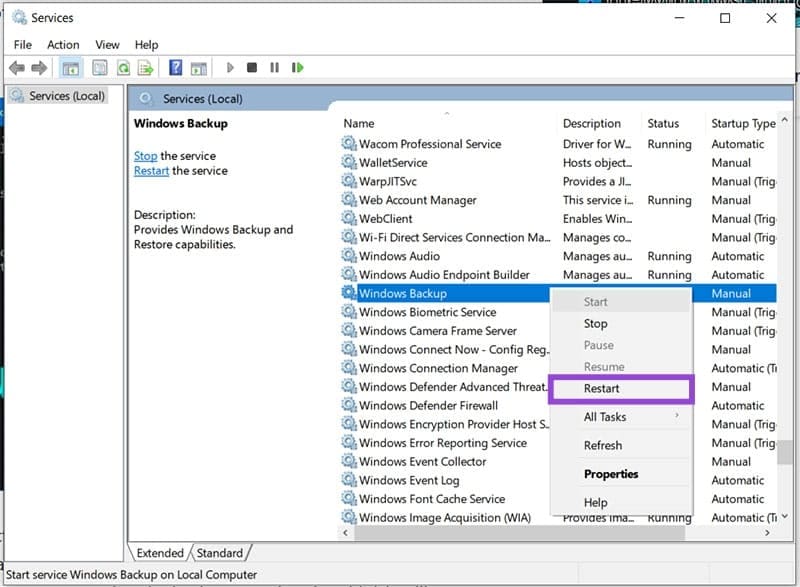
Step 4. Select “Restart” and try the process again.
Delete Previous Backups
Failed or old backups from previous attempts might be causing Backup to get stuck. Clearing these files might help:
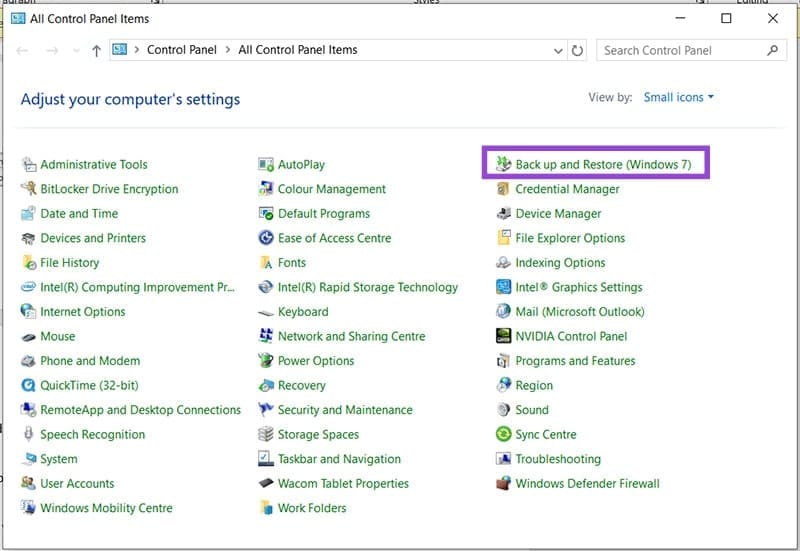
Step 1. Open Control Panel via the search bar or by right-clicking the Start button.
Step 2. Click “Back up and Restore” in the menu.
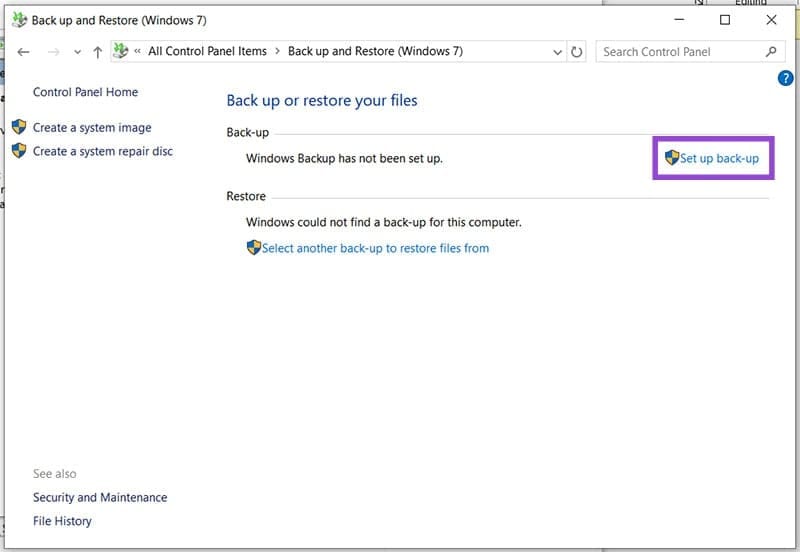
Step 3. Click the “Manage Space” option and delete any existing files.
Exclude Problematic Folders
A big cause of Windows backup stuck issues is problematic files or folders. If you can’t include them, then you may as well leave them out during the backup process. Here’s how:
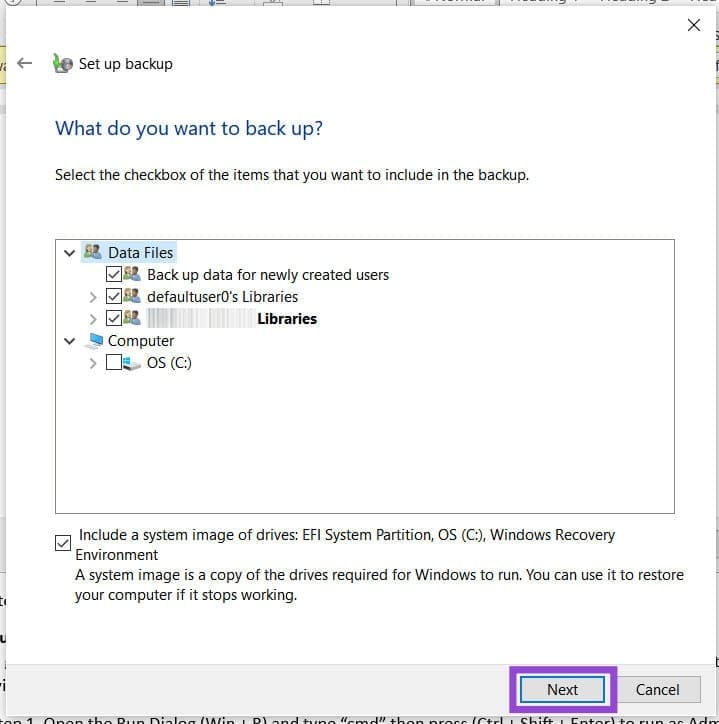
Step 1. Open “Backup and Restore” in Control Panel, in the way mentioned above.
Step 2. Click the “Set up back-up” option and ensure you have Admin privileges.
Step 3. Choose the drive you want to back up to, and then select “Let me choose” before hitting “Next.”
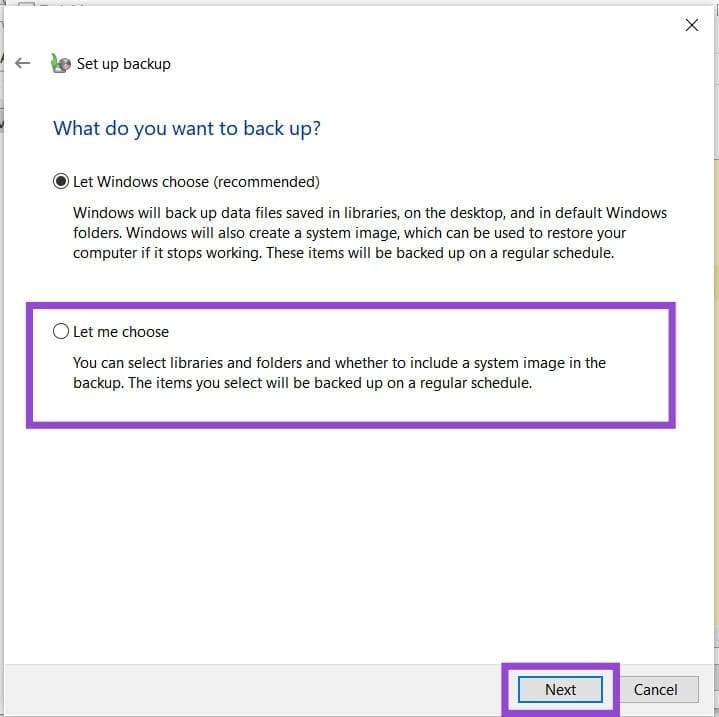
Step 4. Select and exclude the folders you want to back up and then hit “Next” to proceed. Problematic folders are found in “Additional Locations” under your user name, namely “AppData,” “Searches,” and “Contacts.”
Run SFC, Disk Check
A good first step is to ensure the files being backed up aren’t corrupted themselves. You can do this with the double whammy of the System File Checker (SFC) and Disk Check:
Step 1. Open the Run Dialog (Win + R) and type “cmd” then press (Ctrl + Shift + Enter) to run as Admin.
Step 2. In Command Prompt, type: “sfc /scannow” and press “Enter.” Let the process run.
Step 3. Once the process is done, restart your machine.
To perform a Disk Check, do the following
Step 1. Open Command Prompt again in the same way:
Step 2. Type “chkdsk /f ” and hit “Enter.”
Step 3. Let the process run and restart your machine afterwards.
Was this helpful?
Last updated on 28 January, 2026
Read Next
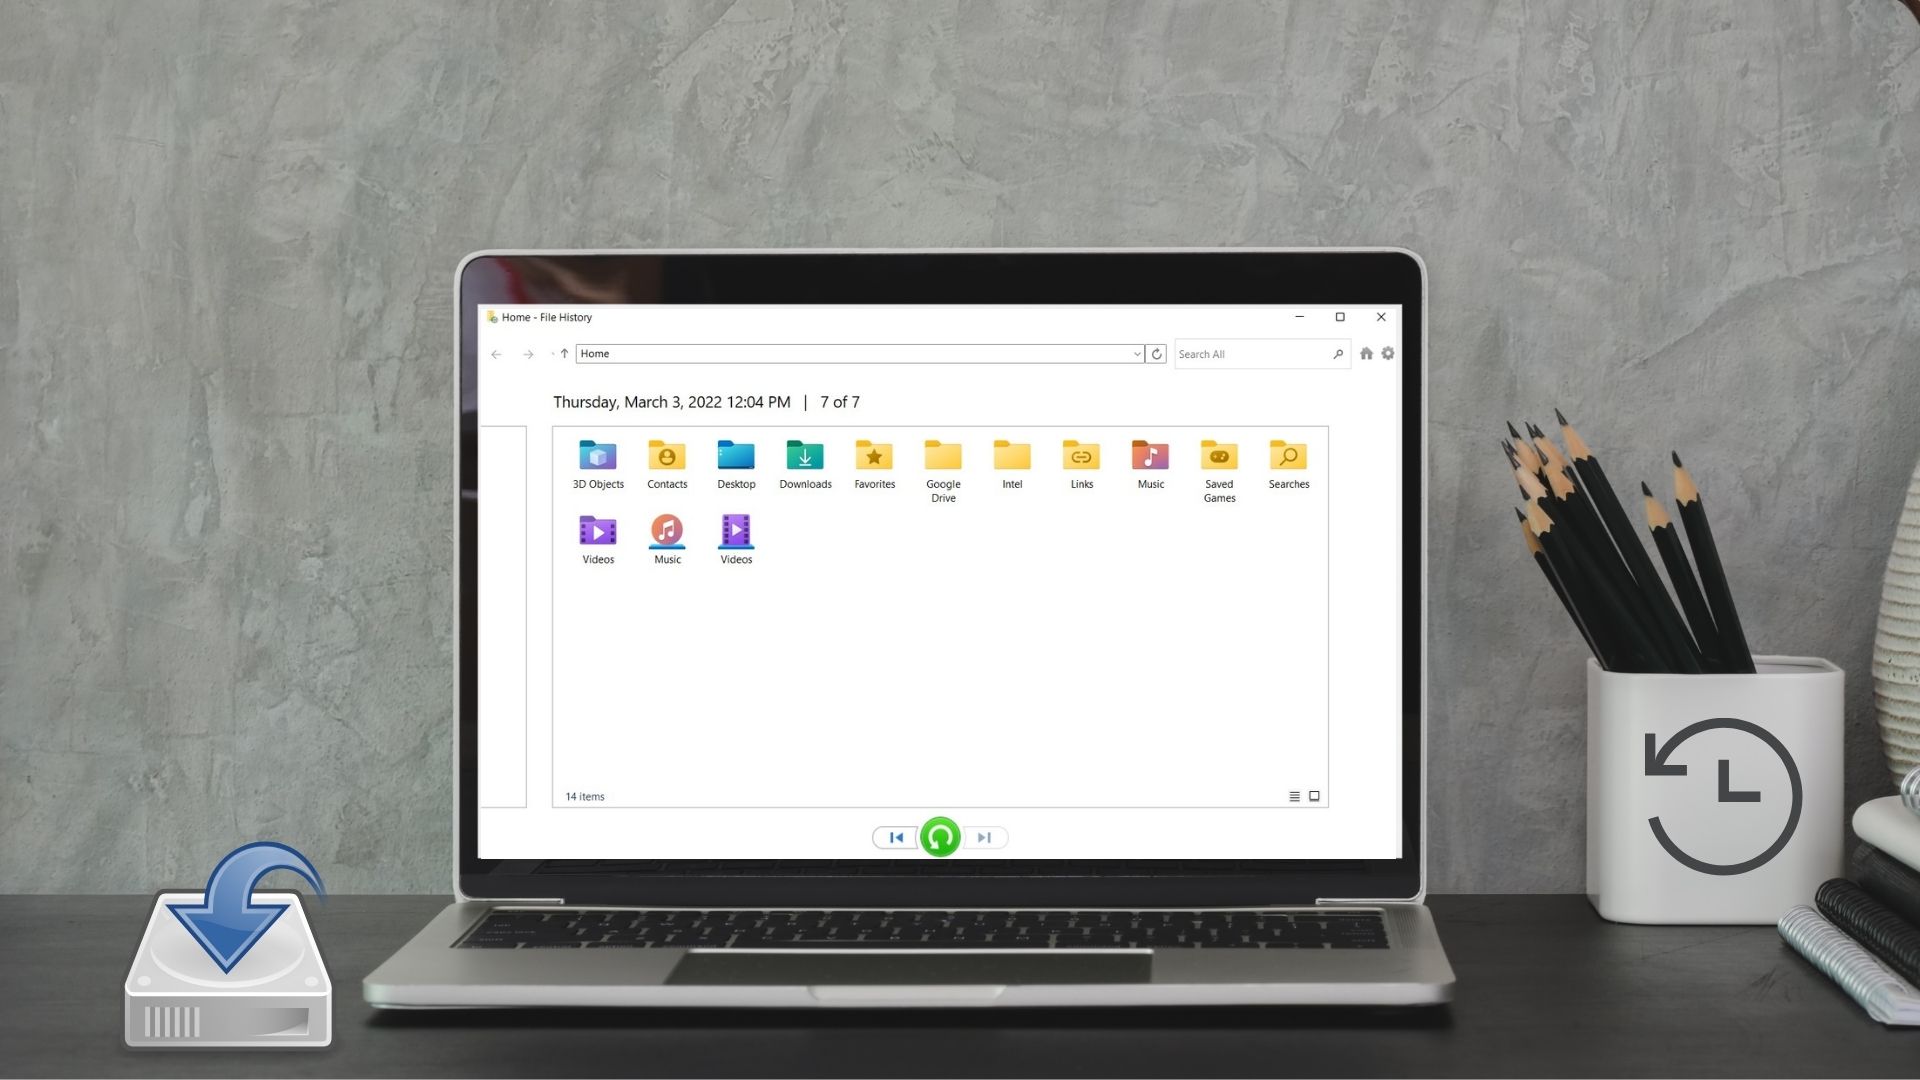 How to Use File History to Backup and Restore Files on Windows 11
File History is a useful utility in Windows 11 to back up select files and folders to an external drive automatically.
How to Use File History to Backup and Restore Files on Windows 11
File History is a useful utility in Windows 11 to back up select files and folders to an external drive automatically.
 A Complete Guide to Using System Restore in Windows 11
Have you made an unwanted change to your Windows 11 PC and don't know how to revert it?
A Complete Guide to Using System Restore in Windows 11
Have you made an unwanted change to your Windows 11 PC and don't know how to revert it?
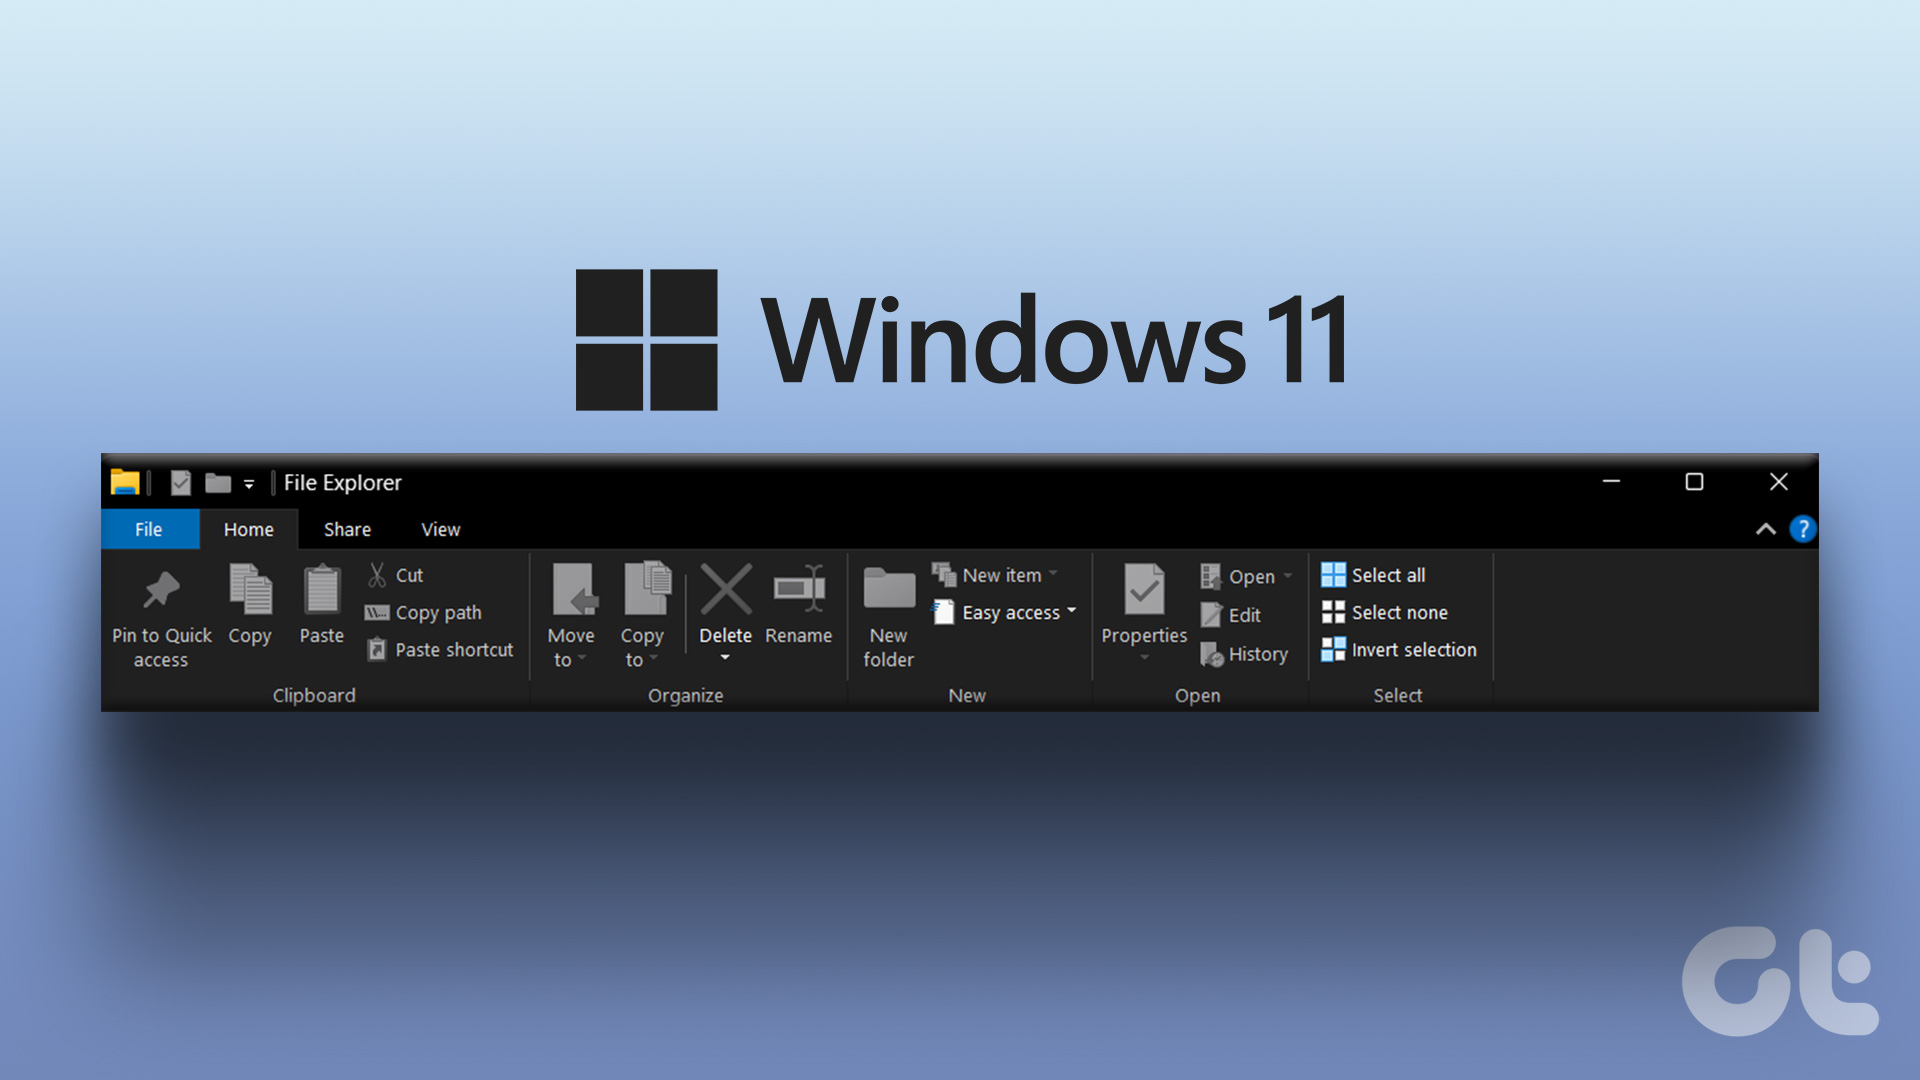 How to Restore the Classic File Explorer Ribbon in Windows 11
Method 1: Using Control Panel This method temporarily restores the old classic ribbon in File Explorer.
How to Restore the Classic File Explorer Ribbon in Windows 11
Method 1: Using Control Panel This method temporarily restores the old classic ribbon in File Explorer.
 4 Ways to Fix System Restore Not Working on Windows 11
Basic Fixes Launch System Restore from Terminal: Open the Power User Menu using the Windows + X shortcut and select Terminal to open it.
4 Ways to Fix System Restore Not Working on Windows 11
Basic Fixes Launch System Restore from Terminal: Open the Power User Menu using the Windows + X shortcut and select Terminal to open it.
 3 Ways to Delete Old Restore Points in Windows 11
Method 1.
3 Ways to Delete Old Restore Points in Windows 11
Method 1.
 11 Steps to Restore the Windows 11 Classic Context Menu (And a Temporary Fix)
How does it always seems like Microsoft manages to break two things every time it fixes one?
11 Steps to Restore the Windows 11 Classic Context Menu (And a Temporary Fix)
How does it always seems like Microsoft manages to break two things every time it fixes one?
 How to Restore Quarantined Items From Windows Defender
Windows Defender (technically named “Windows Security” in Windows 11) remains one of the most reliable built-in antivirus tools and should be sufficient for most users.
How to Restore Quarantined Items From Windows Defender
Windows Defender (technically named “Windows Security” in Windows 11) remains one of the most reliable built-in antivirus tools and should be sufficient for most users.
 How to Restore Files Removed by Windows Defender
Windows Defender is an invaluable tool for keeping your PC safe from harm.
How to Restore Files Removed by Windows Defender
Windows Defender is an invaluable tool for keeping your PC safe from harm.
The article above may contain affiliate links which help support Guiding Tech. The content remains unbiased and authentic and will never affect our editorial integrity.