In some cases, category names or other options look better or more organized with vertical rather than horizontal text, especially if you’re trying to cram a long table onto a screen. Here’s how to write vertically in Excel to make sure you get the best look for your data.
Option 1: Using the Default Text Orientation Options to Make Text Vertical in Excel
By far the simplest solution is to use the stock text orientation option in Excel’s font settings. It basically aligns the text with another axis, allowing you to write in it uninterrupted.
Step 1. Select the cell or cells where you need to make text vertical in Excel.
Step 2. In the “Alignment” section of the toolbar on the top (in the “Home” tab), click on the “Orientation” icon, which has “ab” above a 45-degree arrow.

Step 3. You will get a few different options. Use one of the following:
- Vertical text: Puts the text in vertical mode (where the actual letters are still the “right side up” rather than rotated.
- Rotate text down: Rotates the text so it goes from top to bottom.
- Rotate text up: Rotates the text to read from bottom to top.
The “Vertical text” option makes the text still readable letter-by-letter. However, note that this requires the resulting cell to have a long height, or the text might get trimmed.
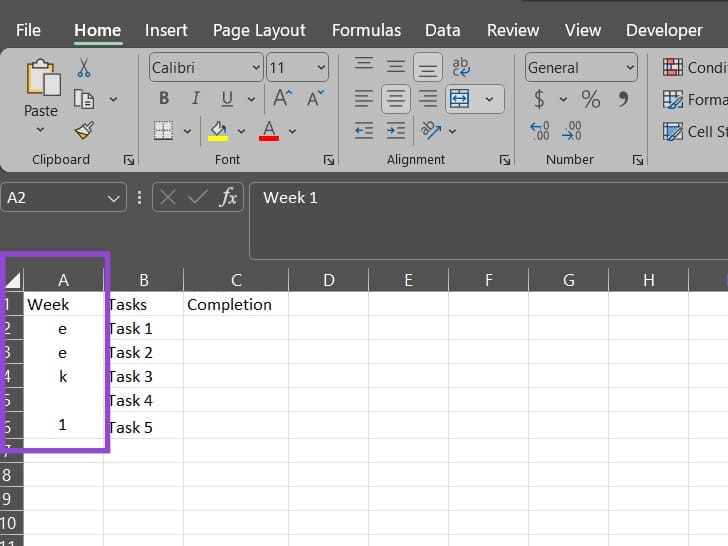
If you want to fix that, you can reduce the letter spacing.
Step 4 (for Vertical text). Click on the cells you need to adjust, then click on “Alignment Settings” arrow (or the last option in the “Orientation menu.”)

Step 5. Check the box “Shrink to fit” and hit “OK” in the popup.
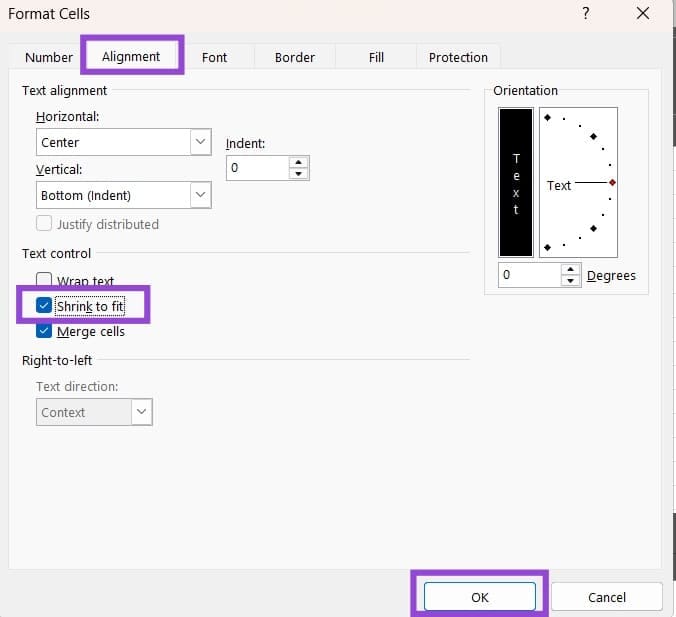
The text will now shrink to fit the constraints of the cell (and might get incredibly small in some cases).
These same options are available if you use the “Textbox” feature to put text on top of the table itself.
Option 2: Use Text Wrap to Write Vertically in Excel
If you use the default “Vertical text” option, you’ll be limited to having only one character or letter per row, which can take quite a lot of space or make it small. You can use text wrapping to write text in multiple lines while still keeping the general orientation of the text.
Step 1. Click on the cell where you want to write vertically.
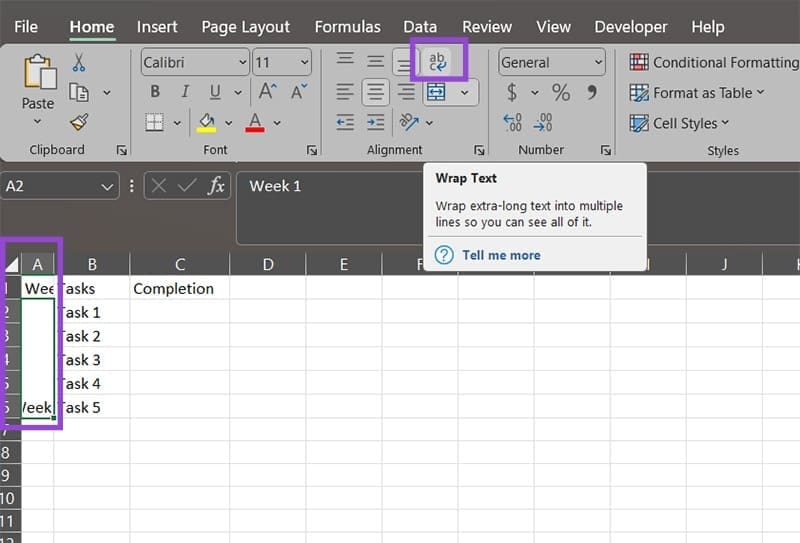
Step 2. Adjust its column width to the point where you can only see one or two letters. Note that this might make some row headers or content need additional changes. You can right-click on a column header, select “Column width,” then enter a small number like 2 or 3 for good results.
Step 3. Click on “Wrap text” from the alignment options.
Step 4. Readjust the text or column width if needed. You can also change the font size or add extra blank spaces if you need to separate the text.
Note that the real-time editing won’t work well, so you’ll need to click on another cell to check how the text actually looks.
Was this helpful?
Last updated on 02 November, 2025
Read Next
 How to Tile Windows Vertically on a Windows PC
Method 1: Using the Snap Assist Feature The Snap Assist feature allows you to arrange multiple windows on your computer, such as to tile your windows vertically.
How to Tile Windows Vertically on a Windows PC
Method 1: Using the Snap Assist Feature The Snap Assist feature allows you to arrange multiple windows on your computer, such as to tile your windows vertically.
 4 Ways to Write a Fraction in Microsoft Word
Method 1: Using Equations Unlike the symbols and autoformat options, which present limited fraction types to insert in your document, you can try creating your fraction using equations.
4 Ways to Write a Fraction in Microsoft Word
Method 1: Using Equations Unlike the symbols and autoformat options, which present limited fraction types to insert in your document, you can try creating your fraction using equations.
 How to Use Spreadsheet Compare to Analyze Excel File Differences
How to Analyze Two Versions of a Workbook With Microsoft Spreadsheet Compare You must import both workbooks into the Spreadsheet Compare tool to analyze different workbook versions.
How to Use Spreadsheet Compare to Analyze Excel File Differences
How to Analyze Two Versions of a Workbook With Microsoft Spreadsheet Compare You must import both workbooks into the Spreadsheet Compare tool to analyze different workbook versions.
 5 Ways to Fix Microsoft Excel Not Saving Changes on Windows
Fix 1: Repair Files From File Explorer Step 1: Open the Microsoft Excel app on your computer.
5 Ways to Fix Microsoft Excel Not Saving Changes on Windows
Fix 1: Repair Files From File Explorer Step 1: Open the Microsoft Excel app on your computer.
 4 Fixes for “Reference Isn’t Valid” Error in Microsoft Excel for Windows
Try Basic Fixes Close and reopen Excel: Microsoft Excel sometimes gets stuck with the "Reference isn’t valid" error due to temporary issues with one of its app processes.
4 Fixes for “Reference Isn’t Valid” Error in Microsoft Excel for Windows
Try Basic Fixes Close and reopen Excel: Microsoft Excel sometimes gets stuck with the "Reference isn’t valid" error due to temporary issues with one of its app processes.
 7 Ways to Combine First and Last Names in Microsoft Excel
Method 1: Using Flash Fill Flash Fill is an intelligent tool in Excel that eliminates the need for complex formulas and manual data manipulation.
7 Ways to Combine First and Last Names in Microsoft Excel
Method 1: Using Flash Fill Flash Fill is an intelligent tool in Excel that eliminates the need for complex formulas and manual data manipulation.
 How to Split a Large Excel File Into Multiple Files
Officially, a Microsoft Excel file can only be 1,048,576 rows by 16,384 columns.
How to Split a Large Excel File Into Multiple Files
Officially, a Microsoft Excel file can only be 1,048,576 rows by 16,384 columns.
 How to Stop Excel From Rounding?
When you are using Excel, it will often “helpfully” round numbers, often to two decimal points.
How to Stop Excel From Rounding?
When you are using Excel, it will often “helpfully” round numbers, often to two decimal points.
The article above may contain affiliate links which help support Guiding Tech. The content remains unbiased and authentic and will never affect our editorial integrity.