Task Scheduler is a powerful tool in Windows that allows you to schedule or automate various tasks and improve your workflow. Whether you’re a power user or want to automate repetitive tasks, Task Scheduler can increase productivity. However, accessing Task Scheduler can be tricky. So, this article outlines 12 ways to open Task Scheduler in Windows.
Knowing different ways to open Task Scheduler in Windows allows you to access the tool and meet your specific needs efficiently. It can be particularly useful if you frequently use Task Scheduler. With that said, let’s begin with the methods.
1. Open Task Scheduler Using Windows Search
Whether on Windows 10 or 11, a quick search gets your desired installed app in front of you. It is one of the easiest and most common ways to open a Task Scheduler. Here’s how to.
Step 1: Press the Windows key on your keyboard or click the on-screen Windows icon.
Note: You may also click on the on-screen Search icon.

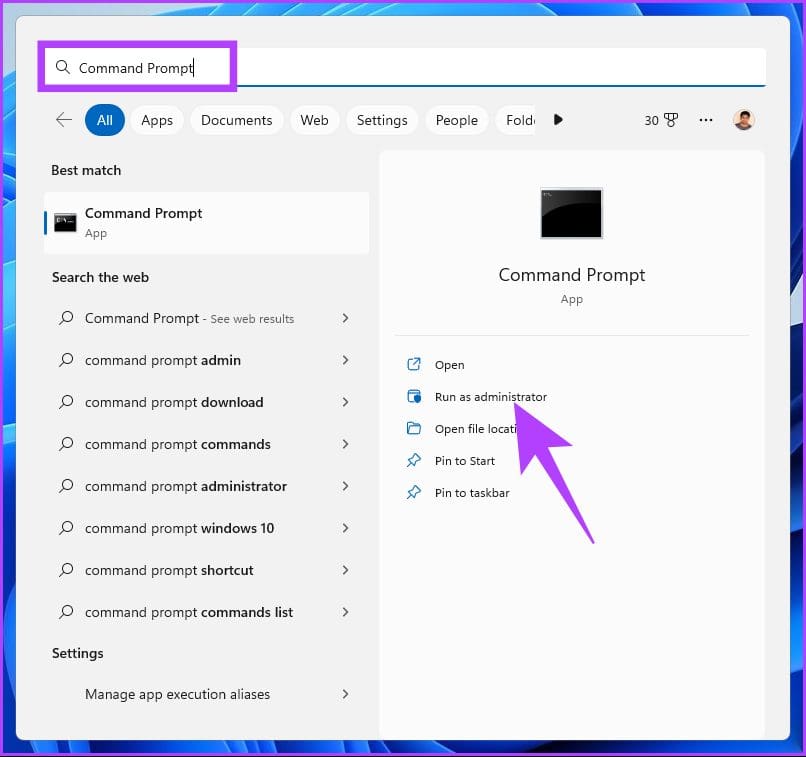
Step 2: Type Task Scheduler.

Step 3: Click ‘Run as administrator.’

In the prompt, select Yes.
That’s it. You have successfully opened Task Scheduler. Now that you have accessed Task Scheduled, you may also want to learn how to schedule tasks in Windows 10.
2. Run Task Scheduler Using Cortana
This method is much easier; you can open Task Scheduler without touching your Windows PC, provided you have turned on Cortana on Windows. Simply activate Cortana by saying ‘Hey Cortana’ (wait for it to open and start listening) and then say, ‘open Task Scheduler.’
It will process and open it for you. If you don’t find Cortana on your PC or you don’t use it, move to the next method.
3. Run Task Scheduler Using Windows Tools
Windows Tools is a collection of system tools and utilities built into the Windows operating system to help you manage, troubleshoot, and diagnose various computer problems.
It includes several built-in features, including Disk Cleanup, Disk Defragmenter, and System Configuration. One of the tools included in Windows Tools is the Task Scheduler.
If you are on Windows 10, follow the instructions carefully.
Step 1: Press the Windows key on the keyboard or click the Windows icon on the taskbar and select All apps.

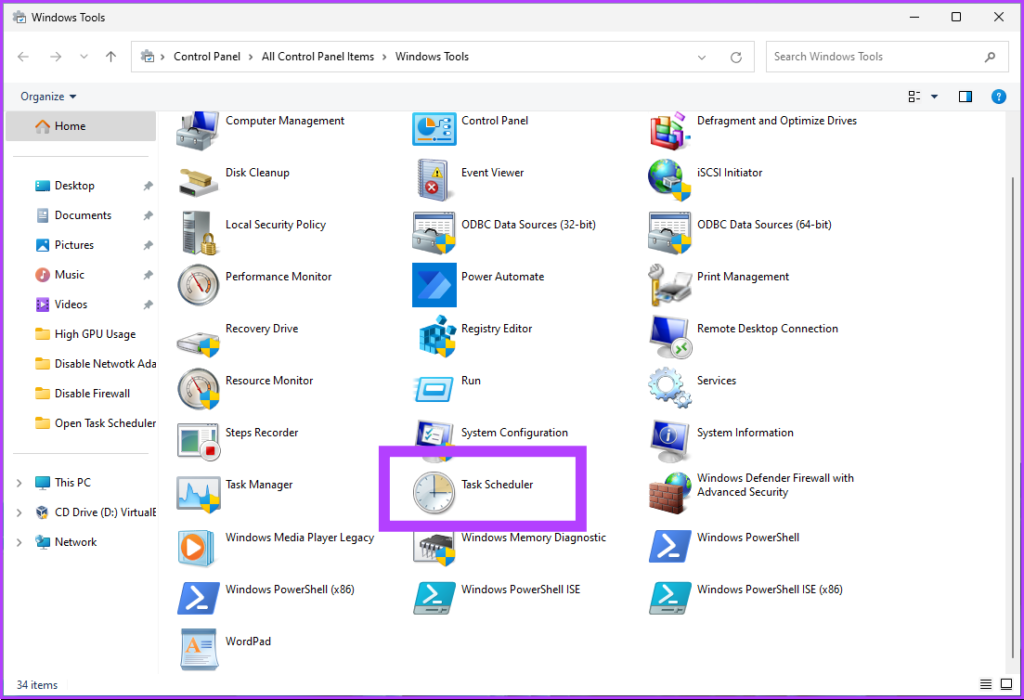
Step 2: From the list of programs, scroll down to find Windows Tools and click on it.
Note: If you are on Windows 10, you will find Windows Administrative Tool. Click on the folder and select Task Scheduler.
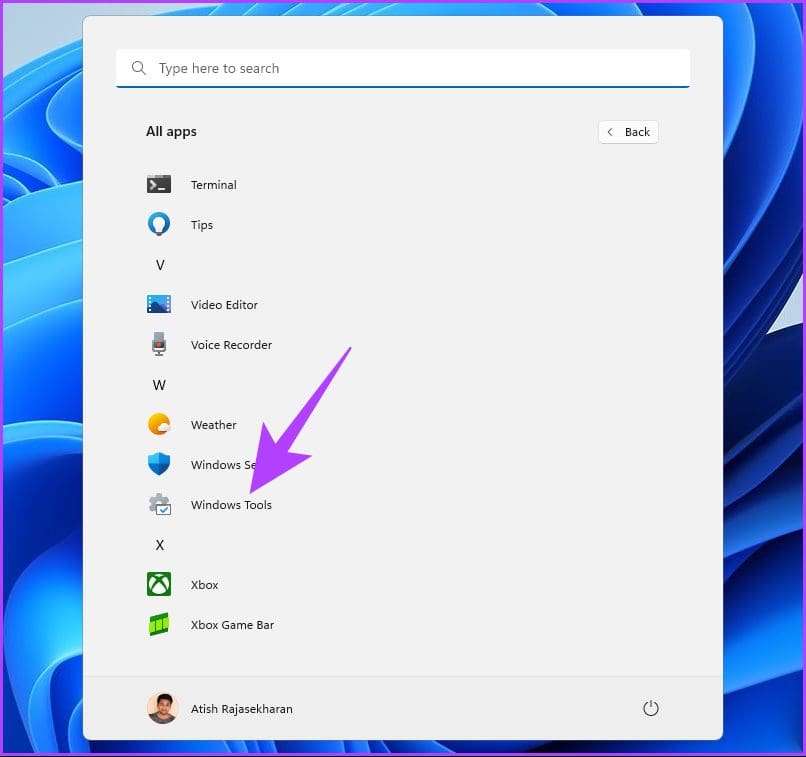
Step 3: Under the Windows Tools folder, click on the Task Scheduler.
There you have it. You have successfully opened Task Scheduler on your Windows PC. Check out the next method if you are looking for a familiar way of opening the Task Scheduler.
4. How to Open Task Scheduler Using File Explorer
This method enables you to open Task Scheduler from File Explorer. Irrespective of whether you are on Windows 10 or Windows 11, it is easy to execute the below steps.
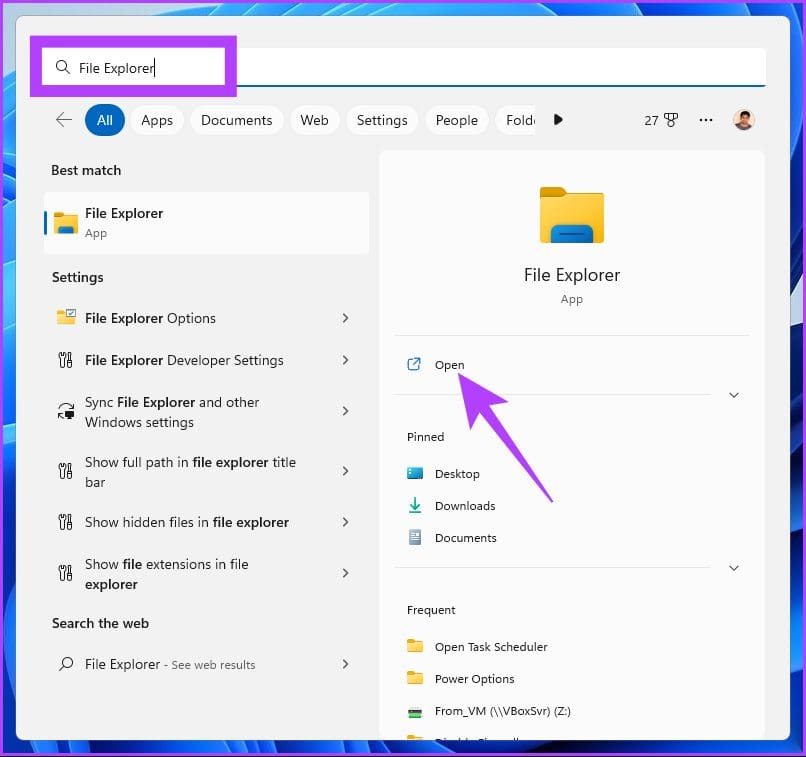
Step 1: Press the Windows key on your keyboard, type File Explorer, and click Open.
Note: Alternatively, press the ‘Windows key + E’ on your keyboard to open Windows Explorer.
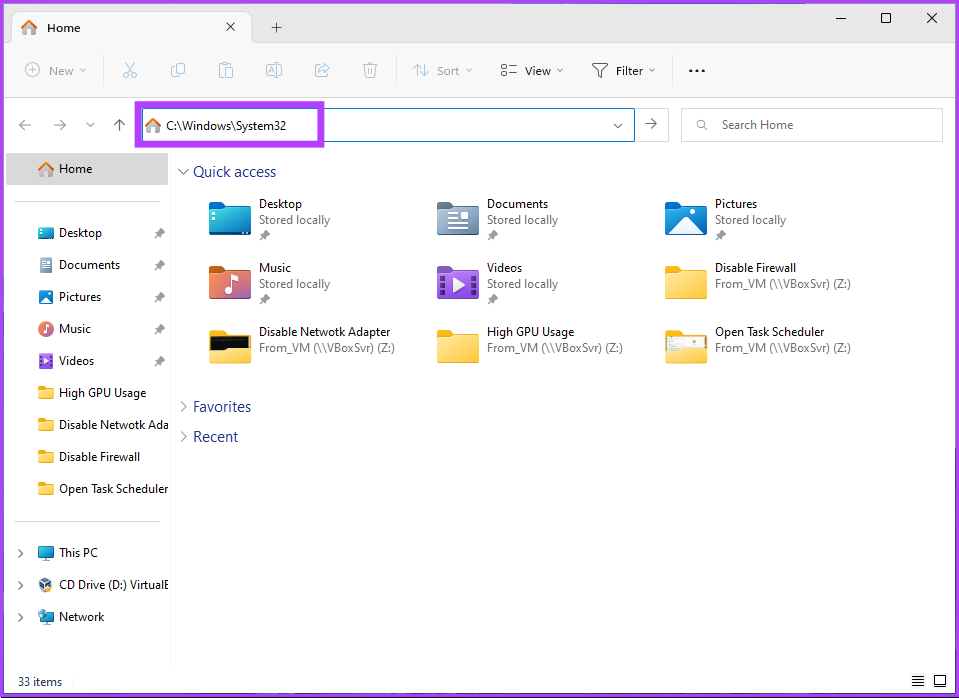
Step 2: Navigate to the address bar, type the below address, and hit Enter.
C:\Windows\System32
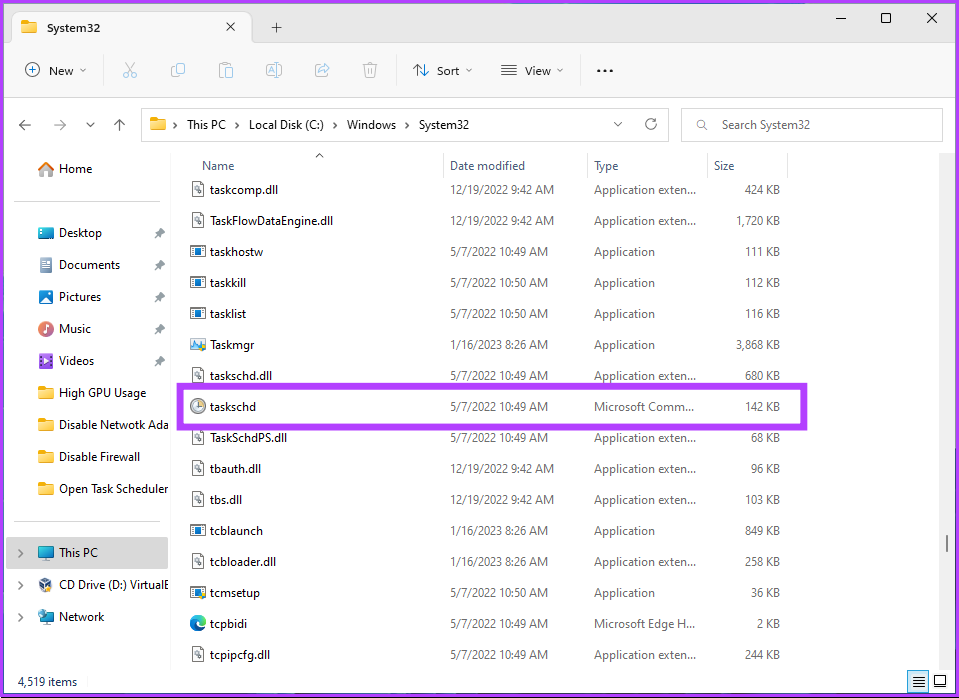
Step 3: Scroll down and double-click on taskschd.
There you go. A few simple steps will get you started with Task Scheduler. You can also create a shortcut and place it anywhere you prefer on your Windows PC. Let’s understand how.
5. How to Create a Task Scheduler Shortcut
Creating a Task Scheduler shortcut is a one-time process that allows you to open the tool with one click every time. This is one of the quickest ways to open Task Scheduler in Windows. Here’s how to do so.
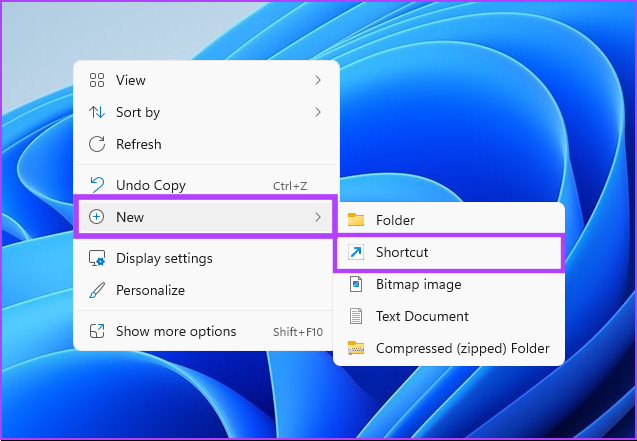
Step 1: Right-click on the empty space on your desktop, go to New, and select Shortcut.
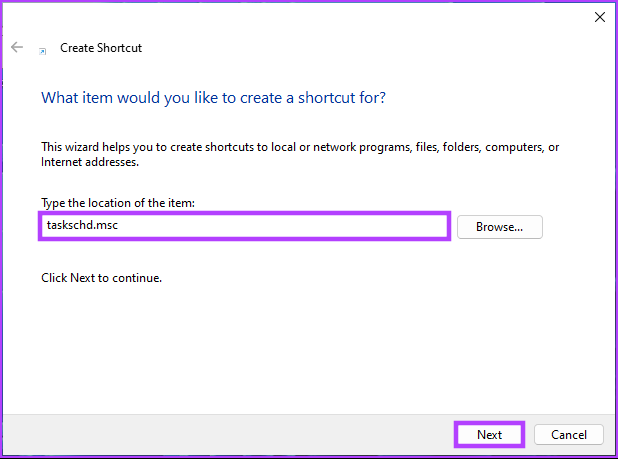
Step 2: In the Create Shortcut wizard, under ‘Type the location for the item,’ type taskschd.msc and click Next.
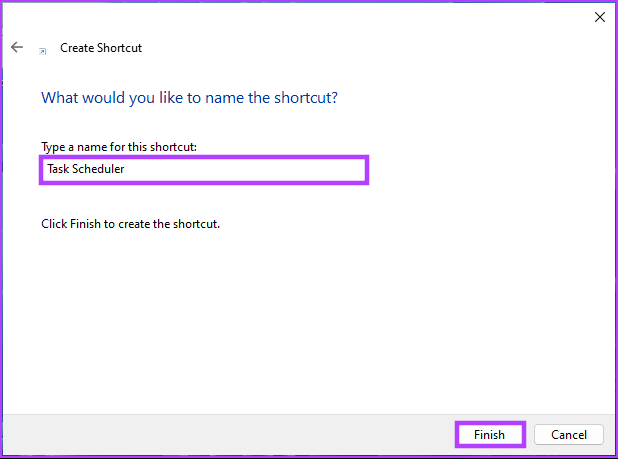
Step 3: Enter a name for your shortcut and click Finish.
Eg: Task Scheduler
With this, you can open Task Scheduler with a button anytime. You can also set a hotkey to open it. Continue reading.
6. How to Open Windows Task Scheduler with a Hotkey
You already know how to create a Task Scheduler shortcut. However, setting a hotkey to open it will make opening Task Scheduler in Windows frictionless. Follow the steps below.
Step 1: First, add a Task Scheduler shortcut to your desktop as shown in the previous section.

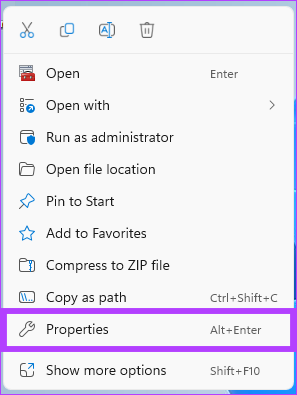
Step 2: Right-click the Task Scheduler desktop shortcut and select Properties.
Note: Alternatively, you can press ‘Alt + Enter’ on your keyboard.
Step 3: In the Task Scheduler Properties window, under the Shortcut key box, press T (or any letter you prefer) to establish a Ctrl + Alt key combination. Finally, click Apply and then OK.

With this, all you have to do is press the key combination to open Task Scheduler. As the key combination is tied to the desktop shortcut, deleting it will also erase the hotkey. If the shortcut is too much for you, there are other options too.
7. Run Windows Task Scheduler Using Control Panel
There are many options that you may find under Control Panel; one of them is Task Scheduler. Here’s how you can open it.
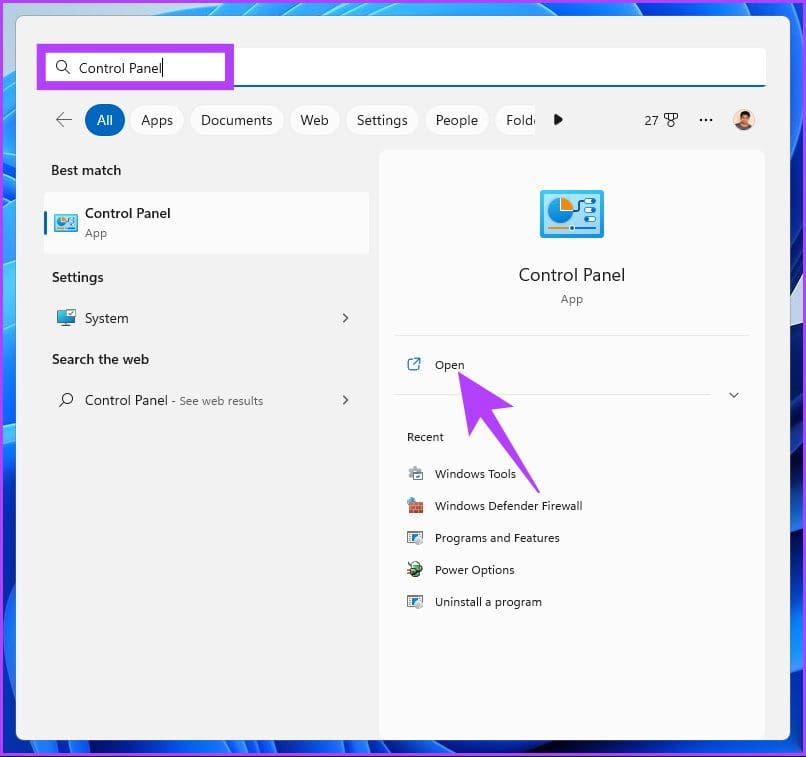
Step 1: Press the Windows key on your keyboard, type Control Panel, and click on Open.
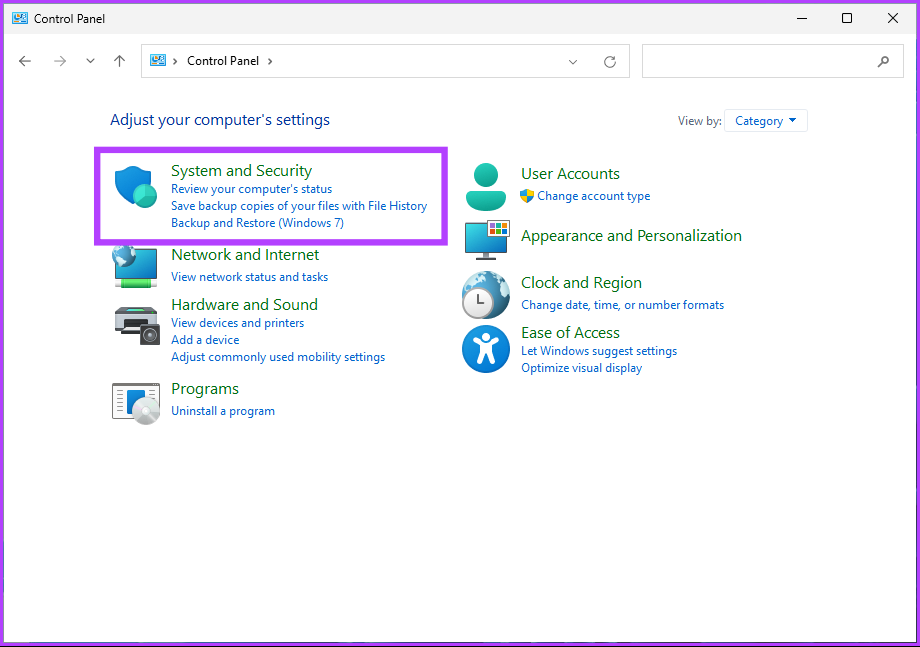
Step 2: Under Control Panel, go to ‘System and Security.’
Step 3: Go to the Schedule tasks option to open Task Scheduler.

If the option is not available or visible, continue with the below steps.
Step 4: Click on Administrative Tools (Windows 10) or Windows Tools (Windows 11).
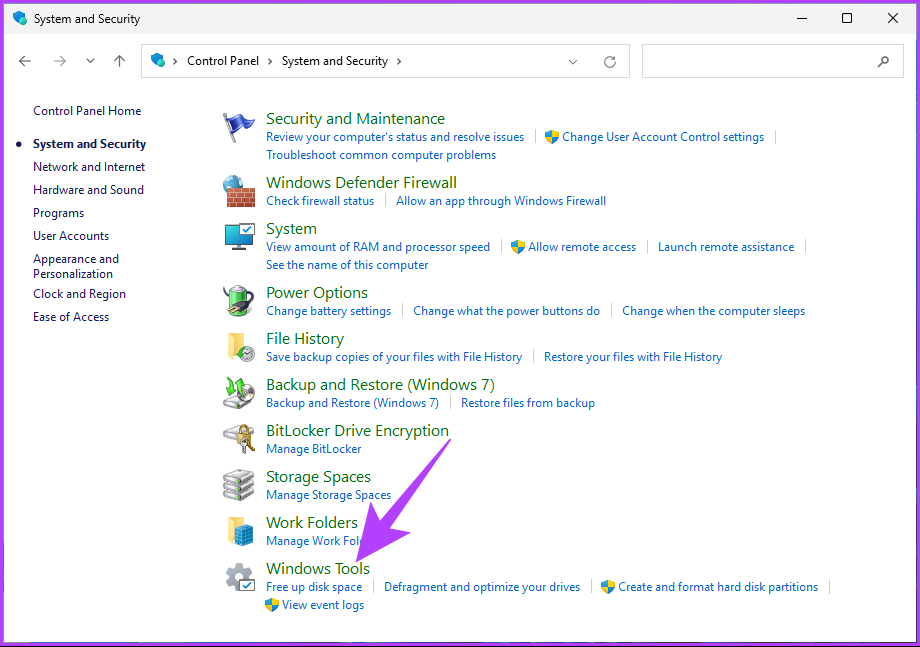
Step 5: Scroll down to find Task Scheduler and double-click on it to open it.
There you go. You have successfully opened Task Scheduler from Control Panel. If you are looking for a more straightforward way to open Task Scheduler, move to the next method.
8. Open Task Scheduler Using Computer Management
Windows Computer Management provides a centralized interface for managing various aspects of a computer system. The Computer Management tool allows access to different system management functions, including a Task Scheduler. Follow the below-mentioned steps.
Step 1: Press the ‘Windows key + X’ on your keyboard to open the context menu.
Note: Alternatively, you can right-click the Windows icon on the taskbar.

Step 2: In the WinX menu, select Computer Management.

Step 3: Go to Task Scheduler from the left pane under the Computer Management window.

There you have it. You know now another way to schedule your tasks on Windows PC. However, if you are in Task Manager and want to schedule a task, it is much easier to open it from there than going full circle.
9. Run Windows Task Scheduler Using Task Manager
It is fairly simple to open Task Scheduler from the Task Manager. All you need to do is follow the instructions below.
Step 1: Press the Windows key on your keyboard, type Task Manager, and click ‘Run as administrator.’
Note: Alternatively, press ‘Windows key + Shift + Esc’ to open Task Manager.

Step 2: Click on ‘Run new task.’
Note: If you are on Windows 10, click on File and select ‘Run new task.’

Step 3: In the ‘Create new task’ window, type taskschd.msc in the text field, and click OK.

You have successfully opened Task Scheduler on your Windows PC using Task Manager. Keep reading if you want to do the same thing using the Run command box.
10. Open Task Scheduler Using Run Command Box
This method is relatively easy, considering you already know how to open Task Scheduler using Task Manager (above). Follow the below steps.
Step 1: Press the ‘Windows key + R’ to open the Run command box.
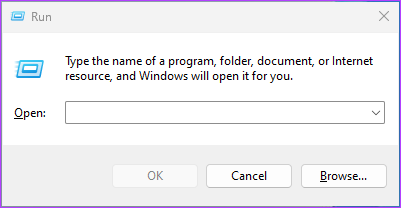
Step 2: Type the below command and click OK.
taskschd.msc

There you have it. This method is the quickest way to open the Task Scheduler. However, if you want another way to open it, check out the next method.
11. Run Task Scheduler Using Command Prompt, PowerShell, or Windows Terminal
You can launch Task Scheduler using command-line interpreters. All you have to do is enter a command to open it. Follow the below steps.
Step 1: Press the Windows key on your keyboard, type Command Prompt or PowerShell or Windows Terminal, and click ‘Run as administrator.’
Note: For the sake of demonstration, we will open Command Prompt and use it to access Task Scheduler.
In the prompt, select Yes.
Step 2: Type the below command and hit Enter.
taskschd

That’s it. It will open Task Scheduler with ease. If you are an avid user of Task Scheduler and want it included in the context menu, move to the next method.
12. How to Open Task Scheduler From the Desktop Context Menu
If you are not a fan of keeping desktop shortcuts but prefer a cleaner view, this method will help. It isn’t as straightforward as the above ones, but the steps are reasonably simple to follow and execute.
However, because we will be using Registry Editor, we strongly advise you to back up the Windows Registry before proceeding with the steps below.
Step 1: Press the Windows key on your keyboard, type Registry Editor, and click ‘Run as administrator.’
Note: You can also press ‘Windows key + R’ to open the Run dialog box, type regedit.exe, and click OK to open Registry Editor.

In the prompt, select Yes.
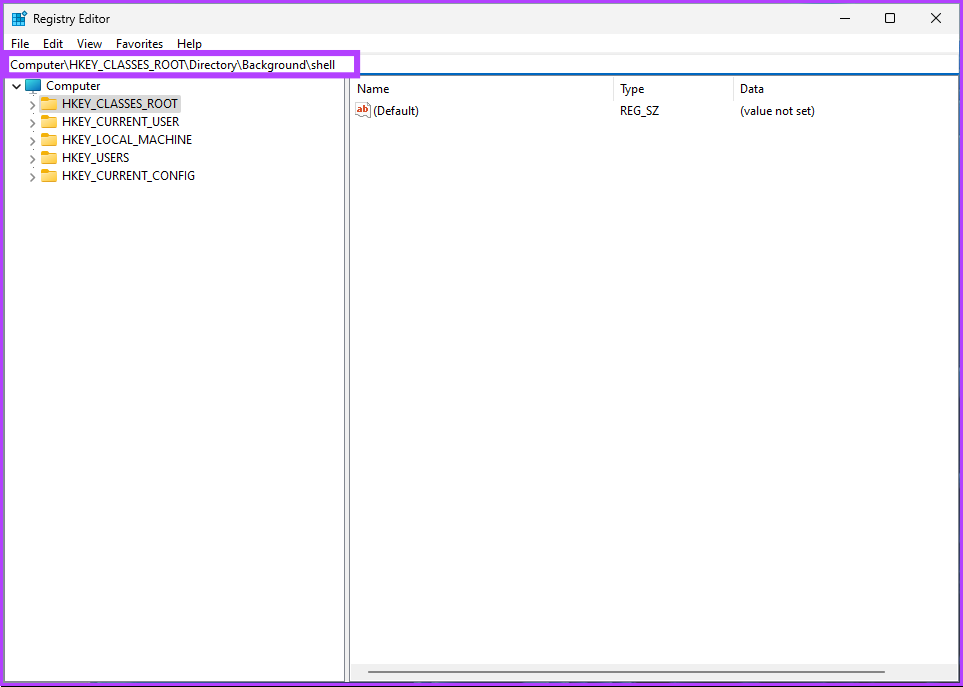
Step 2: In the address bar, enter the below-mentioned address.
HKEY_CLASSES_ROOT\Directory\Background\Shell
Note: You can manually navigate to the section too.
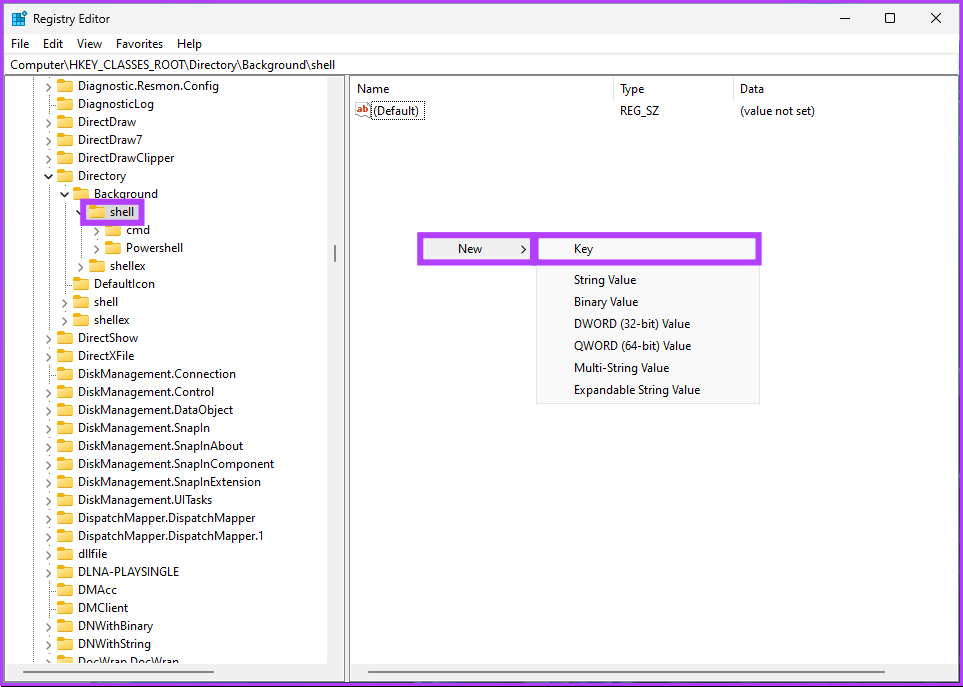
Step 3: Under the Shell folder, right-click, select New, and choose Key.
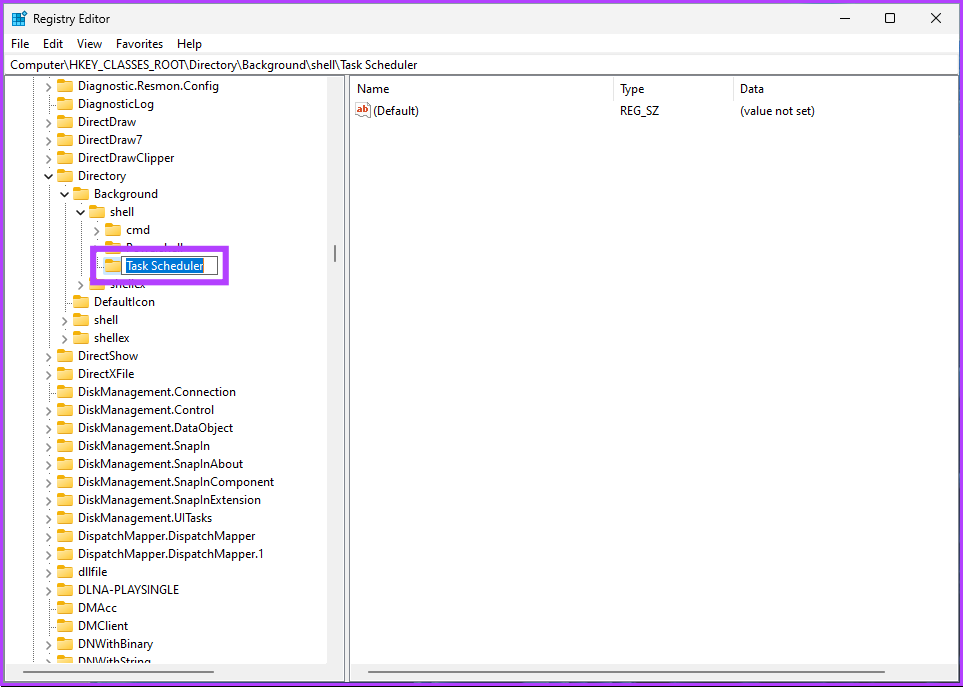
Step 4: Type Task Scheduler in the name field.
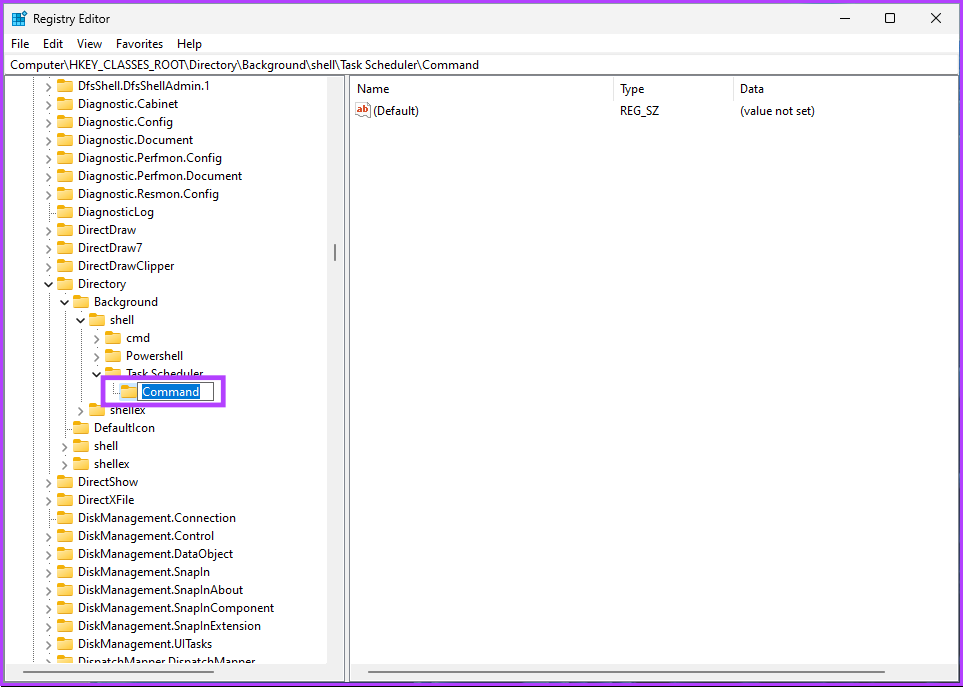
Step 5: Under the Task Scheduler folder, right-click, select New, and choose Key.

Step 6: Type Command in the name field.
Step 7: Under the Command folder, double-click the default registry file, under Value data, type Control schedtasks, and click OK.

Finally, reboot the system to implement the changes. And that’s it! You will find Task Scheduler under the desktop context menu when the system boots back. If you have any queries, check out the FAQ section below.
FAQs on Task Scheduler in Windows
Windows Task Scheduler does not run when the computer is in sleep mode by default. However, in the task properties, select the “Wake the computer to run this task” option to configure the task to run regardless of the sleep status of the computer.
It depends on what tasks you have set up in the Task Scheduler. Disabling the Task Scheduler could interfere with essential tasks that need to run regularly, such as backups, system maintenance, or software updates. You may not notice a significant impact after disabling the Task Scheduler if you do not have any critical tasks set up.
Quickly Schedule Tasks in Windows
Whether you prefer to use the traditional method, like the Control Panel, or the more modern way, like the Windows Search bar, multiple options are available to access the Task Scheduler. By familiarizing yourself with them all, you can quickly access the Task Scheduler. You may also want to read how to use Windows Task Scheduler to schedule Disk Cleanup.
Was this helpful?
Last updated on 31 January, 2023
Read Next
 11 Ways to Fix Task Scheduler Not Working on Windows
Task Scheduler is the behind-the-scenes hero on your Windows computer.
11 Ways to Fix Task Scheduler Not Working on Windows
Task Scheduler is the behind-the-scenes hero on your Windows computer.
 Top 5 Fixes for the Video Scheduler Internal Error on Windows 11
Some Windows users have encountered a Video Scheduler Internal error while performing different device tasks.
Top 5 Fixes for the Video Scheduler Internal Error on Windows 11
Some Windows users have encountered a Video Scheduler Internal error while performing different device tasks.
 9 Ways to Open Task Manager on Windows 10 and Windows 11
Task Manager is one of the most commonly used programs on Windows, regardless of its version.
9 Ways to Open Task Manager on Windows 10 and Windows 11
Task Manager is one of the most commonly used programs on Windows, regardless of its version.
 Top 10 Ways to Fix Task Manager Not Working on Windows 11
Task Manager is a useful utility that lets you monitor your PC’s memory consumption, background processes, startup programs, and more.
Top 10 Ways to Fix Task Manager Not Working on Windows 11
Task Manager is a useful utility that lets you monitor your PC’s memory consumption, background processes, startup programs, and more.
 3 Ways to Disable Task Manager for Specific Users in Windows
The Task Manager is a useful program that lets you see what programs are running on your computer and lets you end the ones that are giving you trouble.
3 Ways to Disable Task Manager for Specific Users in Windows
The Task Manager is a useful program that lets you see what programs are running on your computer and lets you end the ones that are giving you trouble.
 7 Best Windows 10 Task View Settings and Tips in 2020
Microsoft continues to pump Windows 10 with exciting new features and elements with each new update.
7 Best Windows 10 Task View Settings and Tips in 2020
Microsoft continues to pump Windows 10 with exciting new features and elements with each new update.
 How to Disable Task View in Windows 10 Completely
The Task View feature in Windows 10 is a boon for power users.
How to Disable Task View in Windows 10 Completely
The Task View feature in Windows 10 is a boon for power users.
 5 Ways to Create a Task in Microsoft Outlook
For most people, a new day brings about a set of fresh tasks to complete.
5 Ways to Create a Task in Microsoft Outlook
For most people, a new day brings about a set of fresh tasks to complete.
The article above may contain affiliate links which help support Guiding Tech. The content remains unbiased and authentic and will never affect our editorial integrity.