A backlit keyboard provides a comfortable typing experience in a low-light environment. There may be times when the keyboard backlight on your Windows computer just won’t work. That can be frustrating if have to work till late.
The solution to this problem can be as simple as toggling the keyboard backlight or as complex as performing a system restore. Unless it’s a hardware issue, which is rare, the troubleshooting tips below should help you resolve the keyboard backlight not working issue on Windows. So, let’s check them out.
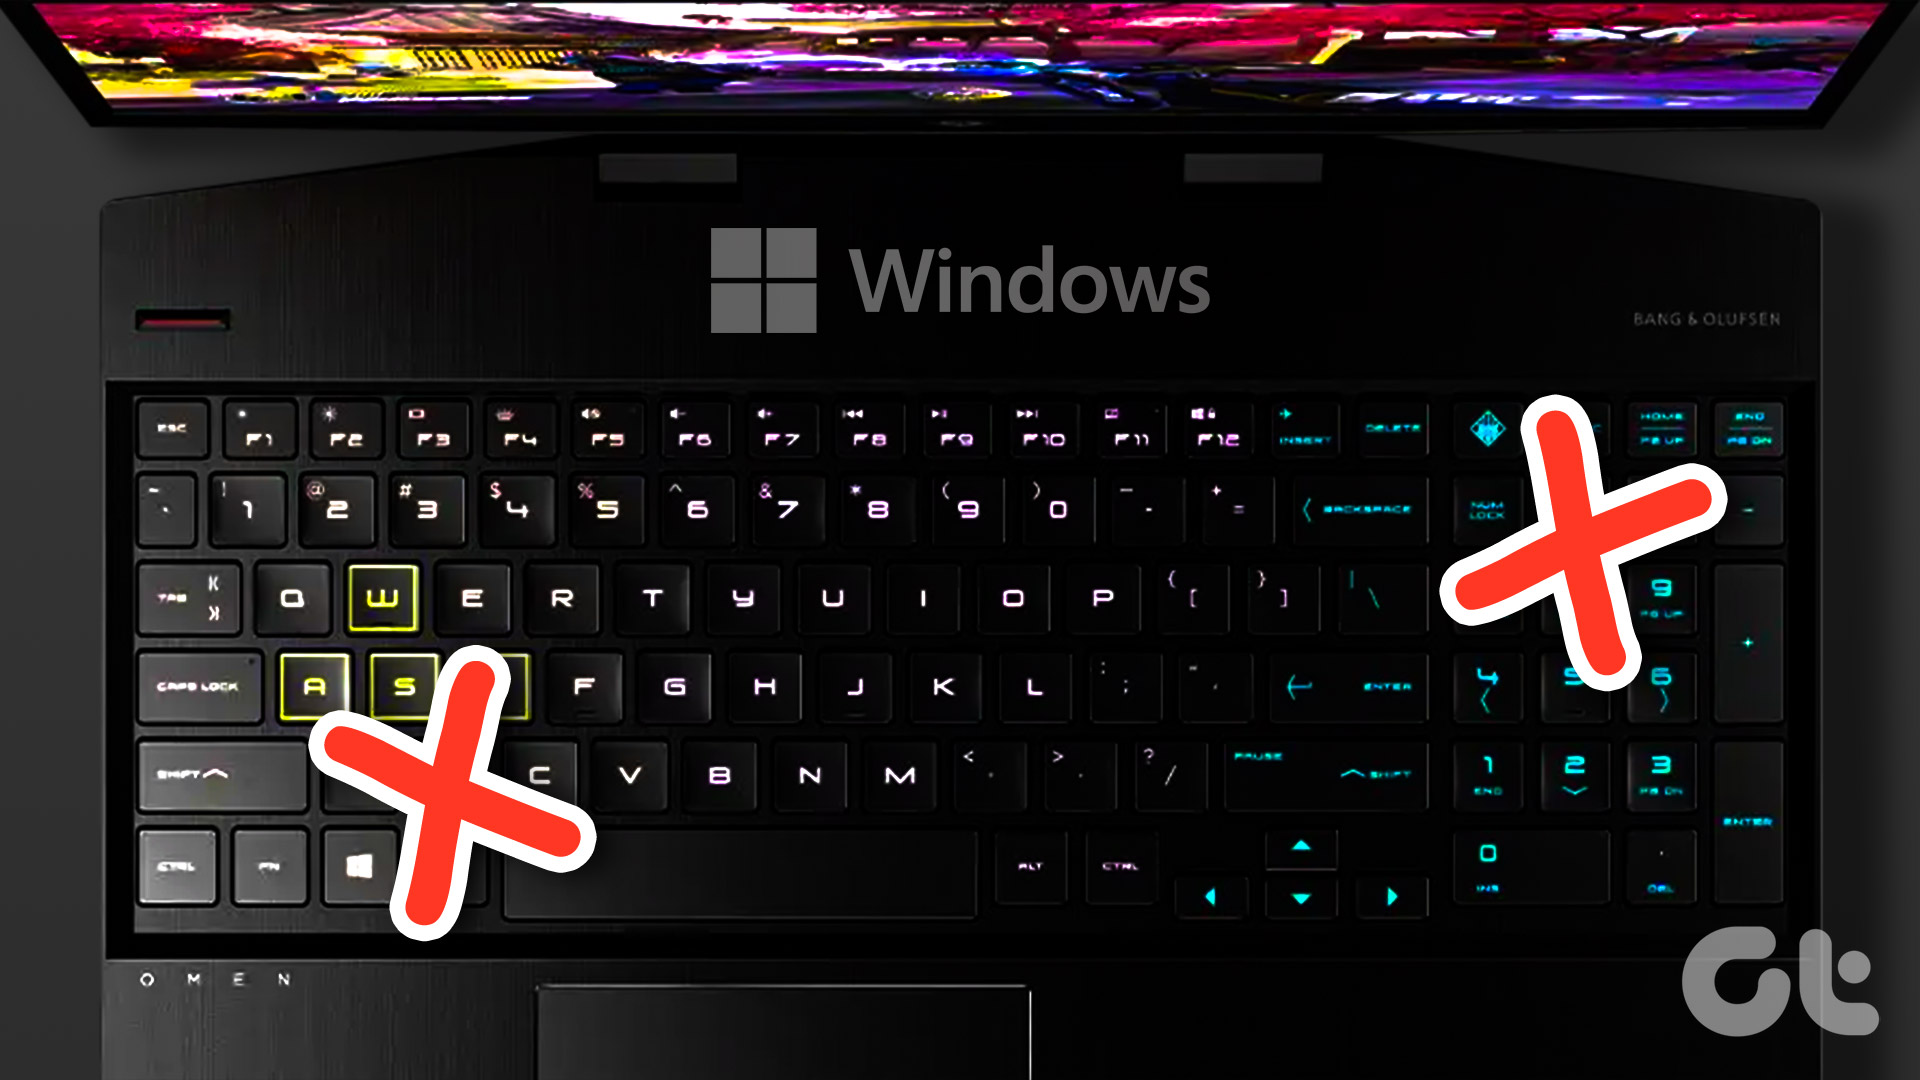
1. Toggle Keyboard Backlight Using the Hotkey
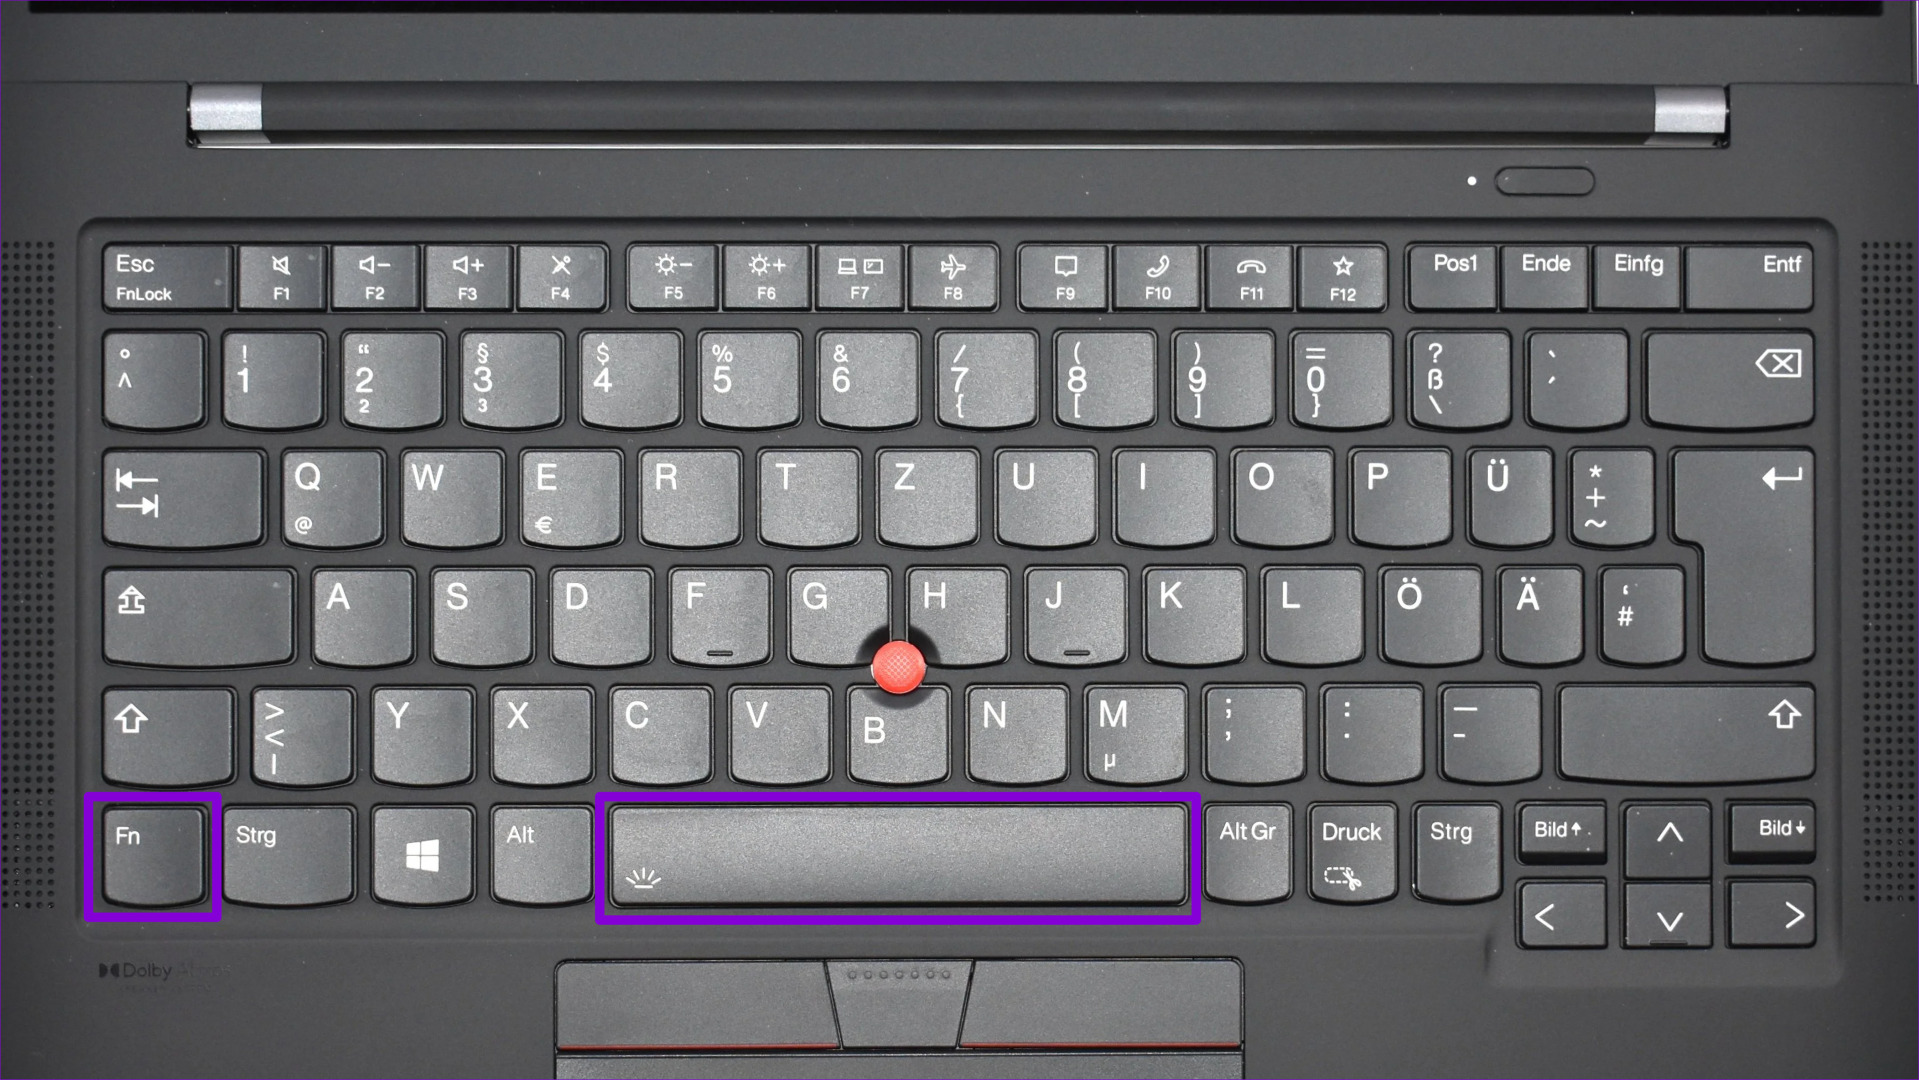
You can use a key combination to quickly enable or disable the keyboard backlight on your Windows 11 PC. However, the exact key combination varies depending on your computer model and manufacturer. If there is a backlight icon on the Space key, you can press Fn + Spacebar to enable the backlighting. On some computers, you need to press Fn + F5 or Fn + F6 to enable the keyboard light.
If you have an external keyboard with a dedicated switch for backlighting, try toggling it a few times and see if that works.
2. Increase the Keyboard Brightness
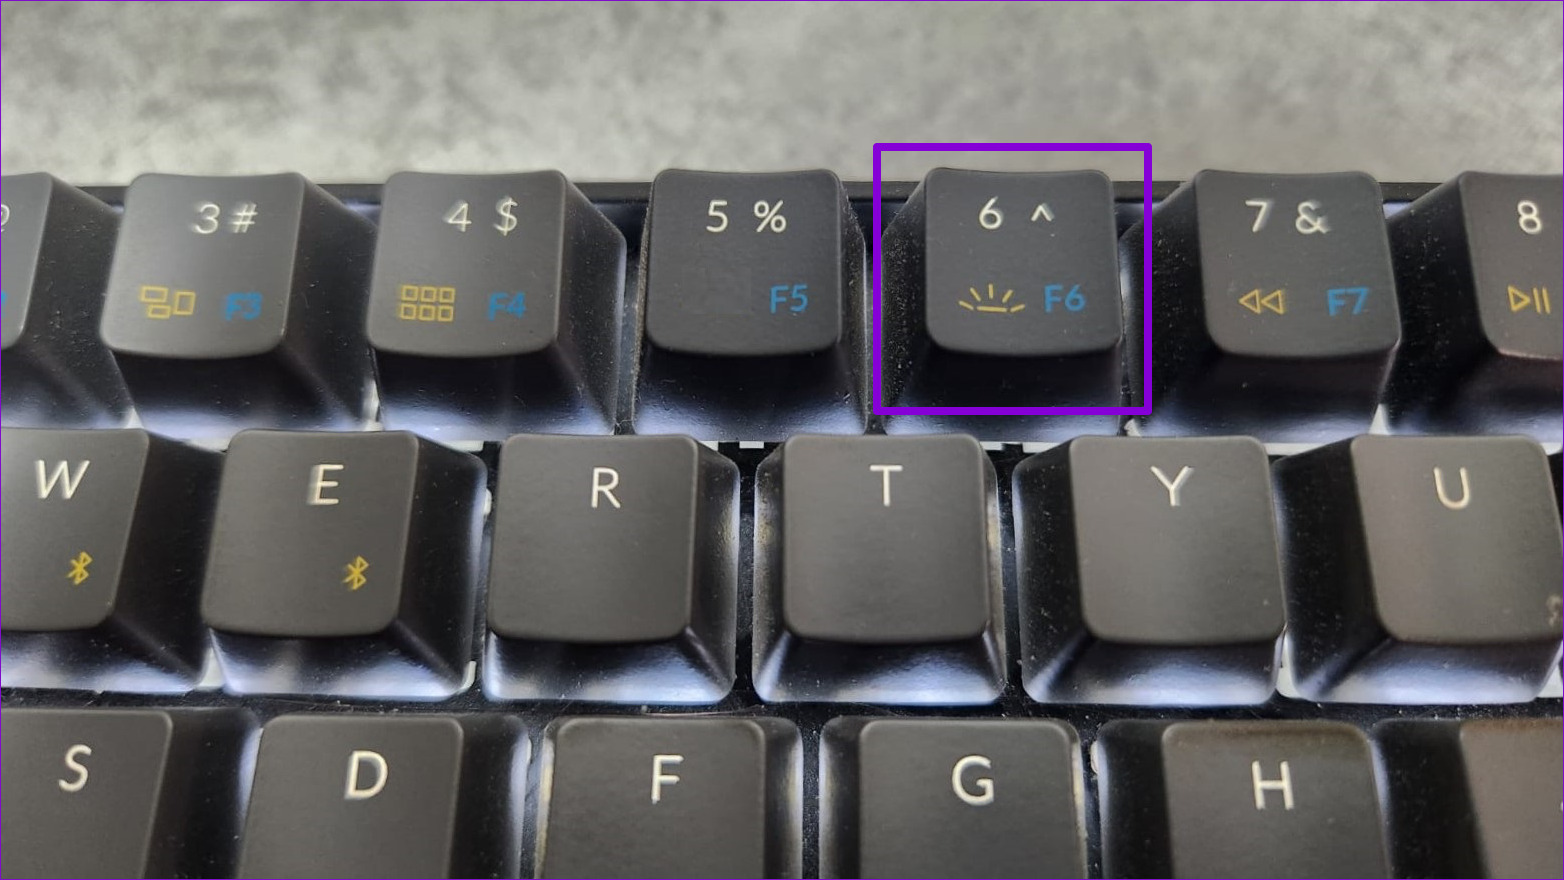
The keyboard backlight may be on already, but the brightness level is low. To increase the keyboard brightness, find a key with the illumination icon on top of it. You’ll find this key on your keyboard’s top row and other function keys. Press that key with the Fn key to cycle through various brightness level options and see if that helps.
3. Check Settings in the Keyboard App
Some keyboards require proprietary software to enable, disable, and customize keyboard backlighting. For example, Lenovo computers come with the Lenovo Vantage app to enable or disable keyboard lights. If you have a Razer laptop or keyboard, you can use its Synapse app to customize the lighting effects for your keyboard.
If a dedicated keyboard app available on your computer, you’ll need to go through the app’s settings to enable keyboard backlighting. You can check the keyboard backlight timeout while you’re at it.

4. Run the Keyboard Troubleshooter
If the keyboard light is still not working, you may take help of a built-in troubleshooter inside Windows. You can run the keyboard troubleshooter on Windows to identify and resolve any common keyboard-related issues. Here’s how to do it.
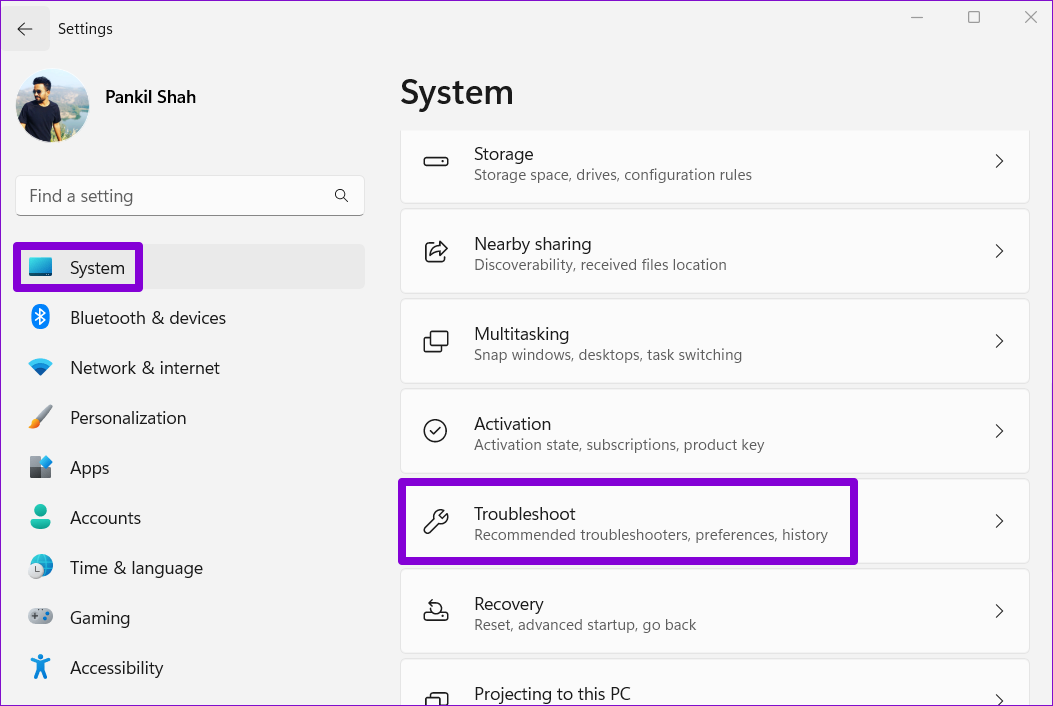
Step 1: Open the Start menu and click the gear icon to launch the Settings app.

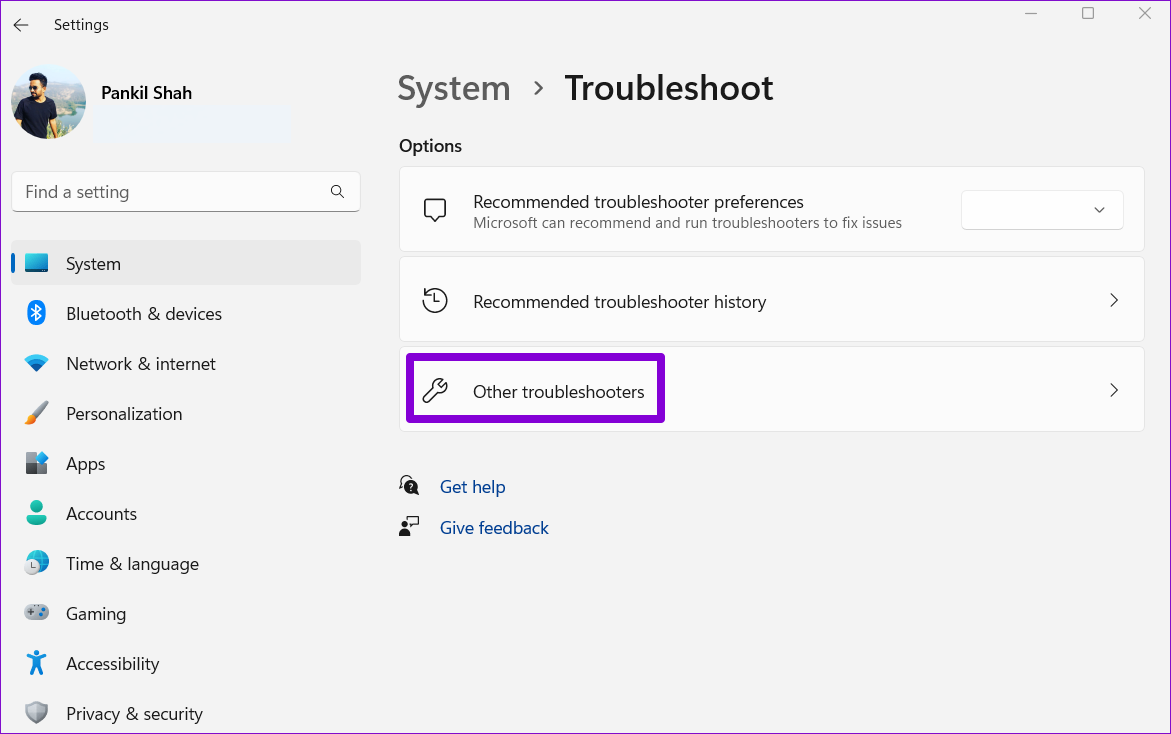
Step 2: Navigate to the System tab. Then, scroll down to select Troubleshoot.
Step 3: Go to Other troubleshooters.
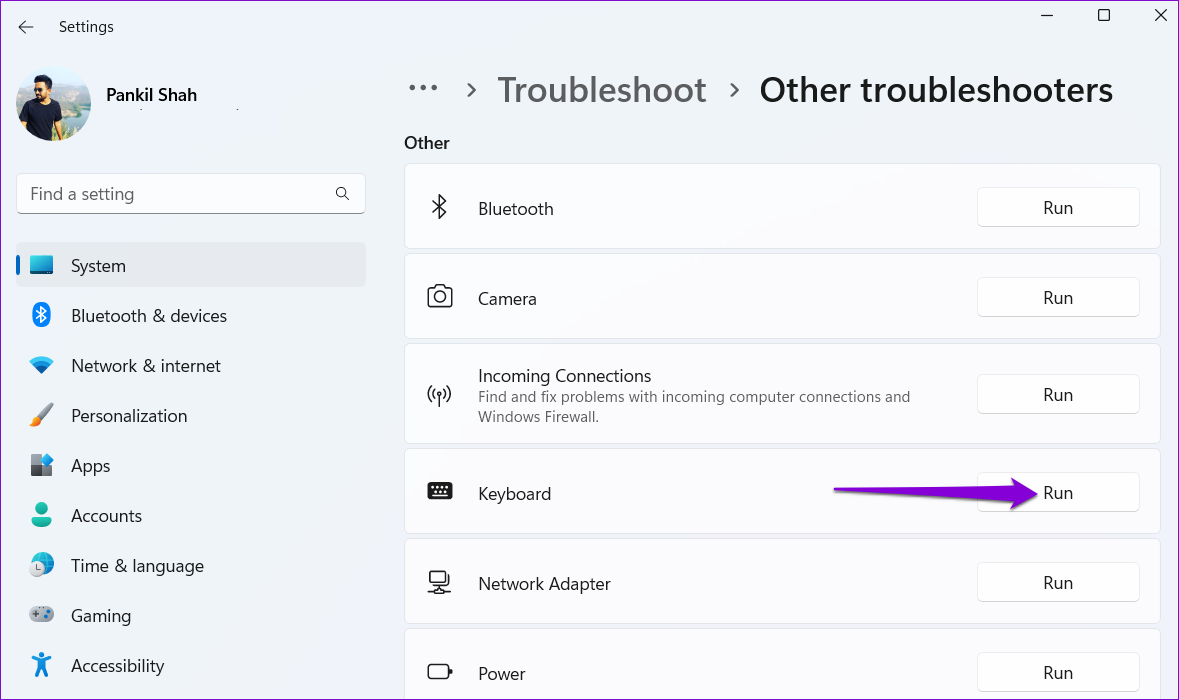
Step 4: Click the Run button next to Keyboard and follow the on-screen instructions to run the troubleshooter.
After running the troubleshooter, try turning on the keyboard light to see if it works.
5. Update Keyboard Drivers
Drivers on your computer help Windows communicate with your hardware. There’s a chance your keyboard’s backlight isn’t working because the keyboard driver is old or damaged. In that case, updating the keyboard driver should fix the problem.
Step 1: Click on the Search icon from the taskbar, type in device manager and select the first result that appears.

Step 2: Expand Keyboards, right-click on your keyboard, and select Update driver from the list.

From there, follow the on-screen prompts to finish updating the drivers.
6. Check If Keyboard Backlight Works in Safe Mode
As a last resort, you can boot Windows into Safe Mode and then try to enable the keyboard backlight. The idea is to determine whether a problematic third-party app or service causes the issue.
To boot Windows into Safe Mode:
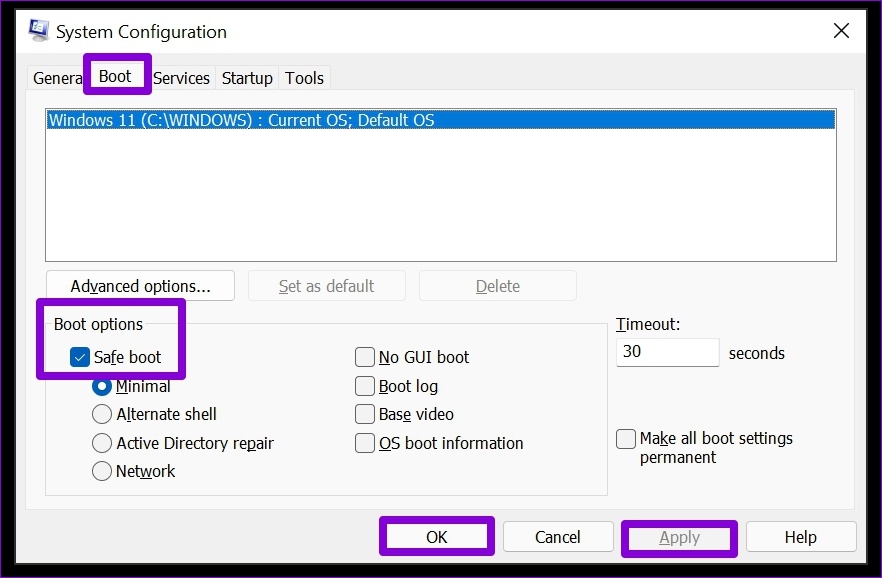
Step 1: Press the Windows key + R to open the Run dialog. Type msconfig in the box and press Enter.

Step 2: Under the Boot tab, tick the Safe boot option. Then, click Apply followed by OK.
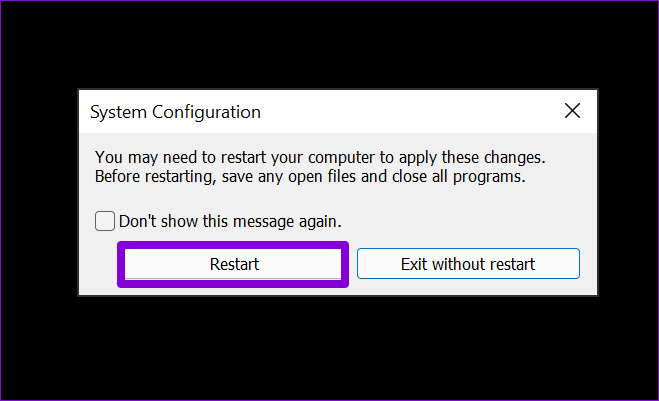
Step 3: Save all your work and then select Restart to boot Windows in Safe Mode.
If the keyboard light works fine in Safe Mode, it’s probably some app or service running in the background causing trouble. Try removing some of your recently installed apps and programs to see if that helps. Alternatively, you can perform a system restore to undo any changes that may have caused the keyboard backlight to stop working.
Light Up Your Keyboard
There’s no need to strain your eyes when the keyboard backlight stops working on your Windows 10 or Windows 11 computer. By applying the fixes mentioned above, you should be able to illuminate your Windows keyboard once again. Let us know which one works for you in the comments below.
Was this helpful?
Last updated on 28 November, 2022
4 Comments
Leave a Reply
Read Next
 4 Ways to Fix Keyboard Backlight Not Working on Mac
Let's look at the solutions to fix the keyboard backlight not working on Mac.
4 Ways to Fix Keyboard Backlight Not Working on Mac
Let's look at the solutions to fix the keyboard backlight not working on Mac.
 How to Fix iPad’s Magic Keyboard Backlight Not Working Issue
If you use an iPad Pro or an iPad Air, a Magic Keyboard w/Trackpad is the best accessory that you can get your hands onto.
How to Fix iPad’s Magic Keyboard Backlight Not Working Issue
If you use an iPad Pro or an iPad Air, a Magic Keyboard w/Trackpad is the best accessory that you can get your hands onto.
 5 Ways to Fix Windows 10 Keyboard Special Characters Not Working
Have you struggled to enter an email ID on your Windows 10 computer?
2 Ways to Fix Mouse and Keyboard Not Working in Windows 10
A computer without a functioning mouse and keyboard is equivalent to a car without wheels.
5 Ways to Fix Windows 10 Keyboard Special Characters Not Working
Have you struggled to enter an email ID on your Windows 10 computer?
2 Ways to Fix Mouse and Keyboard Not Working in Windows 10
A computer without a functioning mouse and keyboard is equivalent to a car without wheels.
 Top 9 Ways to Fix Keyboard Not Working in Windows 11
The keyboard not working right in the middle of work can hamper your productive hours.
Top 9 Ways to Fix Keyboard Not Working in Windows 11
The keyboard not working right in the middle of work can hamper your productive hours.
 3 Ways to Fix Keyboard Function Keys Not Working on Windows 11/10
Fix 1: Confirm Shortcut Keys Don't Disable Function Keys Keyboards with an Fn key allow two sets of actions on the function keys.
3 Ways to Fix Keyboard Function Keys Not Working on Windows 11/10
Fix 1: Confirm Shortcut Keys Don't Disable Function Keys Keyboards with an Fn key allow two sets of actions on the function keys.
 4 Ways to Fix Keyboard Shortcuts Not Working on Windows 11
Preliminary Fixes Disable Game Mode: Gaming keyboards often have special modes that disable keyboard shortcuts.
4 Ways to Fix Keyboard Shortcuts Not Working on Windows 11
Preliminary Fixes Disable Game Mode: Gaming keyboards often have special modes that disable keyboard shortcuts.
 Top 8 Ways to Fix Number Pad Not Working on Keyboard in Windows 11
A number pad is a must-have for folks who tend to punch in numbers on a daily basis.
Top 8 Ways to Fix Number Pad Not Working on Keyboard in Windows 11
A number pad is a must-have for folks who tend to punch in numbers on a daily basis.
The article above may contain affiliate links which help support Guiding Tech. The content remains unbiased and authentic and will never affect our editorial integrity.

non of these options worked for me, the key board light was working fine one minute then stoped
have been trying to fix for a week now – on a Dell G7
Step 2 did it for me. I use Dell Latitude 7390. So I pressed down the Fn key + F10 key(where I have ‘the brightness’ icon) and voila! The backlight came back on.
Thanks for the post. It was quite helpful.
I cant fix my backlight,i dont know if hve a chnce to fix my N20Qi window 11 acer for bcklight or its normal laptop
#2 did it for me.
I didn’t think something like that would work but as it turns out, my model keyboard can make the light turn all the way off when you reduce the brightness.
My cat rolled over my keyboard when I was away and apparently this is what they did.
Give it a try!