Method 1: Use the Keyboard Shortcut
You can use dedicated keyboard shortcuts to change Windows sound volume. These buttons might appear separately or as a part of the F (Function) keys. If they’re a part of the F keys for you, you might need to simultaneously press the Fn and the volume keys to increase or decrease system sound.
Check the volume control bar on your screen to see and adjust the current volume levels.
Method 2: Using the Quick Settings Panel
The Quick Settings menu can be called a mini version of the Settings menu. Here, you can use the volume slider to change the volume levels in Windows 11. Use the Windows + A key to open Quick Settings to access it.
Tip: You can also use Windows Copilot to change the volume levels. Simply open the Copilot window and give the relevant command.
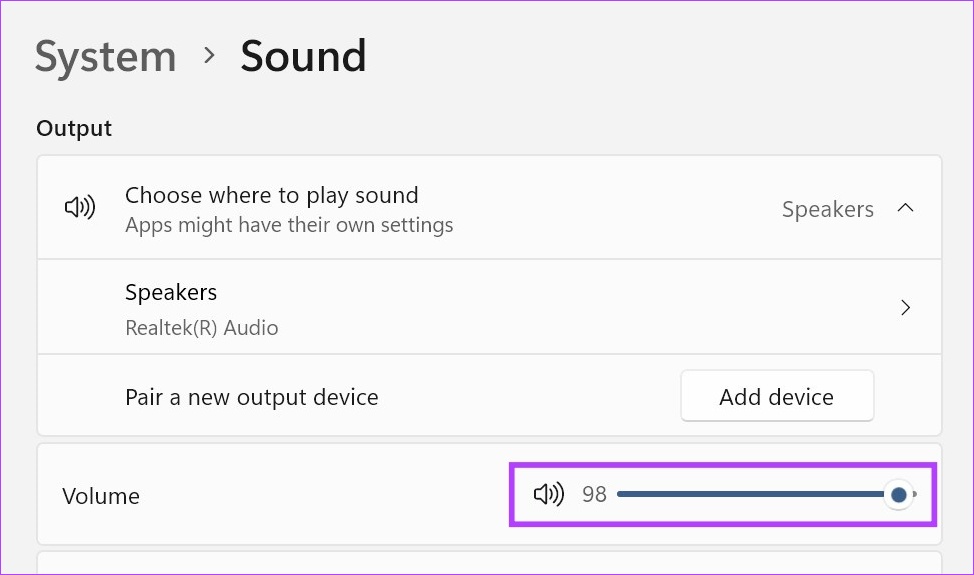
Method 3: Change Volume Using Settings Menu
As its name suggests, the Settings menu is home to all major and minor settings in Windows 11. This also means you can use the volume control options here to change the volume levels in Windows 11. Here’s how.
Step 1: Use the Windows + I key on your keyboard to open Settings. From the menu options, click on System. Then, click on Sound.

Step 2: Now, use the volume slider to adjust the device volume.
You can also access the Windows Volume Mixer to adjust the volume levels for individual apps. If you change volume levels using an external speaker, it will be reflected here.
Method 4: Using Control Panel
You can also use the Control Panel to access Windows Volume Mixer. Then, use it to adjust the volume for individual Windows apps. Follow the below steps to do it.
Step 1: Open the Control Panel and click on Hardware and Sound.

Step 2: Then, go to Sound and click on Adjust system volume.

This will open separate volume sliders for all the active apps using Windows sound. Use the sliders to adjust the volume accordingly.
Also Read: How to fix volume level automatically goes up or down Windows 11
Method 5: Using Xbox Game Bar Shortcut
The Xbox Game Bar can help you quickly check and adjust certain system settings, like volume levels. This can be helpful when playing games. Let’s have a step-by-step look at how to do it.
Tip: Check our article if the Xbox Game Bar is not working on Windows 11.
Step 1: Press Windows + G to open the Xbox Game Bar. Click on the speaker icon to see volume control options.
Step 2: In the new window, select the Mix tab and use the slider under Windows Default Output to adjust the volume levels. Additionally, click on the down arrow to open other volume options.
Step 3: Then, use the individual sliders to adjust volume levels.

Once done, use the Windows + G keyboard shortcut again or click anywhere outside the panel to close the Xbox Game Bar.
Was this helpful?
Last updated on 10 April, 2024
Read Next
 3 Ways to Adjust Windows Microphone Volume
Method 1: Increase Mic Volume in Settings Step 1: Open the Settings app.
3 Ways to Adjust Windows Microphone Volume
Method 1: Increase Mic Volume in Settings Step 1: Open the Settings app.
 Top 7 Ways to Fix Low Volume on Windows 11
If the overall sound volume on your Windows 11 PC feels low, a few things could be wrong.
Top 7 Ways to Fix Low Volume on Windows 11
If the overall sound volume on your Windows 11 PC feels low, a few things could be wrong.
 Top 7 Ways to Fix Volume Level Automatically Goes Up or Down in Windows 11
When you use your Windows 11 computer to watch movies, play games, or attend online meetings, sound is an important part of the experience.
Top 7 Ways to Fix Volume Level Automatically Goes Up or Down in Windows 11
When you use your Windows 11 computer to watch movies, play games, or attend online meetings, sound is an important part of the experience.
 Top 8 Fixes When the Windows 11 Volume Slider Is Stuck on the Screen
The Windows 11 volume slider appears on the screen when you increase or reduce the volume using the keyboard.
Top 8 Fixes When the Windows 11 Volume Slider Is Stuck on the Screen
The Windows 11 volume slider appears on the screen when you increase or reduce the volume using the keyboard.
 5 Easy Ways to Change Alarm Sound on iPhone
If you cannot wake up with the default alarm sound on your iPhone, don’t worry.
5 Easy Ways to Change Alarm Sound on iPhone
If you cannot wake up with the default alarm sound on your iPhone, don’t worry.
 How to Change Microsoft Teams Notification Sound
Microsoft Teams’ popularity has sky-rocketed in recent years.
How to Change Microsoft Teams Notification Sound
Microsoft Teams’ popularity has sky-rocketed in recent years.
 6 Ways to Fix Volume Buttons Not Working on Android
Volume rockers are an essential aspect of all smartphones.
6 Ways to Fix Volume Buttons Not Working on Android
Volume rockers are an essential aspect of all smartphones.
 5 Ways to Fix Low or Loud Alarm Volume on iPhone
Common Fixes Restart iPhone - Press and hold either of the volume buttons with the side button and drag the power off slider to shut down.
5 Ways to Fix Low or Loud Alarm Volume on iPhone
Common Fixes Restart iPhone - Press and hold either of the volume buttons with the side button and drag the power off slider to shut down.
The article above may contain affiliate links which help support Guiding Tech. The content remains unbiased and authentic and will never affect our editorial integrity.