Windows 11 has a handy feature called ‘Personal Vault’ to protect your confidential files and media. It takes a backup of crucial data into the OneDrive cloud service and is available to use from the File Explorer menu. The system syncs your file to your OneDrive account, making them accessible on all your devices. Here’s how you can set up and use Personal Vault in Windows 11 and Windows 10.

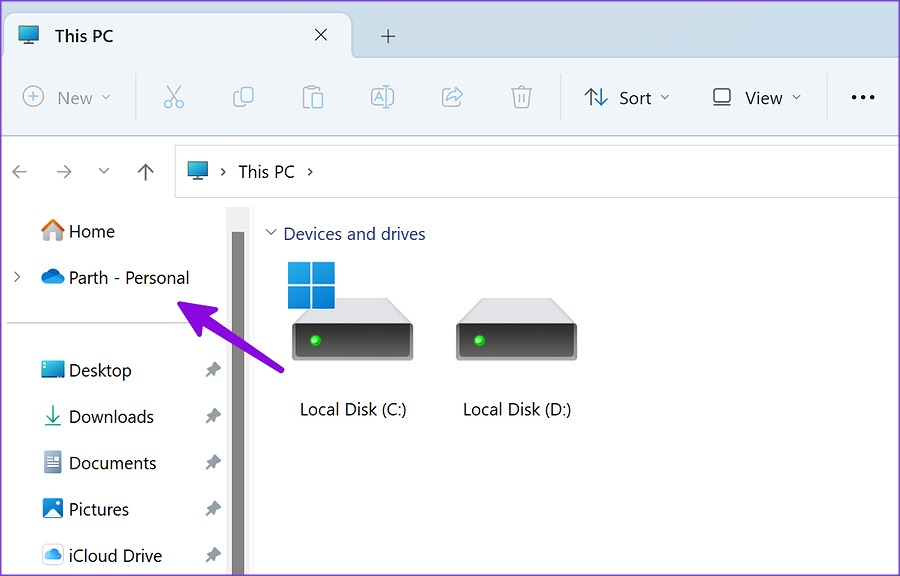
Windows 11 has a tight OneDrive integration, and Personal Vault is a part of Microsoft’s cloud storage service. You can access Personal Vault from the File Explorer menu or use the OneDrive shortcut in the taskbar to glance over your confidential file.
What Is Personal Vault on Windows 11
As the name suggests, Personal Vault is your private folder in OneDrive to store and sync your important files. So how does it differ from a standard password-protected file and folder in Windows 11? Unlike your local folder, the Personal Vault syncs all the uploaded files to the OneDrive platform, making it available on all your smart devices.
Whether you use OneDrive on mobile, Mac, or Chromebook, you can easily access and download files from your Personal Vault. Let’s set up and check it in action.
Open Your Personal Vault on Windows
As mentioned earlier, there are a couple of ways to access the Personal Vault on Windows.
Step 1: Press Windows + I keys shortcut to open the File Explorer menu.
Step 2: Select OneDrive from the left navigation panel.
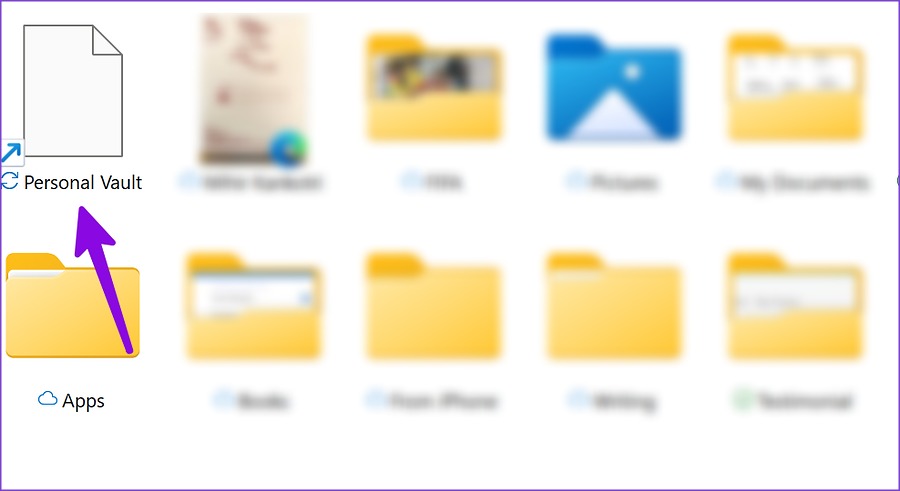
Step 3: Double-click on the Personal Vault icon and confirm your identity using the default Windows authentication method. If you have a Windows Hello-compatible laptop, use the face unlock or fingerprint to complete the authentication.
Step 4: If you don’t have a Windows Hello function, enter your computer’s PIN or Microsoft account password to access the Private Vault.

Step 5: File Explorer will open a new window with Private Vault files.

You can access the same from OneDrive in the taskbar too.
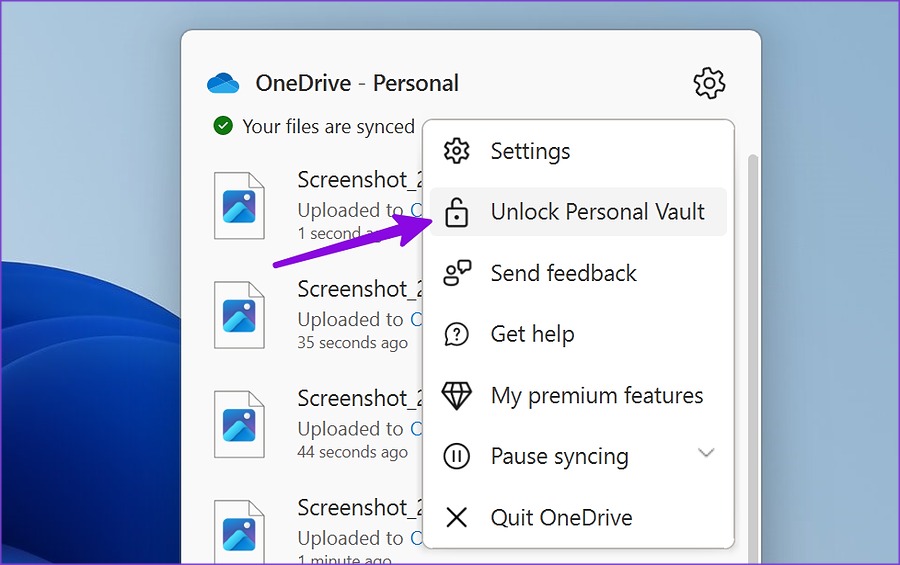
Step 1: Click the OneDrive icon in the taskbar.
Step 2: Select the Settings gear in the top-right corner of the pop-up.

Step 3: Select ‘Unlike Personal Vault,’ verify your identity, and access it.
If you don’t see the OneDrive icon in the system tray, enable it from the Settings app.
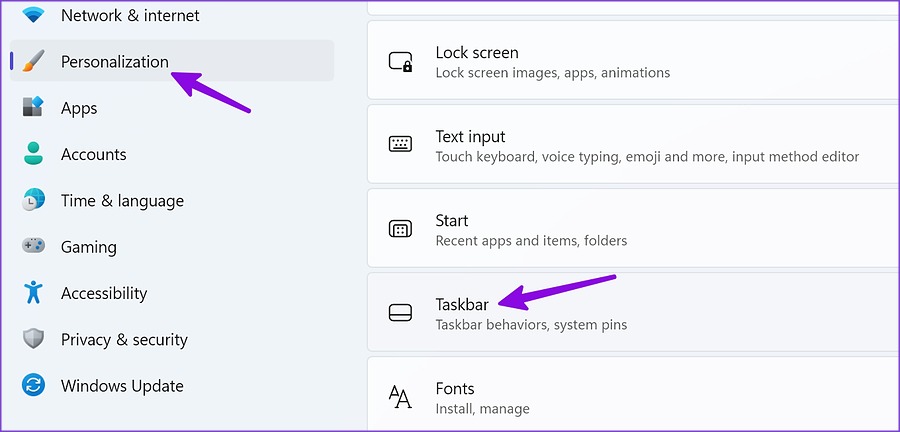
Step 1: Press Windows + I keys shortcut to launch Settings app.
Step 2: Select Personalization from the left sidebar.
Step 3: Click Taskbar from the right pane.
Step 4: Expand the ‘Other system tray icons’ menu.
Step 5: Turn on the toggle for Microsoft OneDrive from the following menu.

Sync Items in Personal Vault
You can use the steps above to open Personal Vault on Windows. Now it’s time to move important files to it.
Step 1: Press Windows + E keys shortcut to open the File Explorer app.
Step 2: Select relevant files and copy or cut them.
Step 3: Open Private Vault (refer to the steps above) and paste the files into it.
You’ll need an active internet connection to sync Private Vault files to the OneDrive platform. You will notice a green checkmark beside uploaded files.
Lock Personal Vault on Windows 11
After you upload private files to Personal Vault, you’ll need to lock it to prevent unauthorized access. The system keeps the Personal Vault open for some time.
Step 1: Open OneDrive from the taskbar.
Step 2: Select ‘Lock Personal Vault,’ and you are good to go.

Check Personal Vault Storage
Personal Vault is a part of OneDrive. You need to have a sufficient amount of OneDrive storage to sync your personal files across all devices. You can’t simply add hundreds of videos and files to the Personal Vault.
Step 1: Press Windows + E keys shortcut to open the File Explorer menu.
Step 2: Click the OneDrive icon in the top-right corner and check the detailed storage breakdown.

If you run low on OneDrive storage, subscribe to one of the Microsoft 365 plans to get 1TB of space.
Disable Personal Vault on Windows 11/10
If you don’t want to deal with OneDrive’s Personal Vault, use the OneDrive web to disable the function for your account.
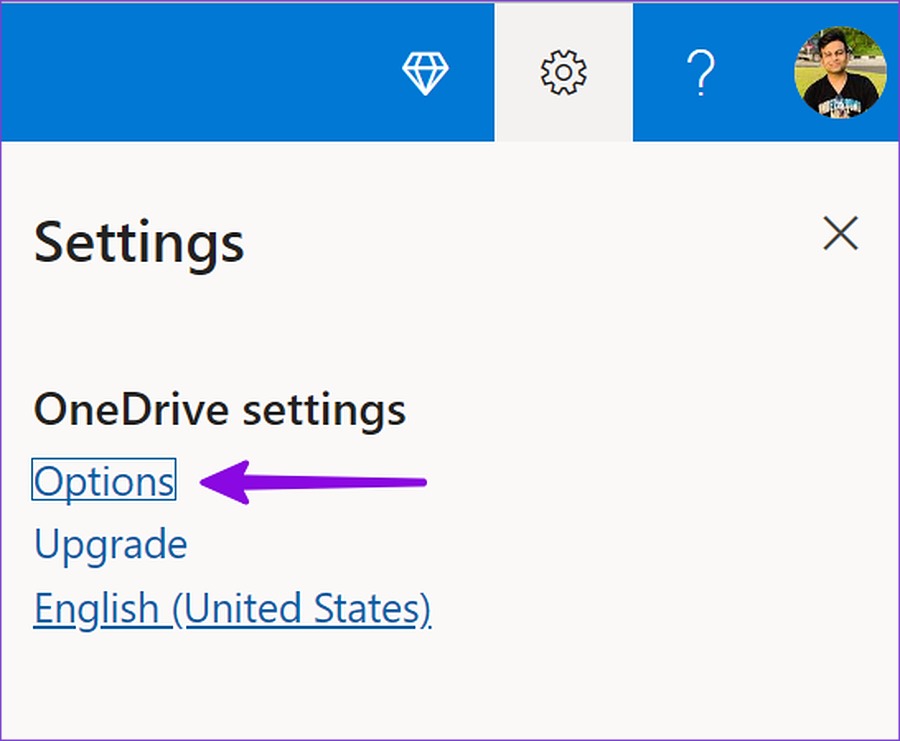
Step 1: Visit OneDrive on the web and sign in with your Microsoft account details.
Step 2: Select the Settings gear in the top-right corner.

Step 3: Open ‘Options.’
Step 4: Select ‘Personal Vault’ from the left sidebar.
Step 5: Select Disable and confirm your decision.

Hide Your Confidential Files on Windows
Personal Vault is an excellent add-on from Microsoft to keep your private files from prying eyes. How do you plan to use Personal Vault on Windows? Share your preference in the comments below.
Was this helpful?
Last updated on 27 December, 2022
Read Next
 7 Best Ways to Fix OneDrive Personal Vault Not Showing on Windows 10 Error
Personal Vault offers a secure folder and a protected area inside OneDrive, where you can save important files.
7 Best Ways to Fix OneDrive Personal Vault Not Showing on Windows 10 Error
Personal Vault offers a secure folder and a protected area inside OneDrive, where you can save important files.
 20 Best Free Notion Templates for Personal Use
Notion – a personal productivity and team collaboration software has taken the market by storm.
20 Best Free Notion Templates for Personal Use
Notion – a personal productivity and team collaboration software has taken the market by storm.
 5 Best Personal Finance Apps for Mac
People often rely on a spreadsheet to track finance and expenses.
5 Best Personal Finance Apps for Mac
People often rely on a spreadsheet to track finance and expenses.
 How to Stop iPhone Personal Hotspot From Turning On Automatically
Is your iPhone's Personal Hotspot turning on all by itself?
How to Stop iPhone Personal Hotspot From Turning On Automatically
Is your iPhone's Personal Hotspot turning on all by itself?
 How to Manage Personal Information On Your Google Account
By performing a search on yourself on Google, you get to see the type of information available to the public.
How to Manage Personal Information On Your Google Account
By performing a search on yourself on Google, you get to see the type of information available to the public.
 30 Best Free AI Tools Online for Your Business or Personal Use
There has been a meteoric rise in the development of Artificial intelligence and Machine Learning in the last few years.
30 Best Free AI Tools Online for Your Business or Personal Use
There has been a meteoric rise in the development of Artificial intelligence and Machine Learning in the last few years.
 Professional vs. Personal Account on Instagram: Understand the Differences
Apart from personal use, Instagram is an ideal platform for small businesses, startups, organizations, and influencers.
Professional vs. Personal Account on Instagram: Understand the Differences
Apart from personal use, Instagram is an ideal platform for small businesses, startups, organizations, and influencers.
 Top 9 Ways to Restore the Missing Personal Hotspot on iPhone
The Personal Hotspot feature allows you to easily share your iPhone's internet connection with nearby devices like your computer or tablet.
Top 9 Ways to Restore the Missing Personal Hotspot on iPhone
The Personal Hotspot feature allows you to easily share your iPhone's internet connection with nearby devices like your computer or tablet.
The article above may contain affiliate links which help support Guiding Tech. The content remains unbiased and authentic and will never affect our editorial integrity.