Google Photos is an easy way to store all of your precious memories in one place, accessible across many devices. However, you’re bound to exhaust your Google Photos storage at some point in time, especially if you are using the free plan. Therefore, we want to show you how to change the quality of Google Photos to reduce the file size, and effectively save storage space.
If you’re close to exhausting your Google Photos storage, you can ideally purchase a Google One plan to expand the storage. However, if you do not want to add another paid subscription, then reducing the upload quality can help you free up some storage space. Let’s begin, and understand what happens when you change the quality of Google Photos.
Also Read : 3 Ways How Google Photos Will Count Against Google Drive Storage
What Happens When You Switch From Original to Storage Saver Quality Photos in Google Photos
Google Photos has two different quality levels you can opt for while uploading a photo or a video. You can either upload the photo/video in the original, unchanged quality or in the storage saver quality, which was earlier called ‘High’ quality.

If you choose to upload in the storage saver quality or switch to it from the original quality, here’s what happens :
- Photos and videos will be resized to 16 Megapixels, and the file size will be significantly compressed.
- Videos will be resized to 1080p.
- Certain metadata like closed captions may be removed.
Photos in storage saver quality are compressed and uploaded with only a slight change in visual quality, which is often not noticeable.
However, the same cannot be said about videos, and we noticed a drop in the quality. Do note that photos and videos stored in the storage saver quality before June 1 2021 do not count towards your storage, thanks to a legacy Google policy.
How to Change Photo Quality in Google Photos
Here’s how you can change the upload quality for photos and videos on Google Photos.
Change Upload Quality on PC and Mac
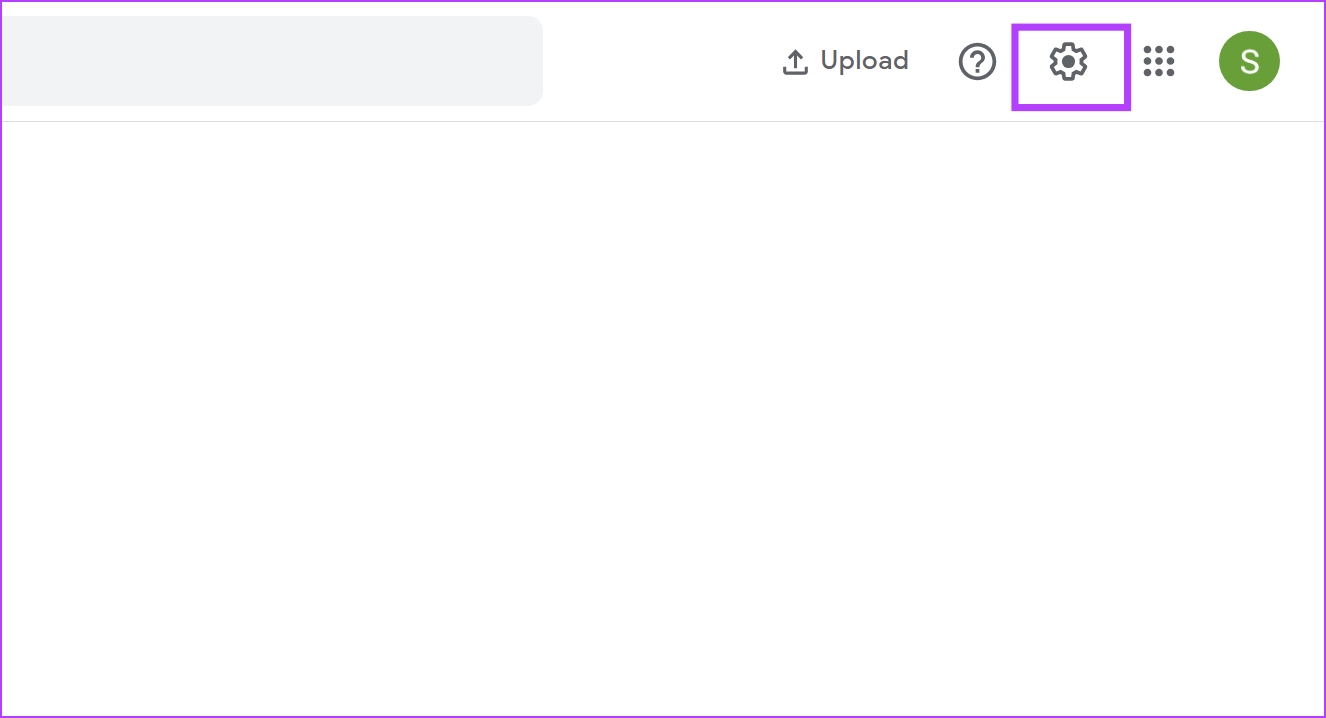
Step 1: Open Google Photos. Click on the Settings icon.
Step 2: Check the box for ‘Storage saver’ to change the quality of all future uploads. However, the quality of photos and videos that have already been uploaded will not change.

Change Upload Quality on iPhone and Android
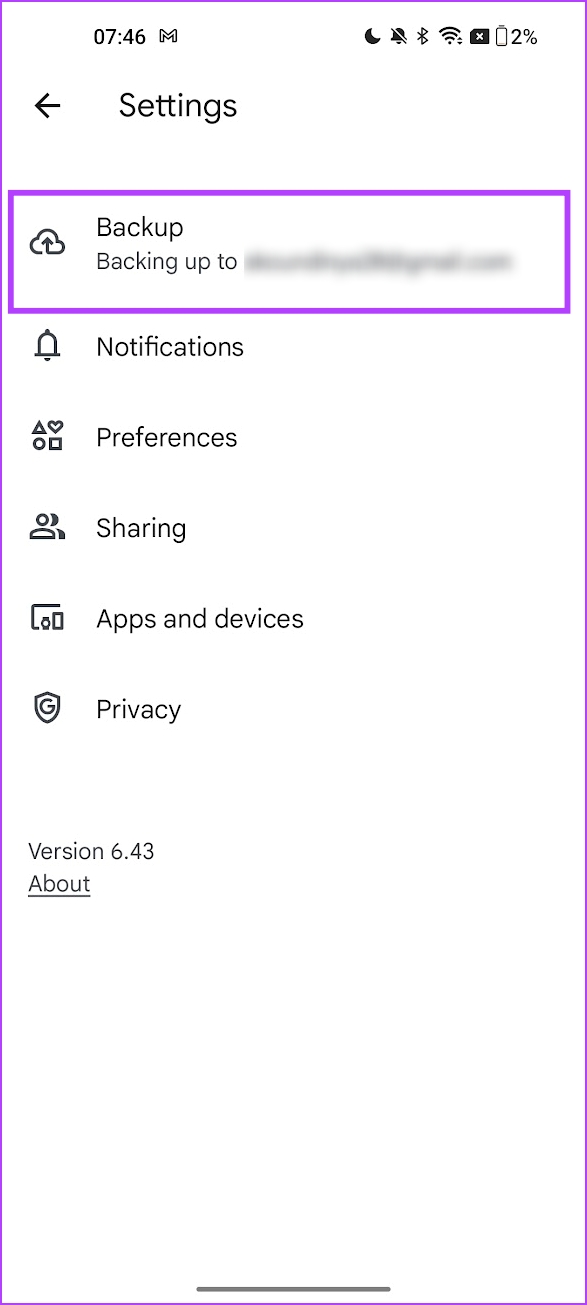
Step 1: Open the Google Photos app on your phone.
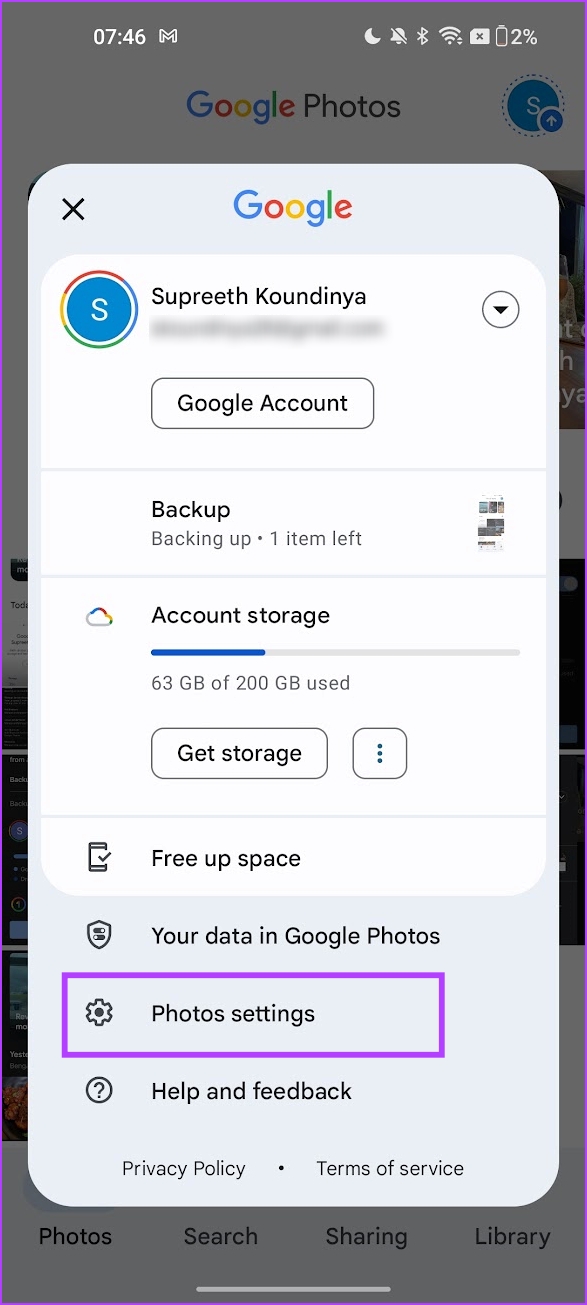
Step 2: Tap on the profile picture icon in the top right corner.
Step 3: Tap on Photos settings.
Step 4: Tap on Backup.
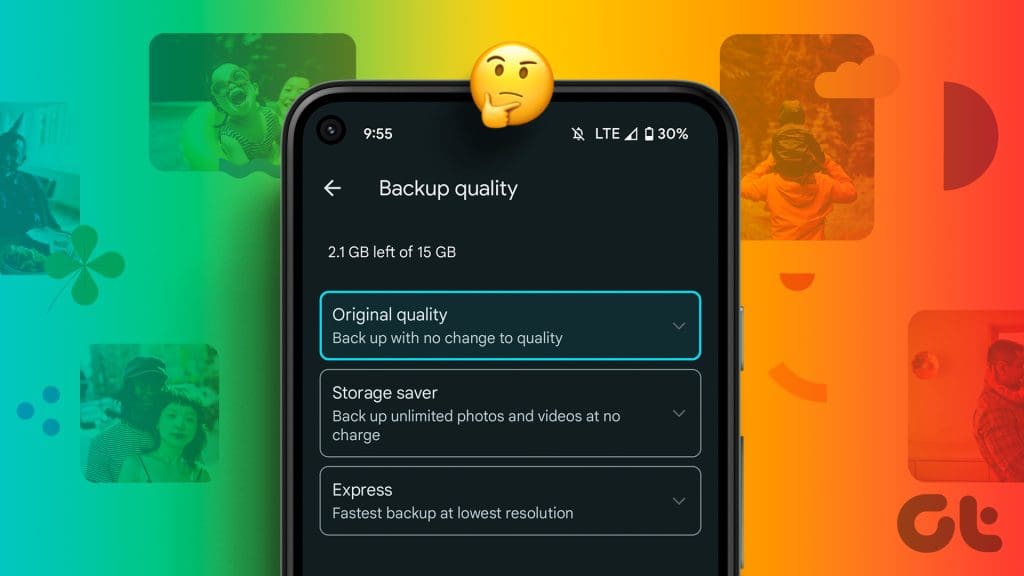
Step 5: Tap on Backup Quality.
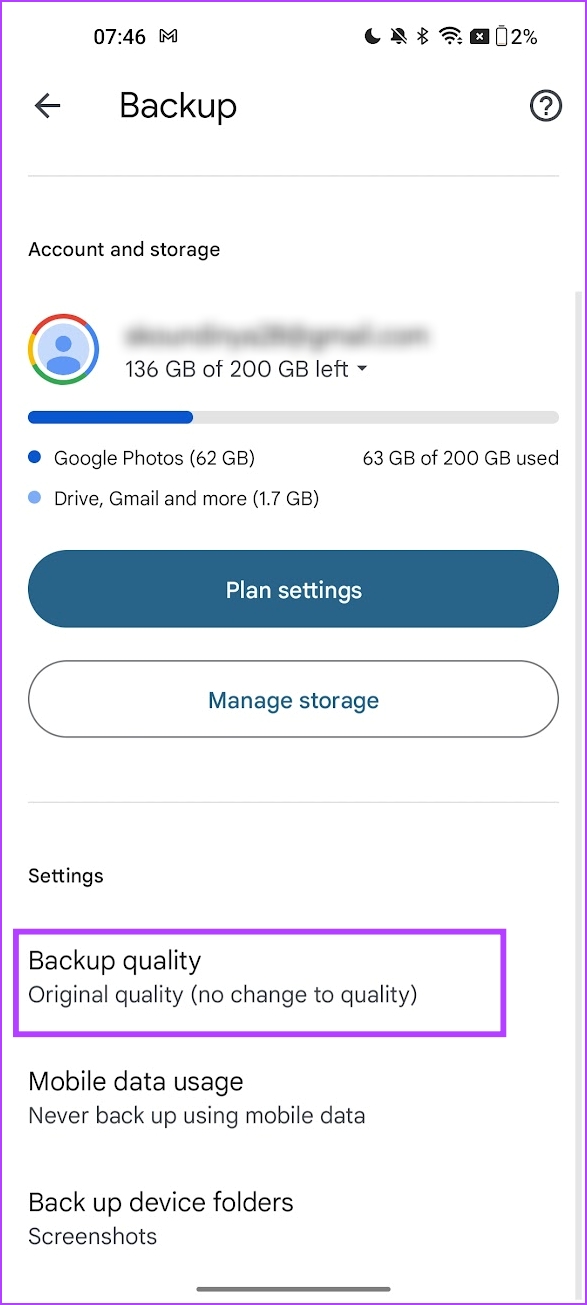
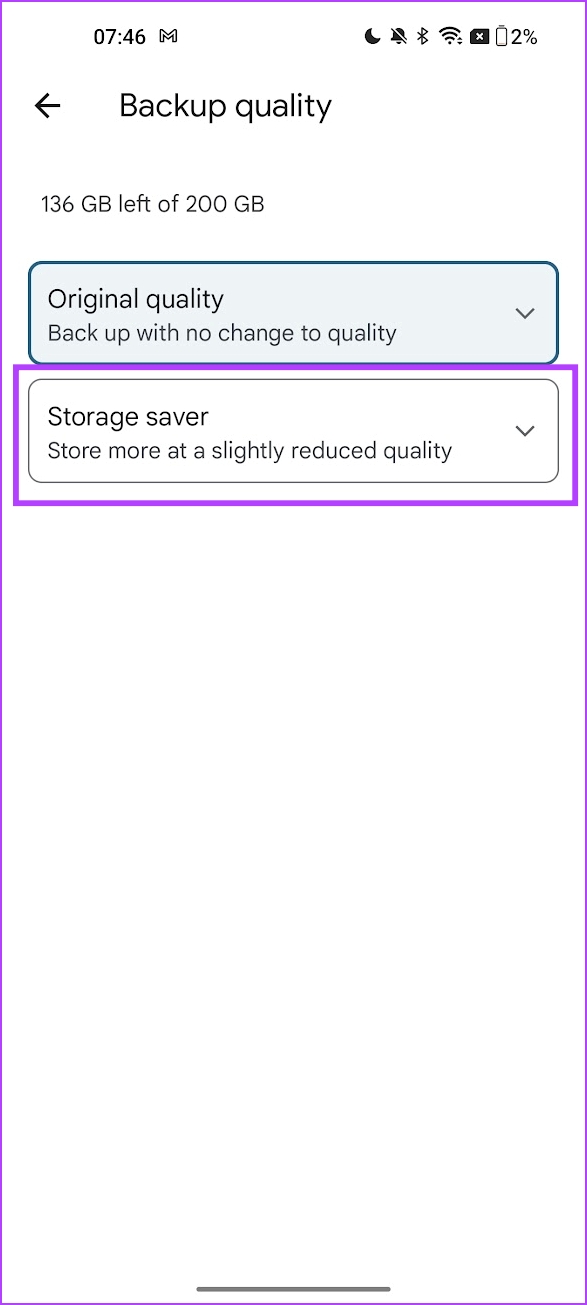
Step 6: Tap on Storage saver. Expand the option, and tap on Select.
All future uploads of photos and videos will back up in the storage saver quality on Google Photos. However, do note the the quality of previously backed up content will not change.

Change the Quality of Existing Backups on Google Photos
Here’s how you can change the quality of photos and videos that have already been backed up on Google Photos. However, do note that you can change the quality for all the uploaded content at once, and not for individual photos and videos. Further, the option to change the quality of existing photos and videos in a backup is only available on the web version of Google Photos on PC/Mac.
Important: Once you convert all the photos and videos backed up in original content to storage saver content, the option cannot be undone. To make sure, upload a photo in storage saver quality, and compare it to the original quality. If you are happy with the results, proceed to convert your existing backup to the storage saver quality.
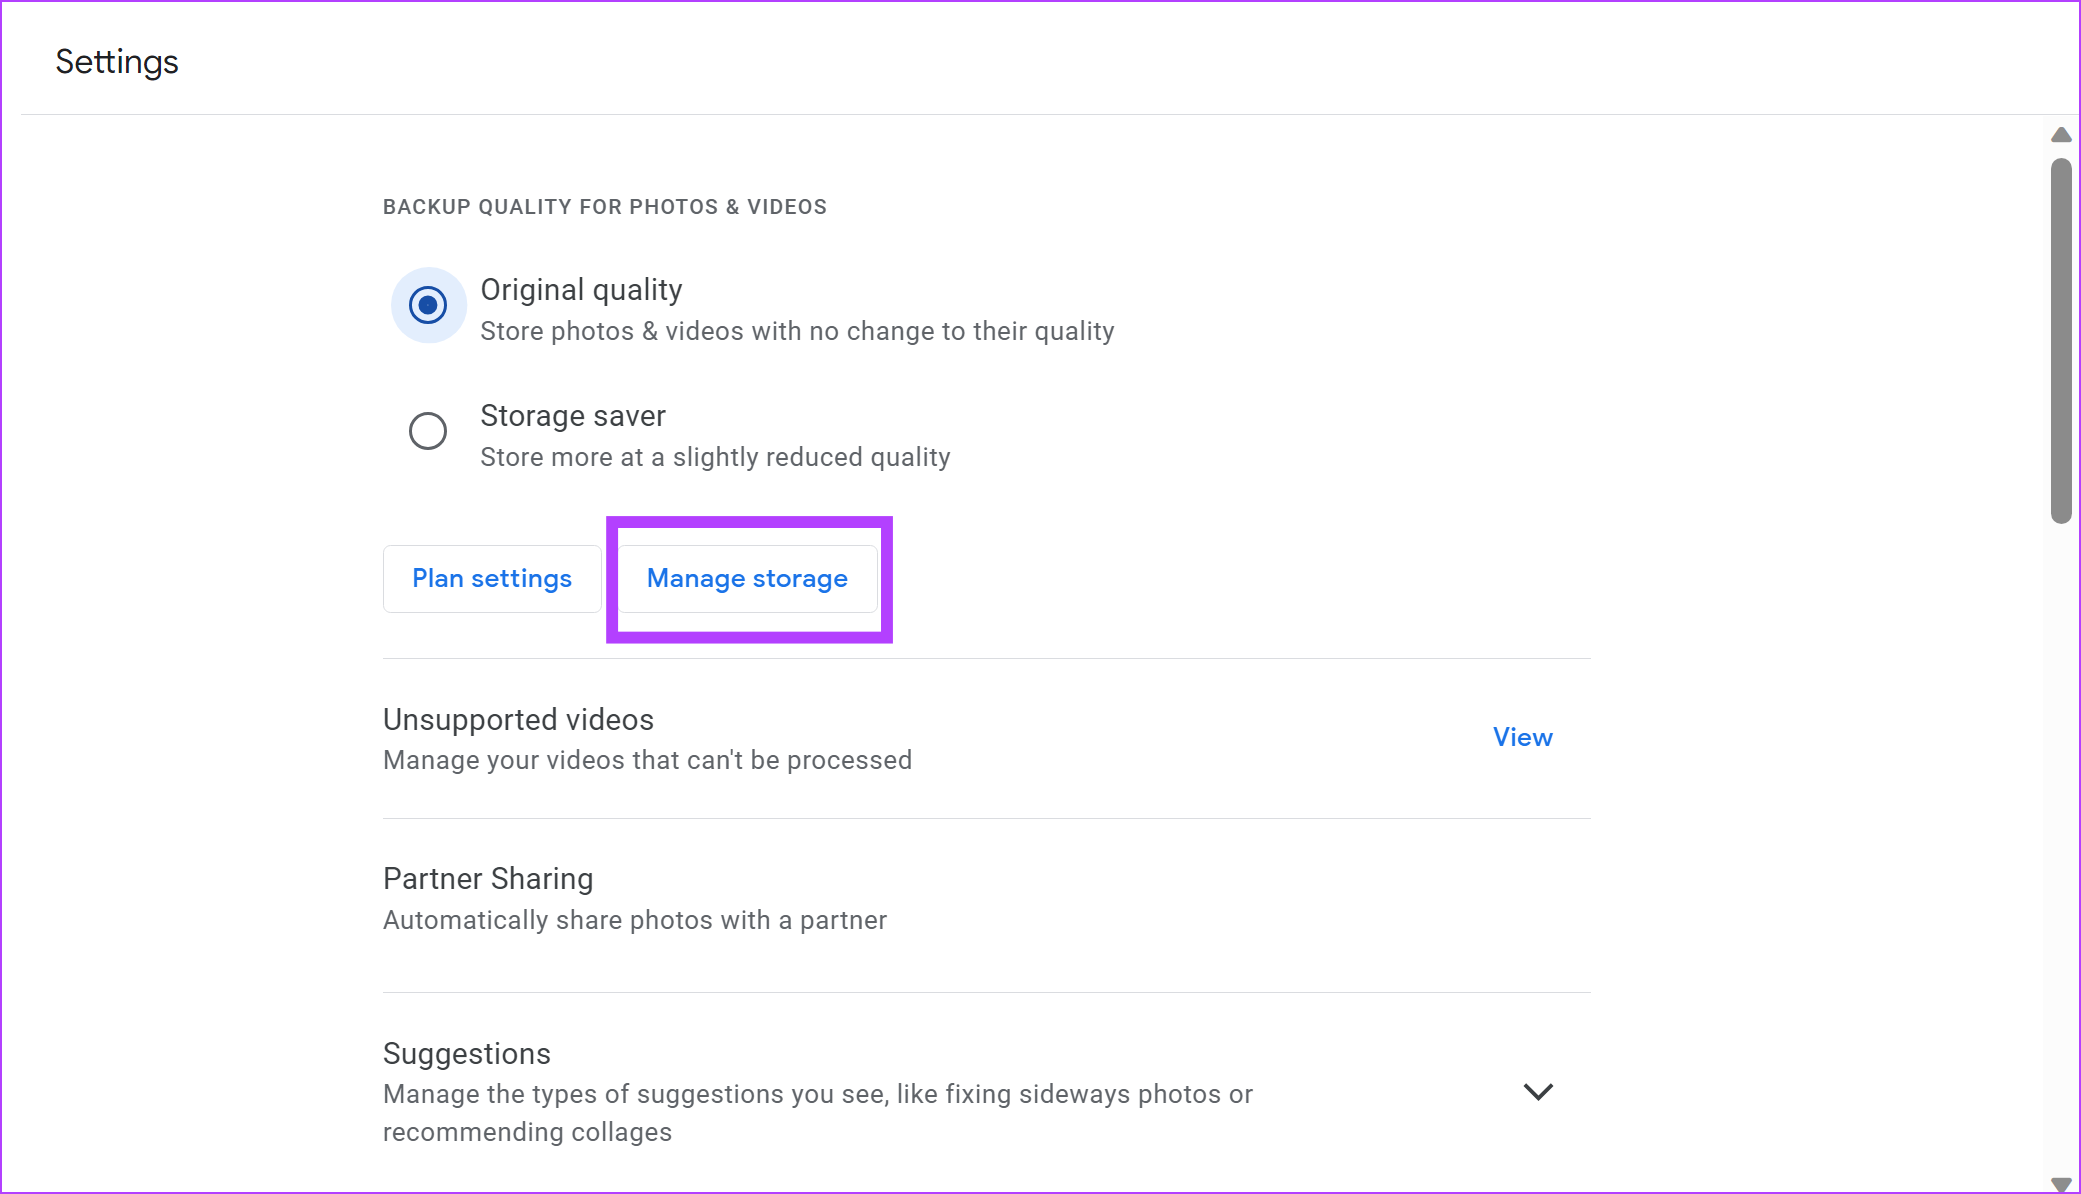
Step 1: Open Google Photos and click on the settings icon.
Step 2: Click on Manage Storage.
Step 3: Click on Learn More next to the ‘Convert existing photos & videos to Storage saver’ option.

Step 4: Check the box to confirm you changes, and click on ‘Compress existing photos & videos’.

Doing this does free up a significant amount of space on Google Photos. However, if you further want to free up your Google Photos storage, here are a few tips.
Tips to Optimize Your Google Photos Storage Capacity
- Consider clearing files on Google Drive. This will free up the available storage space for your Google Account, and you can utilize it on Google Photos.
- Similarly, consider deleting unwanted attachments on Gmail.
- Clear duplicate photos, and screenshots on Google Photos to free up space. You can go to the Manage Storage option on Google Photos to do the same.
- Delete all unsupported videos on Google Photos. You will find the option to do so in the Manage Storage option in Google Photos.
That is everything you need to know on how to change the quality of Google Photos. If you have any further questions, you can take a look at the FAQ section below.
FAQs on Google Photos Storage
You can purchase Google One, which starts at $19. It offers various plans to expand your Google storage.
No. You cannot change the backup quality just for a single photo or a video on Google Photos.
You can consider Dropbox or OneDrive. If you are an iPhone user, you can consider iCloud.
Once uploaded, you cannot increase the quality on Google Photos.
Use Google Photos Efficiently
We hope this article helps you change the quality of Google Photos and effectively free up and save storage space. However, we do wish Google gave us the option to selectively change the quality of photos/videos in an existing backup. This way, we would be able to keep the original quality for just the important photos and videos.
Was this helpful?
Last updated on 14 July, 2023
Read Next
 How to Send High Quality Photos and Video on Telegram on Mobile and Desktop
Telegram lets you share media files of up to 2GB in size collectively and individually.
How to Send High Quality Photos and Video on Telegram on Mobile and Desktop
Telegram lets you share media files of up to 2GB in size collectively and individually.
 Top 5 Camera Settings to Click Best-Quality Photos From iPhone 13
The iPhone 13 is capable of shooting some stunning photos.
Top 5 Camera Settings to Click Best-Quality Photos From iPhone 13
The iPhone 13 is capable of shooting some stunning photos.
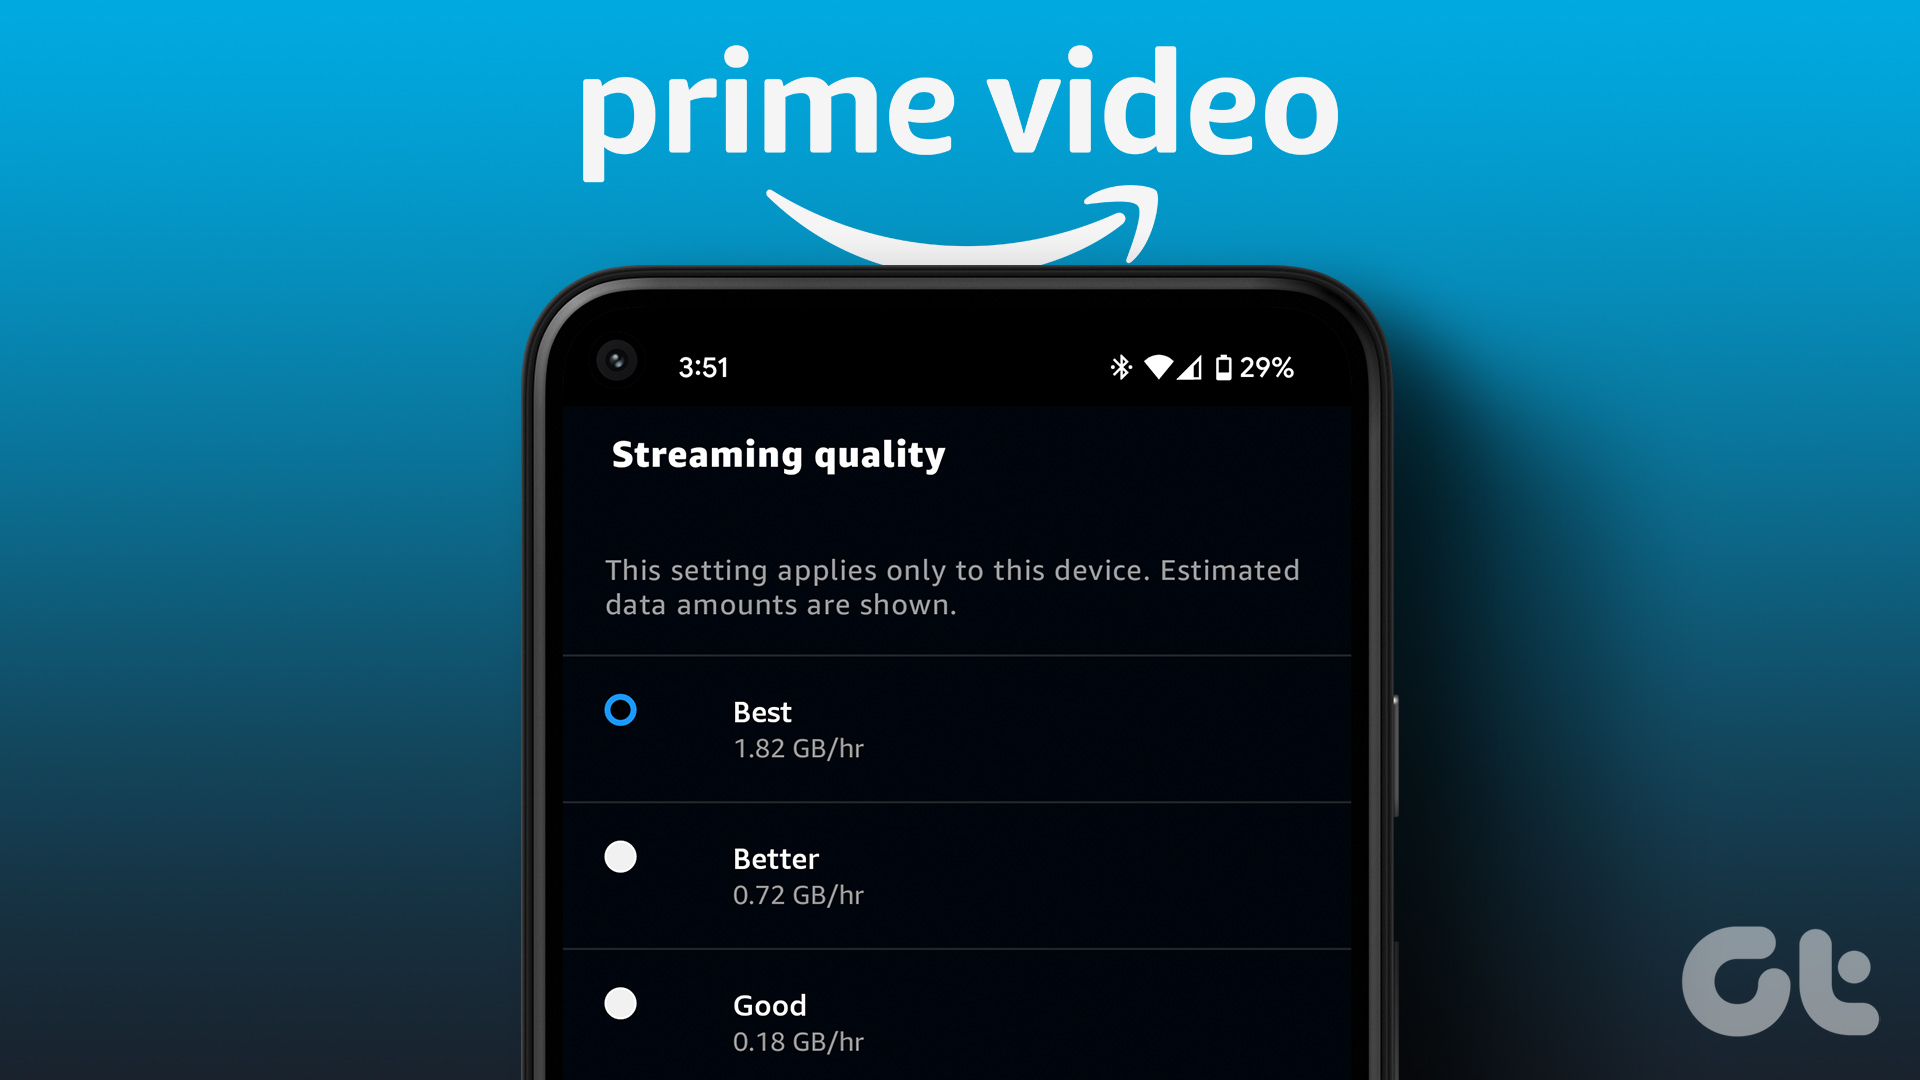 How to Change Amazon Prime Video Streaming Quality on Any Device
Most streaming services these days offer the best quality possible.
How to Change Amazon Prime Video Streaming Quality on Any Device
Most streaming services these days offer the best quality possible.
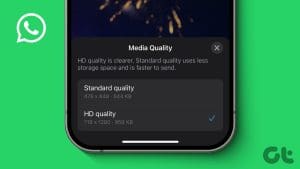 Top 3 Ways to Send High Quality Videos on WhatsApp on iPhone and Android
The default video size limit is 64MB and 480p resolution for WhatsApp users with fast internet connection.
Top 3 Ways to Send High Quality Videos on WhatsApp on iPhone and Android
The default video size limit is 64MB and 480p resolution for WhatsApp users with fast internet connection.
 Top 7 Ways to Fix Poor Video Call Quality in WhatsApp for Android and iPhone
WhatsApp is arguably the best platform for making voice and video calls with people worldwide.
Top 7 Ways to Fix Poor Video Call Quality in WhatsApp for Android and iPhone
WhatsApp is arguably the best platform for making voice and video calls with people worldwide.
 How to Change Photo Upload Quality on WhatsApp
WhatsApp is the first app that pops into your mind when thinking about instant messages.
How to Change Photo Upload Quality on WhatsApp
WhatsApp is the first app that pops into your mind when thinking about instant messages.
 How to Upload Photos to Google Photos on Android, iPhone, PC
Google Photos are private by default and that makes it one of the best photo storage services.
How to Upload Photos to Google Photos on Android, iPhone, PC
Google Photos are private by default and that makes it one of the best photo storage services.
 How to Fix YouTube Quality Unavailable Issue on iOS and Android
YouTube has enjoyed a monopoly over the years as a free video entertainment platform.
How to Fix YouTube Quality Unavailable Issue on iOS and Android
YouTube has enjoyed a monopoly over the years as a free video entertainment platform.
The article above may contain affiliate links which help support Guiding Tech. The content remains unbiased and authentic and will never affect our editorial integrity.