Microsoft claims that Windows 11 brings improved gaming experience. Early adopters are underwhelmed by gaming performance on Windows 11. However, there are ways to improve gaming experience on your Windows 11 PC.
1. Disable Enhance Pointer Precision
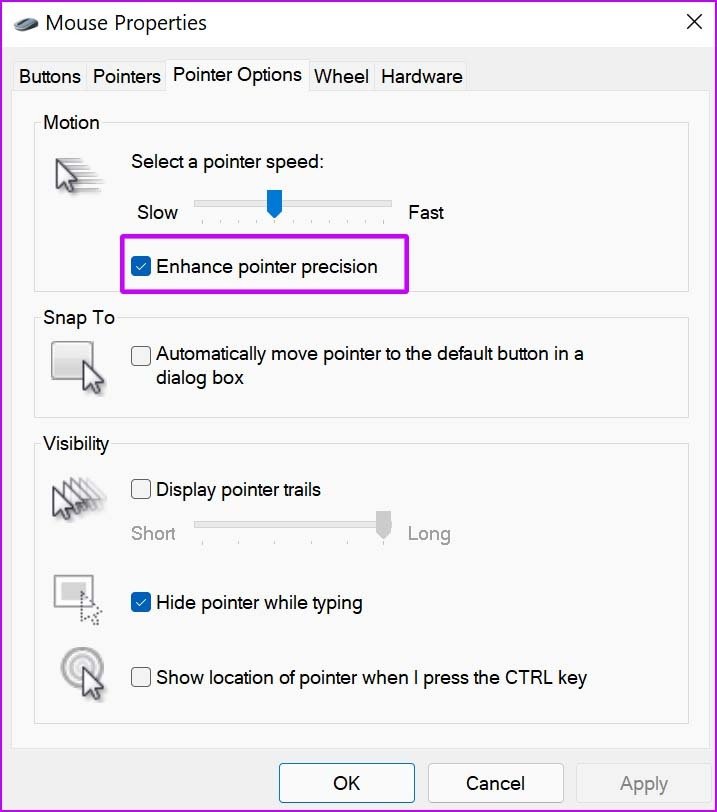
The most gaming mouse come with disabled mouse acceleration in the software. Windows 11 might have enabled it again. The Enhance pointer precision makes sense to use on a laptop where you want to leave the trackpad for some time.
On the desktop gaming setup, it’s worth disabling the option. Here’s how.
Step 1: Press the Windows key and search for Mouse. Open Mouse Settings menu.
Step 2: From the related settings menu, select additional mouse settings.
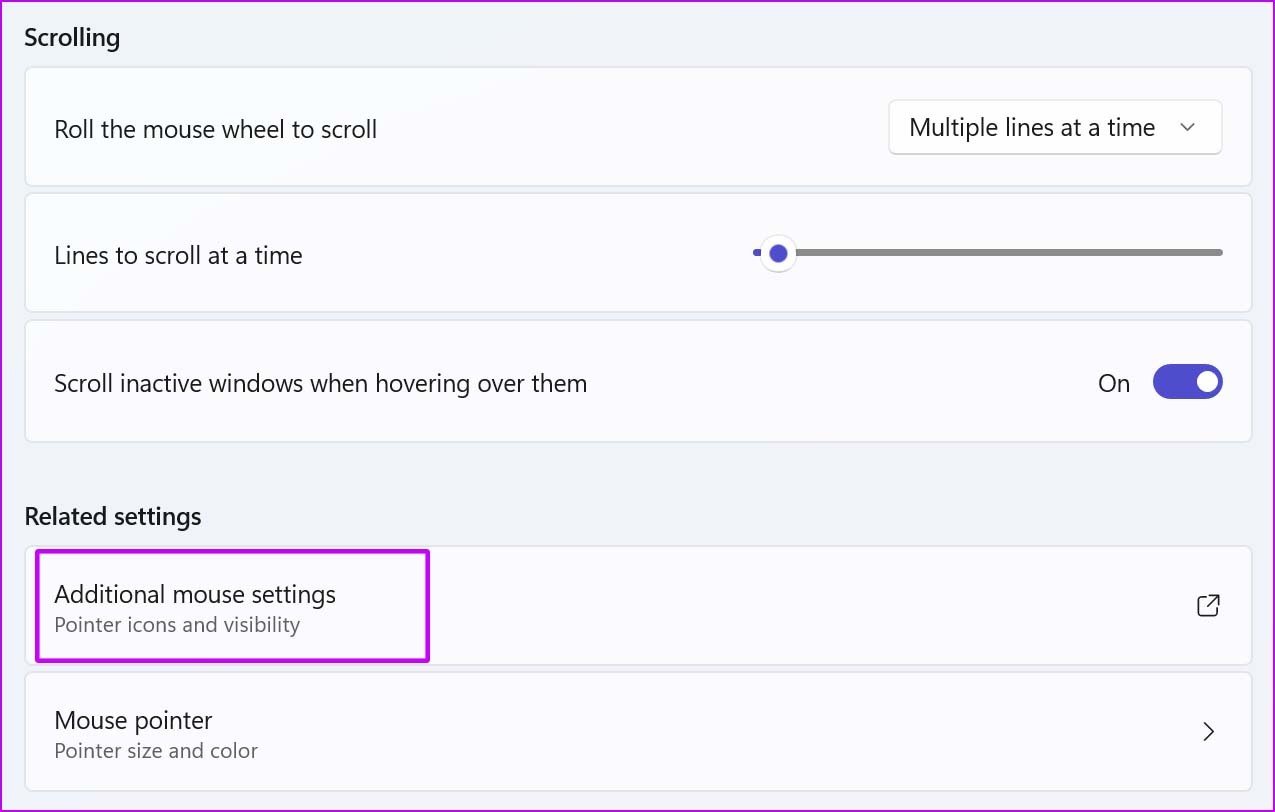
Step 3: Move to the Pointer Options menu.
Step 4: Disable Enhance pointer precision.
2. Enable Game Mode
Gaming mode used to be ineffective, but Microsoft has worked hard on this feature and improved it by quite a margin.
When you enable Game Mode, Windows will prioritize the gaming experience on PC by disabling background tasks, Windows update services, driver installation, and more. The system makes sure you have all the CPU and GPU resources to enjoy a smooth gaming experience.
The goal is to deliver a stable frame rate depending on the game and system.
Step 1: Open the Settings app on Windows 11 (use Windows + I keys).
Step 2: Select Gaming from the left sidebar.
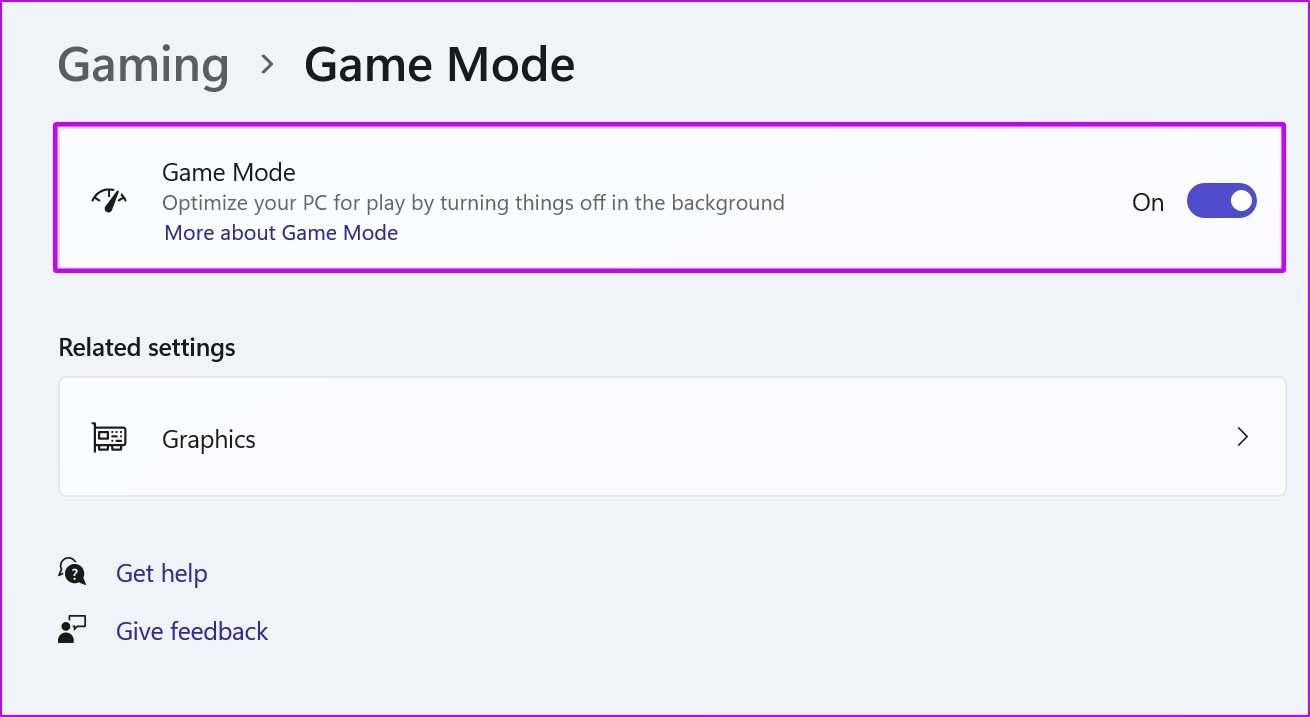
Step 3: Go to Game mode and enable the toggle from the following menu.
3. Prioritize GPU in Specific Games
Most modern desktop CPUs come with a built-in GPU that’s good enough for light gaming. You can always scale it up with a dedicated GPU from the likes of NVIDIA and enjoy high-end gaming.
Following Windows 11 update, you have an option to assign a specific GPU per application. This may not make sense for desktop rigs with a single graphics card as High-performance and Power-saving modes have one GPU to choose from.
It makes sense on gaming laptops or desktop setup with discrete GPU for high-end gaming. You can task a specific game to launch with the integrated GPU for saving battery or a dedicated GPU to deliver raw power from the start.
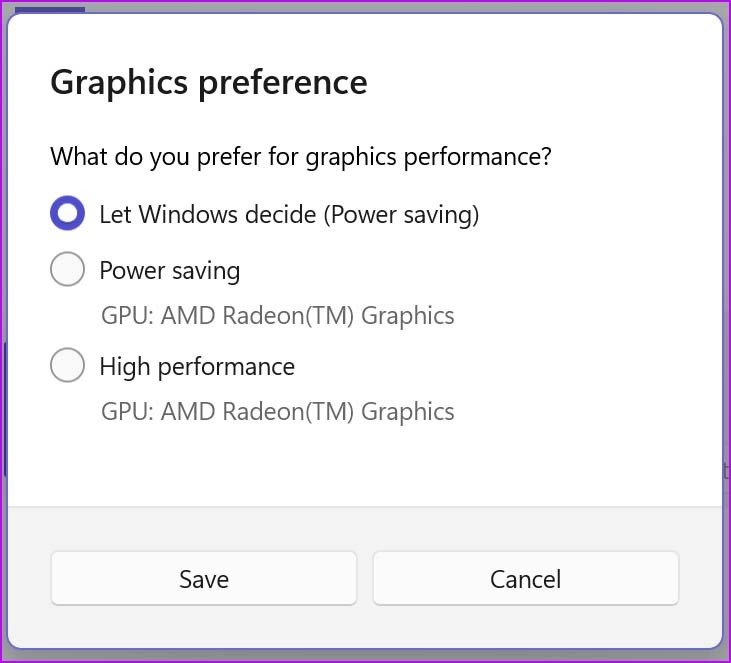
Step 1: Press the Windows key and search for Graphics.
Step 2: Hit Enter and open the Graphics Settings menu.
Step 3: Select a game and click on Options.

Step 4: Select whatever GPU option you want to use with the game and hit Save.
4. Disable Record What Happened
Power gaming users probably use AMD or NVIDIA’s driver-based capture/record settings. Let’s disable the default Windows one.
Step 1: Open the Windows Settings app.
Step 2: Go to Gaming and select Captures.
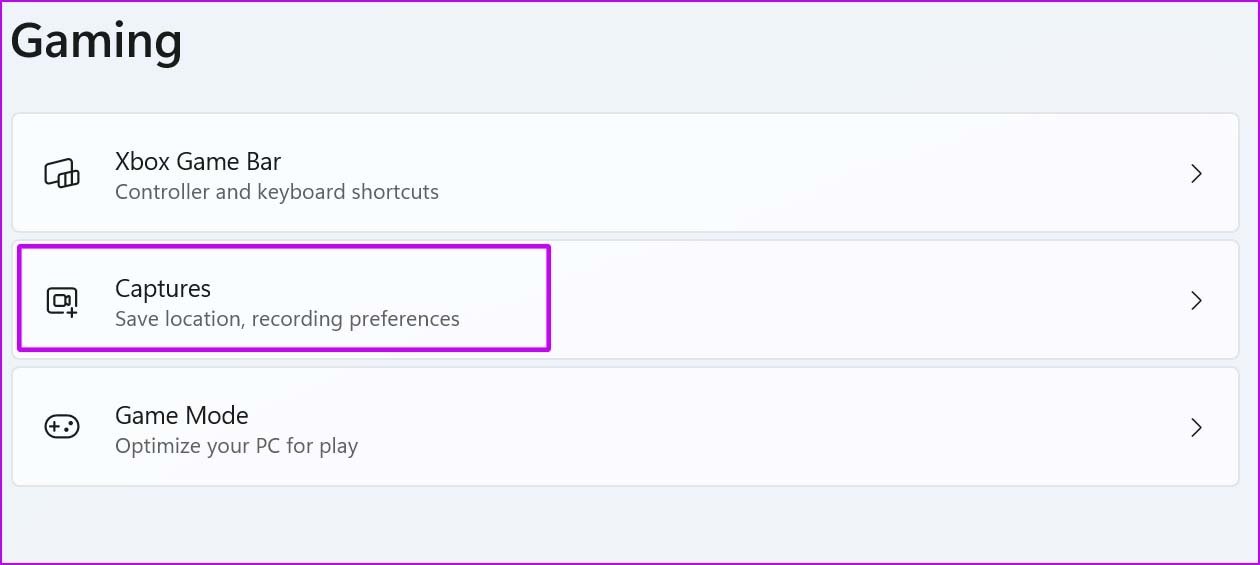
Step 3: Disable Record what happened toggle.

If you are planning to use the default Windows way to capture winning moments, you should also modify the video frame rate and quality.
From the same menu, use 30 fps instead of 60 fps and standard video quality instead of High quality to record the video.
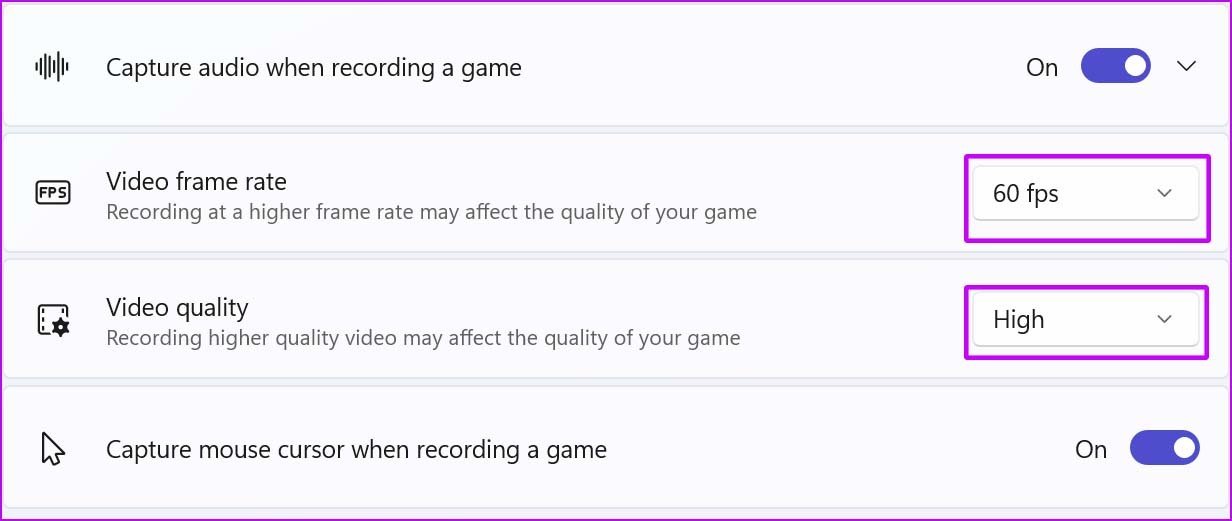
You might see quality-drop in recorded content, but it won’t affect the gaming performance during recording.
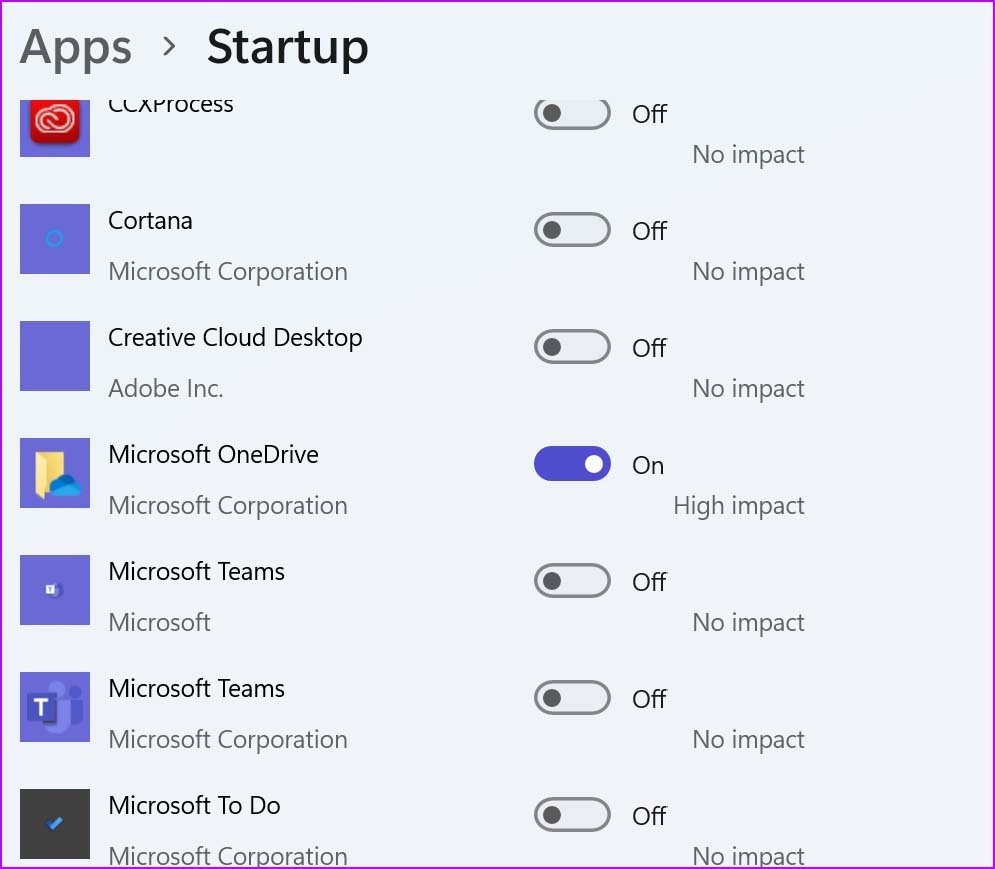
5. Disable Apps Opening on Startup
This is a classic trick to improve overall Windows 11 performance. If there are too many apps and services kicking off during startup, you should disable the behavior from the Settings menu.
Step 1: Open Windows Settings and go to the Apps menu.
Step 2: Select Apps & features and scroll down to Startup.
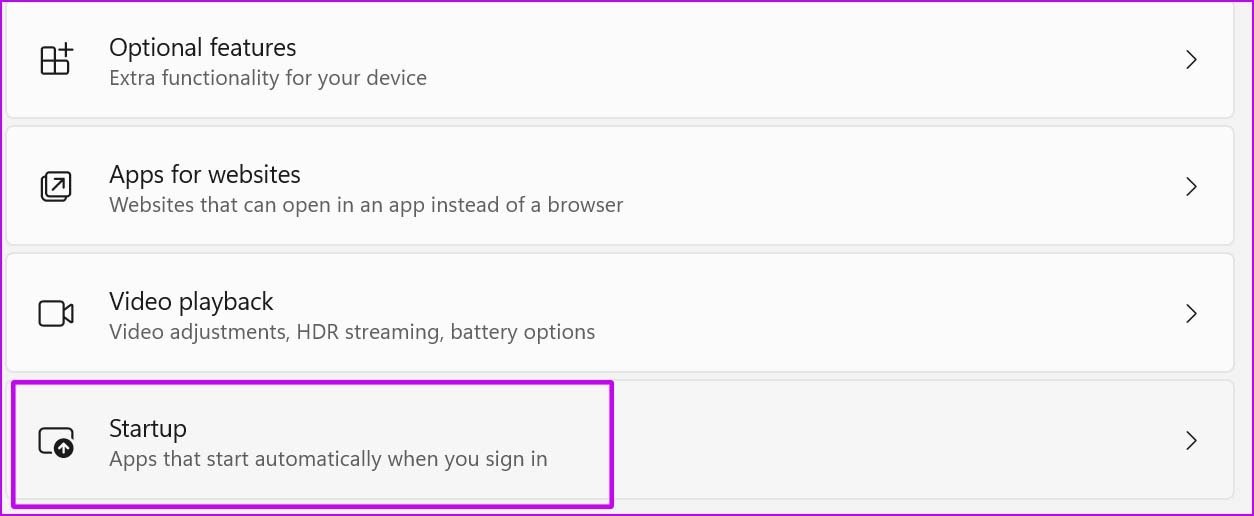
Step 3: Disable irrelevant apps and services starting up during the login process.
6. Enable High Performance from Power Plan
Windows allows you to enable High-performance plan that favors performance with more energy. The option helps you improve the gaming experience on Windows 11. Here’s how to enable it.
Step 1: Hit the Windows key and search for Edit Power Plan.
Step 2: Hit Enter and it will open Power Options.
Step 3: Click on the Power option at the top.
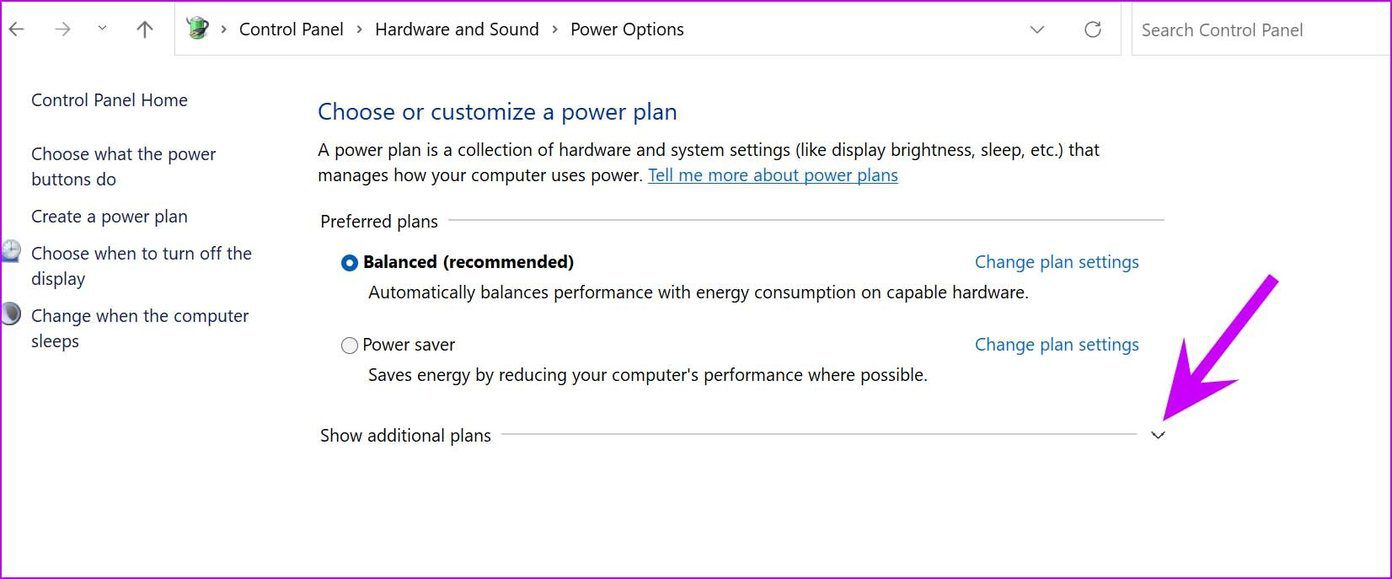
Step 4: Expand Show additional plans and enable High performance from the drop-down menu.

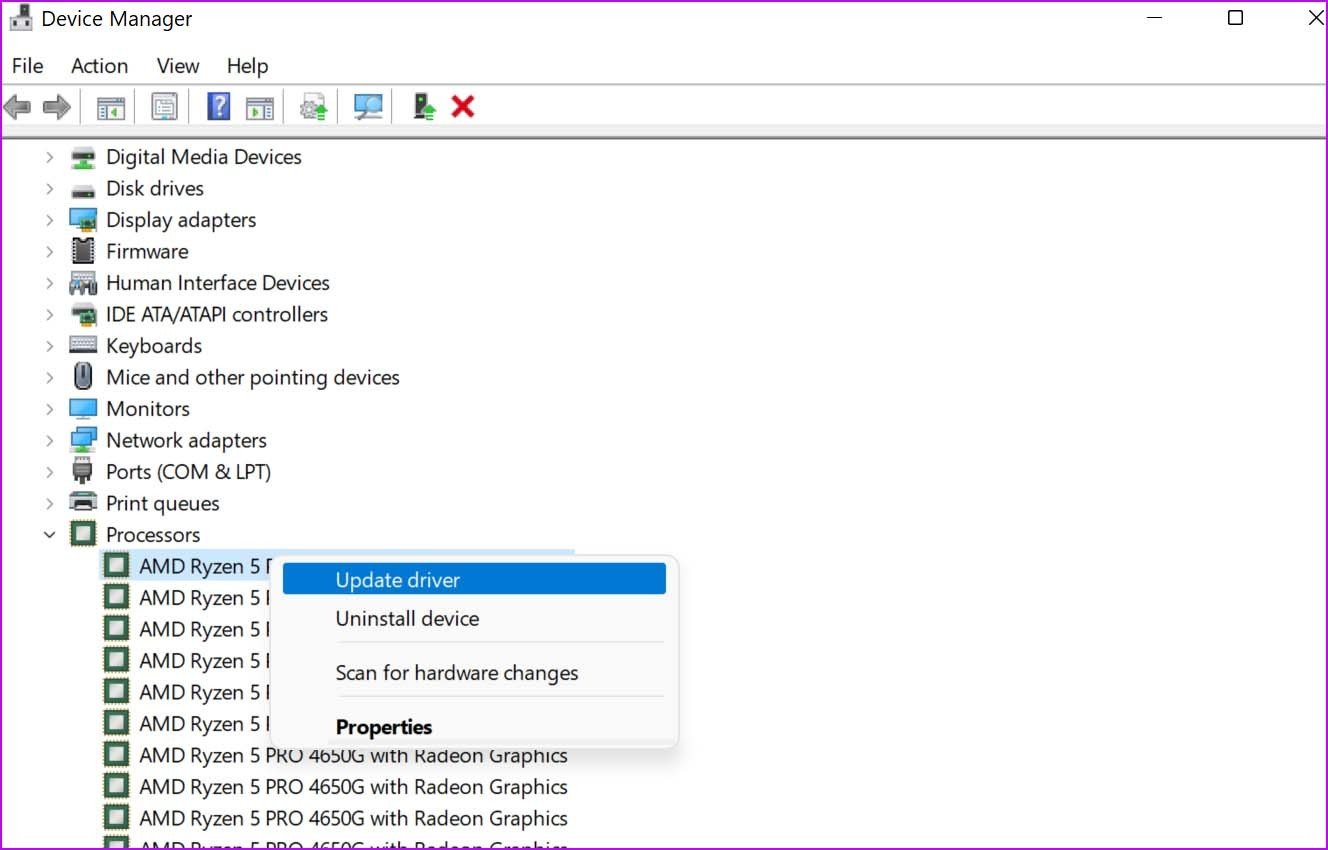
7. Update Graphics Drivers
Are you playing games with outdated graphics drivers? You may want to update graphics drivers from the Device Manager menu.
Press the Windows key and search for the Device Manager menu. Open it and scroll down to Processors. Right-click on the graphics driver and update it to the latest version.
8. Update Windows 11 OS
Many pointed out in their Windows 11 reviews that Microsoft’s latest OS is still a work-in-progress. The company is working hard to fix some of the initial glitches. For instance, AMD processors didn’t play fine with early Windows 11 builds.
Microsoft has fixed those issues with OS updates. Go to Windows Settings and select Windows Update to install the latest OS on your computer.
Enjoy Flawless Gaming on Windows 11
Due to a below-average gaming experience on Windows 11, you might have an urge to go back to Windows 10 on your PC or gaming laptop. Before you do that, you can follow the tips above and see if the improved gaming performance meets your expectations or not.
Did you notice a better gaming performance after applying the tricks above? Share your experience in the comments below.
Was this helpful?
Last updated on 07 February, 2022
Read Next
 6 Best Meta Quest 3 Accessories to Improve Your Gaming Experience
The Meta Quest 3 is here to revolutionize the world of VR gaming.
6 Best Meta Quest 3 Accessories to Improve Your Gaming Experience
The Meta Quest 3 is here to revolutionize the world of VR gaming.
 Top 4 Ways to Improve Location Accuracy on Android
Location services on Android are quite useful in several ways.
Top 4 Ways to Improve Location Accuracy on Android
Location services on Android are quite useful in several ways.
 Top 13 OneNote Keyboard Shortcuts to Improve Your Productivity
Microsoft OneNote has been around for a couple of decades.
Top 13 OneNote Keyboard Shortcuts to Improve Your Productivity
Microsoft OneNote has been around for a couple of decades.
 MSI Cyborg 15 Review: High Performance, Low Bucks
With the launch of Nvidia's latest 40-series of graphics cards, the gaming laptop market has seen a massive performance boost.
MSI Cyborg 15 Review: High Performance, Low Bucks
With the launch of Nvidia's latest 40-series of graphics cards, the gaming laptop market has seen a massive performance boost.
 6 Best Liquid AIO Coolers in 2023 for High-Performance CPUs
When it comes to high-performance CPUs, it's imperative to keep temperatures in check to achieve optimal performance.
6 Best Liquid AIO Coolers in 2023 for High-Performance CPUs
When it comes to high-performance CPUs, it's imperative to keep temperatures in check to achieve optimal performance.
 How to Optimize Steam Deck’s Performance in Games
Valve's Steam Deck is easily one of the best handheld gaming consoles.
How to Optimize Steam Deck’s Performance in Games
Valve's Steam Deck is easily one of the best handheld gaming consoles.
 4 Best Sites to Test Typing Speed and Improve Accuracy
As a writer, I type a lot and been aiming type faster in the past few years.
4 Best Sites to Test Typing Speed and Improve Accuracy
As a writer, I type a lot and been aiming type faster in the past few years.
 How to Improve Facial Recognition in Google Photos
Google Photos is more than just a gallery app on iPhone and Android.
How to Improve Facial Recognition in Google Photos
Google Photos is more than just a gallery app on iPhone and Android.
The article above may contain affiliate links which help support Guiding Tech. The content remains unbiased and authentic and will never affect our editorial integrity.