Windows 11 brings a breath of fresh air with a new Start menu, a fresh coat of paint across default apps, new widgets, improved gaming, and better multitasking. Especially on the multitasking front, Microsoft has improved the whole experience by leaps and bounds. Windows 11 offers snap windows with a new virtual desktop on the taskbar for superior multitasking on the latest OS. Here’s how you use multi-windows on Windows 11.

Before we go ahead and use multi-windows on Windows 11, make sure that you have enabled relevant options from the Settings menu.
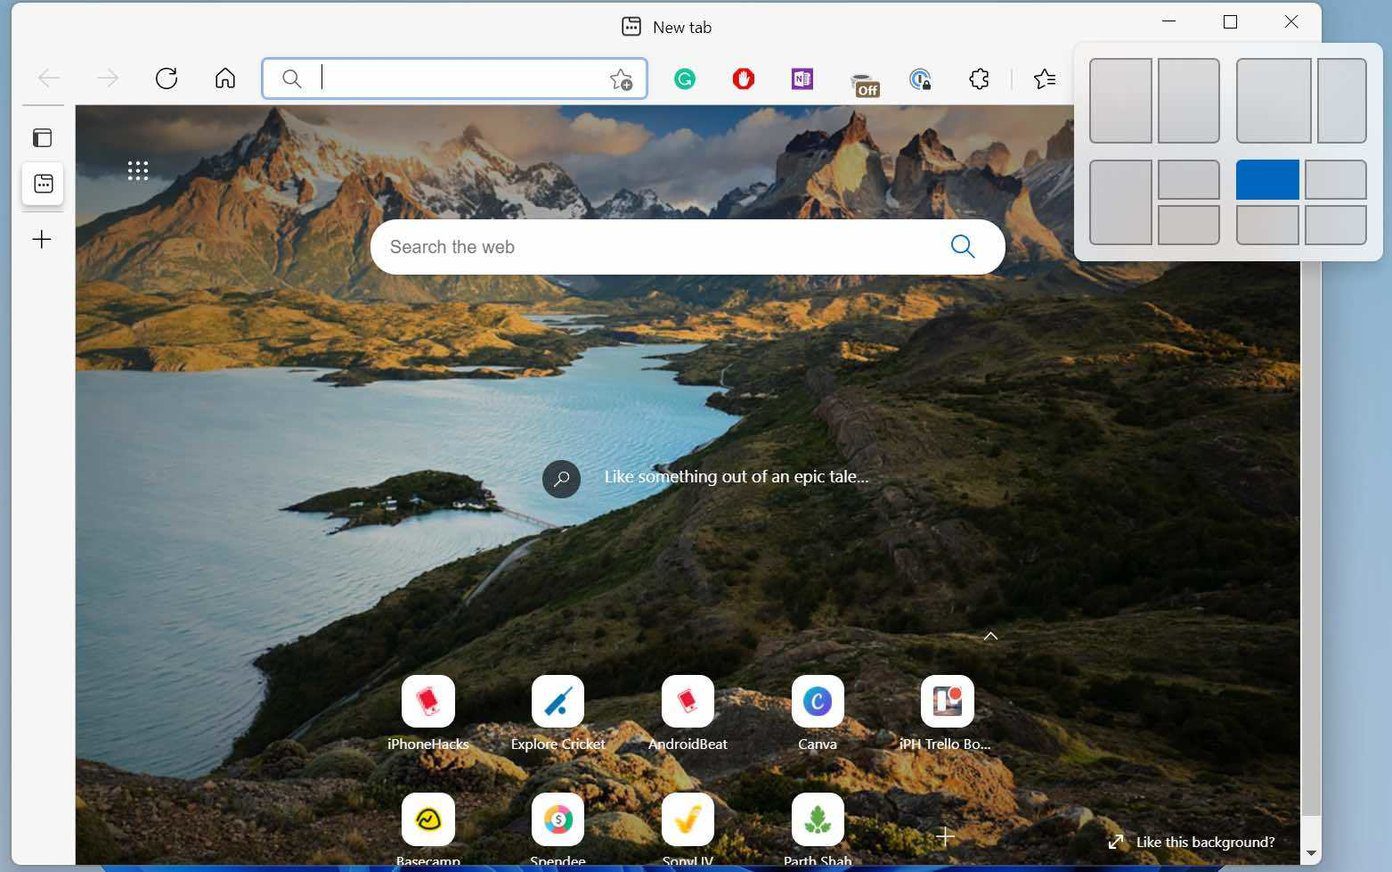
Enable Snap Windows From Windows 11 Settings
By default, the Snap windows option is enabled from the Settings menu. If you or Windows OS have disabled it accidentally, it’s time to enable it.
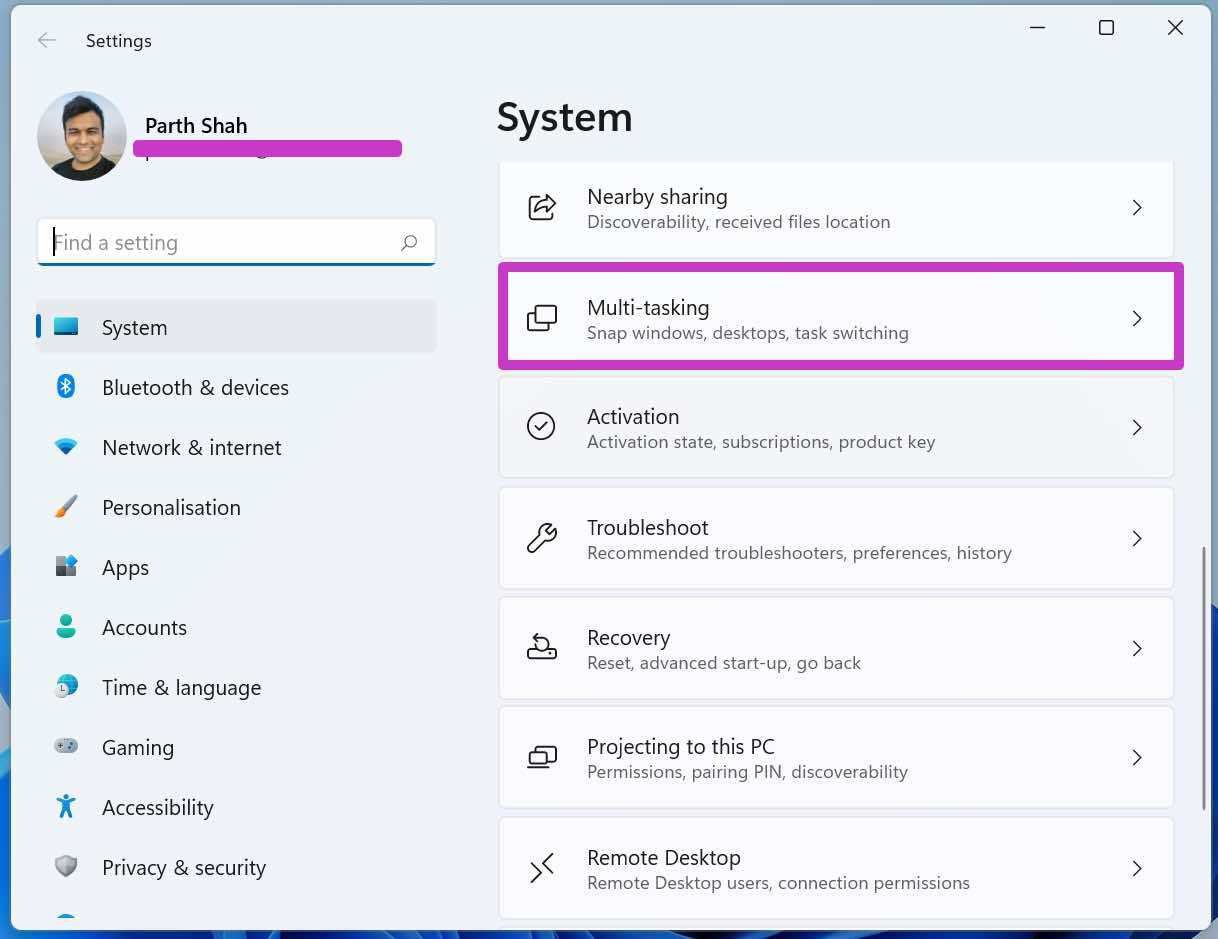
Step 1: Open the Settings menu on Windows 11 (Use Windows + I keys).
Step 2: Go to the System menu.
Step 3: Select Multitasking.
Step 4: Enable Snap windows from the Multitasking menu.
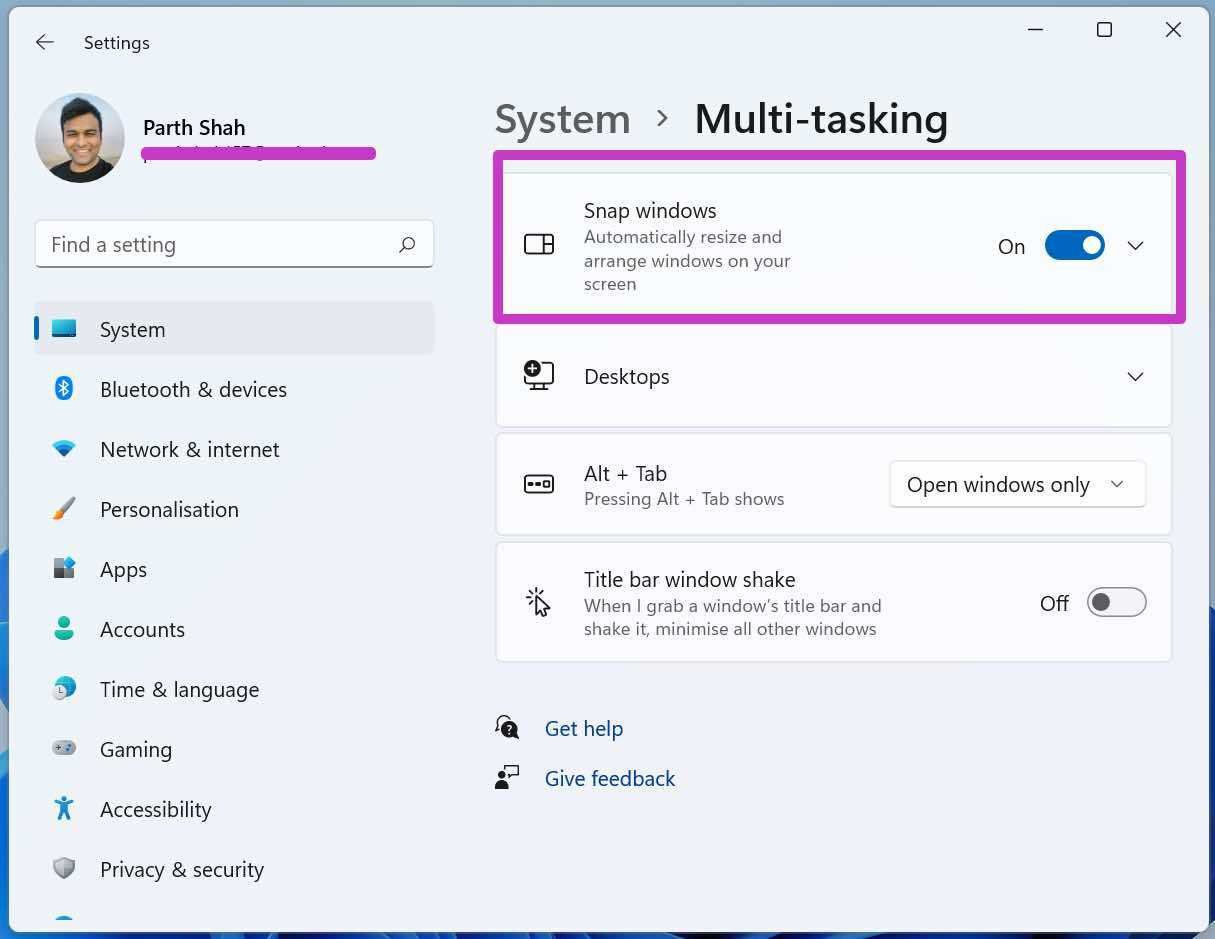
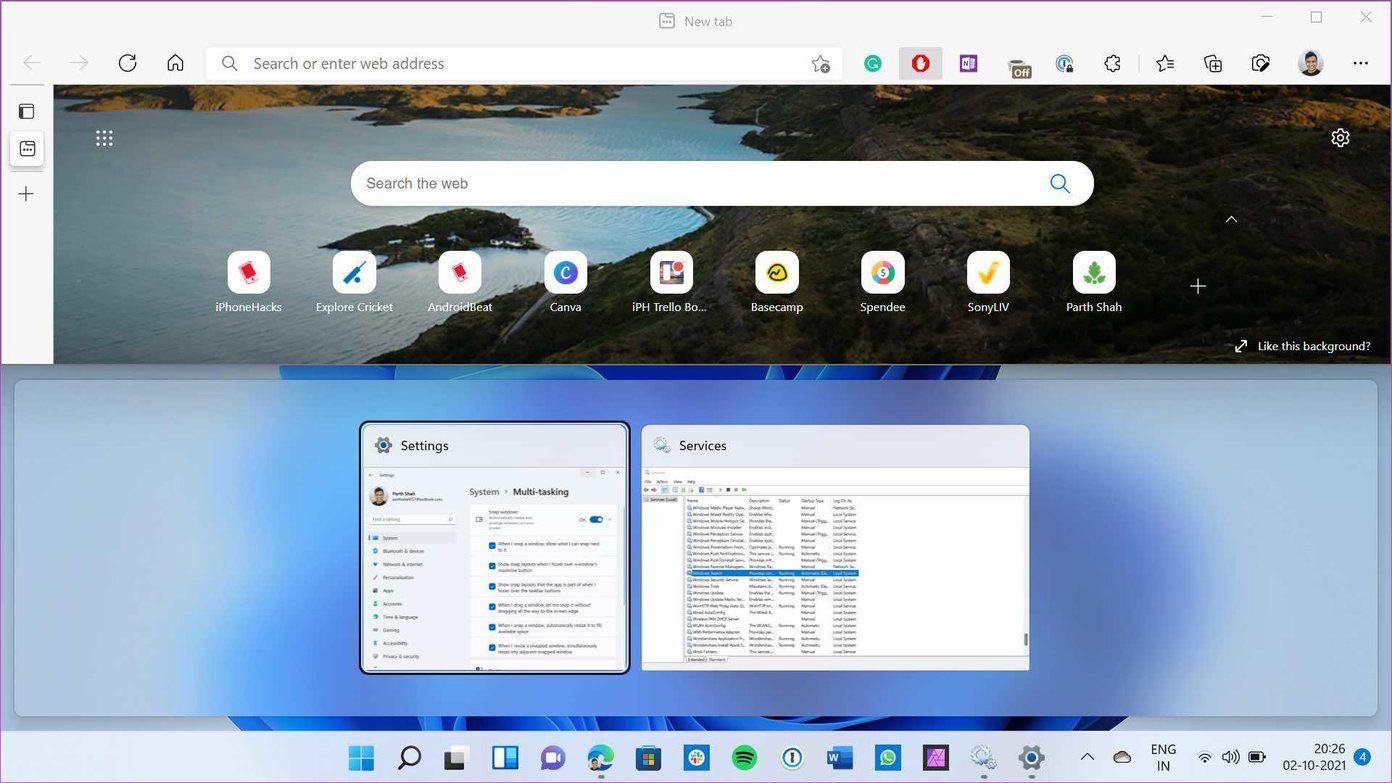
Tap on the arrow-down button and make sure that all the options are enabled for Windows 11 multitasking. These functions are necessary for a friction-free multitasking experience on Windows 11.
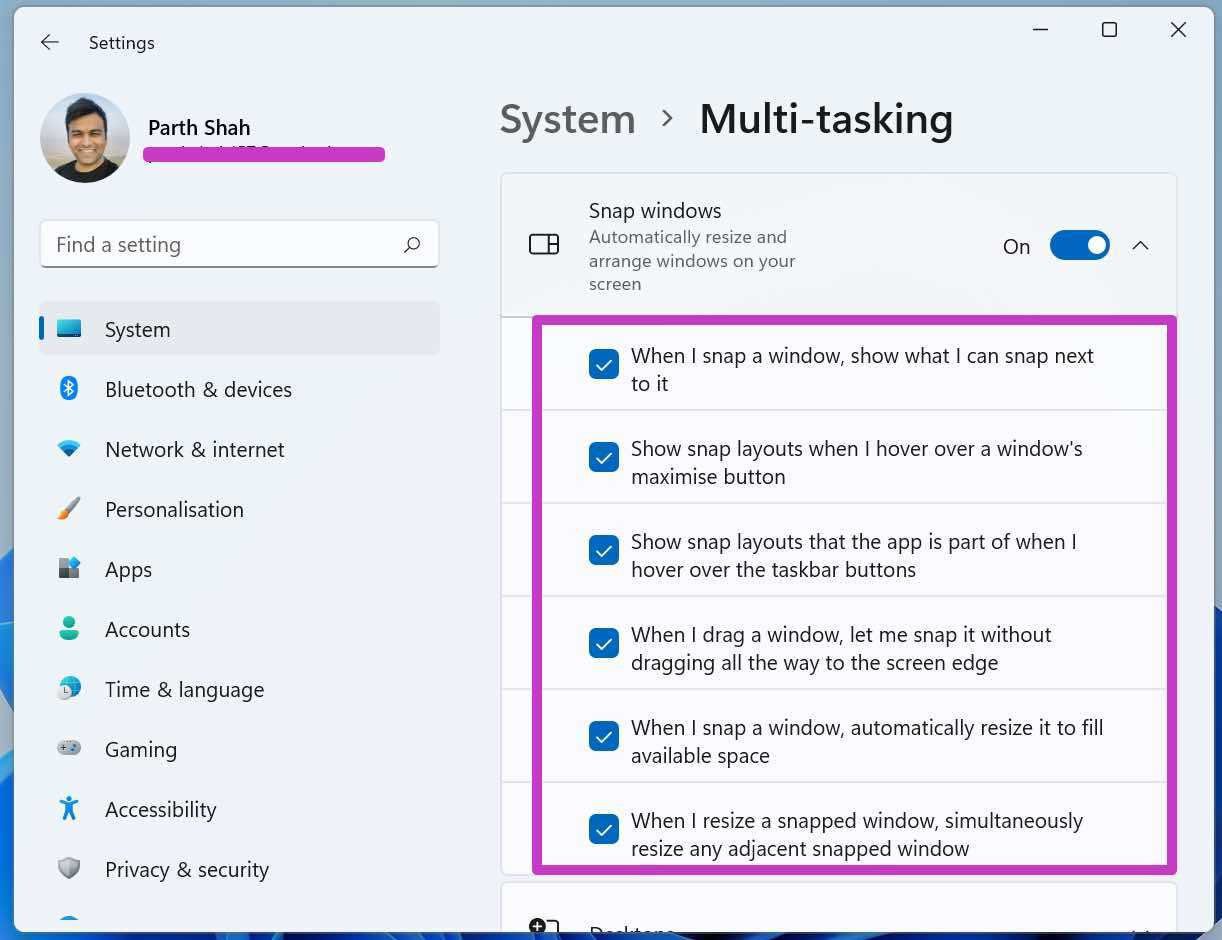
You can read them and understand why they are enabled by default on Windows 11 OS.
Use Multi-Windows on Windows 11
Microsoft does offer multi-windows on Windows 10 OS as well. But the overall implementation is miles better on Windows 11. Here’s what you need to do.
Open an app on Windows. Now hover the mouse pointer above the Maximize icon in the menu bar. Windows 11 will offer an option to use multi-window. Let’s discuss them.
Split Apps Window in Half
You will have a good idea of how the Windows 11 OS will split the current window with the live preview.
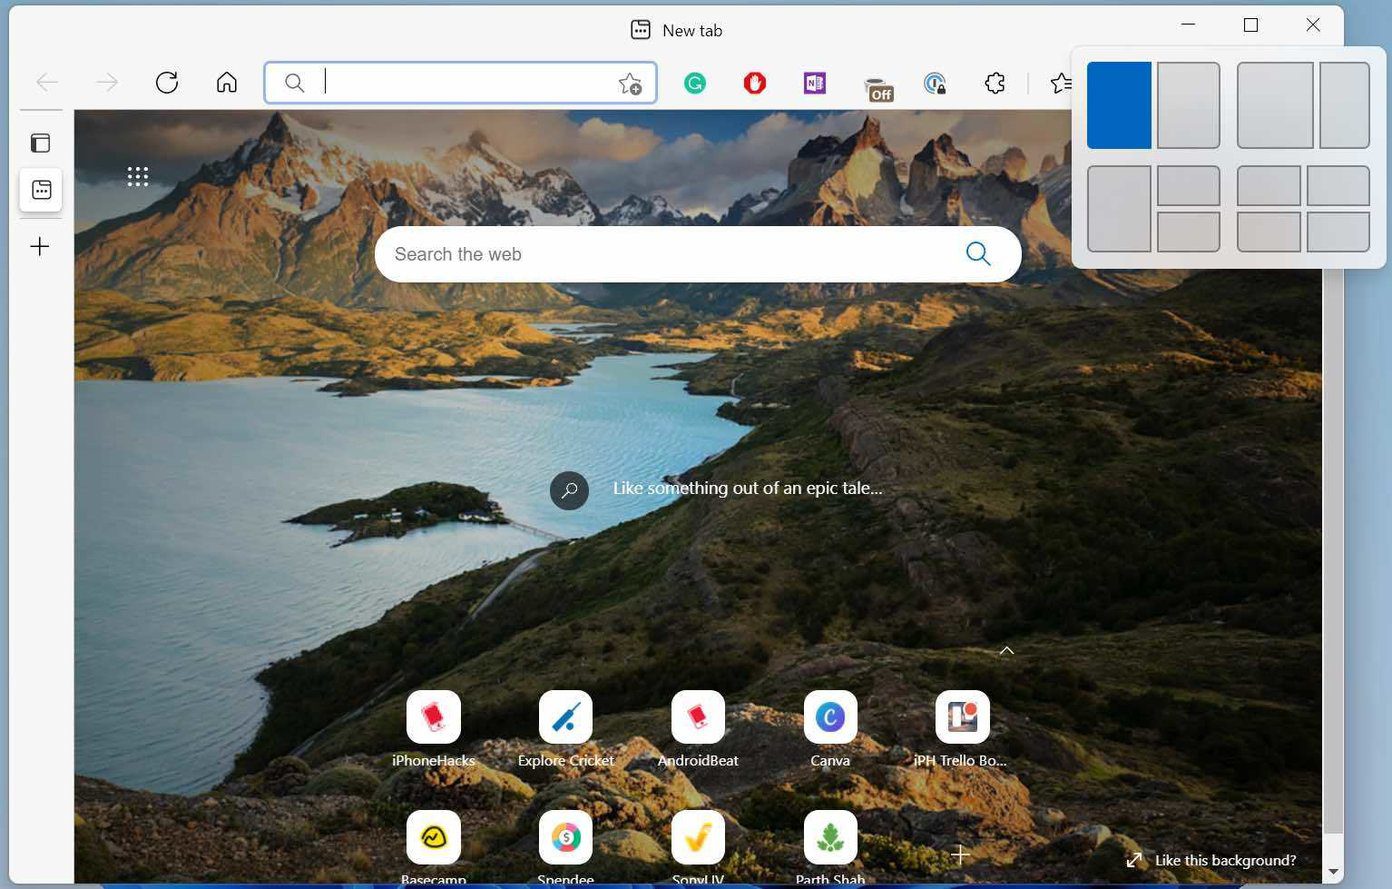
The first option will split the app window in half. You can select the left or right side, and Windows 11 pin the app on the select side. Microsoft all offers to open other background apps from the other side.
Select the app, and you are good to go with split-screen style adjustment on Windows 11.
Use 2:1 Arrangement
This is one of our most-used multitasking styles on Windows 11. The second option allows users to keep one app in the 1/3 area on the right side and the second on the left side.
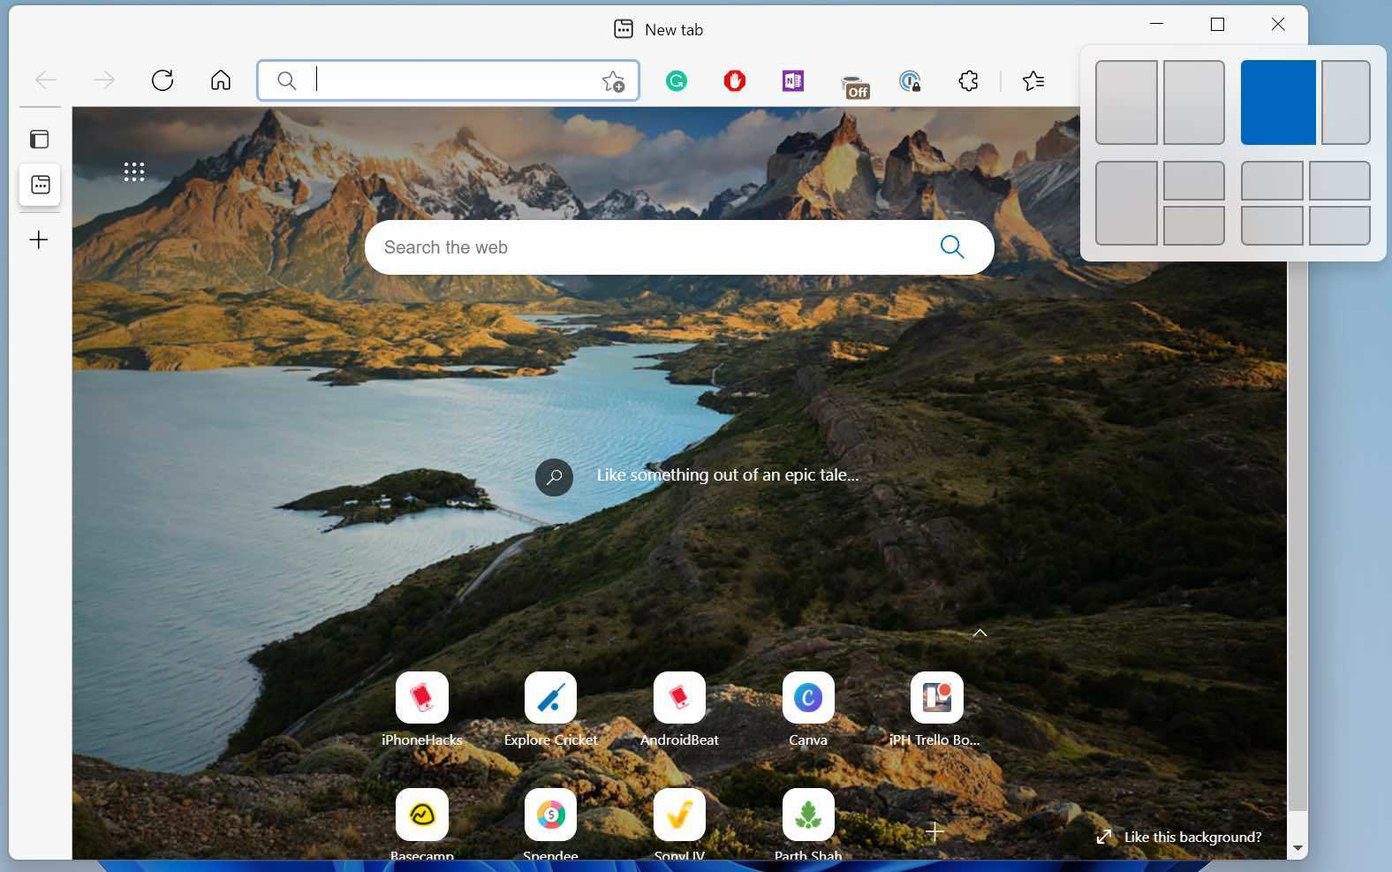
We usually keep the preferred Microsoft Edge on the left side and Microsoft OneNote on the small right window.
Use Three Apps Window at Once
Hover the cursor pointer above the maximize button and use the third option to use three Windows 11.
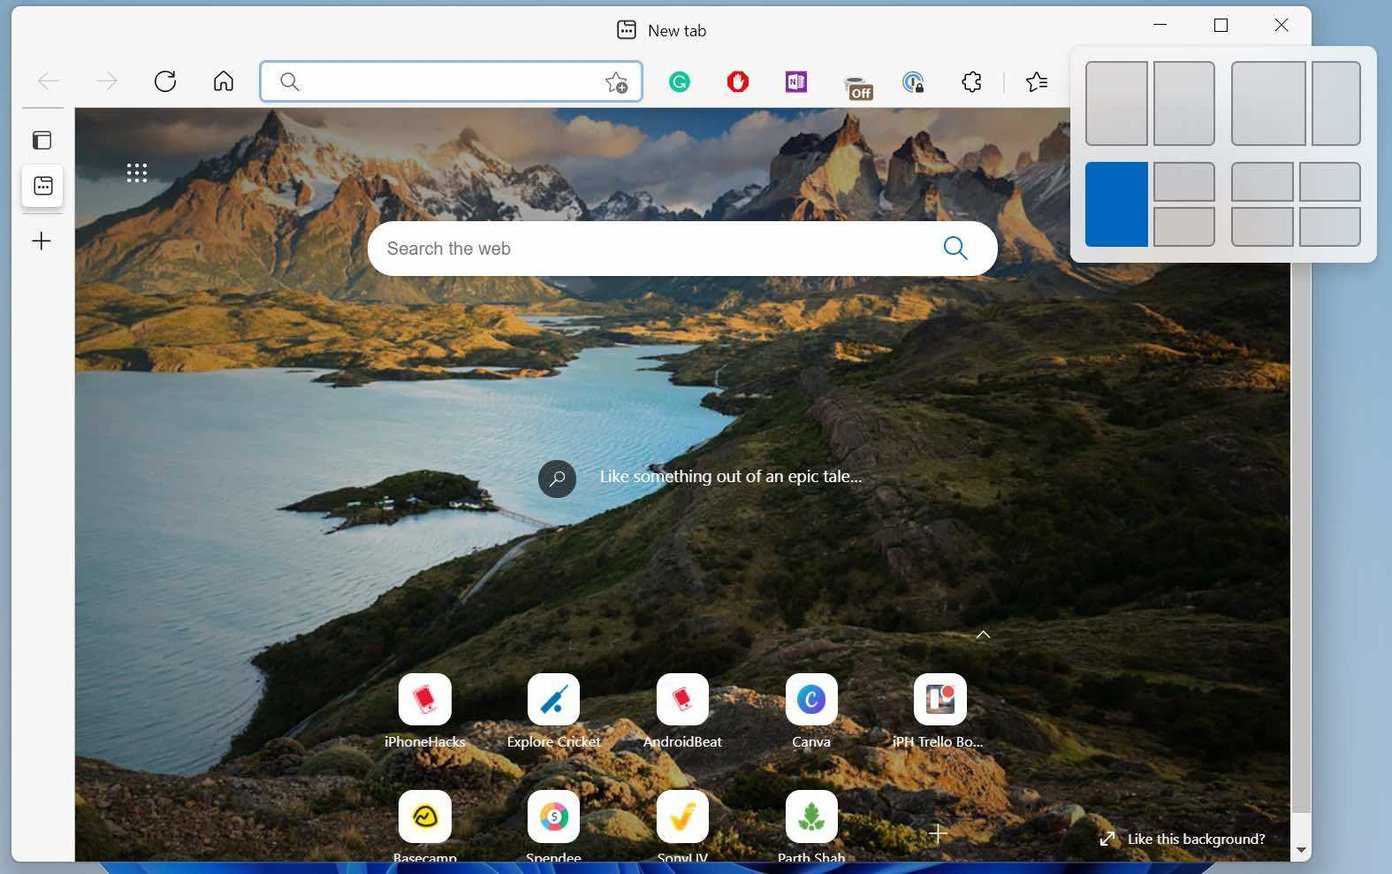
Move the current app on the left half and from the opened windows, select your desired app to continue working.
Split Screen Into Four Sections
This option is ideal for those using Windows 11 on a larger screen. If you are using Windows 11 on a 13/14-inch laptop, you won’t find it useful.
As you may have guessed from the multitasking preview, the option will split the app windows into four parts. People using Windows 11 on a big desktop such as a 27 to 32-inch monitor will find this setup most useful.
Note: Using multi-windows in three or four sections will affect visibility and clarity. We recommend using this set up on a larger display only.
Split Windows Horizontally in Windows 11
Users can split windows horizontally as well. This is most useful for those using Windows 11 in a vertical screen setup. That way, you won’t get much benefit by splitting the apps vertically. You need to split apps horizontally.
Open the app that you want to split at the upper half of the display. Use Windows + Up arrow key and pin it at the top. You can open the app windows on the bottom half part.
Alternatively, you can drag and drop app windows on either side until the cursor moves. Release the cursor, pin apps, and use multi-windows on Windows 11.
Windows 11 Multitasking With External Monitor
This is yet another improvement Microsoft made with Windows 11. When you set up multi-windows on a desktop using the multitasking mentioned above options, the system will remember those app positions once you disconnect Windows 11 laptop from the monitor.
As soon as you plug back the laptop with the monitor again, you can go back to using the same setup with a single click.
Multitask Like a Pro on Windows 11
Windows 11 multitasking is a joy to use. You don’t need any third-party apps on Windows 11 to use multi-windows. Microsoft has made it very convenient to use multi-windows on the latest OS. How are you planning to use it on Windows 11? Share your views in the comments below.
Was this helpful?
Last updated on 07 February, 2022
Read Next
 How to Use Multi Window on Samsung Galaxy Phones
With the Galaxy Note launch in 2011, Samsung pioneered the big-screen trend in the smartphone world.
How to Use Multi Window on Samsung Galaxy Phones
With the Galaxy Note launch in 2011, Samsung pioneered the big-screen trend in the smartphone world.
 7 Best Multi-Charging Cables for Charging Multiple Devices
Most of us nowadays have multiple devices to charge.
7 Best Multi-Charging Cables for Charging Multiple Devices
Most of us nowadays have multiple devices to charge.
 How to Use YouTube’s Multi Audio Track Feature
Gone are the days when you needed to switch to different YouTube dubbed videos to listen to a specific language.
How to Use YouTube’s Multi Audio Track Feature
Gone are the days when you needed to switch to different YouTube dubbed videos to listen to a specific language.
 6 Best Multi-Device Keyboards With Bluetooth Connectivity
Most people use more than one screen.
6 Best Multi-Device Keyboards With Bluetooth Connectivity
Most people use more than one screen.
 6 Best Wireless Mice With Multi-Device Connectivity
If you have a multi-device desk setup, investing in a good wireless mouse with multi-device connectivity is wise.
6 Best Wireless Mice With Multi-Device Connectivity
If you have a multi-device desk setup, investing in a good wireless mouse with multi-device connectivity is wise.
 3 Ways to Delete Old Windows Update Files From Windows 10 and Windows 11
Method 1: Delete Old Windows Update Files via the Settings App The Storage section of the Settings app provides a detailed breakdown of all temporary files on your PC, including
3 Ways to Delete Old Windows Update Files From Windows 10 and Windows 11
Method 1: Delete Old Windows Update Files via the Settings App The Storage section of the Settings app provides a detailed breakdown of all temporary files on your PC, including
 6 Ways to Fix Microsoft Teams Crashing on Windows 11
Common Fixes Check service outage - Access Microsoft Service health and click Teams in the left sidebar to check service status.
6 Ways to Fix Microsoft Teams Crashing on Windows 11
Common Fixes Check service outage - Access Microsoft Service health and click Teams in the left sidebar to check service status.
The article above may contain affiliate links which help support Guiding Tech. The content remains unbiased and authentic and will never affect our editorial integrity.