OneDrive, Microsoft’s cloud storage service, comes integrated with Windows, offering seamless file syncing and accessibility. However, there are scenarios where users might want to uninstall OneDrive from Windows. In this article, we will guide you on how to completely uninstall OneDrive from Windows.

You might want to uninstall OneDrive for several reasons. It may be that you prefer another cloud storage solution, have concerns about data privacy, or are running out of space. OneDrive is easy to remove from Windows 11 and 10. Let’s get started.
Things to Know Before Uninstalling OneDrive
Uninstalling OneDrive from your system is a decision that should be made considering how it integrates with your workflow and the potential impact on your files. Here are important points to keep in mind:
- OneDrive is often used for file synchronization across devices. If you uninstall OneDrive, the files stored in the OneDrive folder on your computer will no longer be automatically synchronized with the cloud. Ensure that you have a backup of essential files before uninstalling.
- Uninstalling OneDrive from your computer does not delete the files stored in your OneDrive cloud account. You can still access your files by logging into the OneDrive web interface. However, changes made locally won’t automatically sync with the cloud.

- If you collaborate on documents with others using OneDrive, uninstalling it may affect your ability to share and collaborate on files seamlessly.
- Files stored in the OneDrive folder on your computer contribute to your overall storage usage. If you uninstall OneDrive, the local copies of these files will be removed, potentially freeing up storage space on your device.
- If you decide to use OneDrive again, you can reinstall it. However, reinstalling won’t automatically restore your files’ synchronization settings or local copies unless you sign in with the same OneDrive account.
With this understanding, let’s begin with the methods.
How to Remove OneDrive From Your Windows
There are multiple ways to remove OneDrive from your Windows machine. We will list them down one by one and in a step-by-step format. Let’s begin with the first method.
Note: Uninstalling OneDrive will not remove the associated leftover files and registry keys from your PC. You will have to remove them manually, as we have explained below. However, if you use third-party tools (mentioned as one of the methods below), you won’t need to remove the residual files; the software will do it for you.
1. Uninstall OneDrive Using Control Panel
This is one of the most common ways to remove OneDrive from Windows 11 or 10. Follow the below steps.
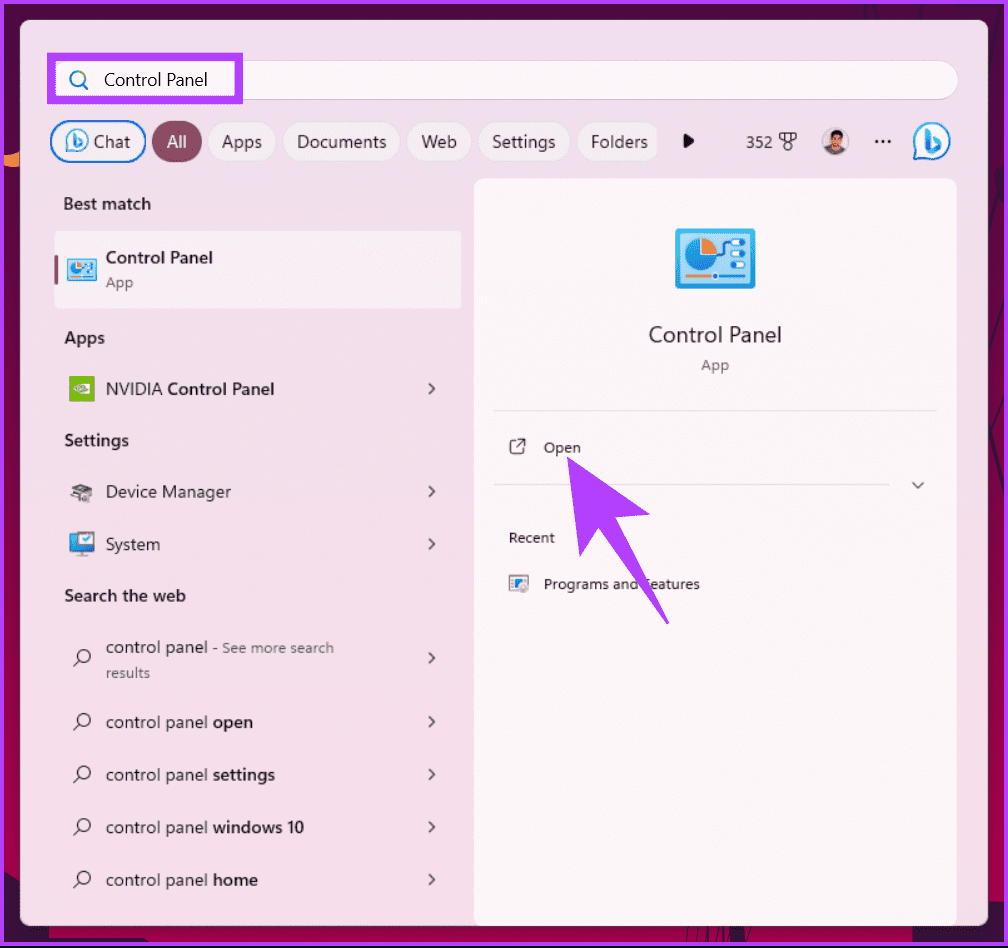
Step 1: Open the Start Menu, type Control Panel in the search bar, and choose Open from the right pane.
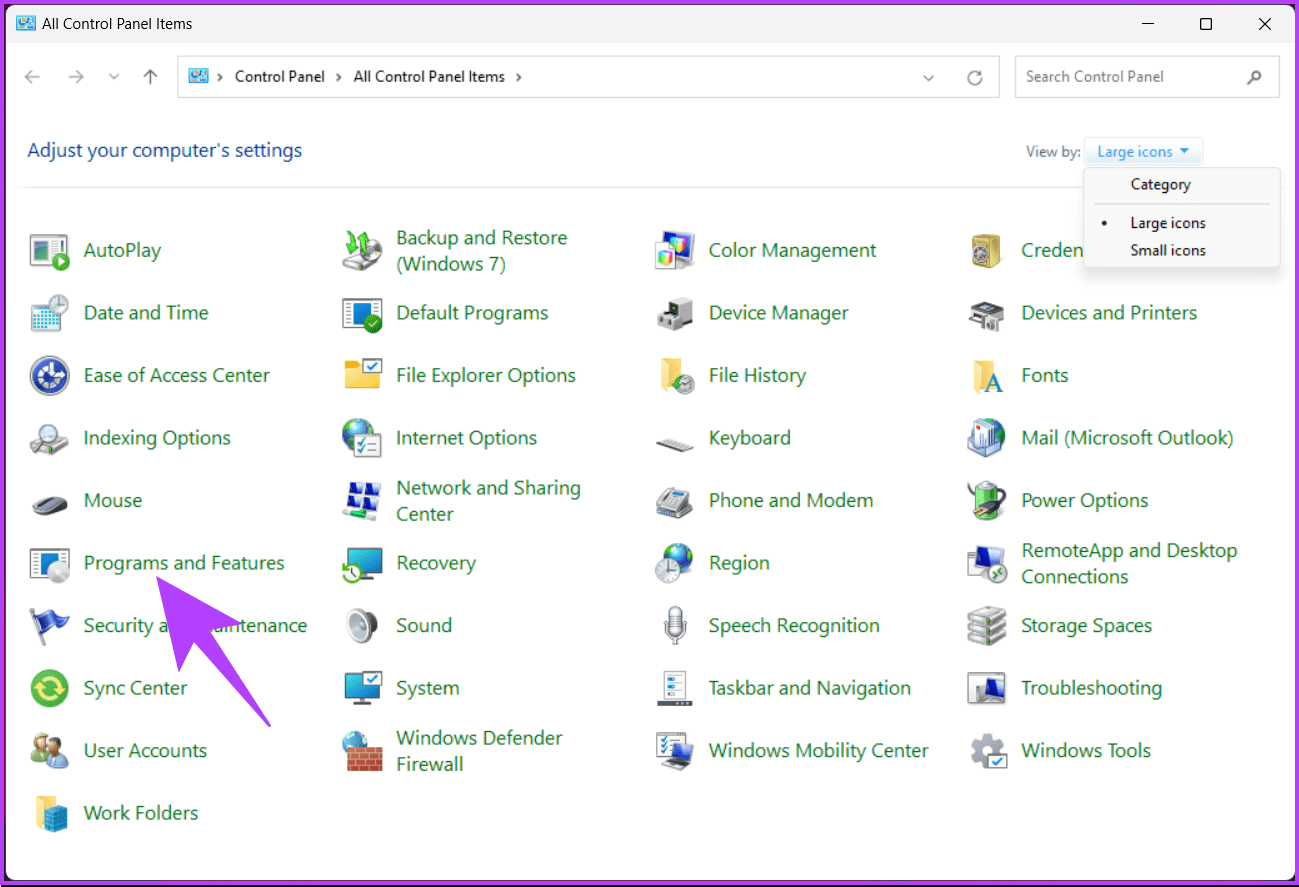
Step 2: In the Control Panel, choose ‘Programs and Features.’
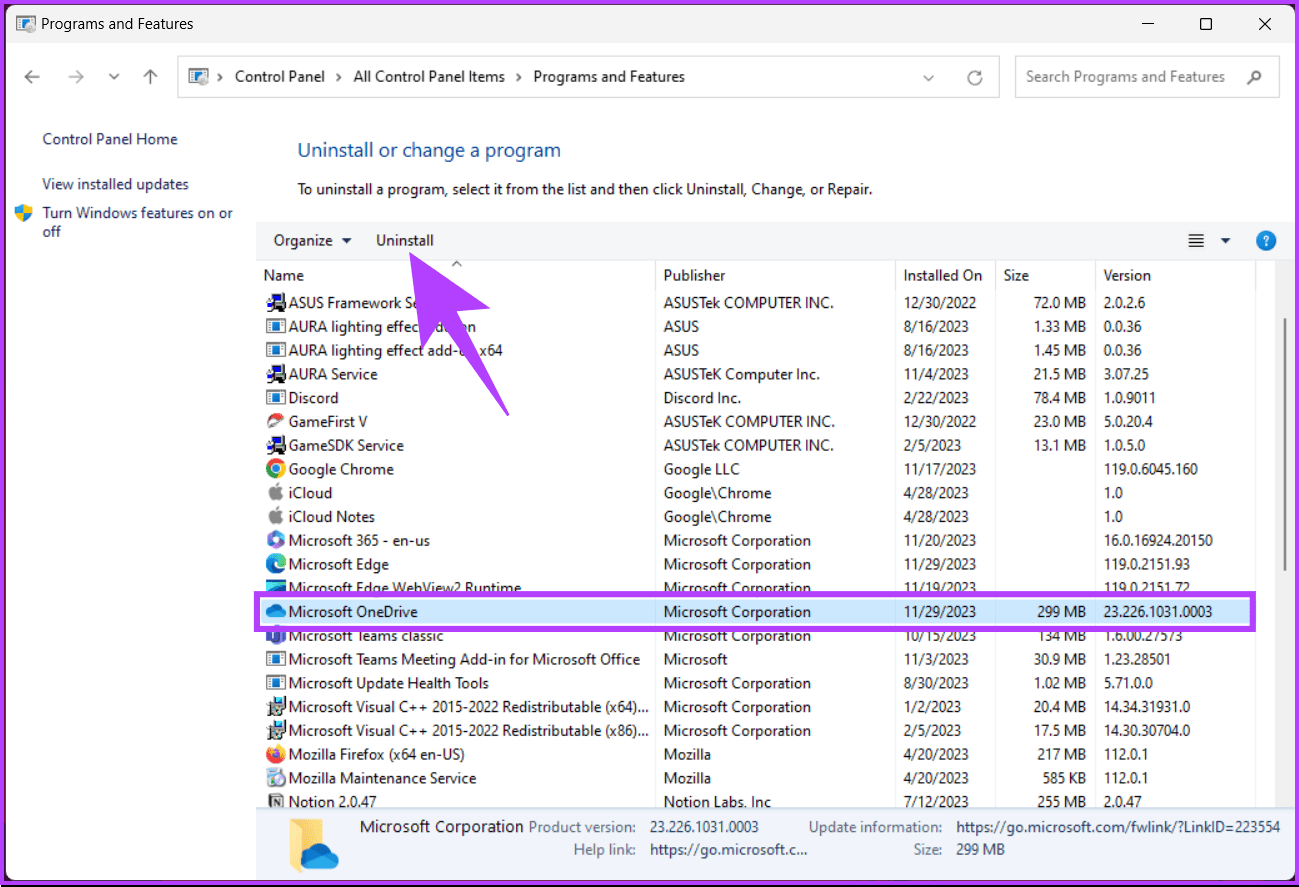
Step 4: Click on OneDrive and click Uninstall from the menu.
That’s it. OneDrive will be uninstalled from your PC. There’s another way to remove OneDrive from your PC; keep reading.
Also Read: OneDrive storage guide: what counts and what doesn’t
2. Remove OneDrive Using Registry Editor
Unlike the above method, this method is slightly tricky and would require more diligence while executing. Moreover, because we will use the Registry Editor, we strongly advise you to back up the Windows Registry before proceeding with the steps below. This will help restore your data if things go south.
Step 1: Press the Windows key on your keyboard, type Registry Editor, and click ‘Run as administrator.’
Note: Alternatively, press ‘Windows key + R’ to open the Run dialog box, type regedit.exe, and click OK to open Registry Editor.

In the prompt, select Yes.
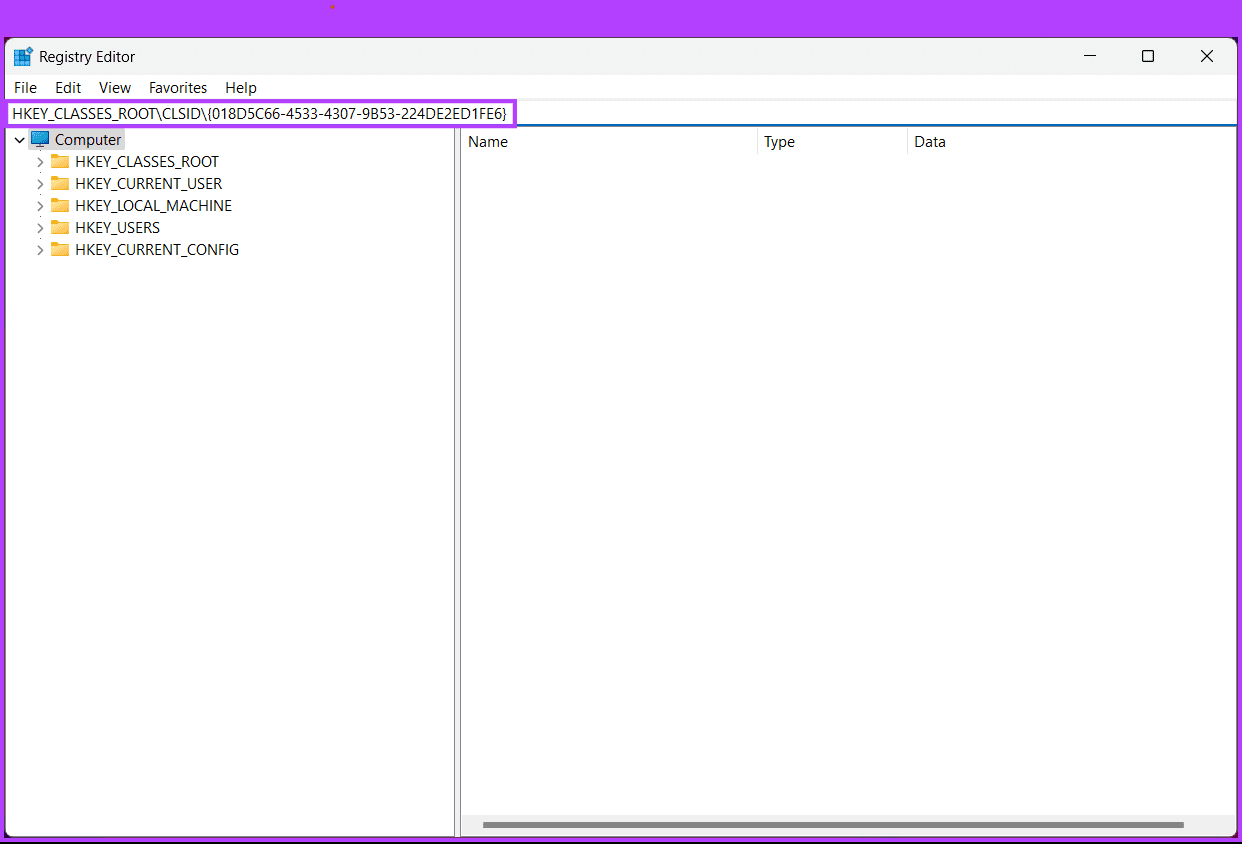
Step 2: In the top address bar, enter the following path:
HKEY_CLASSES_ROOT\CLSID\{018D5C66-4533-4307-9B53-224DE2ED1FE6}
Step 3: Find and double-click on the ‘System.IsPinnedToNameSpaceTree’ file to open it.
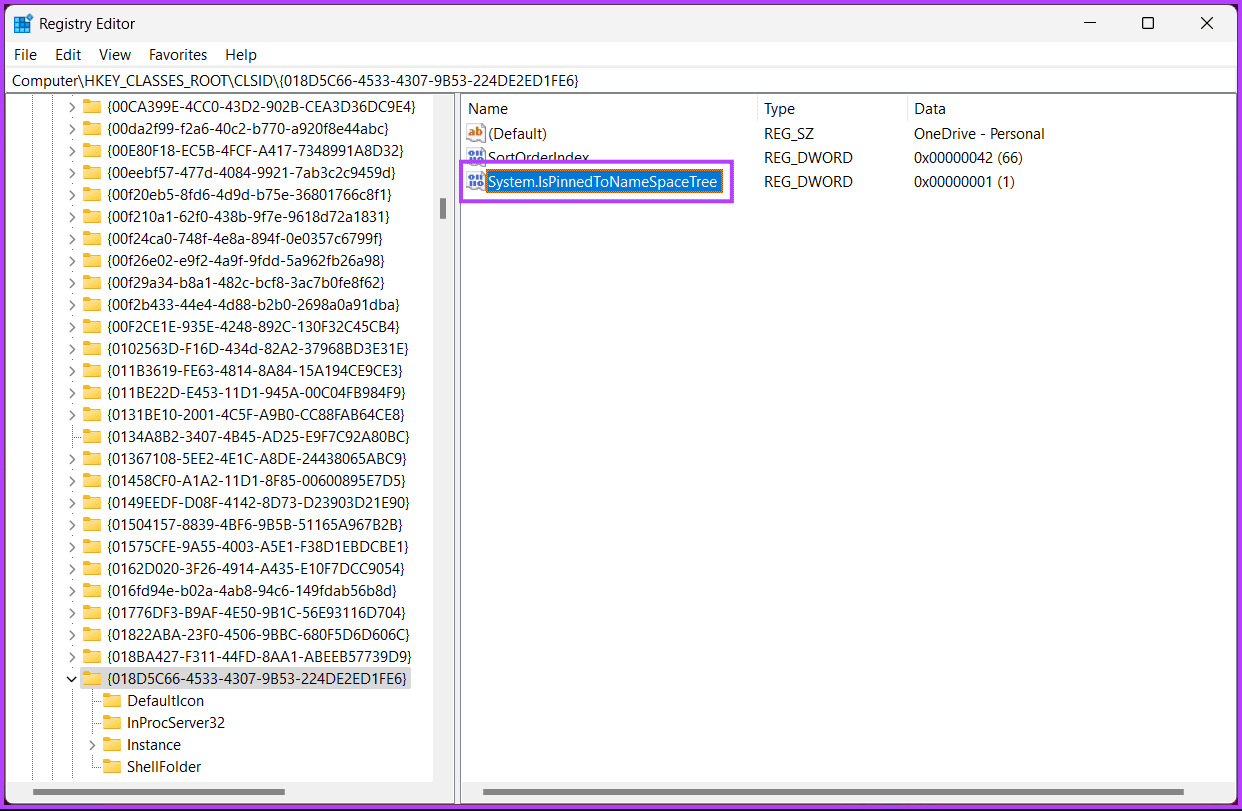
Step 4: Now, type 1 in the Value Data field and press OK.

Finally, reboot the system to implement the changes. And that’s it! After booting up your PC again, you will completely remove OneDrive from Windows.
You can go with the Group Policy editor if you don’t want to remove OneDrive from Windows using the registry.
3. Get Rid of OneDrive Using Group Policy Editor
The Local Group Policy Editor helps you control Windows. Thus, you can also use it to delete OneDrive from your Windows machine. Follow the below instructions.
Note: Group Policy Editor is only available for Windows 11 Pro and Enterprise versions. You can skip this method if you are on Windows 11 Home Edition.
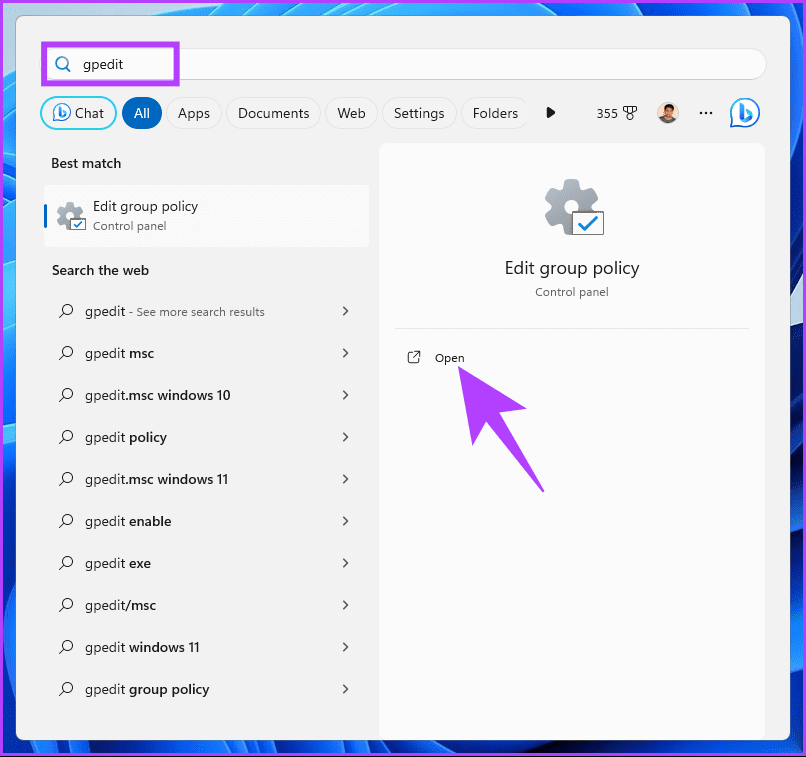
Step 1: Press the Windows keys on your keyboard, type gpedit.msc, and click Open.
Note: Press ‘Windows key + R’ to open the Run dialog box, type gpedit.msc, and click OK.
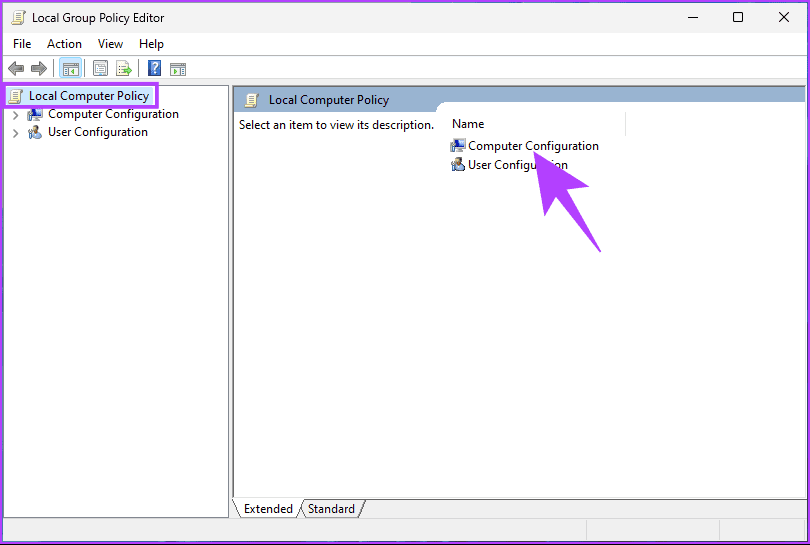
Step 2: Select Computer Configuration under ‘Local Computer Policy’ in the left pane.
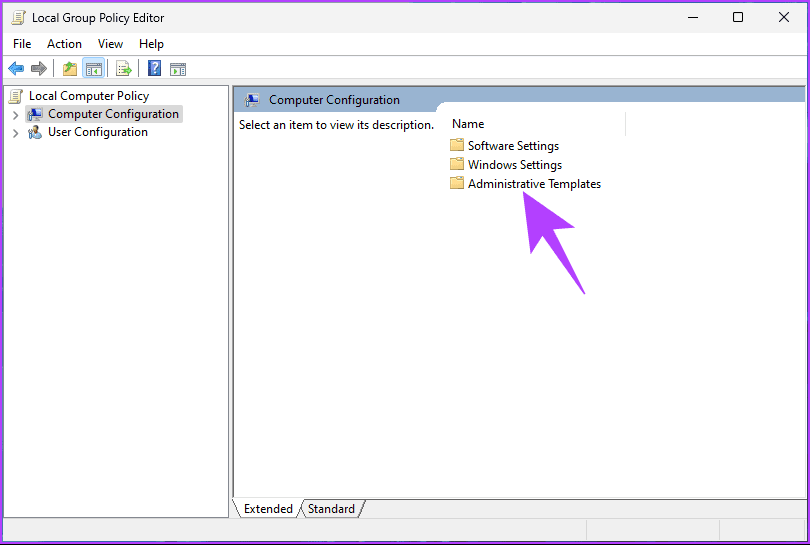
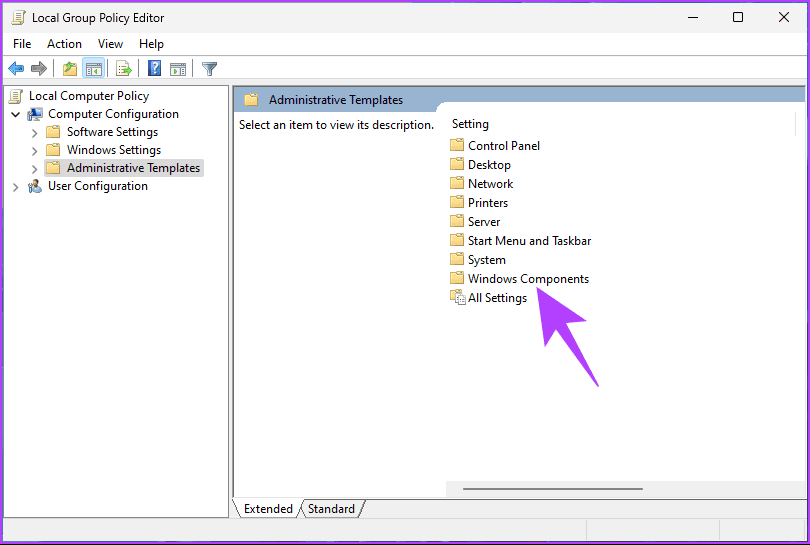
Step 3: In the right pane, double-click on Administrative Templates.
Step 4: Select the Windows Components option.
Step 5: Now, choose OneDrive.
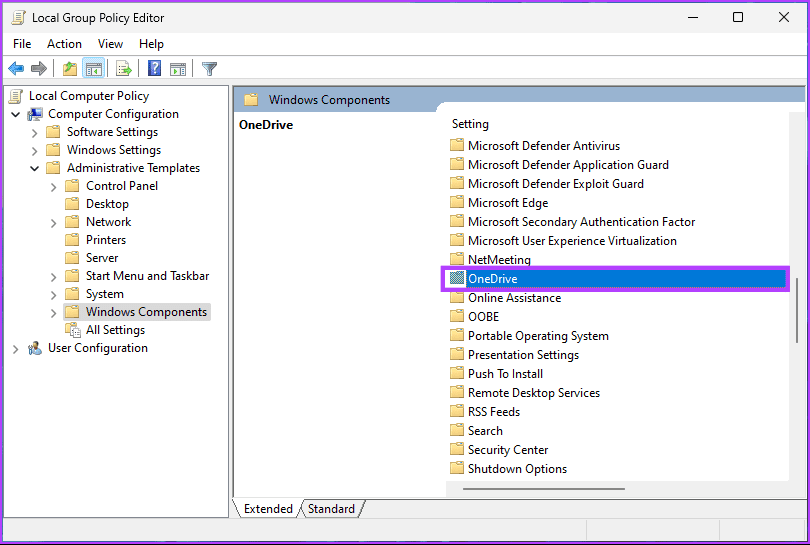
Step 6: Under the OneDrive option, double-click ‘Prevent the usage of OneDrive for file storage.’
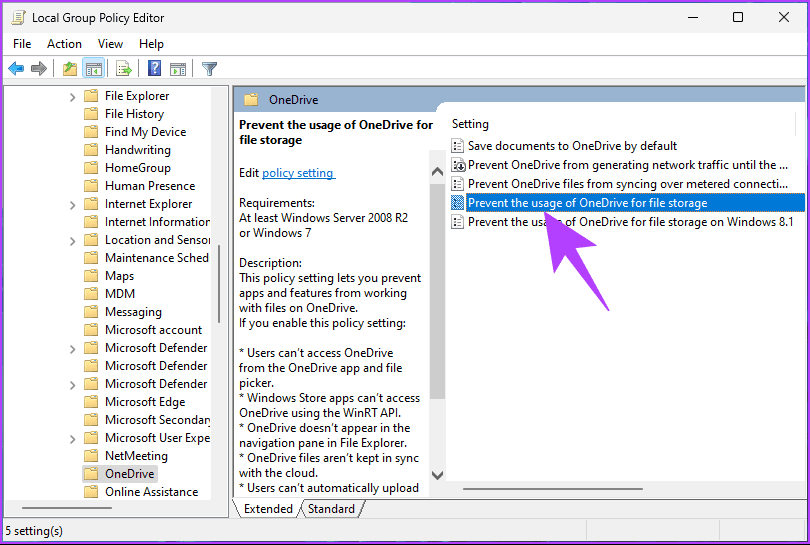
Step 7: Choose the Enabled option. Finally, click on Apply, followed by OK.

That’s it. You have successfully removed Microsoft OneDrive. Suppose you don’t want to go through the hassle of removing OneDrive from your PC. You can check out the next method.
Also Read: How to save shared files on OneDrive for web and mobile
4. Completely Remove OneDrive from Windows Using Third-Party Tools
While Windows provides built-in methods to uninstall programs, third-party tools often offer a more comprehensive uninstallation by removing leftover files, registry entries, and other remnants that the standard uninstallation process might leave behind. Tools like Revo Uninstaller or IObit Uninstaller are popular choices. For demonstration, we will go with Revo Uninstaller. Follow along.
Step 1: Go to Revo Uninstaller’s official website from your preferred browser and click Download.
Step 2: Double-click on the exe file to begin installation once downloaded.
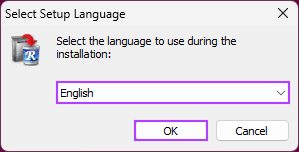
Step 3: In the Select Setup Language pop-up, choose your preferred language and click OK.
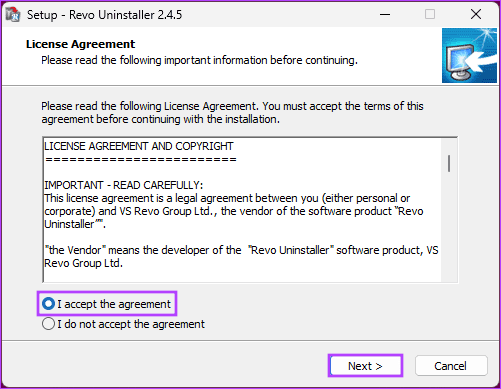
Step 4: In the License Agreement section, choose ‘I accept the agreement.’ and click Next.
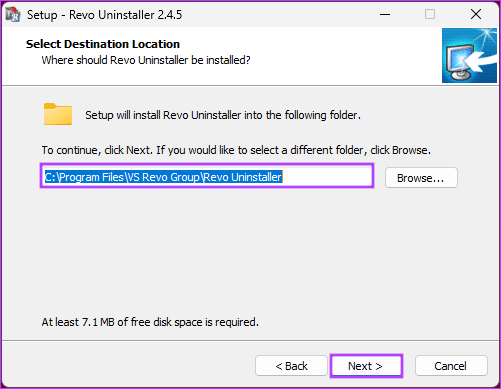
Step 5: On the next screen, choose the destination location and click Next.
Step 6: Under Select Additional Tasks, uncheck or leave the checked box next to ‘Create a desktop shortcut’ and click Next.

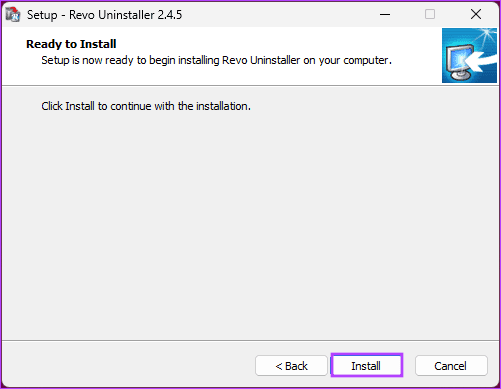
Step 7: Finally, click Install.
Step 8: Once installed, click the Finish button.
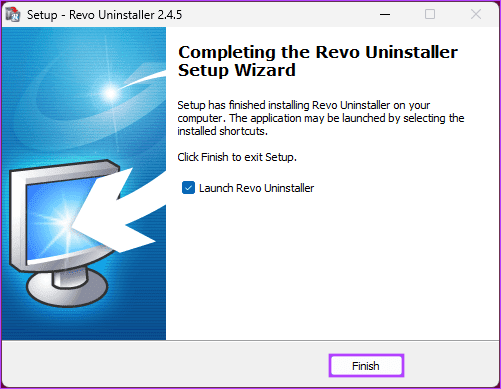
The Revo Uninstaller is now installed on your computer and will launch automatically.
Step 9: Once the Revo Uninstaller launches, scroll down, click on Microsoft OneDrive, and click on the Uninstall option at the top.

Step 10: In the pop-up, click Continue.

That’s about it. This will begin the process of removing Microsoft OneDrive and its associated files completely from your computer. However, if you have utilized any of the methods mentioned to remove OneDrive, you may see the OneDrive folder still showing after uninstalling; continue reading to learn how to delete them.
Also Read: How to stop OneDrive from deleting files automatically on Windows 11
How to Remove All Traces of OneDrive From Windows 11 or 10
We will use the Command Prompt to remove leftover files and registry keys associated with OneDrive. Follow the instructions below.
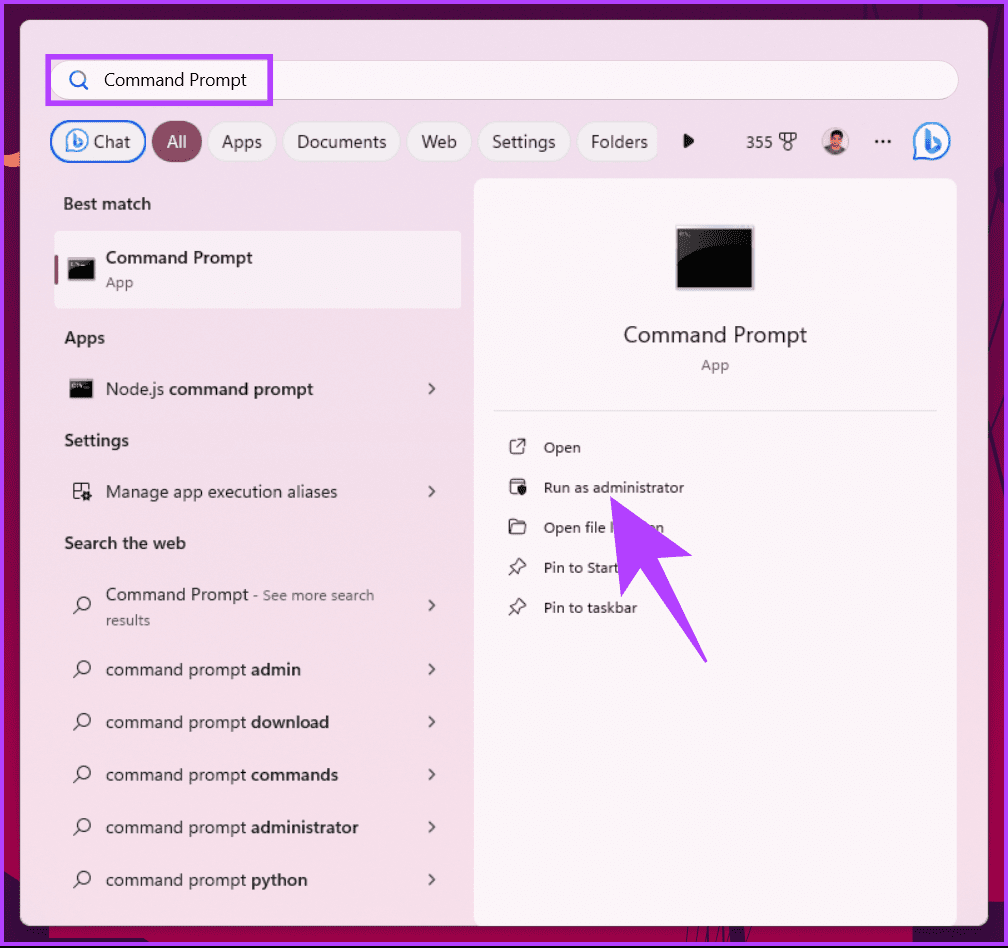
Step 1: Press the Windows key on your keyboard, type Command Prompt, and click ‘Run as administrator.’
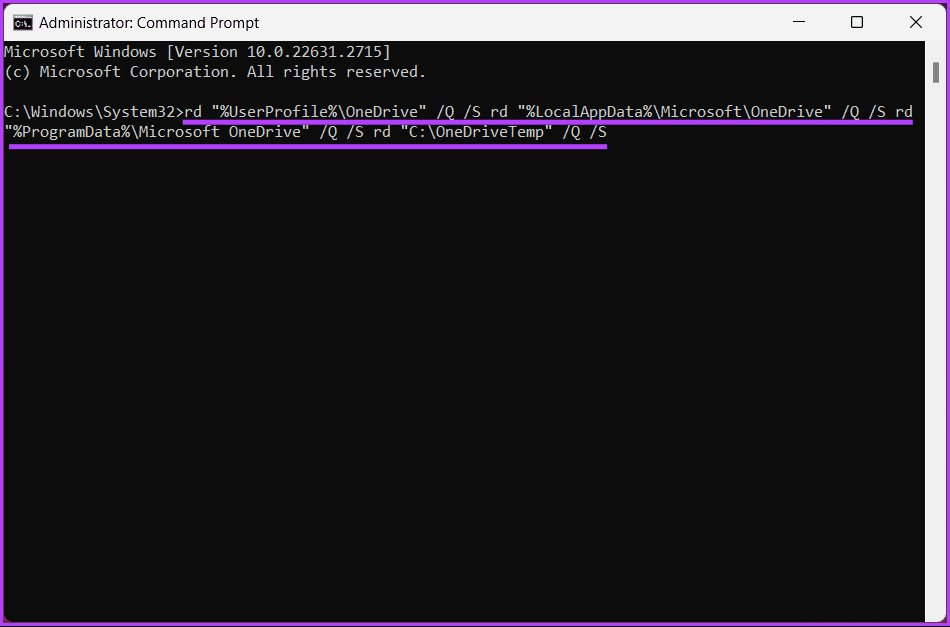
Step 2: Type the below command and hit Enter.
rd "%UserProfile%\OneDrive" /Q /S rd "%LocalAppData%\Microsoft\OneDrive" /Q /S rd "%ProgramData%\Microsoft OneDrive" /Q /S rd "C:\OneDriveTemp" /Q /S
That’s it. All the temporary and residual OneDrive files will be removed from your Windows machine. If you have any queries, check out the FAQ section below.
FAQs on Uninstalling OneDrive Completely From Windows
Yes, you can reinstall OneDrive after uninstalling it. Visit the official OneDrive website, download the latest version, and install it on your computer.
Uninstalling OneDrive does not directly affect other Microsoft Office apps. However, if you use OneDrive for saving and syncing Office files, it may impact your ability to access them across devices.
Uninstalling OneDrive does not disable Windows sync settings. Windows sync settings are separate and control the synchronization of various settings across Windows devices.
Remove OneDrive
Now that you know how to completely uninstall OneDrive from Windows, you can quickly and effectively remove OneDrive, allowing for a more tailored approach to file storage and management on your Windows device. You may also want to read how to stop OneDrive from syncing folders on Windows.
Was this helpful?
Last updated on 29 November, 2023
Read Next
 How to Completely Remove and Uninstall Java From Windows PC
In the past we have talked about some online services that use the Java Runtime Environment (JRE) to run the server side application on the client side.
How to Completely Remove and Uninstall Java From Windows PC
In the past we have talked about some online services that use the Java Runtime Environment (JRE) to run the server side application on the client side.
 How to Completely Uninstall McAfee on Windows
Several laptop manufacturers partner with third-party anti-virus software solutions like McAfee to keep your new purchase safe from online threats and bogus files.
How to Completely Uninstall McAfee on Windows
Several laptop manufacturers partner with third-party anti-virus software solutions like McAfee to keep your new purchase safe from online threats and bogus files.
 How to Completely Uninstall Existing GPU Drivers the Right Way
Regardless of how careful you are, there will always be times when a new driver update messes your PC.
How to Completely Uninstall Existing GPU Drivers the Right Way
Regardless of how careful you are, there will always be times when a new driver update messes your PC.
 How to Completely Uninstall Discord From Windows, Mac, Android, and iOS
Discord consumes plenty of storage space, especially if you are active on several Discord Servers.
How to Completely Uninstall Discord From Windows, Mac, Android, and iOS
Discord consumes plenty of storage space, especially if you are active on several Discord Servers.
 How to Disable Task View in Windows 10 Completely
The Task View feature in Windows 10 is a boon for power users.
How to Disable Task View in Windows 10 Completely
The Task View feature in Windows 10 is a boon for power users.
 5 Best Ways to Completely Disable Windows Defender
Windows Defender is a security feature included with the Windows operating system.
5 Best Ways to Completely Disable Windows Defender
Windows Defender is a security feature included with the Windows operating system.
 A Complete Guide to OneDrive Storage and Avoiding Disk Full Error
Microsoft OneDrive, previously known as SkyDrive, is a complete cloud storage solution for Windows users.
A Complete Guide to OneDrive Storage and Avoiding Disk Full Error
Microsoft OneDrive, previously known as SkyDrive, is a complete cloud storage solution for Windows users.
 OneDrive Storage Guide: What Counts and What Doesn’t
Thanks to its seamless integration with Windows, Microsoft 365 apps, Microsoft Teams, Outlook, and Samsung Galaxy devices, OneDrive is the go-to cloud storage solution for many.
OneDrive Storage Guide: What Counts and What Doesn’t
Thanks to its seamless integration with Windows, Microsoft 365 apps, Microsoft Teams, Outlook, and Samsung Galaxy devices, OneDrive is the go-to cloud storage solution for many.
The article above may contain affiliate links which help support Guiding Tech. The content remains unbiased and authentic and will never affect our editorial integrity.