Microsoft Word’s immense popularity is why users enjoy an array of features. Whether you make use of Word for personal or professional purposes, it is important to understand effective techniques that make working with the software easy.

For example, what do you do when your Word document has several images, and you need to save one or a few of them as individual files? Microsoft Word may not have provided specific ways to do this, but there are certain ways to achieve this feat. We will show you three of them in this post.
Manually Save Individual Images
This is the perfect method to use when you only have a few images in the document. Here’s how it works:
Step 1: Launch the Microsoft Word document containing the images.

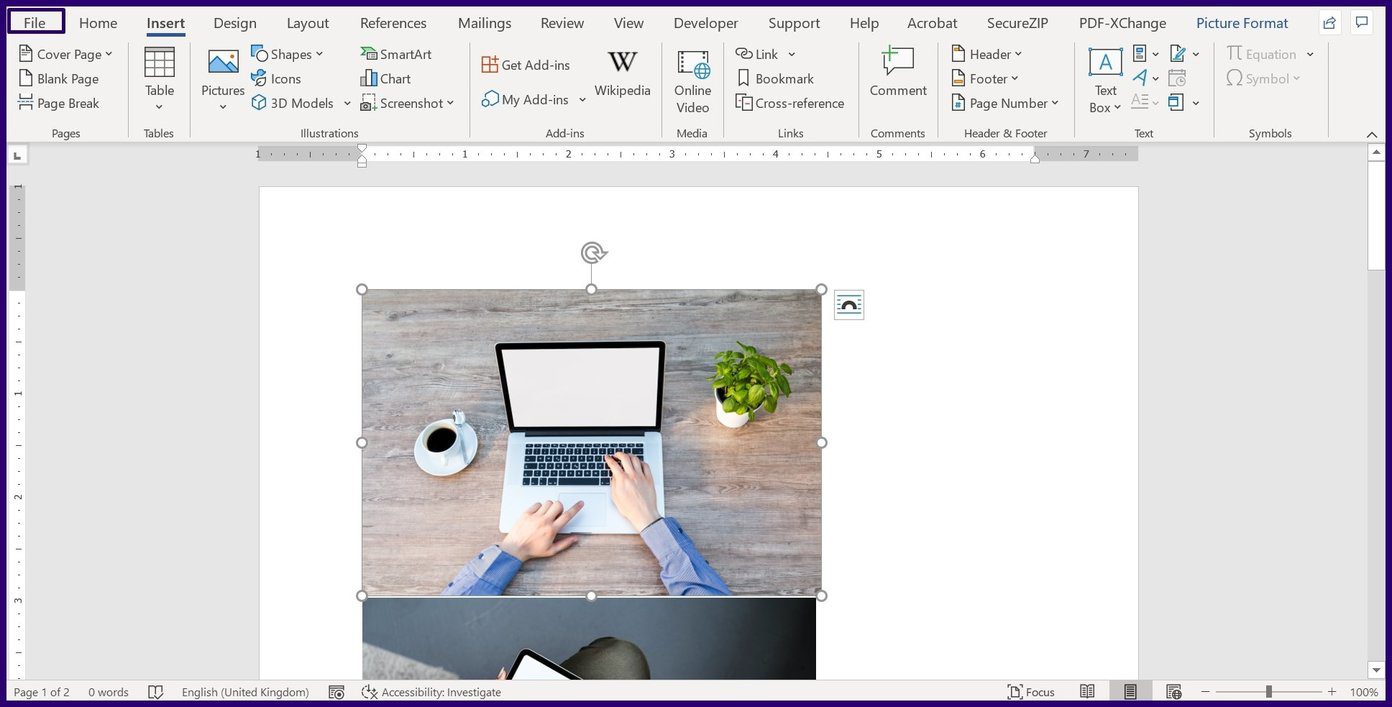
Step 2: Select the image that you want to save and right-click on it.
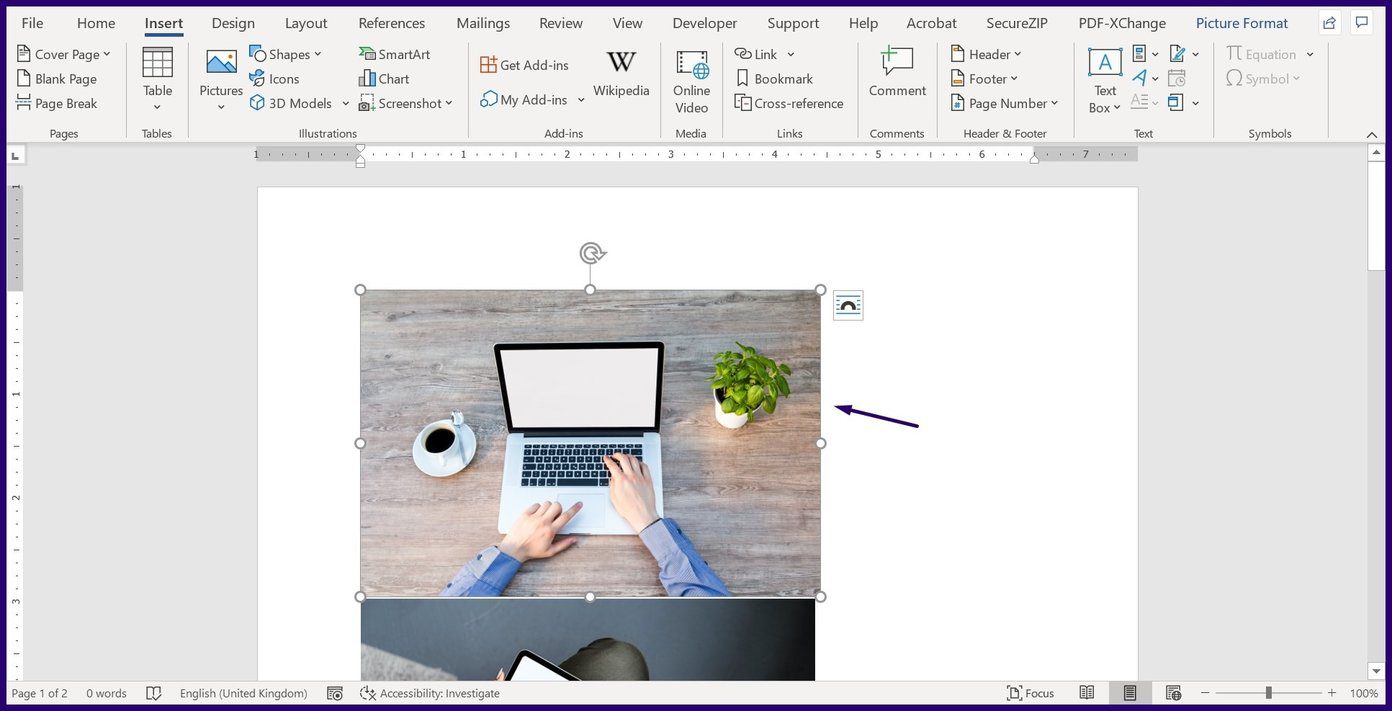
Step 3: From the list of options, select Save as Picture.

Step 4: On File Explorer, click on the drop-down beside Save as type and select the file format you prefer.

Step 5: Provide a name for your image file by typing it within the Filename box.
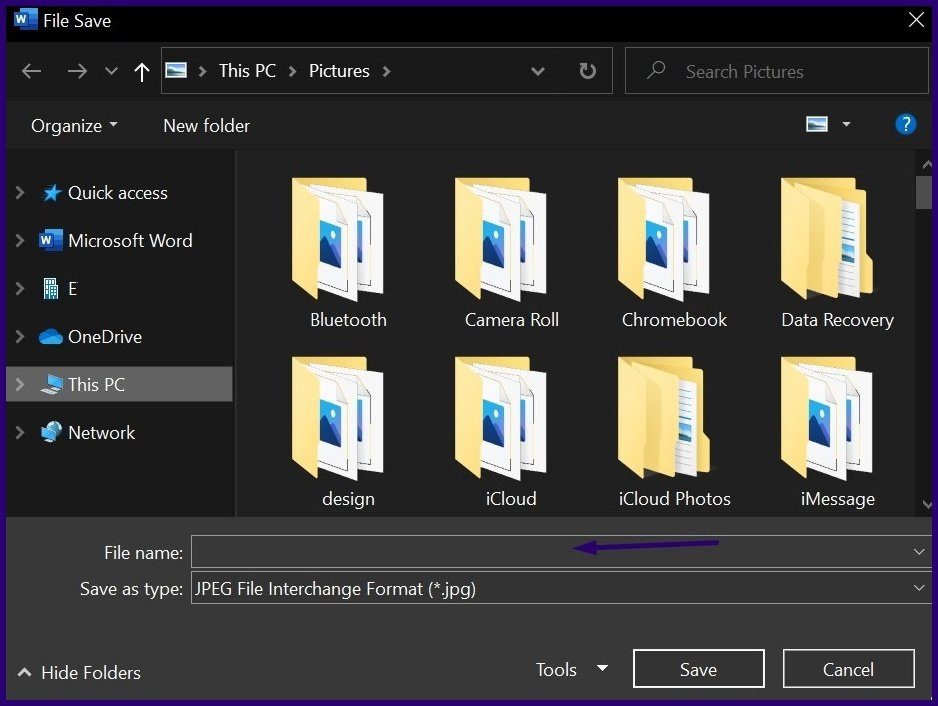
Step 6: Choose the destination folder for the image that you are saving.
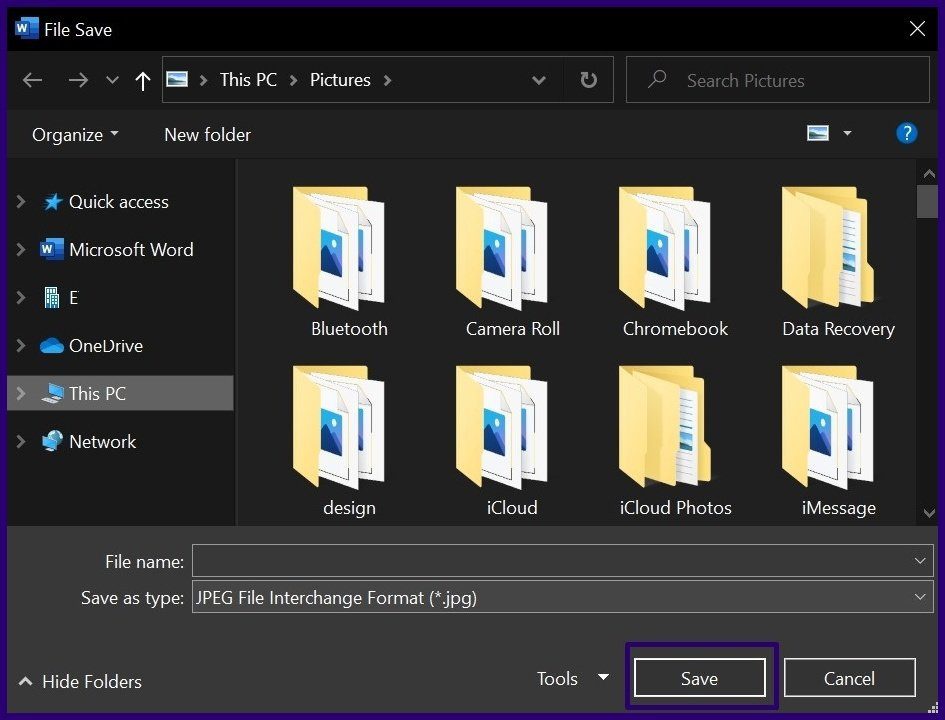
Step 7: Click on Save.
What if you have several images to save from your document? This method will take a lot of time and effort. Check the next method to learn how to save multiple images.
Save Multiple Images by Saving the Word File as a Webpage
Certain Word documents contain as many as 200 images. Imagine using the method above to save each image individually? There is a simpler way to save multiple images in a Word file. It involves saving the Word file as a webpage.
A webpage stores resources including images as individual files in HTML. As such, if you save your Word file as a webpage, the document is altered into an HTML page. This saves all the images in the document in a different folder. Here’s what you should do:
Step 1: Launch the Microsoft Word document containing the images.
Step 2: Click on File from the Ribbon.
Step 3: Click on Save As and select Browse.

Step 4: On the File Explorer menu, click on the drop-down list beside Save as type.
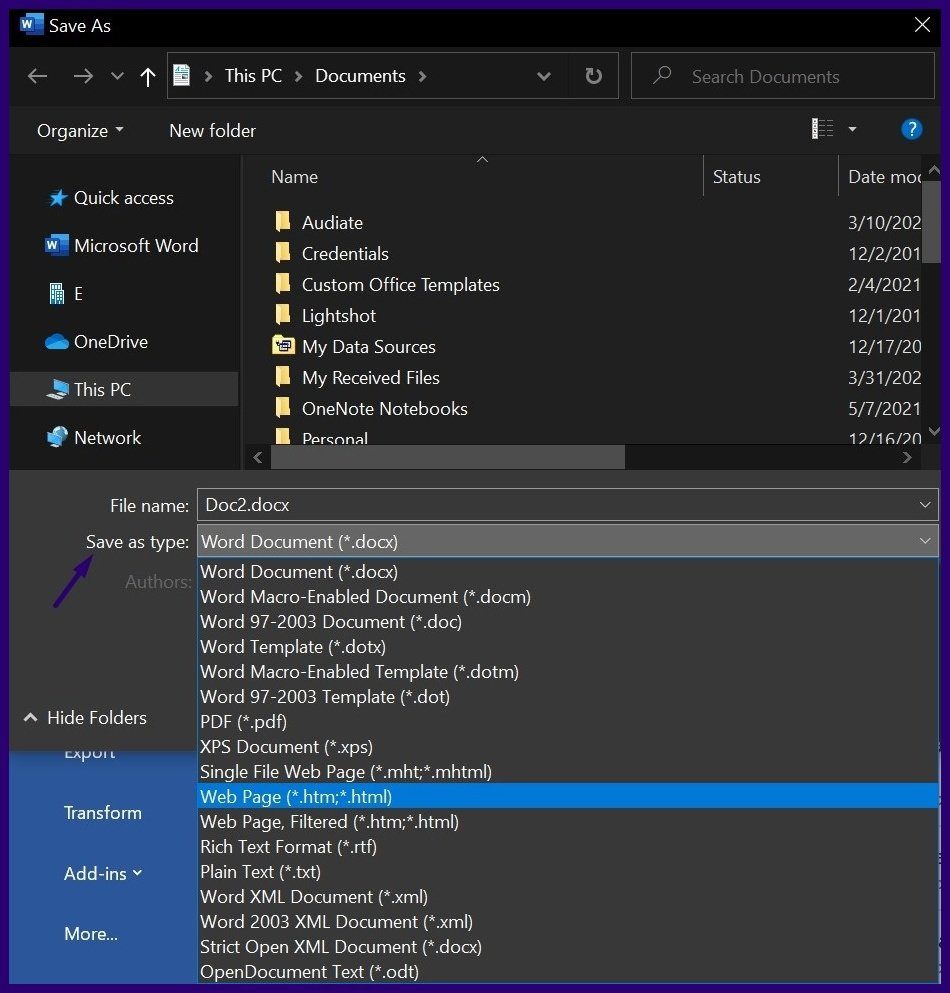
Step 5: Select Webpage from the options available.
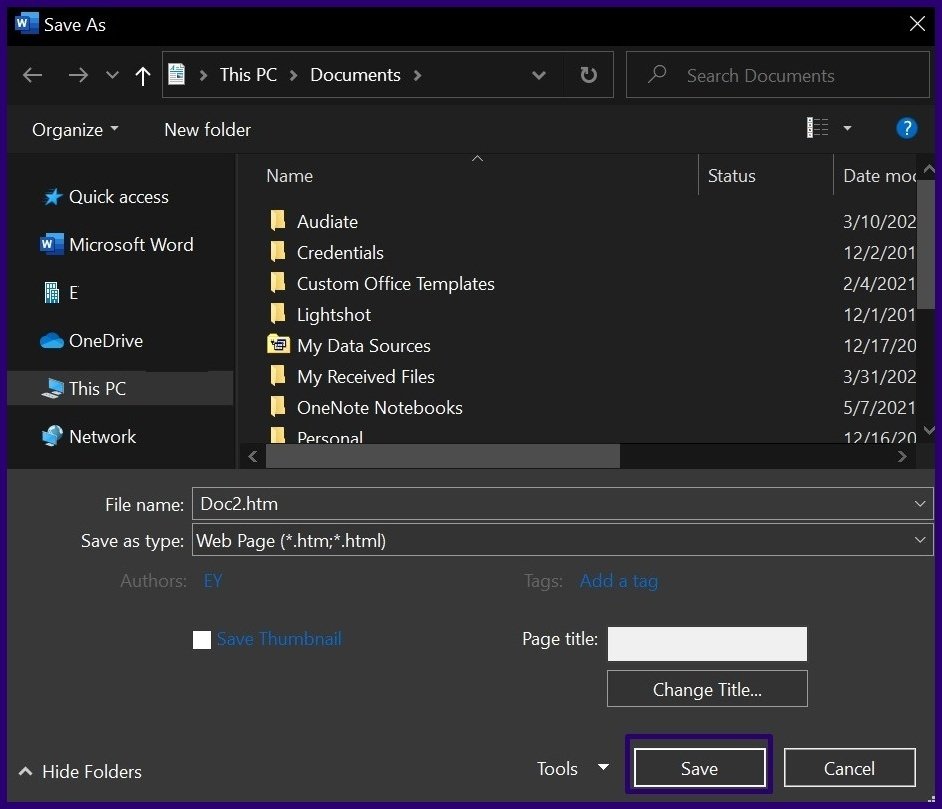
Step 6: Click on Save to save your Word file as a webpage.
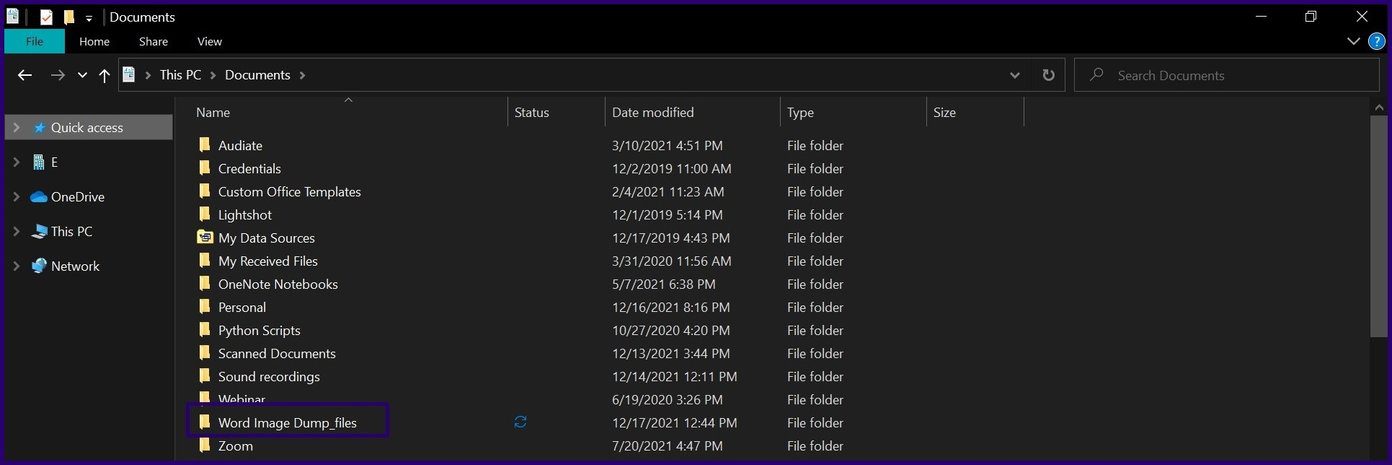
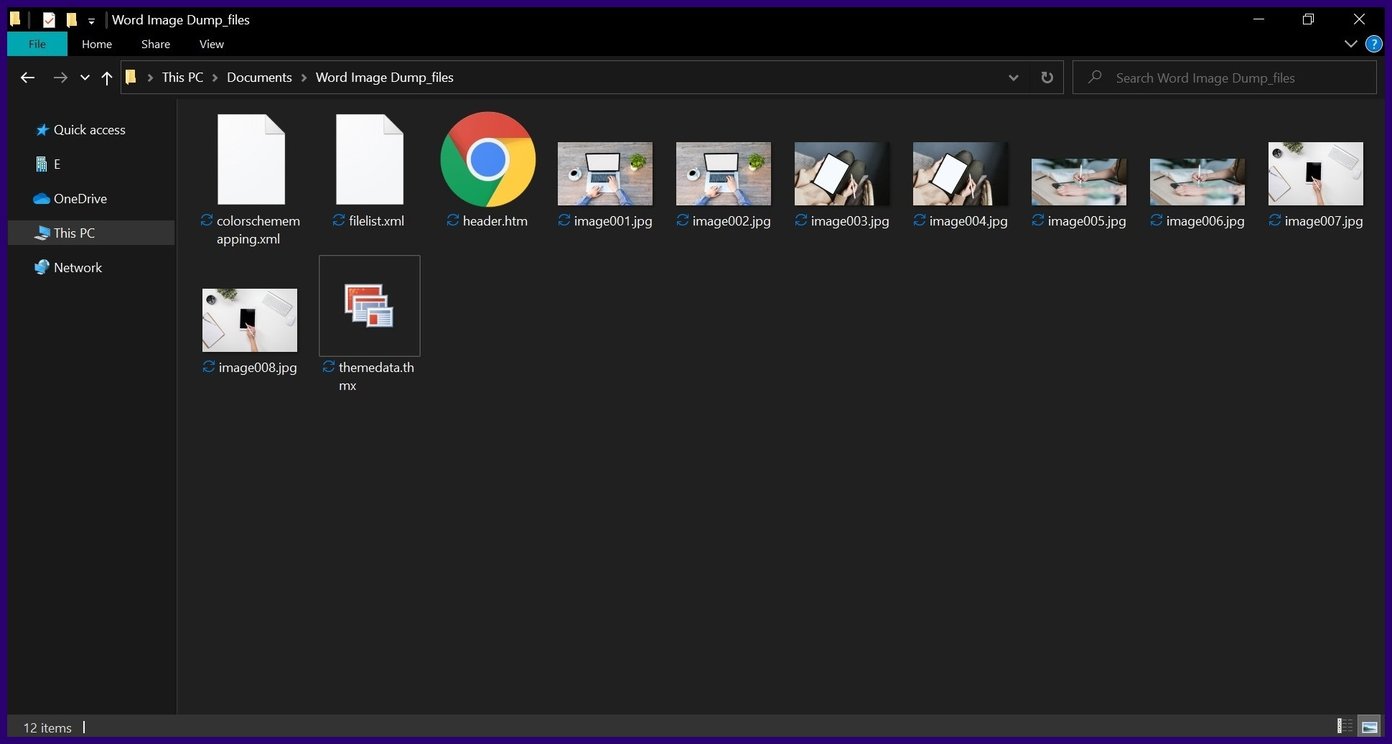
Step 7: Launch File Explorer and navigate to the location of the document.

Step 8: Once you find the location, you will see the latest folder bearing the Word file name that you just saved. Open the folder, and find all the images in the document.
Step 9: You can rename each of the images and move them to a separate location if you like.
Save Images by Extracting With an Archiving App
The final method we will discuss is extracting the images using a zip app. Note that this trick only works with Microsoft Word files saved as a zip file. Using this format stores your document as a package making it possible to unzip the folder and extract its contents. The steps below will guide you on using this method:
Step 1: Launch File Explorer and navigate to the location with the Microsoft Word document containing the images.
Step 2: Right click on the file and select Rename.

Step 3: Change the file extension from .DOCX to .ZIP and press Enter on your keyboard.

Step 4: On the dialog box, click Yes to confirm change of file extension.

Step 5: Right-click on the renamed file and select Open. You should see all the images within the document.
Step 6: You can extract the contents of the folder by using the Extract button of the zip app or by copying the contents to a new location.

Saving Images From Google Docs
That’s it for how to save images from Microsoft Word documents. All methods provided are pretty straightforward and shouldn’t take more than five minutes. You can also employ the save as webpage option when saving images in a Google Docs file.
Was this helpful?
Last updated on 07 February, 2022
Read Next
 Top 4 Ways to Save Images From an Excel Workbook
Although Excel files are mostly about numbers and data, they can also include images and charts.
Top 4 Ways to Save Images From an Excel Workbook
Although Excel files are mostly about numbers and data, they can also include images and charts.
 Top 6 Fixes for Microsoft Word Experienced an Error Trying to Open the File Error in Windows
Microsoft Word is a powerful word processor to create, edit, and format documents.
Top 6 Fixes for Microsoft Word Experienced an Error Trying to Open the File Error in Windows
Microsoft Word is a powerful word processor to create, edit, and format documents.
 Top 12 Ways to Fix Microsoft Teams Not Displaying Images on Windows
While Microsoft Teams is feature-packed with many functions, such as a whiteboard, the ability to create multiple teams, a breakout room, and more, the app often misses the mark with
Top 12 Ways to Fix Microsoft Teams Not Displaying Images on Windows
While Microsoft Teams is feature-packed with many functions, such as a whiteboard, the ability to create multiple teams, a breakout room, and more, the app often misses the mark with
 9 Best Ways to Fix Can’t Save Images From Google Chrome
Even though Safari and Microsoft Edge come preinstalled on Mac and Windows, respectively, Google Chrome remains the defacto choice for most consumers.
9 Best Ways to Fix Can’t Save Images From Google Chrome
Even though Safari and Microsoft Edge come preinstalled on Mac and Windows, respectively, Google Chrome remains the defacto choice for most consumers.
 How to Move Images Freely in Word Without Limitations
Microsoft Word has long been the default champion of the document editing world, that is until Google Docs came along.
How to Move Images Freely in Word Without Limitations
Microsoft Word has long been the default champion of the document editing world, that is until Google Docs came along.
 4 Ways to Fix Images Not Loading in Microsoft Edge
Fix 1: Check Site Permissions The first thing you should do is review site permissions in Microsoft Edge to ensure websites are allowed to load images.
4 Ways to Fix Images Not Loading in Microsoft Edge
Fix 1: Check Site Permissions The first thing you should do is review site permissions in Microsoft Edge to ensure websites are allowed to load images.
 How to Save as PDF in Microsoft Word for Android and Other Cool Tips
The Microsoft Word app on Android is quite surprisingly feature packed.
How to Save as PDF in Microsoft Word for Android and Other Cool Tips
The Microsoft Word app on Android is quite surprisingly feature packed.
 Apple Pages vs Microsoft Word: Which Word Processing Software Is Better
Every major tech company out there is offering their version of the productivity suite.
Apple Pages vs Microsoft Word: Which Word Processing Software Is Better
Every major tech company out there is offering their version of the productivity suite.
The article above may contain affiliate links which help support Guiding Tech. The content remains unbiased and authentic and will never affect our editorial integrity.