Fix 1: Verify Site Settings
To start, you should verify the content settings in Chrome and make sure websites are allowed to load images on your computer. Here’s how to do it.
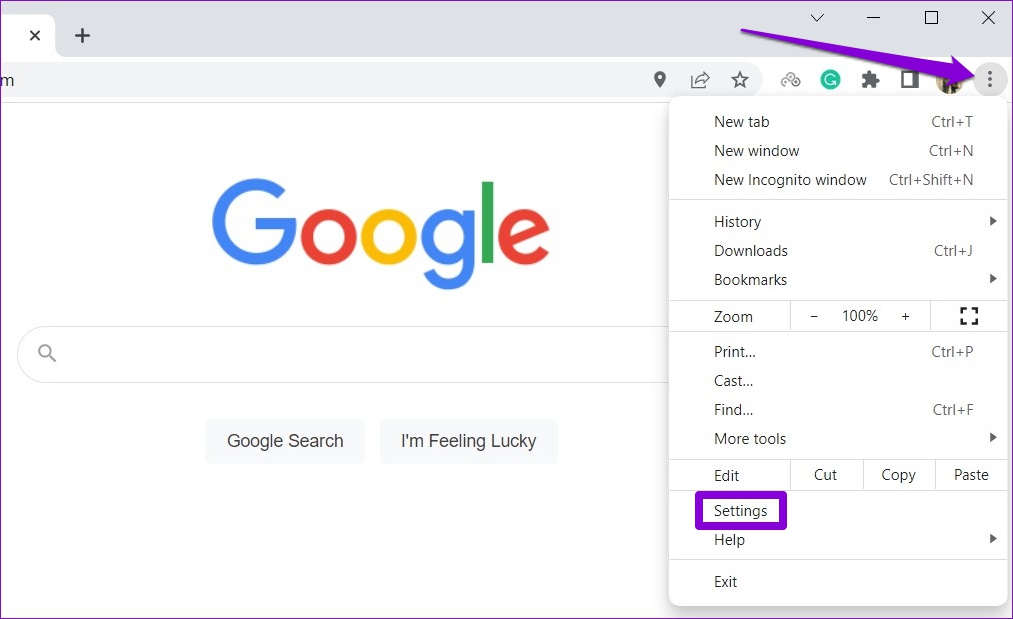
Step 1: In Chrome, click the three-dot menu icon in the top-right corner and select Settings.
Step 2: Use the left pane to switch to the Privacy and security tab and go to Site Settings.

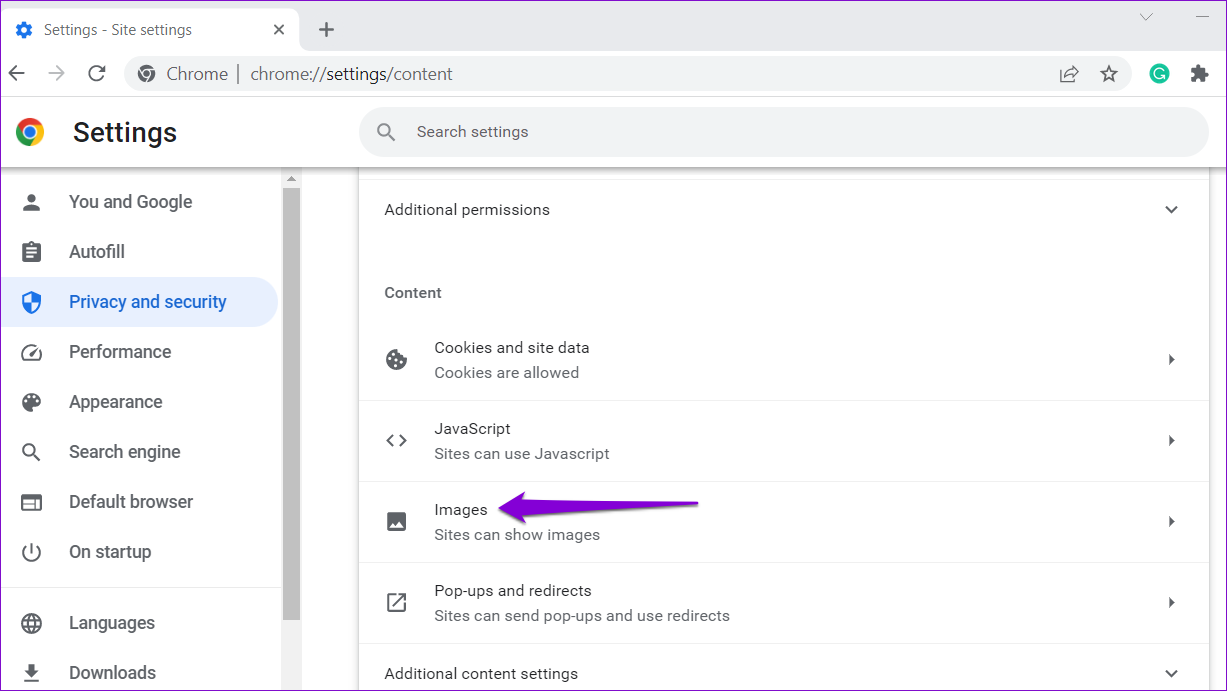
Step 3: Scroll down to the Content section and click on Images.
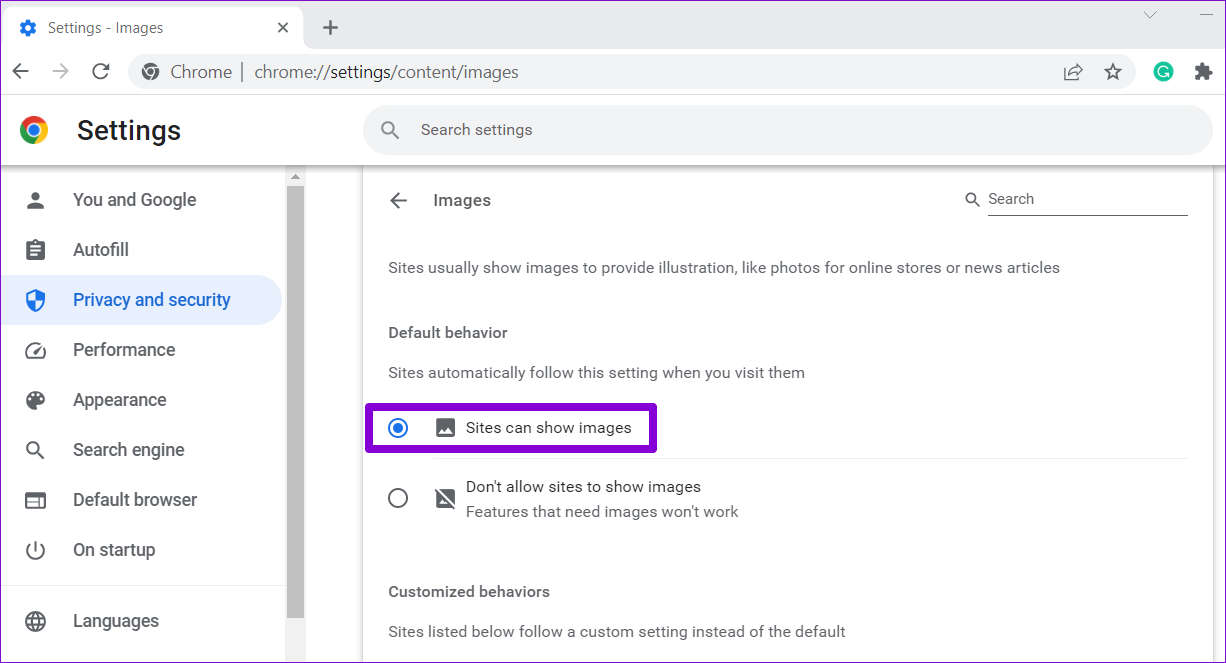
Step 4: Under Default behavior, select the Sites can show images option.
Fix 2: Turn On JavaScript
JavaScript is a programming language that web developers use to add various features and visual elements to their websites. If you’ve previously blocked websites from using JavaScript in Chrome, they might fail to load images. Here’s what you can do to fix that.
Step 1: In Google Chrome, type chrome://settings/content/javascript in the URL bar at the top and press Enter.
Step 2: Under Default behavior, select the Sites can use Javascript option.

Fix 3: Disable Hardware Acceleration
While enabling hardware acceleration in Chrome enhances your browsing experience visually, there are times when this feature fails to function properly. In such cases, Chrome might have trouble loading images or playing videos. To avoid this, you can try disabling hardware acceleration in Chrome.
Step 1: In Chrome, click the three-dot menu icon in the top right corner and select Settings from the list.
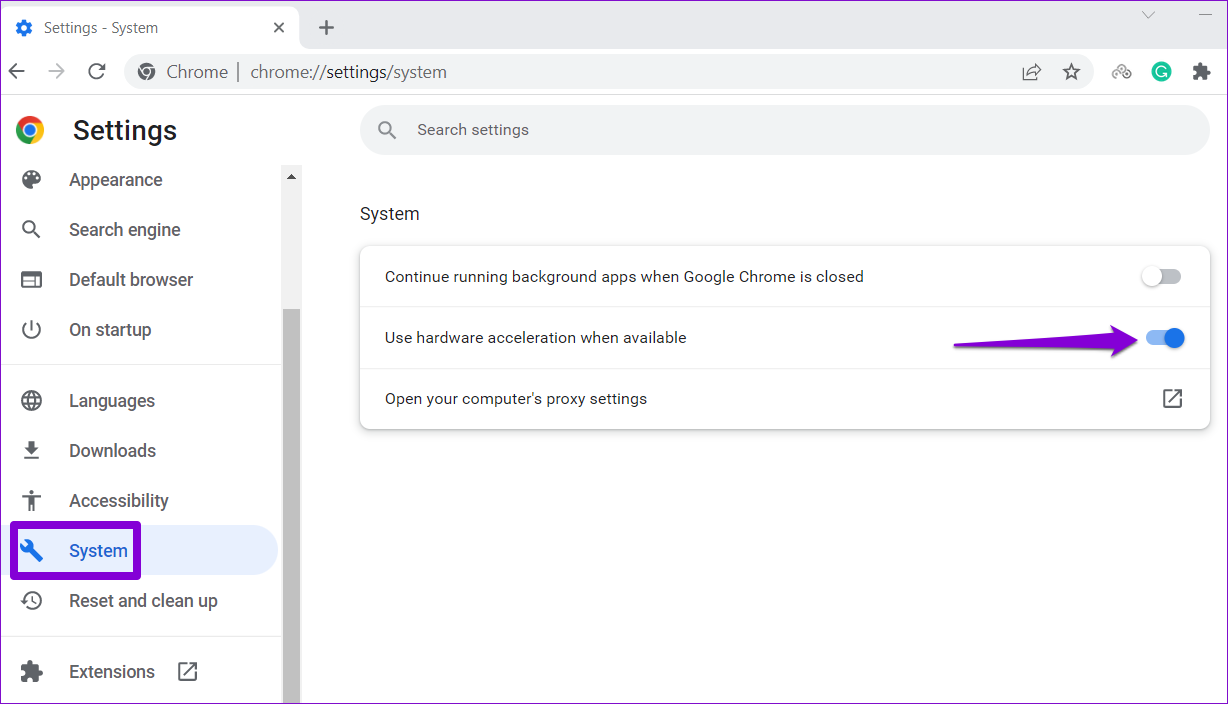
Step 2: In the System tab, toggle off the switch next to Use hardware acceleration when available.
Fix 4: Rename Chrome’s Data Folder
Corrupt or outdated app files in Chrome’s data folder can also lead to such anomalies. To fix this, you can rename Chrome’s data folder on your PC, which will force the browser to recreate it.
Step 1: Press the Windows key + R to launch the Run command. Type %localappdata% in the Open field and press Enter.
Step 2: In the File Explorer window that opens, navigate to Google > Chrome > User Data folder. Then, rename that Default folder to something else.

Relaunch Chrome after this and check if the issue is still there.
Fix 5: Clear Browsing Data
Just like any other browser, Chrome stores cache data to reduce loading times and improve your experience. However, if this data somehow gets corrupted, Chrome might fail to load web pages as usual. You can try clearing Chrome’s existing browsing data to see if that helps.
Press Ctrl + Shift + Del to open the Clear browsing data panel in Chrome. Use the Time range drop-down menu to select All time. Tick the checkboxes that read Cookies and other site data and Cached images and files. Then, click on the Clear data button.

Fix 6: Change DNS Servers
Issues with your current DNS server can also prevent Chrome from loading images on your PC. You can try switching to a more reliable DNS server, such as Google Public DNS, to see if that helps.
Step 1: Press the Windows key + R to launch the Run dialog box. In the Open field, type ncpa.cpl, and press Enter.
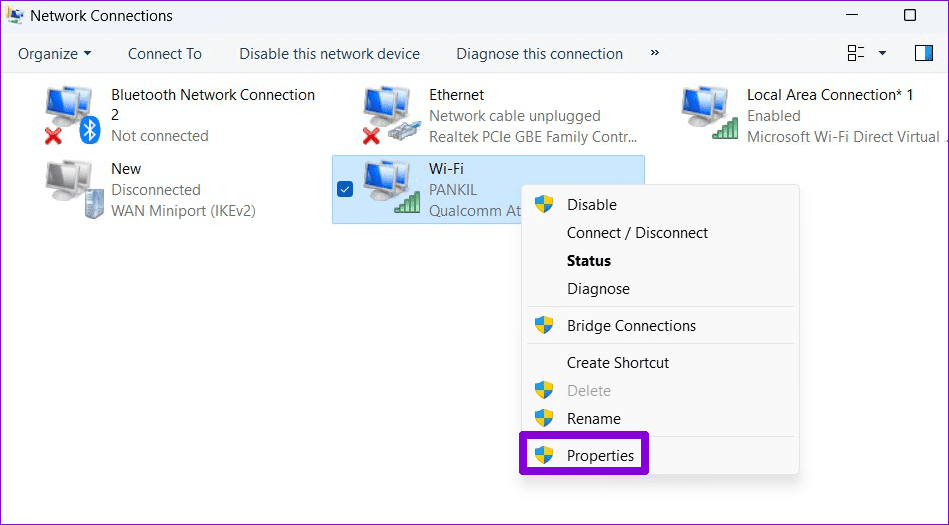
Step 2: In the Network Connections window, right-click on your internet connection and select Properties.
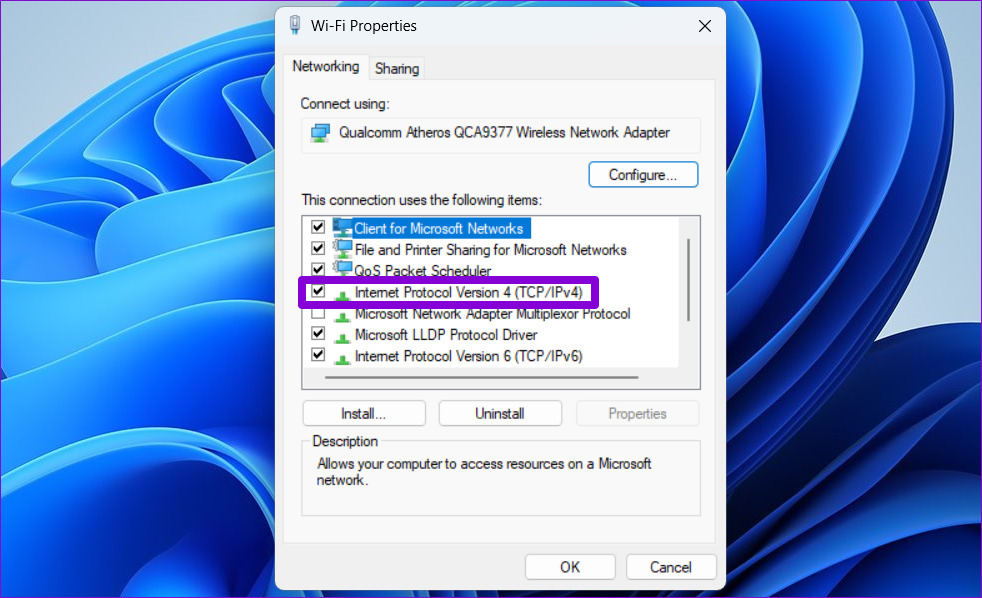
Step 3: Double-click the Internet Protocol Version 4 (TCP/IPv4) option.
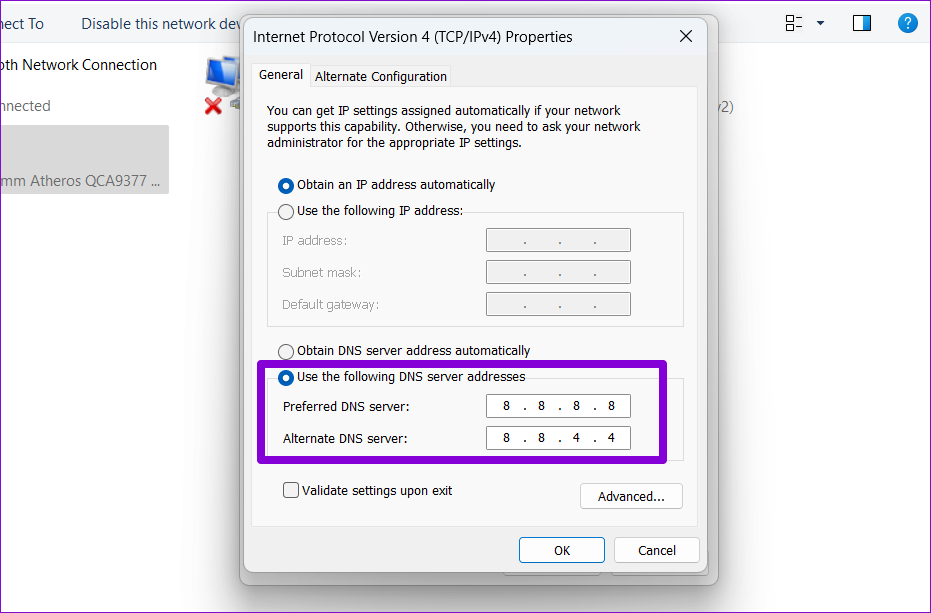
Step 4: Select the Use the following DNS server addresses option. In the text fields next to the Preferred DNS Server and the Alternate DNS Server, enter 8.8.8.8 and 8.8.4.4, respectively. Then, click OK.
Fix 7: Reset Google Chrome
Lastly, if all else fails, you have no option but to reset Google Chrome. To do so, use these steps:
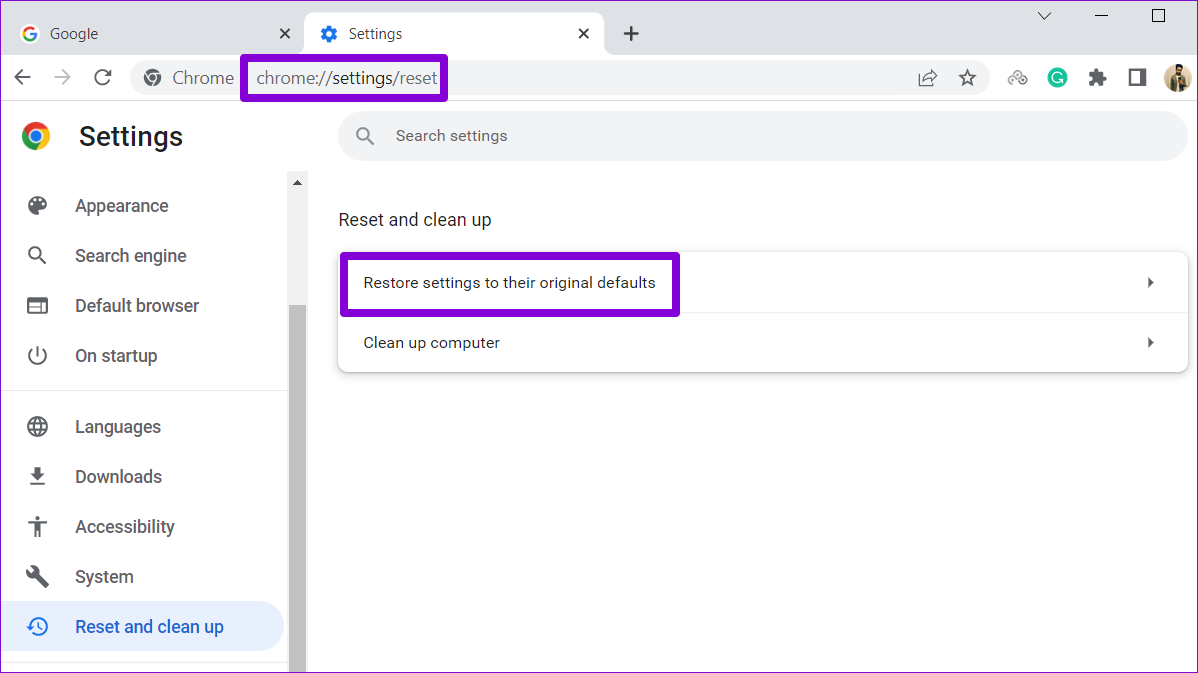
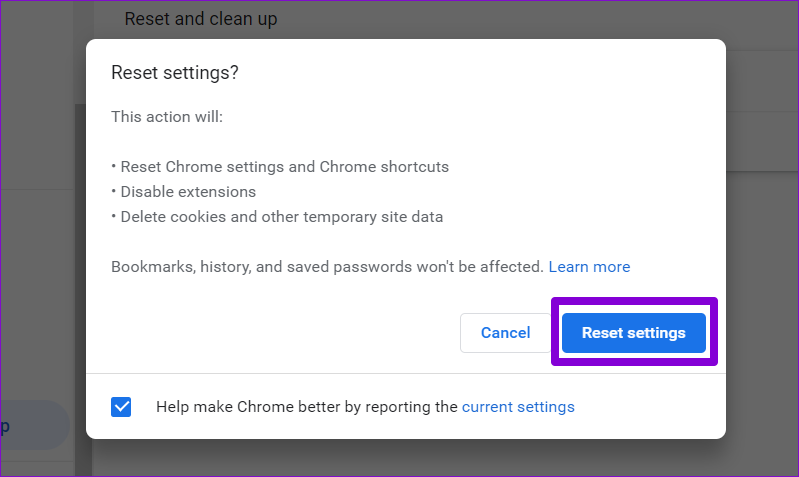
Step 1: In Chrome, type chrome://settings/reset in the address bar up top, and press Enter. Then, click on Restore settings to their original defaults.
Step 2: Click on Reset settings when prompted.
Was this helpful?
Last updated on 20 April, 2024
Read Next
 4 Ways to Fix Images Not Loading in Microsoft Edge
Fix 1: Check Site Permissions The first thing you should do is review site permissions in Microsoft Edge to ensure websites are allowed to load images.
4 Ways to Fix Images Not Loading in Microsoft Edge
Fix 1: Check Site Permissions The first thing you should do is review site permissions in Microsoft Edge to ensure websites are allowed to load images.
 Top 7 Ways to Fix Safari Not Loading Images on iPhone
Apple Safari has evolved significantly over the years.
Top 7 Ways to Fix Safari Not Loading Images on iPhone
Apple Safari has evolved significantly over the years.
 9 Best Ways to Fix Google Chrome Not Loading Pages in Windows 10
Google Chrome is one of the most used browsers in the world, no doubt.
9 Best Ways to Fix Google Chrome Not Loading Pages in Windows 10
Google Chrome is one of the most used browsers in the world, no doubt.
 Top 7 Ways to Fix Google Slides Not Loading in Chrome
Google Slides is a fantastic tool to create and share captivating presentations without installing anything on your computer.
Top 7 Ways to Fix Google Slides Not Loading in Chrome
Google Slides is a fantastic tool to create and share captivating presentations without installing anything on your computer.
 Top 7 Ways to Fix Facebook Games Not Loading in Google Chrome
Facebook games allow you to connect with friends and family across distances.
Top 7 Ways to Fix Facebook Games Not Loading in Google Chrome
Facebook games allow you to connect with friends and family across distances.
 9 Best Ways to Fix Can’t Save Images From Google Chrome
Even though Safari and Microsoft Edge come preinstalled on Mac and Windows, respectively, Google Chrome remains the defacto choice for most consumers.
9 Best Ways to Fix Can’t Save Images From Google Chrome
Even though Safari and Microsoft Edge come preinstalled on Mac and Windows, respectively, Google Chrome remains the defacto choice for most consumers.
 Top 10 Ways to Fix Google Chrome Not Loading Pages on Android and iPhone
When it comes to web browsing, Google Chrome remains the top choice, even on mobile devices.
Top 10 Ways to Fix Google Chrome Not Loading Pages on Android and iPhone
When it comes to web browsing, Google Chrome remains the top choice, even on mobile devices.
 6 Best Fixes for Images Not Loading in Mail App on Mac
The Mail app on your Mac lets you answer all your personal and professional emails.
6 Best Fixes for Images Not Loading in Mail App on Mac
The Mail app on your Mac lets you answer all your personal and professional emails.
The article above may contain affiliate links which help support Guiding Tech. The content remains unbiased and authentic and will never affect our editorial integrity.