File Explorer is a vital tool on Windows 11 that is used to browse files, folders, and even for your cloud storage such as Onedrive, Google Drive, and iCloud. But what happens when the File Explorer becomes unresponsive or stops working entirely? Well, many of the Windows 11 users experience the same.
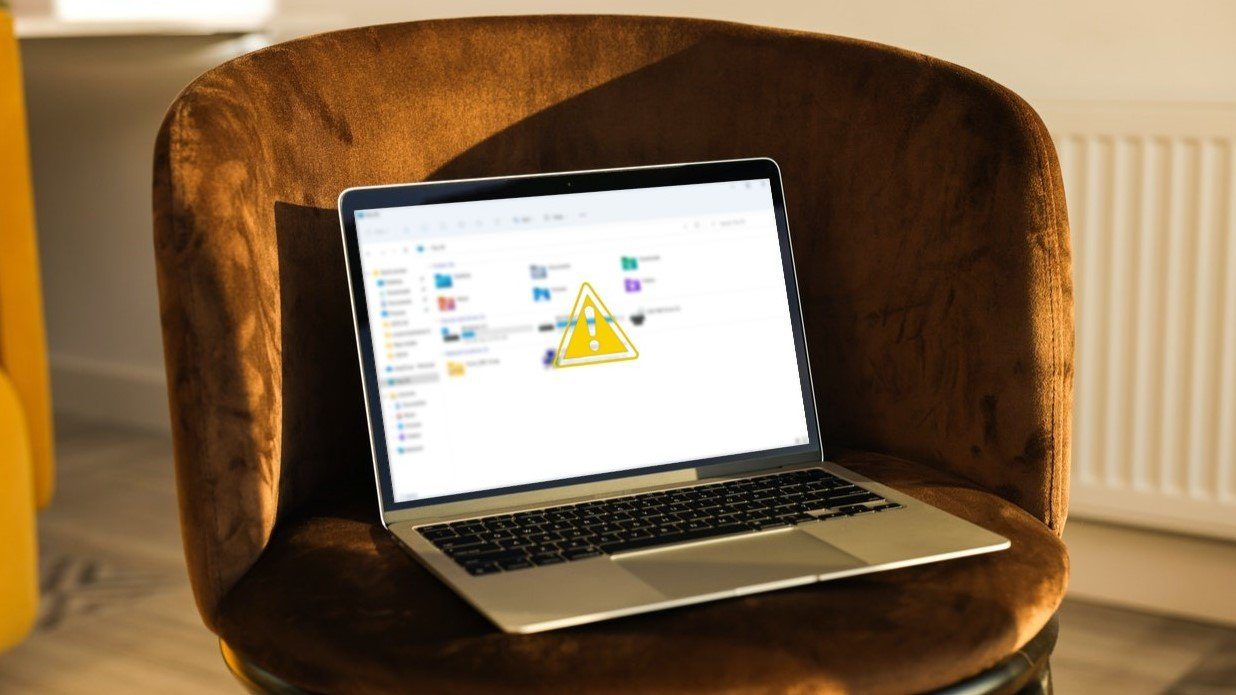
It’s safe to say that any files Explorer problems can effectively interrupt your workflow and leave you anxious. To help out, we’ve compiled a list of fixes that should get you back to browsing files in no time. Let’s begin.
1. Restart Windows Explorer
Whenever the File Explorer becomes unresponsive or starts crashing, you can try restarting the Windows Explorer process first to see it helps. Here’s how.
Step 1: Press Ctrl + Shift + Esc on your keyboard to quickly launch the Task Manager.
Step 2: In the Task Manager window, click on the More details option to expand it.
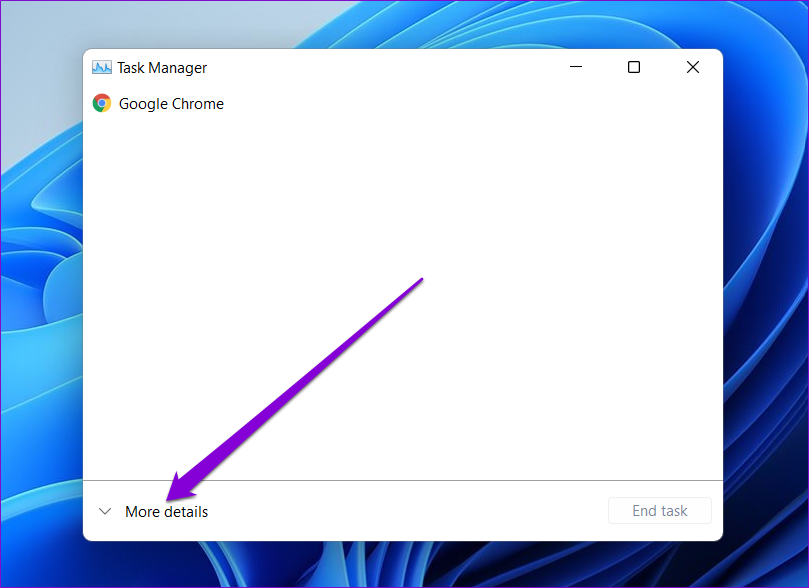
Step 3: In the Process tab, scroll down to find Windows Explorer. Select it and then hit the Restart button at the bottom.

Now, wait for Windows to restart the File Explorer and see if it’s working fine.
2. Reboot PC
If restarting Windows Explorer doesn’t help, then you should consider restarting your PC itself. This will stop all the apps and processes running on your PC and give them a fresh start.
3. Clear File Explorer Cache
The more you use file explorer, the more data it accumulates. This cache data might sometimes slow down or even crash the File Explorer if not cleared at regular intervals. Thus, you can try removing it by following the steps below.
Step 1: Click on the Search icon in the taskbar, type in File Explorer options, and press Enter.
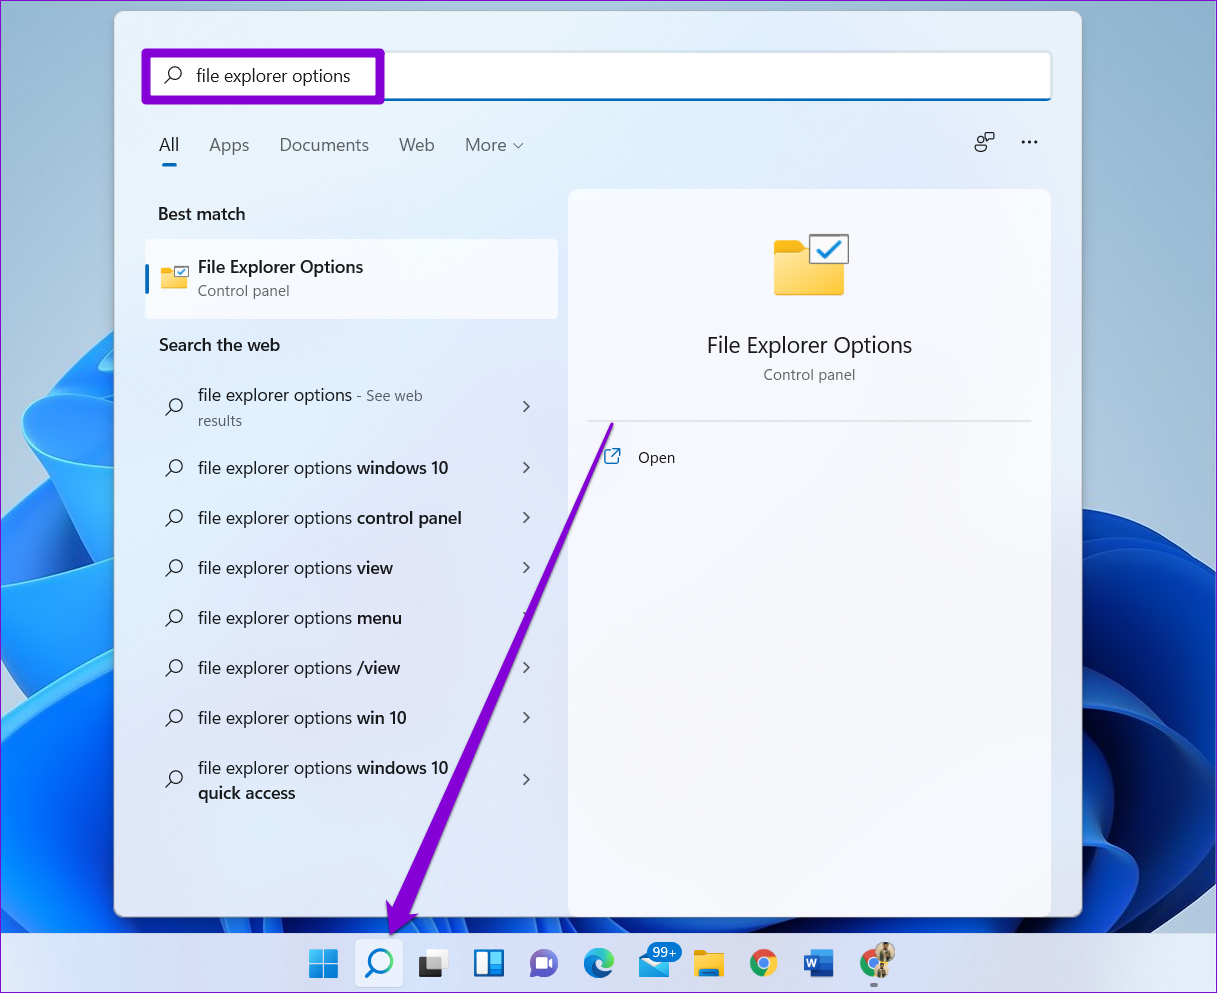
Step 2: In the File Explorer Options window that opens, switch to the General tab. Navigate to the Privacy section and click on the Clear button followed by OK to remove the File explorer cache.

4. Run SFC and DISM Scan
SFC (System File Checker) scan is a handy utility on Windows that can find corrupted system files on your PC and restore them to their previous version. So, if the File Explorer on Windows 11 is crashing abruptly, you can try running an SFC scan by following the steps below.
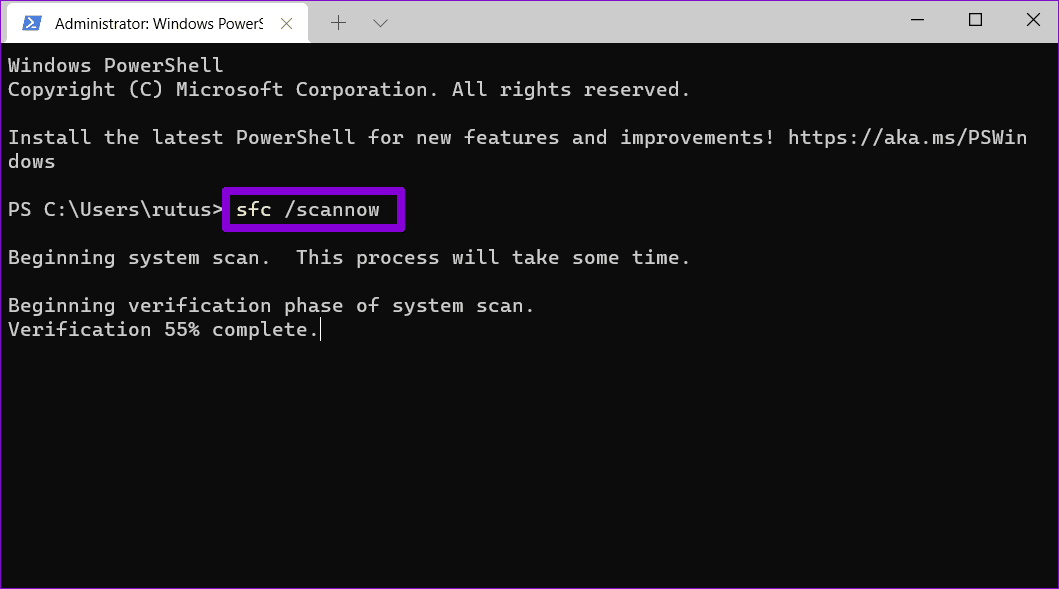
Step 1: Right-click on the Start menu icon and select the Windows Terminal (admin) option from the resulting menu.
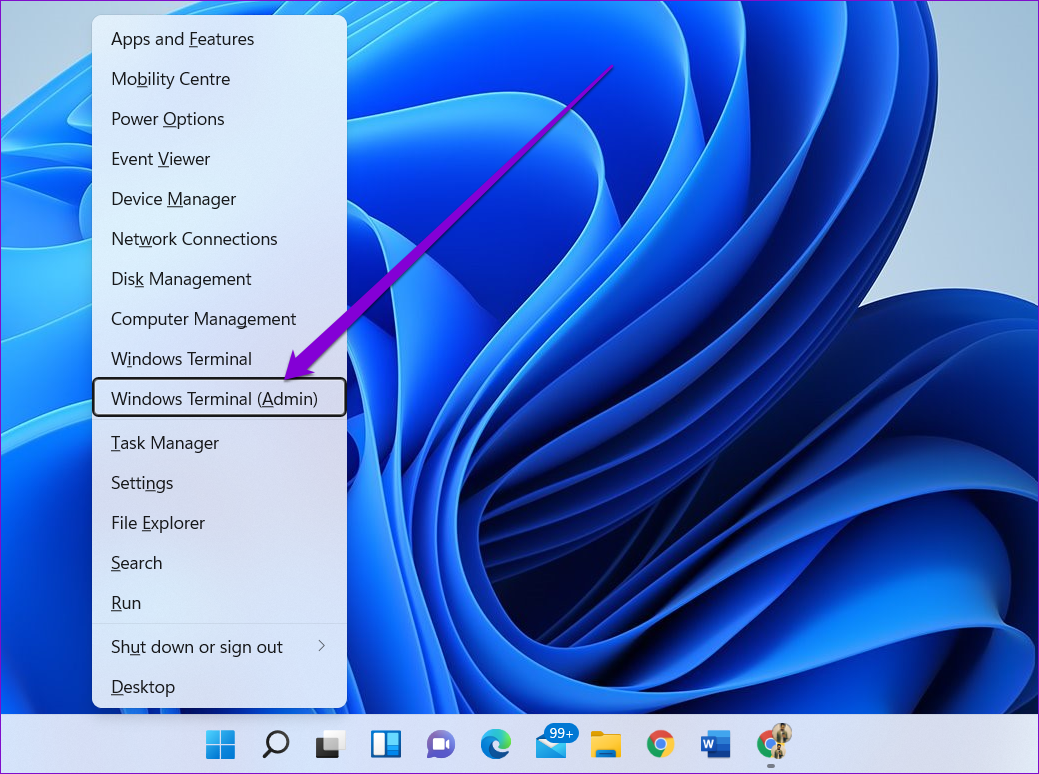
Step 2: Type the command mentioned below and press Enter.
SFC /scannow
Wait for the process to complete (it might take a while) and then restart your PC. If the issue persists, you can try performing a DISM or Deployment Image Servicing and Management scan. Similar to SFC scan, DISM is also a system utility that is built to repair system images and files on your Windows. Here’s how to run it.
Launch Command Prompt with admin rights and enter the following commands one by one.
DISM /Online /Cleanup-Image /CheckHealth
DISM /Online /Cleanup-Image /ScanHealth
DISM /Online /Cleanup-Image /RestoreHealth
Once done, restart your PC and see if the File Explorer is working fine now.
5. Run System Maintenance Troubleshooter
If the above methods fail to resolve the File Explorer issues on Windows 11, then you can try using the System Maintenance Troubleshooter. It can optimize the overall performance of your PC by resolving issues such as broken desktop shortcuts, unused icons, disk volume errors, etc.
Read on to learn how to run System Maintenance Troubleshooter on Windows 11.
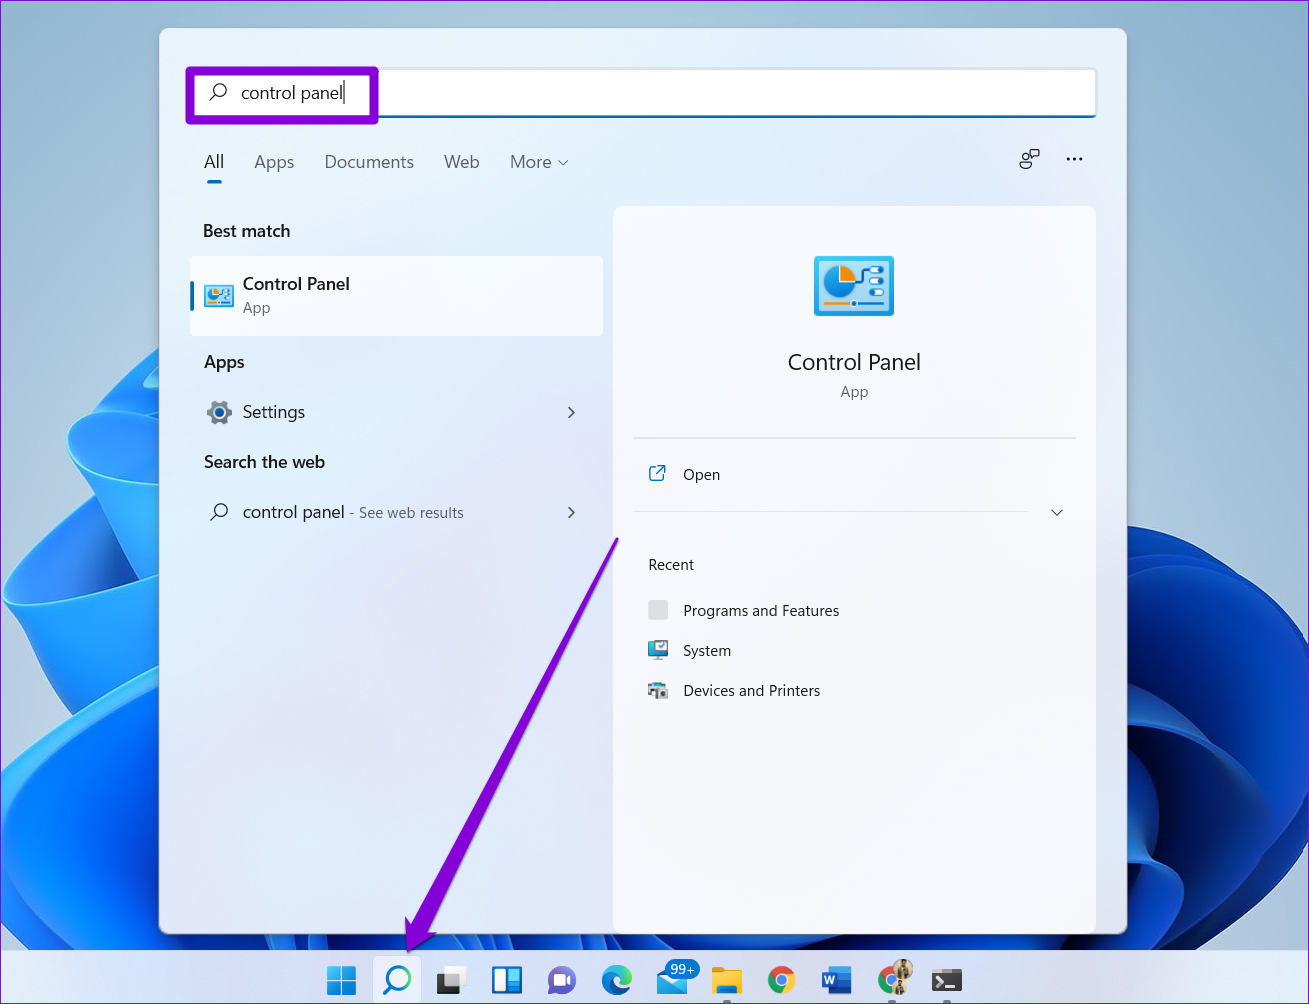
Step 1: Click on the Search icon in the taskbar, type in control panel, and press Enter.
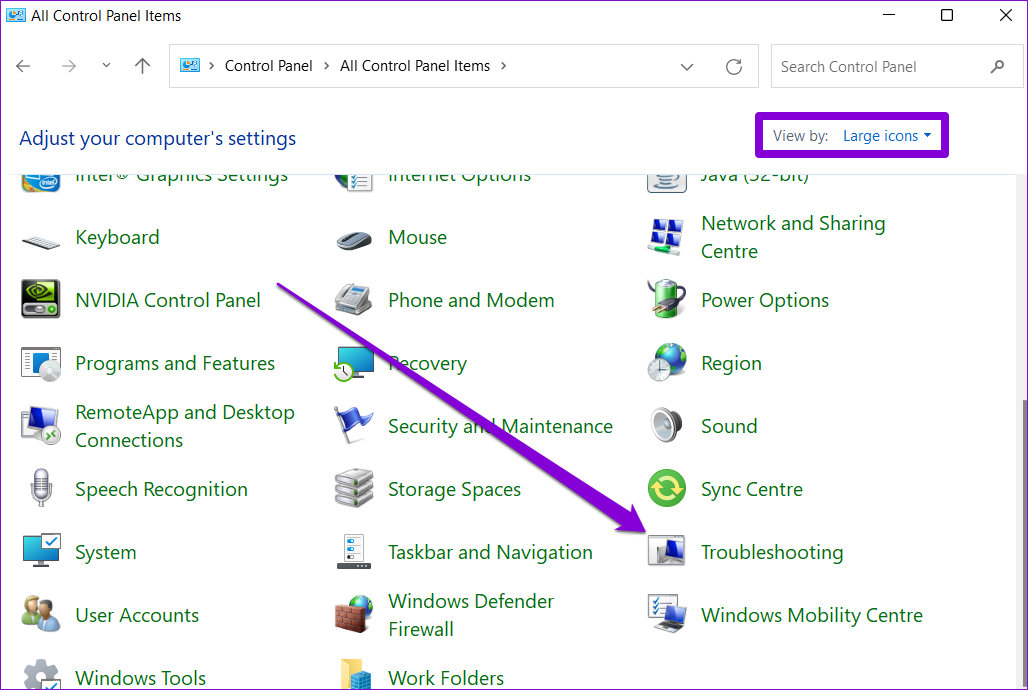
Step 2: In the Control Panel window, switch the view type to large icons, if it isn’t already, and go to Troubleshooting.
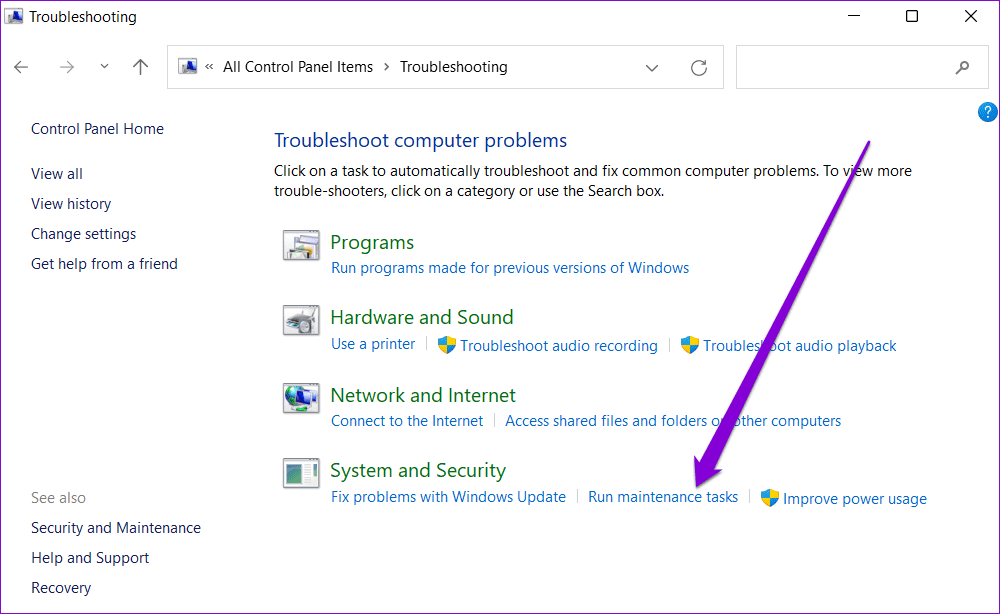
Step 3: Under System and Security, click on the Run maintenance tasks option.
From there, follow the on-screen instructions to run the troubleshooter. Then restart your PC and see if the issue is resolved now.
6. Scan for Malware
It’s possible that a malicious virus has affected your PC and has been interfering with regular operations on Windows 11. To be sure of it, you can try scanning your PC for malware and viruses by performing a quick scan.
7. Check For Windows Updates
Lastly, if the above solutions haven’t worked, you can check if there’re any pending updates on your PC. If so, go ahead and install them first. Microsoft is usually quick when it comes to releasing fixes. The newer Windows 11 build may have resolved the current File Explorer-related issues you’re facing.
To check for updates, press Windows key + I to open the Settings app. Navigate to the Windows Update to install any pending updates.
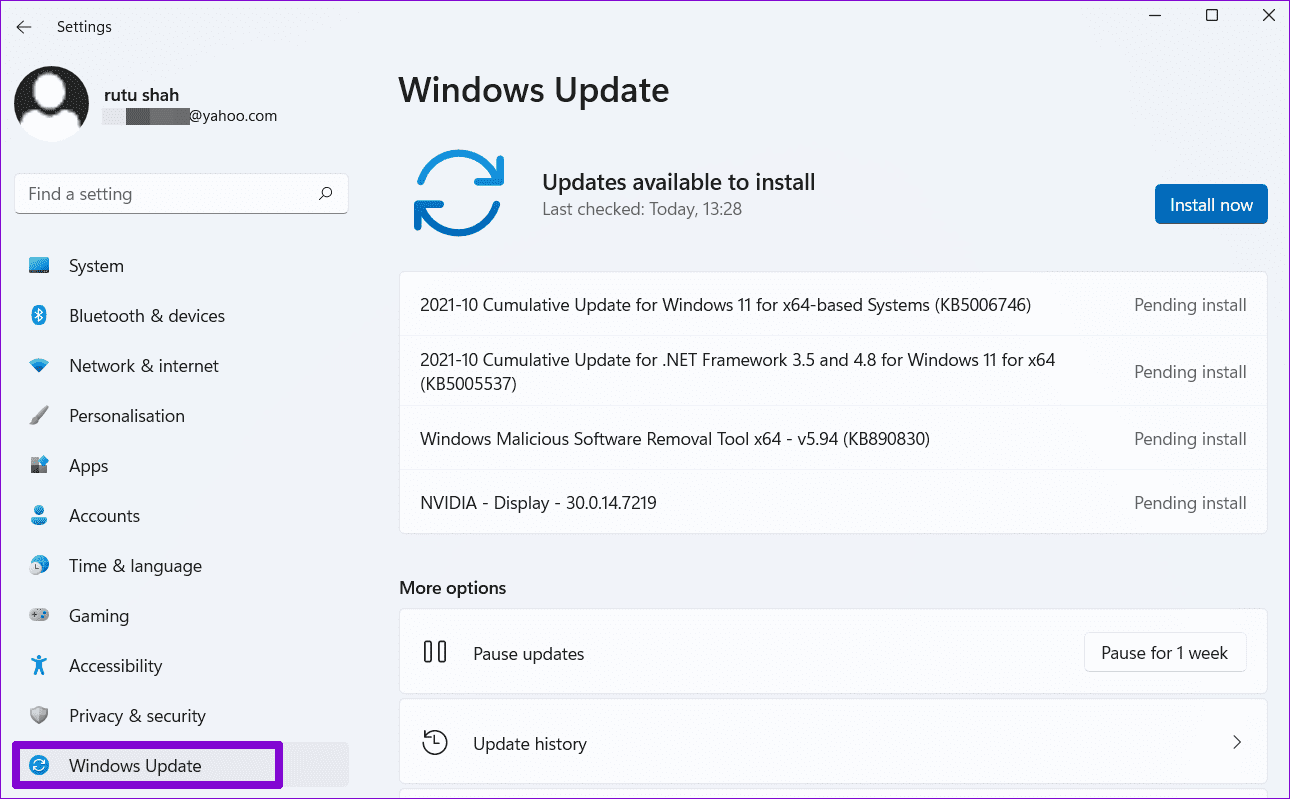
Apply all the updates and restart your PC to see if the issue is resolved.
Explore Your PC
Even with Windows 11, much of the solutions that helped you fix the File Explorer problems on Windows 10 will work. The way you apply those fixes has changed a little bit. Hopefully, the solutions above have helped you get the File Explorer back up and running for now.
Was this helpful?
Last updated on 07 February, 2022
1 Comment
Leave a Reply
Read Next
 Top 14 Ways to Fix File Explorer Search Not Working on Windows 11
The default File Explorer app received a huge makeover with Windows 11 update.
Top 14 Ways to Fix File Explorer Search Not Working on Windows 11
The default File Explorer app received a huge makeover with Windows 11 update.
 Top 10 Ways to Fix File Explorer Stuck at ‘Working on It’ Error
Even with continuous improvements by Microsoft, the usual quirks with File Explorer remain the same.
Top 10 Ways to Fix File Explorer Stuck at ‘Working on It’ Error
Even with continuous improvements by Microsoft, the usual quirks with File Explorer remain the same.
 Top 8 Ways to Fix File Explorer Not Opening on Windows 10
File Explorer is an integral part of Windows 10 OS.
Top 8 Ways to Fix File Explorer Not Opening on Windows 10
File Explorer is an integral part of Windows 10 OS.
 Top 6 Ways to Fix File Explorer Tabs Not Showing in Windows 11
The updated File Explorer in Windows 11 features a tabbed interface that lets you open multiple File Explorer tabs within a single window and switch between them as necessary.
Top 6 Ways to Fix File Explorer Tabs Not Showing in Windows 11
The updated File Explorer in Windows 11 features a tabbed interface that lets you open multiple File Explorer tabs within a single window and switch between them as necessary.
 Top 4 Ways to Select Multiple Files on Windows 10 File Explorer
There are several reasons why you may need to select multiple files on your Windows 10 File Explorer.
Top 4 Ways to Select Multiple Files on Windows 10 File Explorer
There are several reasons why you may need to select multiple files on your Windows 10 File Explorer.
 Top 10 Ways to Fix iPhone Not Showing Up in File Explorer on Windows 11
Since Windows users have nothing like AirDrop, they must connect their iPhone to the PC and transfer media from the File Explore menu.
Top 10 Ways to Fix iPhone Not Showing Up in File Explorer on Windows 11
Since Windows users have nothing like AirDrop, they must connect their iPhone to the PC and transfer media from the File Explore menu.
 5 Best Fixes for Windows 10 File Explorer Search Not Working
Microsoft's integration of Windows Search into File Explorer made searching for files such a bliss.
5 Best Fixes for Windows 10 File Explorer Search Not Working
Microsoft's integration of Windows Search into File Explorer made searching for files such a bliss.
 4 Fixes for OneDrive Not Showing Up in File Explorer on Windows
Fix 1: Restart Windows Explorer Windows Explorer is a system process that handles the graphical user interface for File Explorer.
4 Fixes for OneDrive Not Showing Up in File Explorer on Windows
Fix 1: Restart Windows Explorer Windows Explorer is a system process that handles the graphical user interface for File Explorer.
The article above may contain affiliate links which help support Guiding Tech. The content remains unbiased and authentic and will never affect our editorial integrity.

Thank you Mr Shah… great comprehensive article.
I must have a REALLY serious Windows 11 problem ’cause NONE of these methods had any effect.
File Explorer WILL NOT RUN.