With the iOS 16 update, the Continuity Camera gets a new feature that’ll let you make the best of your iPhone’s camera with your Mac. Apple took the Continuity Camera functionality to the next level by letting you use the iPhone camera as a webcam on Mac. The functionality works as expected, but it comes with a few conditions. If your devices don’t meet all the conditions, the iPhone camera won’t work as a webcam on Mac. Here are the best ways to fix the issue.
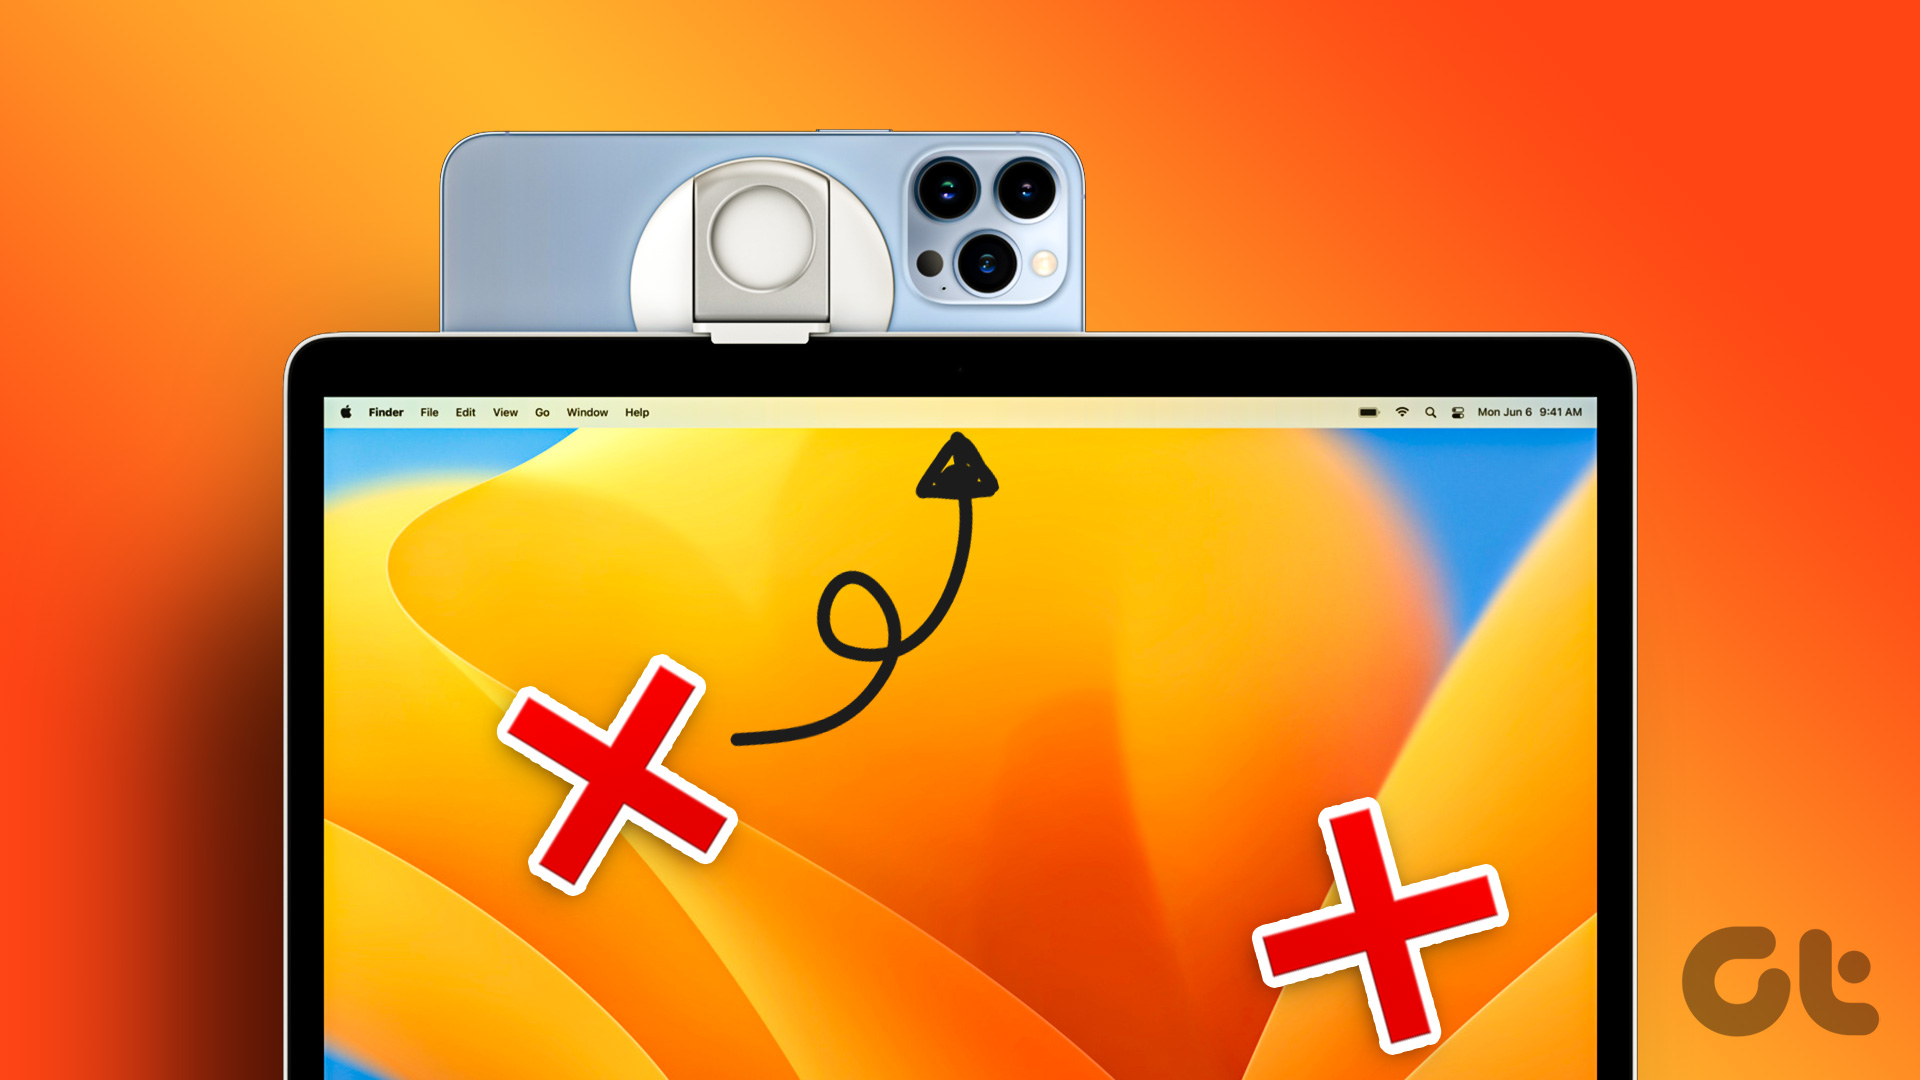
With Continuity Camera, you no longer need to settle with a below-average webcam on Mac. If you continue to face issues with Continuity Camera, Read along to troubleshoot the problem. For starts, your iPhone needs to run iOS 16 or above and your Mac needs to run macOS Venture or later.
1. Make Sure to Use the Same Apple ID
Are you trying to use your friend’s iPhone with your Mac? You won’t find an iPhone camera as an option on Mac if you use different Apple IDs on those devices. Your iPhone and Mac must be signed into the same Apple account.
iPhone
Step 1: Open the Settings app on iPhone.

Step 2: Select your profile picture at the top and check your Apple ID from the following menu.


Mac
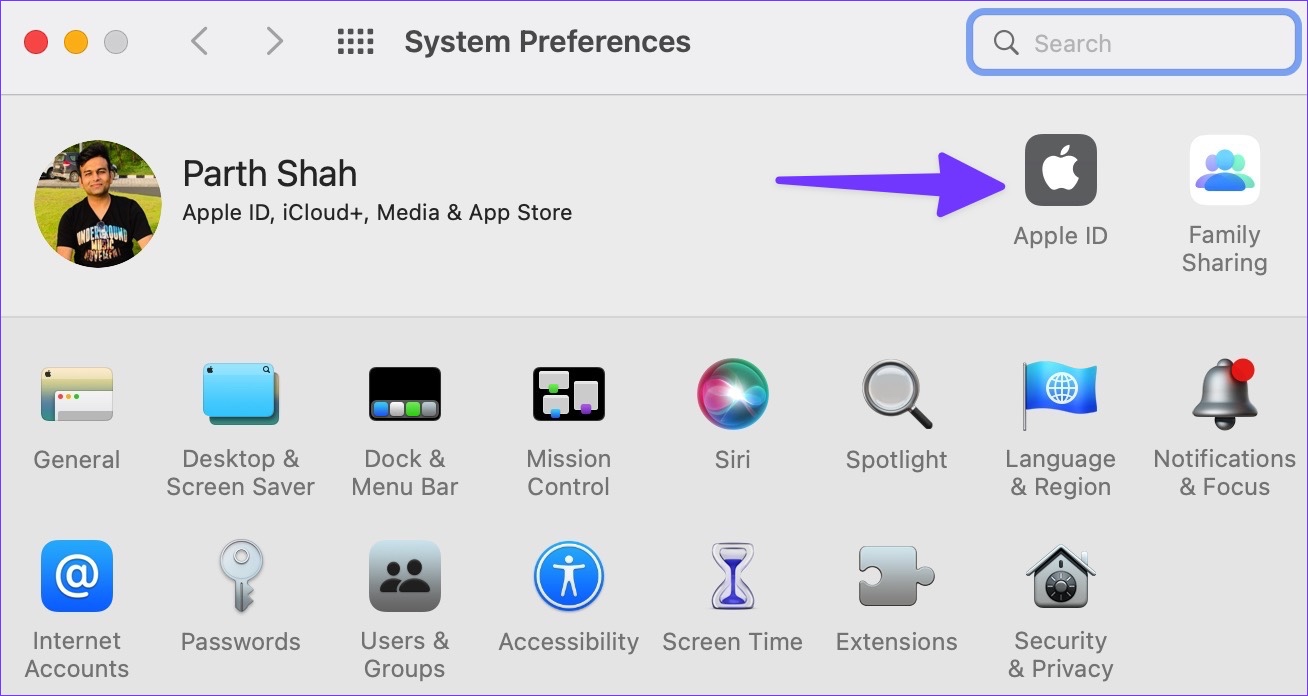
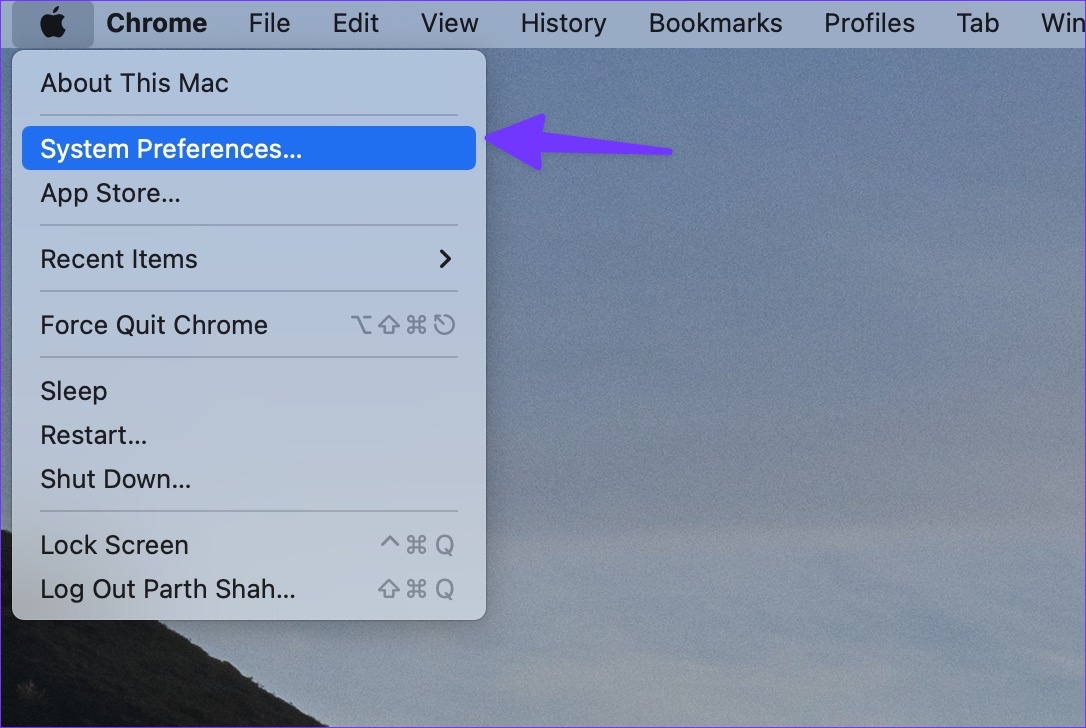
Step 1: Click the Apple icon in top-left corner the menu bar and open System Preferences.
![]()
Step 2: From the System Preferences window, click on the Apple ID in the top-right corner.
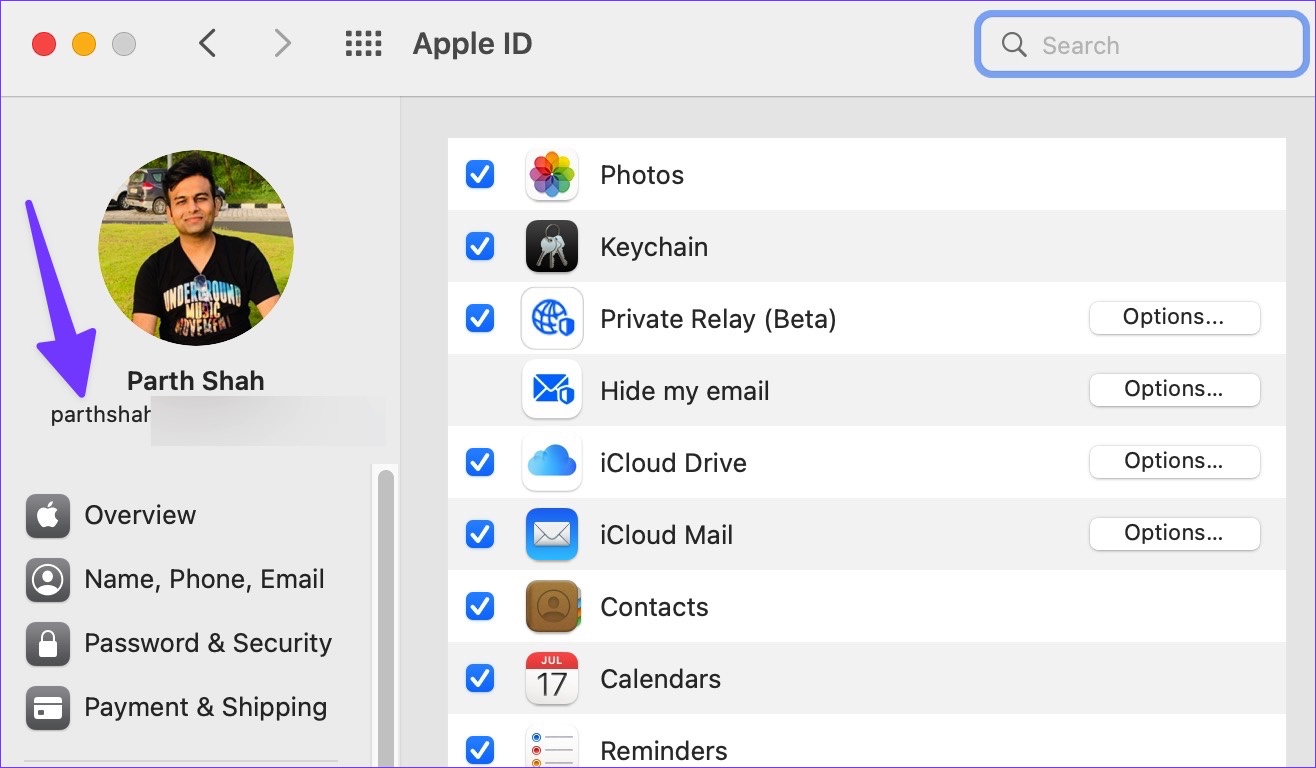
Step 3: Select Apple ID and check your Apple email ID.
2. Install the Latest Update on iPhone and Mac
Continuity Camera function to turn your iPhone into a webcam is part of the latest updates on iPhone and Mac. Your iPhone and Mac need to run the iOS 16 and macOS Ventura update, respectively. If one of the devices is running old software, you can’t use Continuity Camera. Follow the steps below to install the latest iOS update on your iPhone.
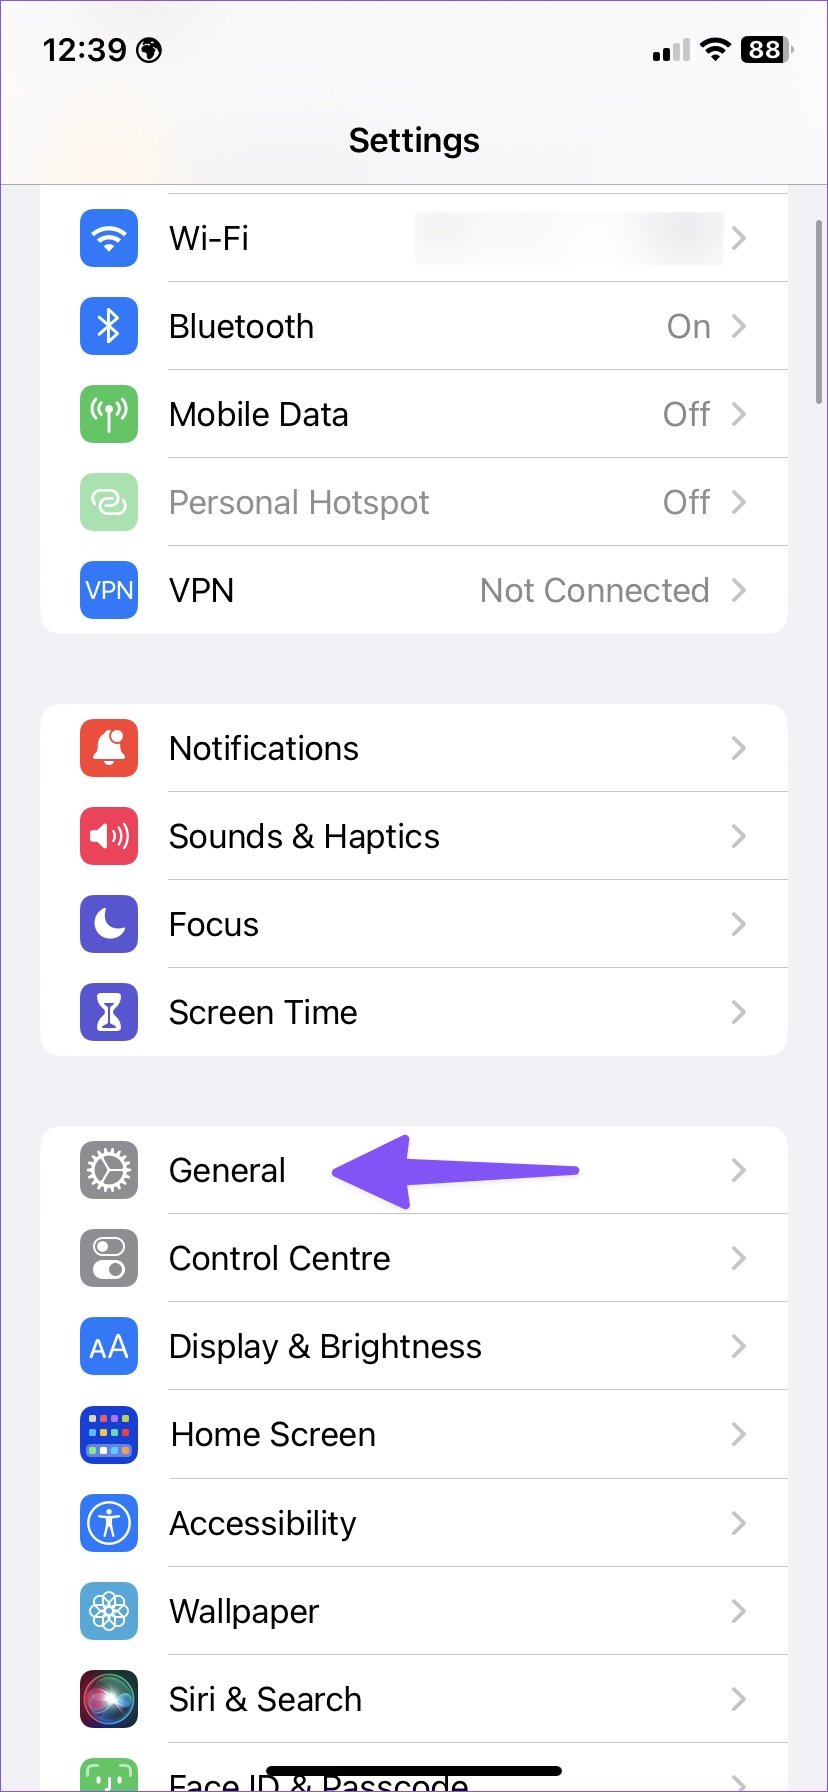
Step 1: Open the Settings app on iPhone.
Step 2: Scroll to General.
Step 3: Select Software Update and install the latest iOS build.

Here are the steps to install macOS Ventura on Mac. The software is available in the public beta right now. You can head to the Apple Beta Software Program online and enroll your Mac for the beta build. After Apple releases the update to the public, go through the steps below.
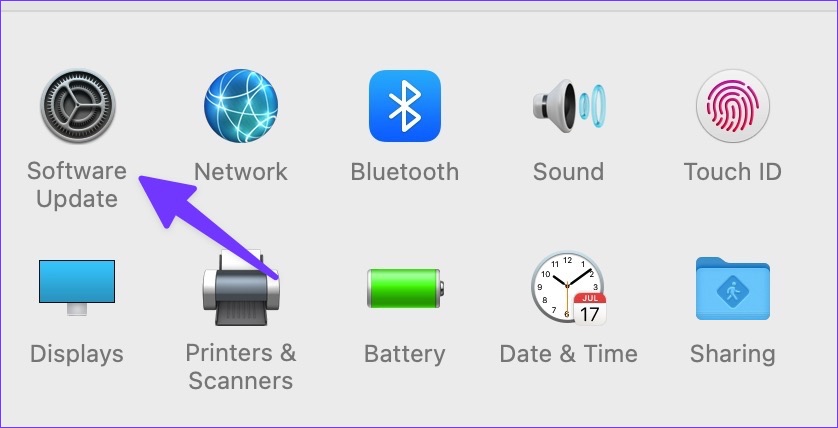
Step 1: Open System Preferences on Mac.
Step 2: Select ‘Software Update’ and install the latest update on Mac.
3. Enable Wi-Fi and Bluetooth on Both Devices
To successfully use iPhone as a webcam on Mac, you’ll need to enable Wi-Fi and Bluetooth on both devices – Mac and iPhone. You also need to connect them to the same Wi-Fi connection. Here’s how you can check and confirm that.
Step 1: Swipe down from the top-right corner on your iPhone. Swipe up from the bottom (for iPhone models with a Home button) to open Control Center.

Step 2: Enable Bluetooth and Wi-Fi options on your iPhone.
Mac users need to click the Control Center icon in the top-right corner in the menu bar to enable Wi-Fi and Bluetooth toggles.

4. Enable Continuity Camera Toggle
Apple automatically enables the Continuity Camera option after installing the latest iOS 16 update. If you have accidentally disabled it, follow the steps below to turn it on.
Step 1: Launch Settings on iPhone.
Step 2: Open General.
Step 3: Select AirPlay & Handoff.
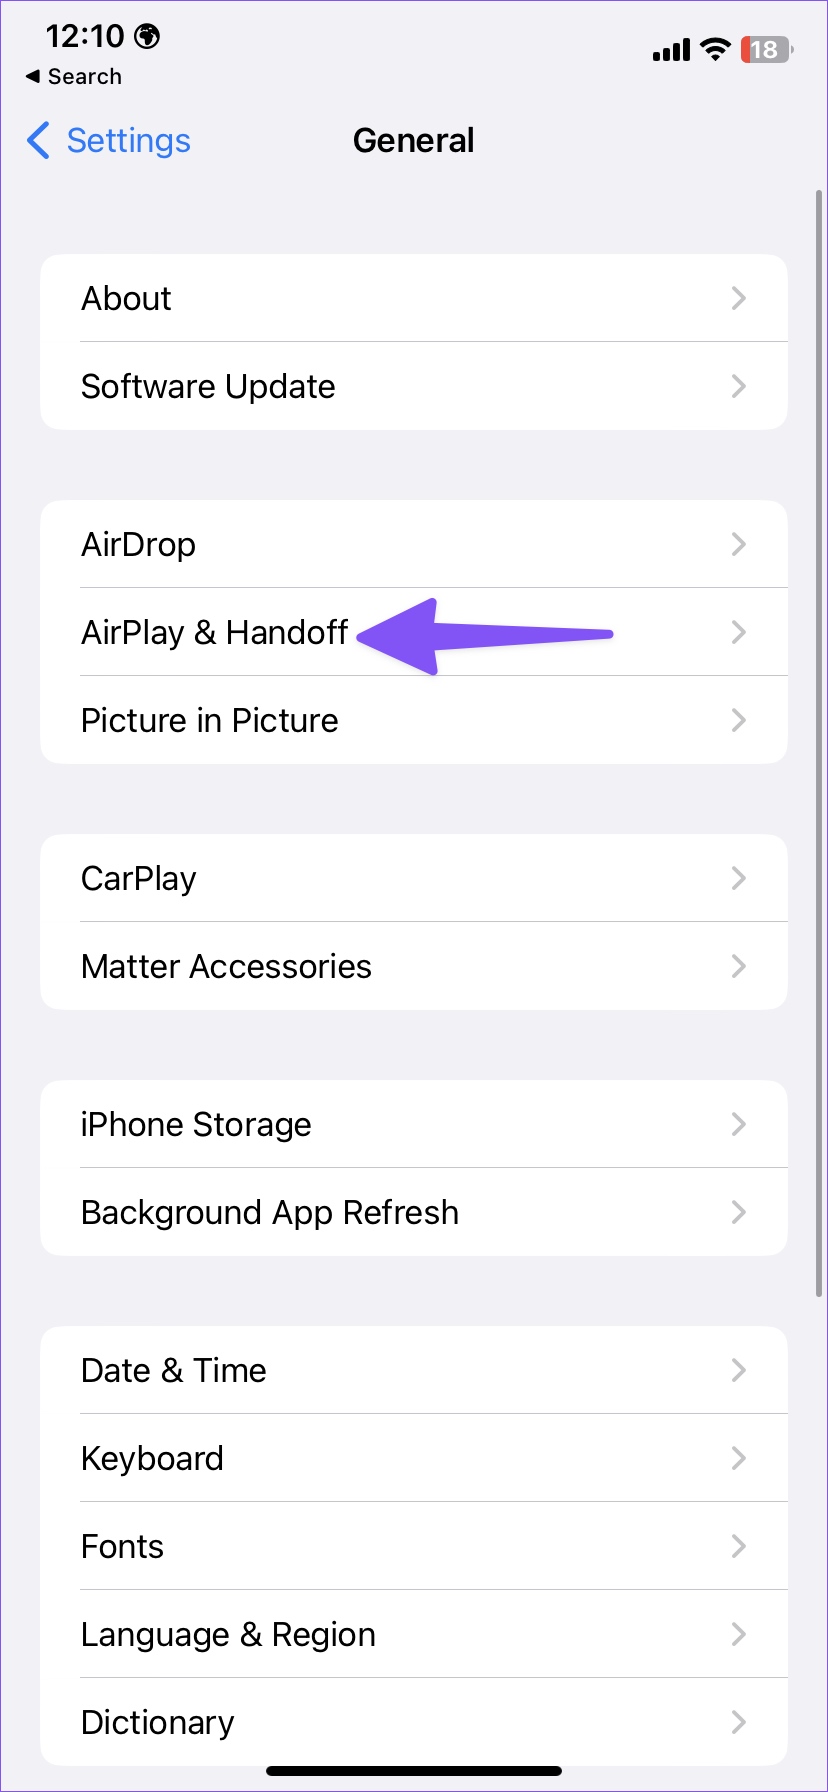
Step 4: Enable the ‘Continuity Camera’ toggle from the following menu.

5. Change the Default Webcam
Continuity Camera is compatible with all the popular third-party video apps like Zoom, Teams, and Google Meet. iPhone camera option automatically appears on these apps, though. You’ll need to tweak a setting to change the default webcam on Mac.
After you meet all the conditions, place your iPhone beside your Mac and make relevant changes to your preferred video app. We will use Google Meet, Microsoft Teams, and Zoom as an example.
Google Meet
Step 1: Visit Google Meet on the web. Sign in with your Google account details.
Step 2: Select the Settings gear in the top right corner.

Step 3: Select Video from the left sidebar.

Step 4: Expand the Camera and select your iPhone’s main camera from the list.

Microsoft Teams
Step 1: Open the Microsoft Teams app on your Mac.
Step 2: Click Microsoft Teams menu in the top-left on the menu bar and select Preferences.
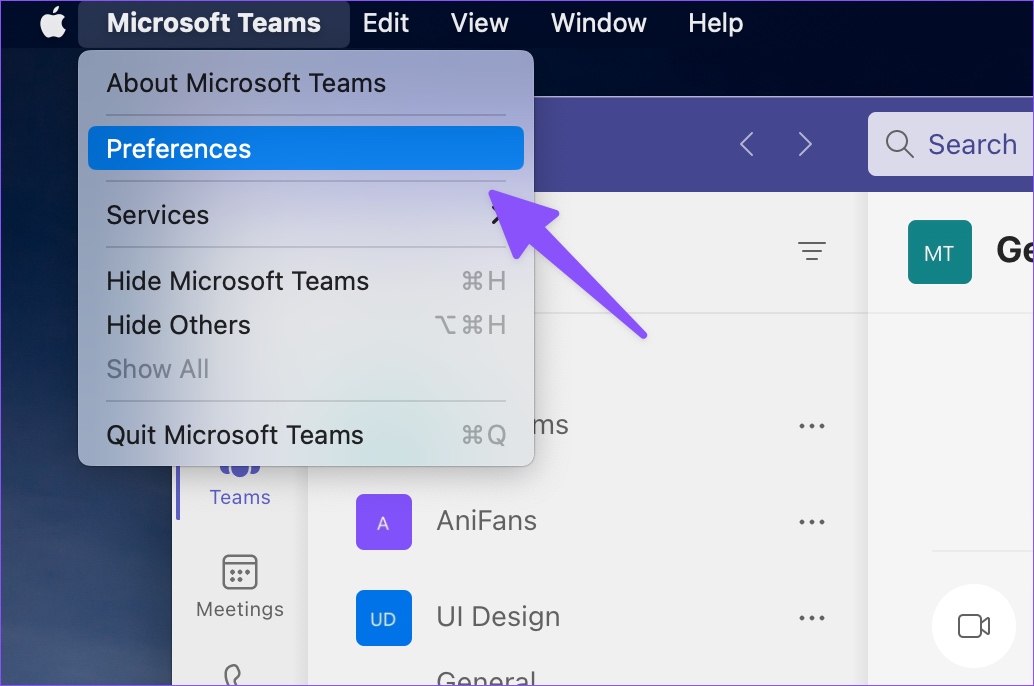
Step 3: Select Devices from the left sidebar.

Step 5: Click on the Camera menu drop-down and select your iPhone camera from the list.

Zoom
Step 1: Launch the Zoom app on your Mac.
Step 2: Select the profile picture in the top-right corner and open Settings.
Step 3: Click Video from the left sidebar.

Step 4: Expand the Camera and select your iPhone camera.
You shall notice a dramatically improved video feed during video calls.
Your iPhone Can Be the Best Webcam
Using your iPhone camera as a webcam is one of the best examples of flawless integration among Apple hardware in recent years. It may confuse you when the function doesn’t work as expected. Go through the tricks above and fix the issue in no time.
Was this helpful?
Last updated on 03 October, 2022
Read Next
 5 Best Ways to Fix Blurry Webcam on Windows 11
Making video calls on a Windows 11 computer requires a good webcam - whether it's your laptop's built-in cam or a dedicated webcam for your desktop.
5 Best Ways to Fix Blurry Webcam on Windows 11
Making video calls on a Windows 11 computer requires a good webcam - whether it's your laptop's built-in cam or a dedicated webcam for your desktop.
 How to Use Your Phone as a Webcam on PC and Mac
Webcams were sparingly used until 2020, when most employers started embracing the work-from-home model.
How to Use Your Phone as a Webcam on PC and Mac
Webcams were sparingly used until 2020, when most employers started embracing the work-from-home model.
 iVCam vs EpocCam: Which iPhone Webcam App Is Better on Windows
Work from home is the new norm these days.
iVCam vs EpocCam: Which iPhone Webcam App Is Better on Windows
Work from home is the new norm these days.
 How to Use the Insta360 X3 as a Webcam With Your Computer
If you’re a budding vlogger or filmmaker, the Insta360 X3 is a fun gadget to get your hands on.
How to Use the Insta360 X3 as a Webcam With Your Computer
If you’re a budding vlogger or filmmaker, the Insta360 X3 is a fun gadget to get your hands on.
 Top 7 Ways to Fix Facebook Messenger Camera Not Working on Android and iPhone
Whether you want to capture photos and videos for your Messenger story or connect with your favorite people over a video call, Messenger’s camera is an important part of the
Top 7 Ways to Fix Facebook Messenger Camera Not Working on Android and iPhone
Whether you want to capture photos and videos for your Messenger story or connect with your favorite people over a video call, Messenger’s camera is an important part of the
 Top 11 Ways to Fix iPhone Hotspot Not Working With Mac
As a part of Apple Continuity, iPhone users can instantly enable mobile hotpot on Mac.
Top 11 Ways to Fix iPhone Hotspot Not Working With Mac
As a part of Apple Continuity, iPhone users can instantly enable mobile hotpot on Mac.
 Top 8 Ways to Fix Camera Lag on iPhone
iPhones have always had the best cameras.
Top 8 Ways to Fix Camera Lag on iPhone
iPhones have always had the best cameras.
 Top 11 Ways to Fix Camera Not Working on Windows 11
Imagine getting ready for your virtual meeting, only to discover that the camera on your Windows 11 PC isn't working.
Top 11 Ways to Fix Camera Not Working on Windows 11
Imagine getting ready for your virtual meeting, only to discover that the camera on your Windows 11 PC isn't working.
The article above may contain affiliate links which help support Guiding Tech. The content remains unbiased and authentic and will never affect our editorial integrity.