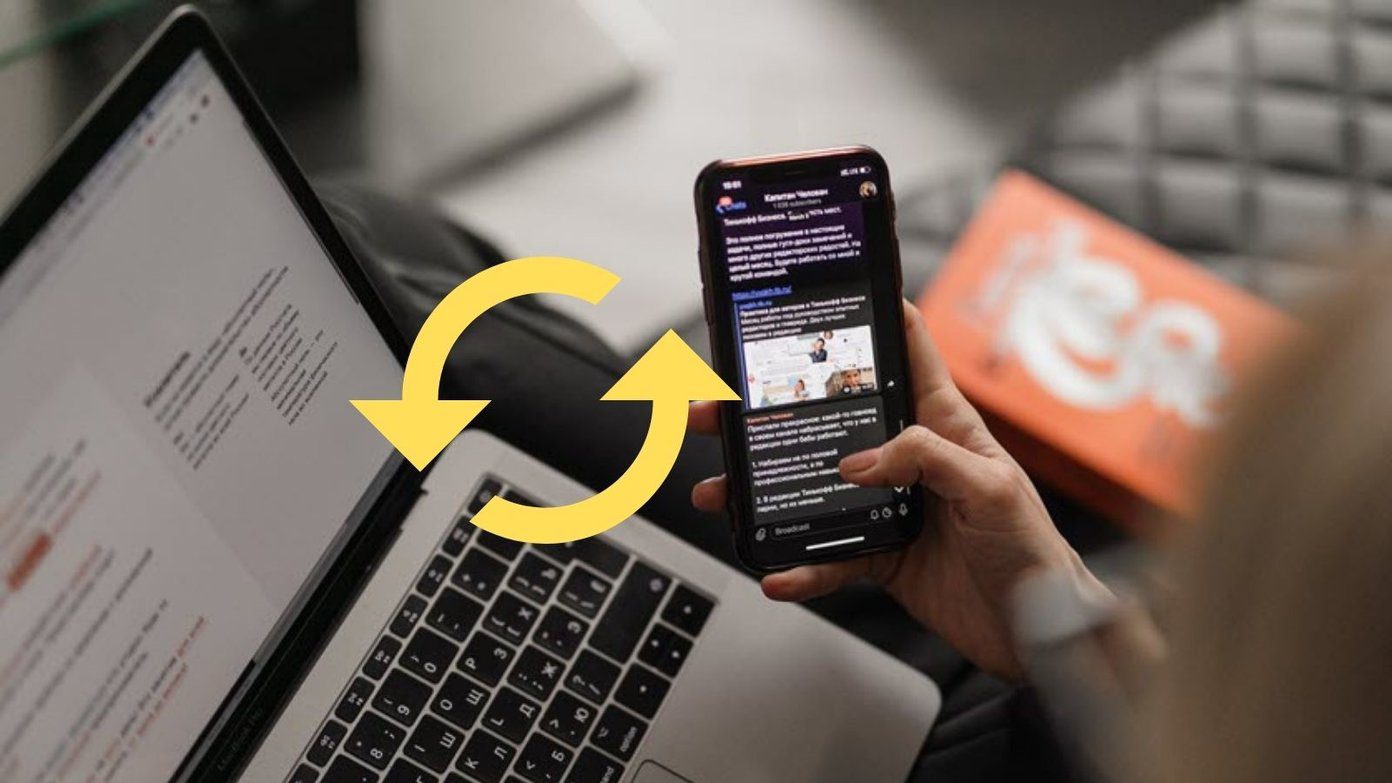
While there are many ways to get Android notifications on a Windows 10 PC, very few apps let you sync notifications across Android devices. Nowadays, many people own more than one gadget (read phone or tablet). If you use two Android devices, you would probably want to sync notifications across them (isn’t tech supposed to make our lives better?).
For instance, I have a tab and a phone. I sometimes watch movies on my tab in my garden and simultaneously like to charge my phone inside the house. Of course, that’s when I get the lion’s share of my daily calls and texts (life is weird). I am jealous of you iOS users!
So I started looking for an app that could push notifications from one Android device to another, and could also dismiss notifications across all devices.
Thankfully, I found a good one.
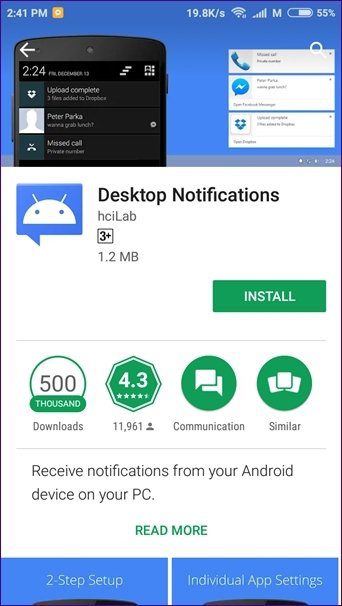
The app goes by the name Desktop Notifications. It lets you sync notifications to multiple Android devices (phones and tablets) and even to PC. It comes as a Chrome extension for PC. The best part about the app is that it’s available for free.
The setup is easy and the app also offers customization options. We have covered both in this post.
Let’s get started.
Mirror Notifications Across Multiple Android Devices
Step 1: Install the Desktop Notifications app on your Android device.
Step 2: Launch the app. You will be taken to the setup process. It’s a two-step process to set up the app. First, you need to grant notification access followed by signing into your Google account.
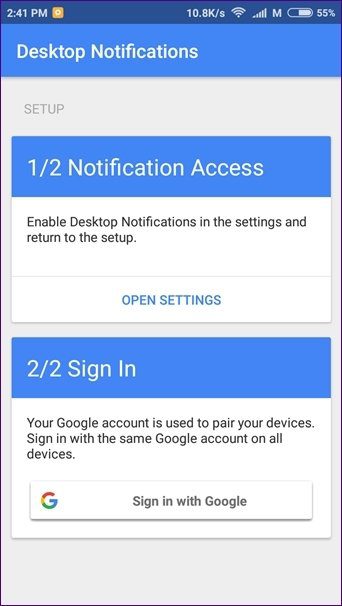
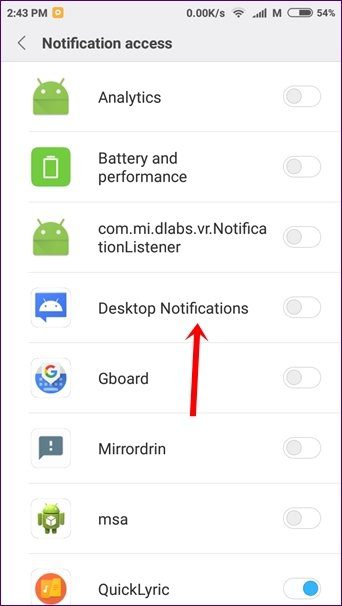
Step 3: Tap Open Settings under Notifications Access. On the next screen, turn the toggle on for Desktop Notifications. A confirmation pop up will appear. Tap Allow.
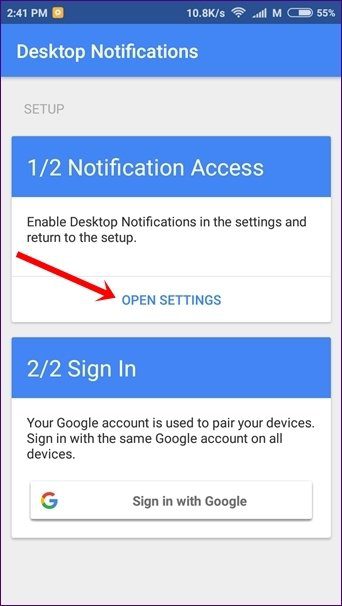
Step 4: Go back and Tap Sign in with Google. Once you have successfully completed the setup process, you will get the following screen.
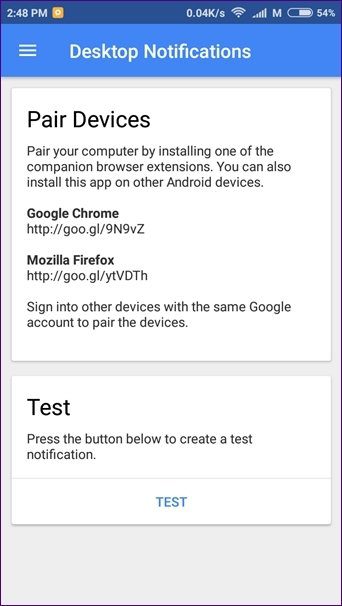
Step 5: Repeat the steps 1-4 on all Android devices. You can tap Test to send a test notification across all the connected Android gadgets.
Note:That’s all you need to know to set up this app to mirror notifications.
Thankfully, this app lets you customize the notification settings for each installed app individually. For instance, if you have Facebook installed on all your devices, the Facebook app will send notifications on all of them. Now if you use the Desktop Notifications app, you would get Facebook notifications twice. So, it’s better to disable Facebook notifications in this app.
Here’s how to turn off notification sync for individual apps.
Customize Notification Sync
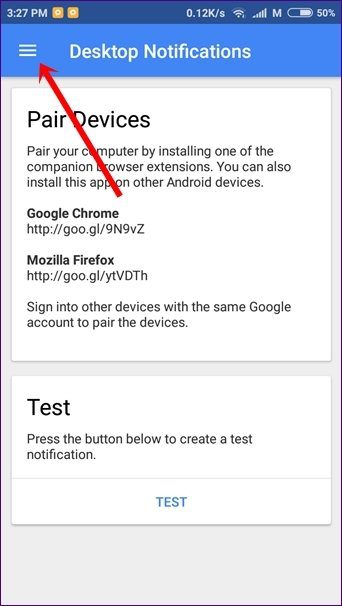
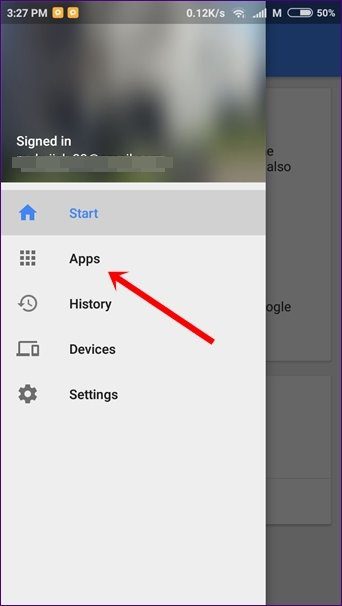
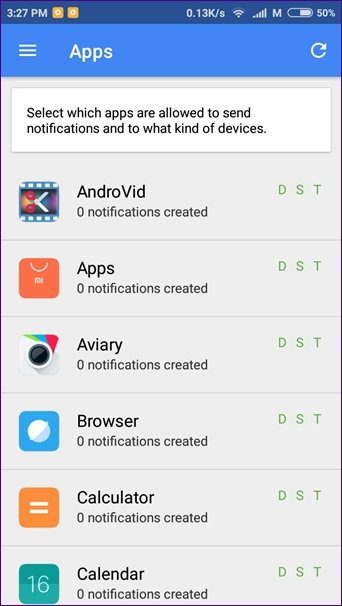
Step 1: Launch the Desktop Notifications app on the device whose notifications you want to customize. Tap the three-bar icon at the left corner to open the navigation drawer. Tap Apps. Wait for the apps to load.
Step 2: Then tap the app whose notifications you want to customize. You will get four options – Desktop (Chrome/Firefox), Android smartphones, Android tablets, and Include the content of the notification.
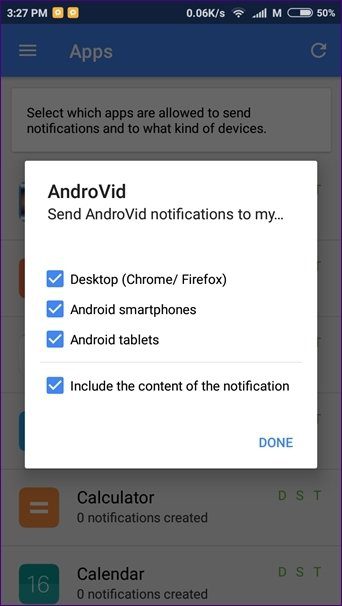
If you don’t want this app to send notification to other Android devices, deselect Android smartphones from the pop up. Similarly, deselect Android tablets and Desktop to stop notification mirroring to Android tablets and PC respectively.
Deselecting any option will affect all the devices under that label. For instance, if you deselect Android smartphones, then notification sync will stop across all the connected Android phones. As of now, you cannot remove individual device models in this app.
Also Check: How to Easily Set Reminders for All Android NotificationsNow that you know how to use and customize this app for Android phones, you might be wondering how to send notifications to PC using this app. Let’s dive in.
Send Android Notifications to PC
Step 1: Install the Desktop notifications app on your Android device. Grant it the necessary permission and sign in with your Google account as we did above.
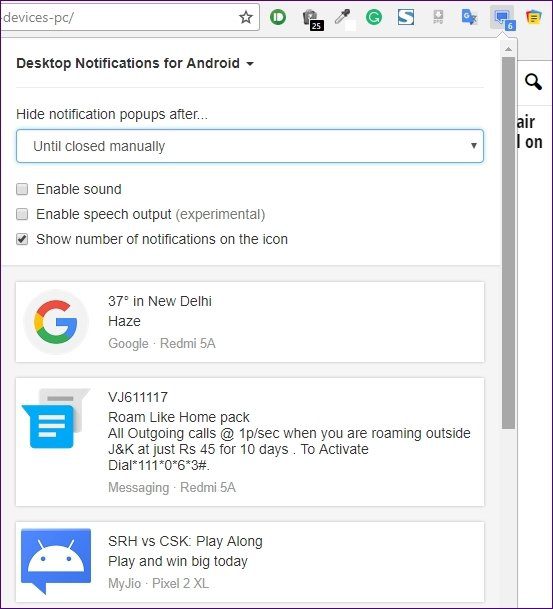
Step 2: Install the Desktop notifications extension on Chrome on your PC.
Step 3: Once installed, click its icon in the extension bar of Chrome. Then click Sign in with Google. Again, make sure to use the same Google account across all the connected devices. If you use a different account, your notifications will not sync.

You can further customize the notifications that you receive on desktop. You can enable sound for them and even change the time period for which they should be shown on your PC.
Bonus Tricks
Here are some tips and tricks that might be of help while using the app.
1. You can view the past notification history in the app. To do so, open the navigation drawer and tap History.
2. To view all your connected devices, go to Devices in the Navigation drawer.
3. To change device name, go to Settings followed by Device name.
4. To stop the notifications from appearing on a device model, you will have to sign out from that device. Go to Settings and tap Sign out.
I like it … Do you?
Since the day I found this app, it has made my life so easy. It works without any hiccups and doesn’t affect battery life. I can dismiss notifications from any device now.
I really like this app. And in case you do too, you can ditch your existing PC notification sync app. After all, you are getting best of both worlds in one app.
Was this helpful?
Last updated on 03 February, 2022
Read Next
 How to Sync Game Progress Across Different Android Devices
You got a brand new phone and you installed all your apps and games.
How to Sync Game Progress Across Different Android Devices
You got a brand new phone and you installed all your apps and games.
 How to Sync Clipboard Between Samsung Devices and Windows
Over the last few years, Microsoft's My Phone app has slowly yet steadily evolved with time.
How to Sync Clipboard Between Samsung Devices and Windows
Over the last few years, Microsoft's My Phone app has slowly yet steadily evolved with time.
 7 Best Multi-Charging Cables for Charging Multiple Devices
Most of us nowadays have multiple devices to charge.
7 Best Multi-Charging Cables for Charging Multiple Devices
Most of us nowadays have multiple devices to charge.
 How to Use Multiple Facebook Accounts on iPhone, Android
Accessing multiple Facebook accounts on the computer is very easy — you just have to open a new browser or a private window to sign in to another Facebook account
How to Use Multiple Facebook Accounts on iPhone, Android
Accessing multiple Facebook accounts on the computer is very easy — you just have to open a new browser or a private window to sign in to another Facebook account
 11 Reasons You Must Try Android Multiple Users Feature
Back in the day when owning a computer was a privilege in itself, people shared a single computer where every user had its own profile.
11 Reasons You Must Try Android Multiple Users Feature
Back in the day when owning a computer was a privilege in itself, people shared a single computer where every user had its own profile.
 How to Install Multiple Apps on Android at Once
Everytime you switch smartphones, you have to install all the apps that you had on your last Android phone all over again.
How to Install Multiple Apps on Android at Once
Everytime you switch smartphones, you have to install all the apps that you had on your last Android phone all over again.
 3 Ways to Fix Unable to Send Multiple Documents on WhatsApp on Android
Basic Fixes: Check document size: WhatsApp allows you to send documents only up to 2GB in size.
3 Ways to Fix Unable to Send Multiple Documents on WhatsApp on Android
Basic Fixes: Check document size: WhatsApp allows you to send documents only up to 2GB in size.
 How to Delete Multiple or All Text Messages on Android
Is your messages app full of old and unwanted messages?
How to Delete Multiple or All Text Messages on Android
Is your messages app full of old and unwanted messages?
The article above may contain affiliate links which help support Guiding Tech. The content remains unbiased and authentic and will never affect our editorial integrity.