Google Docs is an amazing online alternative to Microsoft Word. The web-based word processor provides many cool features with smart styling and editing tools. With a working network connection, you can create and edit documents on-the-go, even with your smartphone.

Most of us tend to work a variety of file and we keep trying out the new features to suit our requirements. However, while playing with these features, we mess up with the settings. To change it back to the default values, we need to reset them. In this post, we shall tell you how to reset the major settings of Google Docs such as margins, numbering, formatting, etc.
Let’s get started.
Reset Numbering
While creating a numbered list, you would want to break the list and start from a new number to get it right. Let’s say you are creating a question paper with multiple headings. The first section will have four questions. Now if you want the numbering of the second section to start from five, you will have to restart the numbering.
Here’s how to do it.
Step 1: In the Google Docs page, first create a numbered list by clicking on the list icon.
Step 2: To reset the numbering, double-click on the list number. Then with the number selected, right-click on it.

Step 3: A pop-up window will appear, click on Restart numbering.
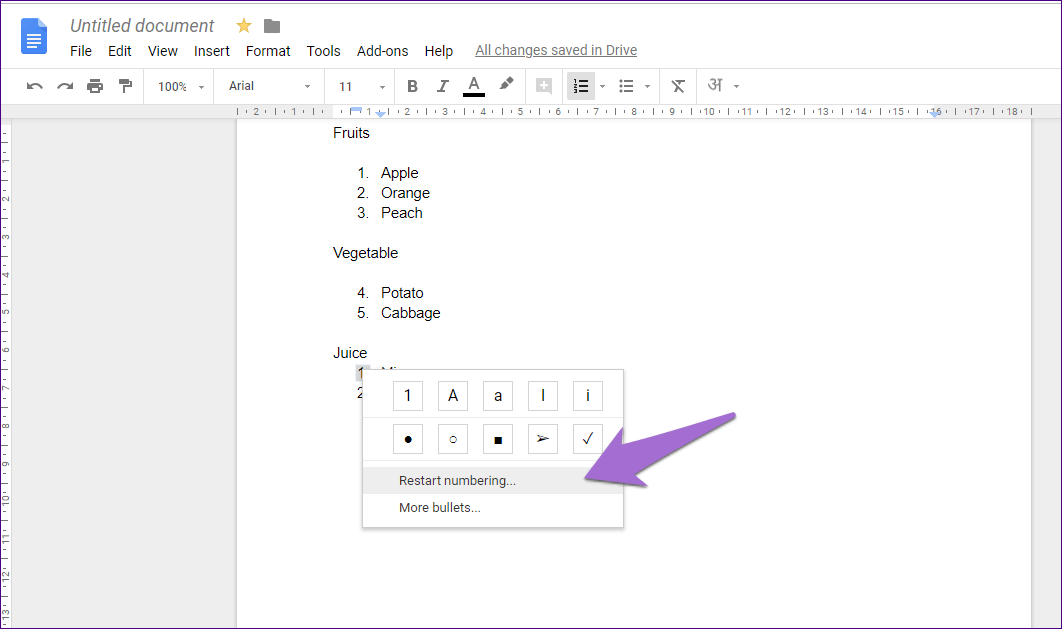
Step 4: Enter the number from where you want to start the list.

Alternatively, move your cursor to the start of the list item and right-click on it. Then from the menu, select Reset numbering and set the number.


Reset Formatting
There are two ways to reset the text formatting in Google Docs. One is using the Clear Formatting option, and the other one is the Paste without formatting option.
The former one will clear the font style, but it won’t match it to the document style. Further, it also won’t remove images and links from the text. On the other hand, the second option will remove all the links and pictures from the text and also match it to the font used in the document body. It removes all formatting and leaves you with simple text.
To remove all formatting, select and copy the text, then right-click and choose Paste without formatting from the menu.

To simply clear formatting, select the text, then click the Format option and choose Clear formatting.
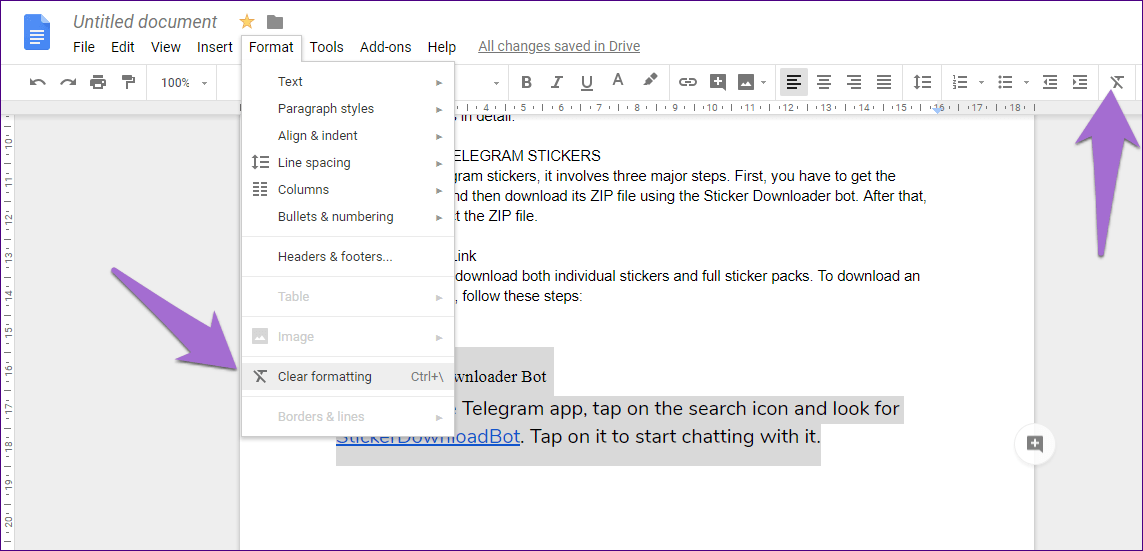
Alternatively, click on the Clear formatting icon present in the toolbar.
Reset Printing
If you are facing an issue while printing a page from Google Docs and changing the settings haven’t solved your problem, you can try resetting the printer settings.
Since Google Docs uses the printer settings for Chrome, you need to reset that. To do so, follow these steps:
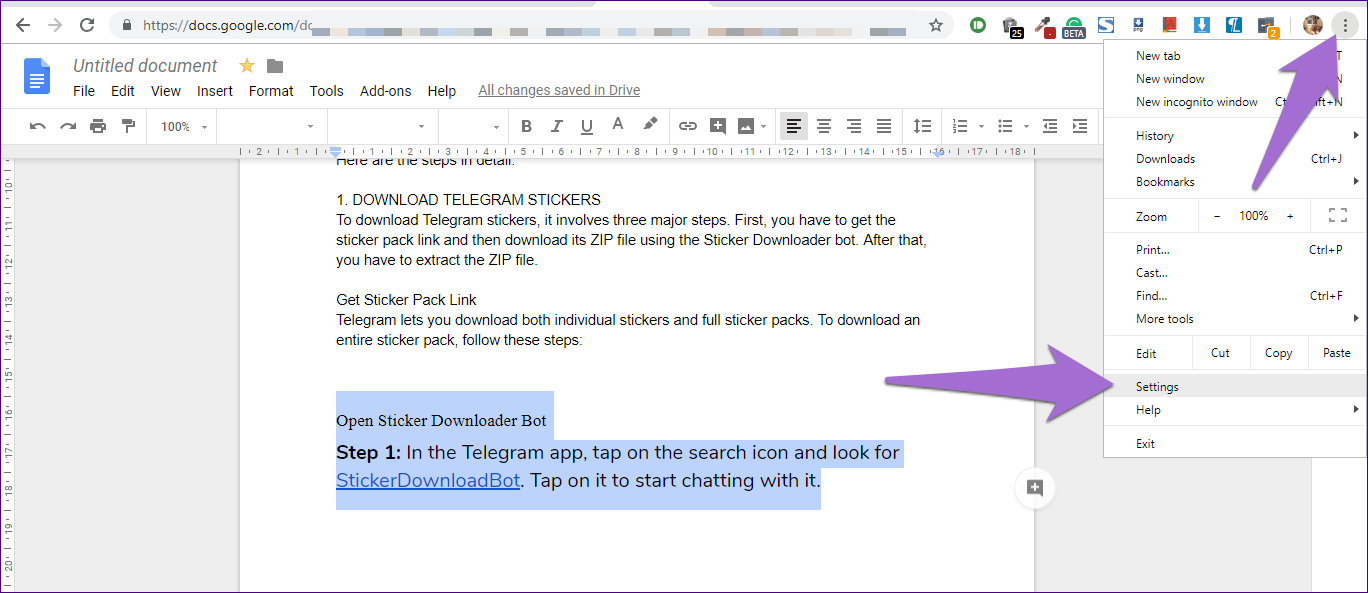
Step 1: Click on the three-dot icon present at the top-right corner of Chrome. Then select Settings from the menu.
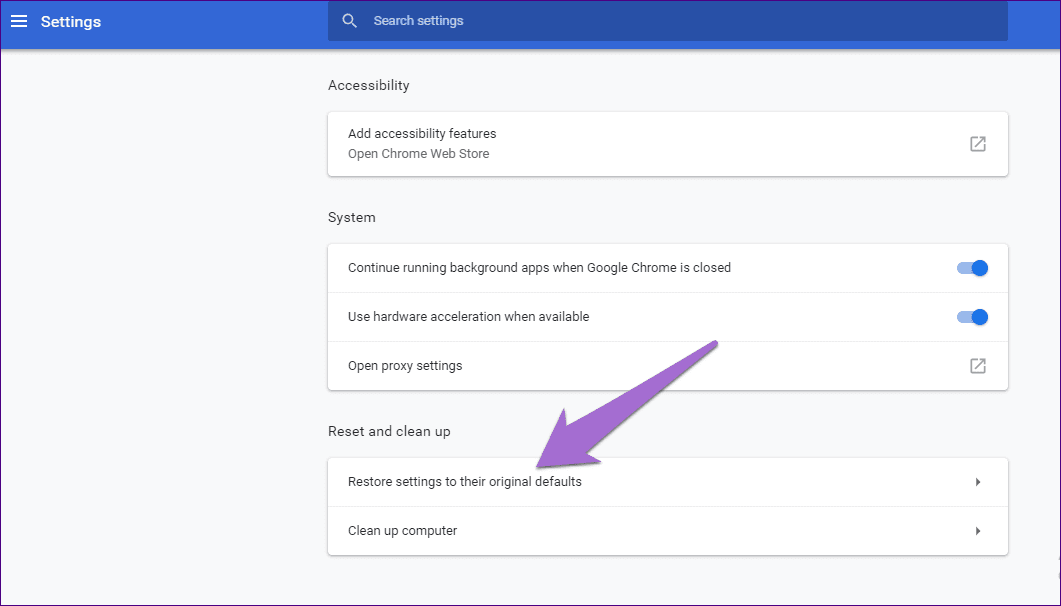
Step 2: Scroll down and click on Advanced.

Step 3: Again scroll down and click on Restore settings to their original defaults. A pop-up will appear asking you to confirm. Click on Reset Settings.

Reset Dictionary
Similar to Microsoft Word, Google Docs comes with its native dictionary where you can add new words. However, sometimes a lot of wrong words are added to the dictionary. In that case, one may want to reset the dictionary.
Sadly, that’s not possible. You cannot delete all new words from the dictionary at once. However, you can remove one word at a time.
Here’s how to go about it.
Step 1: Open a document in Google Docs. Then click on the Tools option.

Step 2: Click on Spelling and then select the Personal dictionary.

Step 3: On the Personal dictionary screen, click on the cross icon next to the words that you want to remove from Google Docs.

Finally, hit the Save button.
Reset Margins
To reset margins, follow the steps:
Step 1: Open a document and then click on the File option. Select Page setup.

Step 2: The Page setup window will open. Enter the new margins for your document. If you want the new margins to be your default margins, click on the Set as the default option. Finally, hit Save.

Reset Header and Footers
To reset Header and footer margins, follow these steps:
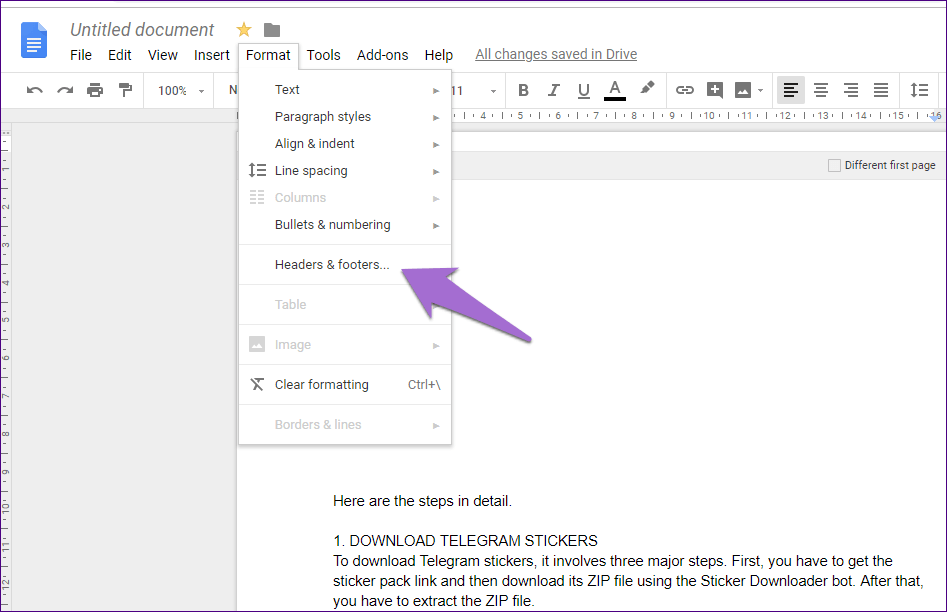
Step 1: In the Google Docs document, click on the Format option and select Headers and Footers.
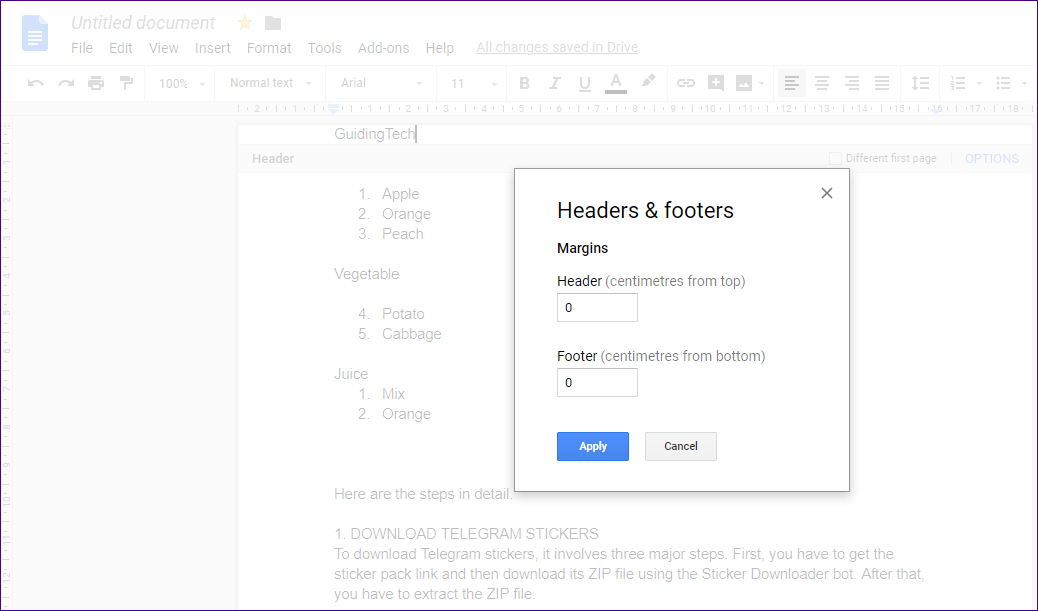
Step 2: In the window that opens, set the header and footer margins as per your need.
Reset Paragraph Styles
Google Docs also lets you reset your paragraph styles. You don’t have to clear all the formatting to achieve that. You get a dedicated feature for it.
Here’s how to do it.
Step 1: In the Google Docs document, click on the Format option and select Paragraph styles.

Step 2: Under Paragraph styles, go to Options and choose Reset styles.

Bring it Back
It’s a good thing to explore different settings and see what they do. Now even if you mess up with a setting, you know how to restore it. That way you can restore the balance and continue using Google Docs as you deem fit.
Google Docs is a part of Google Drive. Many users have switched from other cloud services like Dropbox to Google Drive. If you are also thinking about it, check out my colleague’s experience of moving from Dropbox to Google Drive.
Was this helpful?
Last updated on 13 July, 2021
Read Next
 How to Reset iPhone and What Happens When You Reset iPhone
No matter the trouble, whether 5G is not working, the iPhone is heating up, or the phone keeps losing network connection, resetting the iPhone is the ultimate fix.
How to Reset iPhone and What Happens When You Reset iPhone
No matter the trouble, whether 5G is not working, the iPhone is heating up, or the phone keeps losing network connection, resetting the iPhone is the ultimate fix.
 How to Reset Display Settings to Default on Windows 10
Often a software update might end up messing up your display settings on a Windows 10 PC.
How to Reset Display Settings to Default on Windows 10
Often a software update might end up messing up your display settings on a Windows 10 PC.
 What Happens When You Reset Network Settings on Windows 10
Windows 10 often suffers from numerous network connection issues.
What Happens When You Reset Network Settings on Windows 10
Windows 10 often suffers from numerous network connection issues.
 Top 5 Ways to Reset Firewall Settings in Windows 11
Windows firewall settings help you manage your computer’s security.
Top 5 Ways to Reset Firewall Settings in Windows 11
Windows firewall settings help you manage your computer’s security.
 Top 2 Ways to Reset Local Group Policy Settings on Windows 11
The Group Policy Editor is a useful tool for making system-wide changes on PCs running Windows 11 Professional, Enterprise, and Education editions.
Top 2 Ways to Reset Local Group Policy Settings on Windows 11
The Group Policy Editor is a useful tool for making system-wide changes on PCs running Windows 11 Professional, Enterprise, and Education editions.
 How to Convert Google Forms to PDF, Google Docs, or Word
There are multiple ways to share Google Forms.
How to Convert Google Forms to PDF, Google Docs, or Word
There are multiple ways to share Google Forms.
 How to Insert a Date Picker in Google Sheets and Google Docs
Google Sheets and Google Docs provide a free, online alternative to Microsoft Office, along with unique features.
How to Insert a Date Picker in Google Sheets and Google Docs
Google Sheets and Google Docs provide a free, online alternative to Microsoft Office, along with unique features.
 Top 4 Ways to Fix Google Docs Voice Typing Not Working
Voice Typing is one of the many hidden features of Google Docs that people are yet to use regularly.
Top 4 Ways to Fix Google Docs Voice Typing Not Working
Voice Typing is one of the many hidden features of Google Docs that people are yet to use regularly.
The article above may contain affiliate links which help support Guiding Tech. The content remains unbiased and authentic and will never affect our editorial integrity.