Face swaps have been a popular phenomenon on the Internet lately. People are really getting a kick out of being able to swap out one face with another for photo and video. Thanks to Snapchat and other third-party apps, doing so is practically automatic. They build in the technology to detect faces and make the switch.
If you want, you can also perform a face swap with just about anyone in a standard photo editor. I guarantee it’ll work even better and look even more accurate, yet it’s not very time-consuming at all. All you need is some decent photo editing software like Photoshop or Pixelmator.
Note: In this tutorial, I’ll be using Pixelmator. However, the tools necessary for a face swap are in most photo editing applications. If you’re using something else like GIMPFace Swapping
For the tutorial, I found a free stock photo of three people on Imagebase. You can download it there too if you want to practice using the same image.
Important:
Open the photo you want to use in your preferred photo editor. Again, I’m using Pixelmator. Start by duplicating the layer.
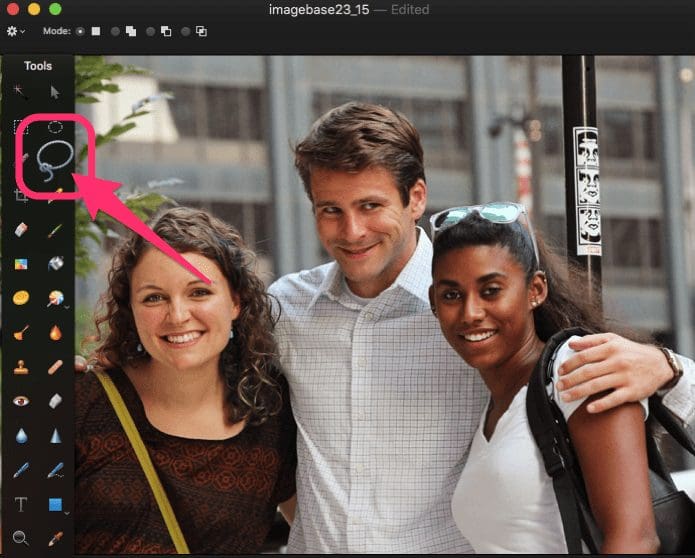
Then use the Selection tool. The best one for this use is the Lasso, so you can draw a rough selection around one of the faces. It doesn’t have to be perfect, and it definitely shouldn’t be larger than the face itself, in fact, try to get the selection a bit smaller than the entire face.
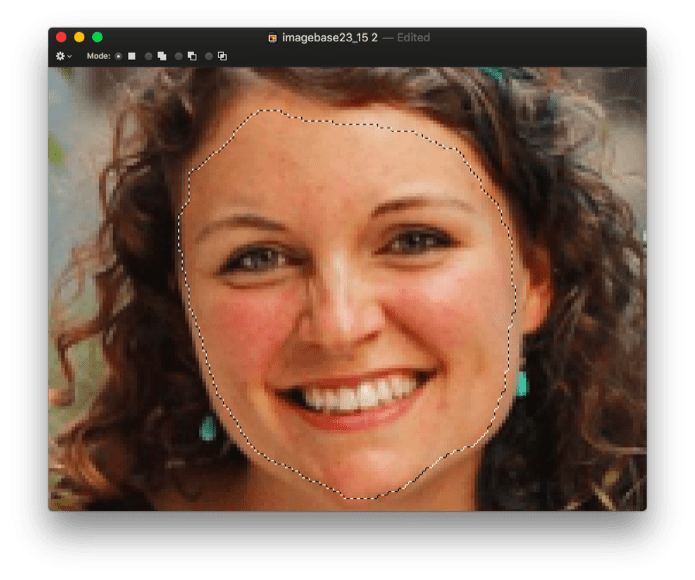
If you have a Refine Selection or similar feature, use that to smooth out the curves of your selection and enable feathering, which will blur the edges of the selection a bit. The amount you’ll need depends on the size of the photo, but for this one, I’m going with about 20 percent.

Copy and paste the face into a new, separate layer. Now repeat that entire selection process for the other face and also copy and paste that face into its own layer.
You should now have two identical layers with the full photo, one layer with one face and one layer with another.

Now here’s the fun part. You’re going to drag over one face in its own layer on top of the other face. If you’re using a good photo with two subjects at the same angle and distance, it should look pretty decent right off the bat. If not, you’ll have to play around with it to achieve a more professional result, but what you’ll have to do depends on your own situation.
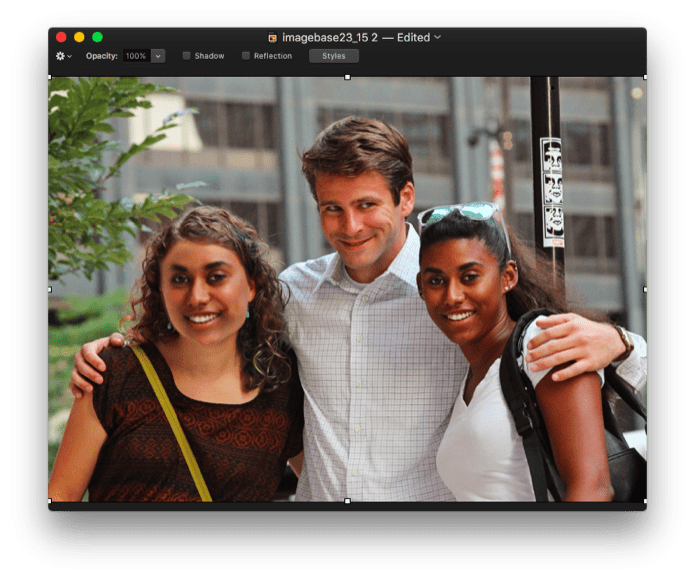
Some tools to consider: resize the face/selection to adjust to the new subject and rotate the face to be in line with the subject’s own angle.
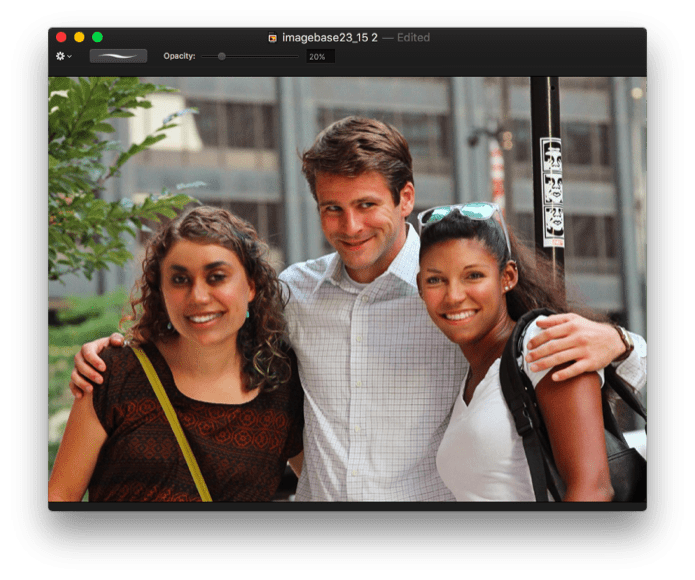
Optionally, use a very soft eraser to blend in facial features with the new subject’s skin color and shadows. Even adjust the opacity down to about 30 or 35 percent, at first, to make sure the lighting details from face to face aren’t accentuated. This part isn’t necessary but the blending tends to make the photo look more realistic instead of like a face pasted onto another.
Repeat this same process for the other face.
And you’re done. Keep in mind that there’s no magical way to do this so that it looks perfect every time. The end result will still probably look moderately unrealistic, but just keep refining using the tips above until it’s believable (and humorous) enough to you.
ALSO SEE: A Guide to Irfanview: Desktop Tool For All Your Image Editing Needs
Was this helpful?
Last updated on 03 February, 2022
Read Next
 11 Best Animated Watch Faces for Samsung Galaxy Watch
Watch faces enhance the look of any smartwatch.
11 Best Animated Watch Faces for Samsung Galaxy Watch
Watch faces enhance the look of any smartwatch.
 How to Install Custom Watch Faces on Amazfit Watches
The Huami Amazfit watches may not be as slick or feature-rich as their $399 counterparts (like Apple Watch or the Galaxy Watch), but they sure pack a punch.
How to Install Custom Watch Faces on Amazfit Watches
The Huami Amazfit watches may not be as slick or feature-rich as their $399 counterparts (like Apple Watch or the Galaxy Watch), but they sure pack a punch.
 How to Search Pictures by Faces in Google Photos
Note: We've written instructions for the Google Photos app on iPhone, however, they remain the same for the Android and the web apps as well.
How to Search Pictures by Faces in Google Photos
Note: We've written instructions for the Google Photos app on iPhone, however, they remain the same for the Android and the web apps as well.
 How to Add Faces in Photos App on iPhone, iPad and Mac
The Photos app is the default option for viewing your photos and videos on iPhone, iPad, and Mac.
How to Add Faces in Photos App on iPhone, iPad and Mac
The Photos app is the default option for viewing your photos and videos on iPhone, iPad, and Mac.
 Top 6 Fixes for Apple Photos Not Recognizing Faces on iPhone
One of the standout features of the Apple Photos app is its ability to recognize and group photos by faces.
Top 6 Fixes for Apple Photos Not Recognizing Faces on iPhone
One of the standout features of the Apple Photos app is its ability to recognize and group photos by faces.
 7 Best Free AI Apps for Android: AI Assistant, Photo Editor, and More
Mobile applications have been around for almost as long as our devices.
7 Best Free AI Apps for Android: AI Assistant, Photo Editor, and More
Mobile applications have been around for almost as long as our devices.
 4 Ways to Fix Group Policy Editor (gpedit) Missing on Windows 10
The Group Policy Editor, or GPE as it is popularly called, is a feature limited to Windows Pro and Enterprise editions.
4 Ways to Fix Group Policy Editor (gpedit) Missing on Windows 10
The Group Policy Editor, or GPE as it is popularly called, is a feature limited to Windows Pro and Enterprise editions.
 How to Edit Reels Using Instagram’s Built-In Editor
Ever since TikTok introduced short-form content, the internet has never been the same.
How to Edit Reels Using Instagram’s Built-In Editor
Ever since TikTok introduced short-form content, the internet has never been the same.
The article above may contain affiliate links which help support Guiding Tech. The content remains unbiased and authentic and will never affect our editorial integrity.