Sometimes, simple photos seem boring. Suppose, you want to create a birthday video for a friend, but you don’t have the actual video footage. In situations like those, you can take the help of the photos.

That is, you can create a video from still pictures by adding music and effects. You may be wondering what gigantic tool you would need to download to create such a video. Well, get ready to be surprised for you don’t have to install anything.
The app that lets you create this is pre-installed on your Windows 10 computer. We are talking about the Photos app. Yes, the app comes with an amazing video editor that will help you in making a video slideshow with pictures.
So, let’s start the fun.
Create Videos by Adding Pictures and Audio
You can make the video in two ways in the Photos app — automatic and manual method.
1. Create a Video Automatically in the Photos App
If you don’t want to spend much time on creating a video, Microsoft takes care of that. All you need to do is select the photos, and it will automatically create a video for you.
Here’s how to go about it.
Step 1: Launch the Photos app on your Windows 10 PC.
Step 2: If your pictures are visible in the Photos app, move to step 3 directly. If you don’t see the pictures, click on Import at the top-left corner, followed by From a folder. Then add the folder where your pictures are located. Don’t worry if it has extra pictures or if it is missing some. We can always add and remove them later.

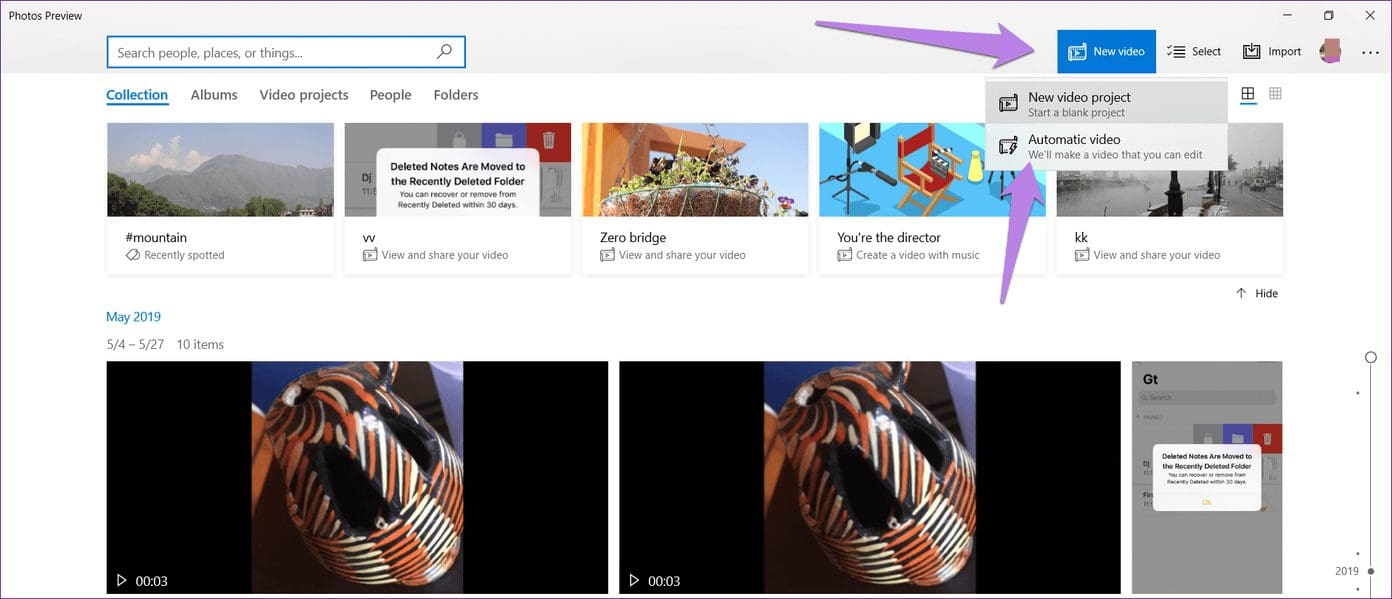
Step 3: Once you have your photos, click on the New video option present at the top. From the menu, select Automatic video.
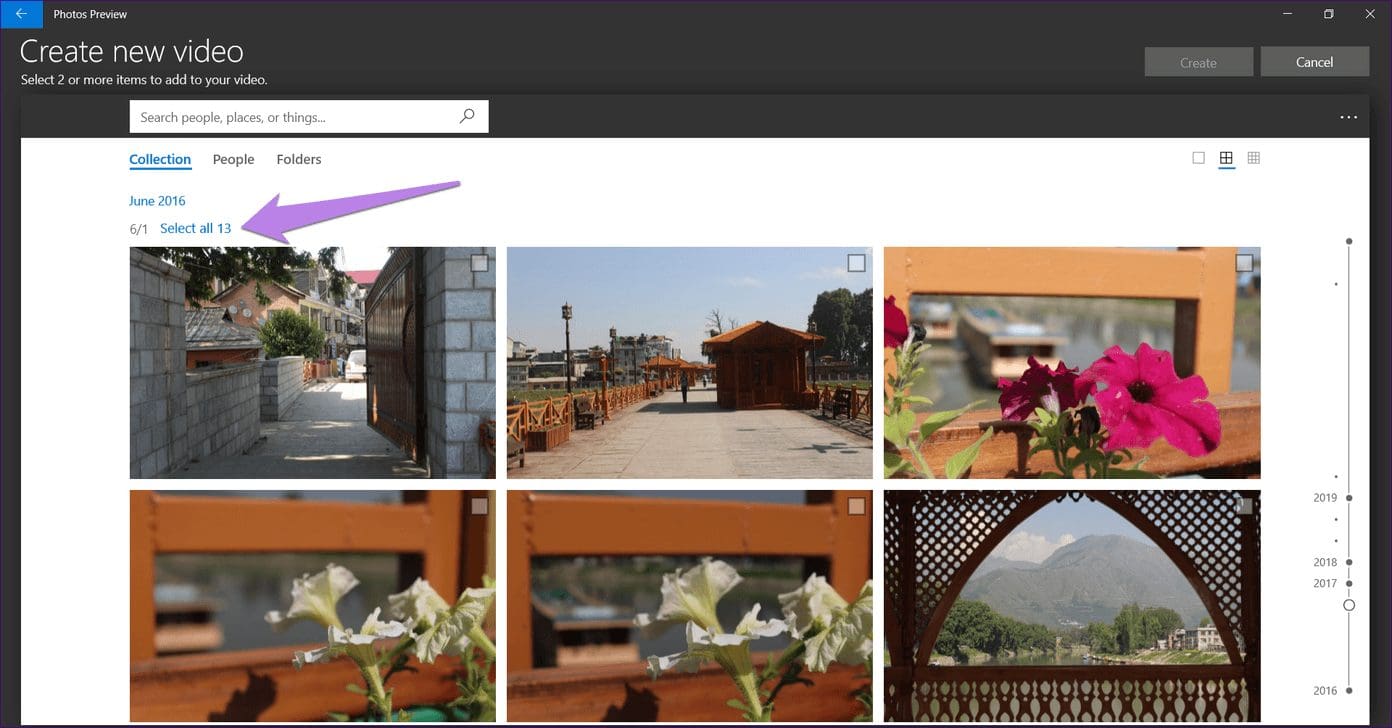
Step 4: Now, select the photos from which you want to make a video. You can either select the photos individually by clicking on them or use the Select all feature.
Step 5: Click on Create, once you have selected the photos.

Step 6: You will be asked to name your video. Give it an appropriate name. That will be used as the title of your video. You can rename it later.

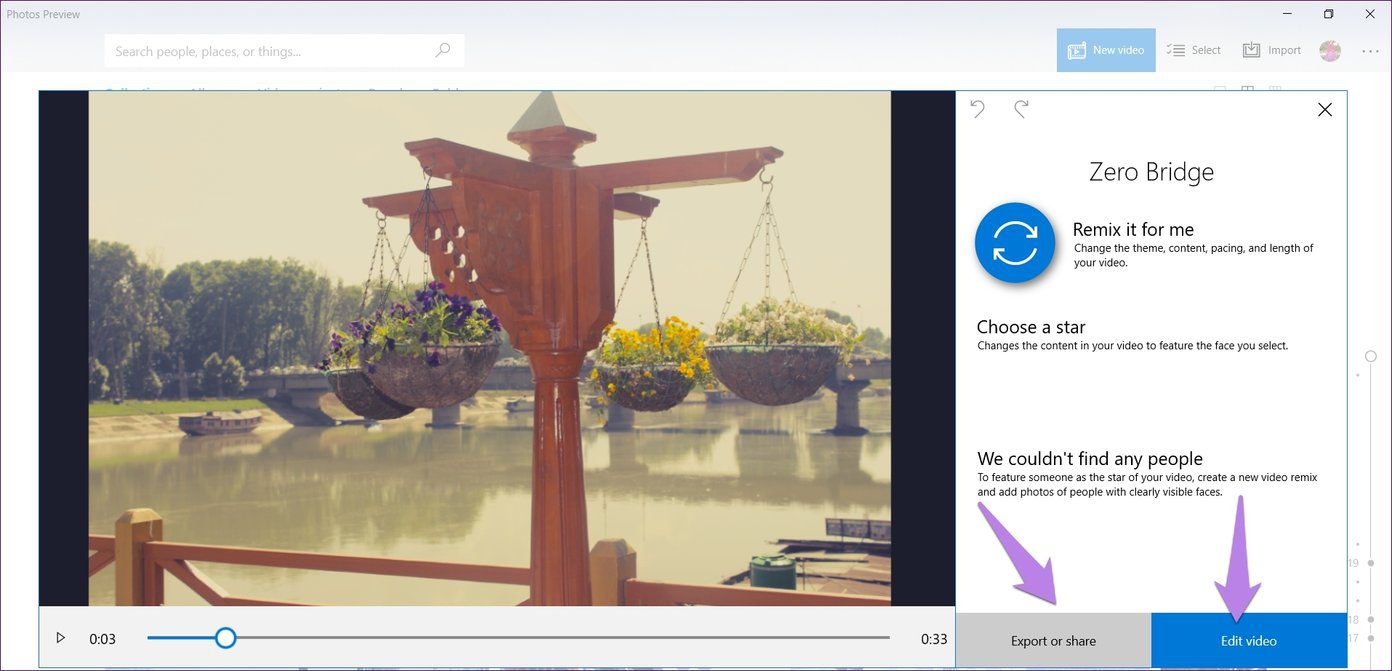
Step 7: Your video with music will be ready. Press the play icon to start playing it. If you don’t like the composition, use the remix button to try other themes with a different music and text style.

If you are satisfied with what Microsoft offered you, press the Export or Share button to save the video. However, if you want to change something in the video, click on Edit video (more on it below).
2. Create a Video from Scratch in the Photos App
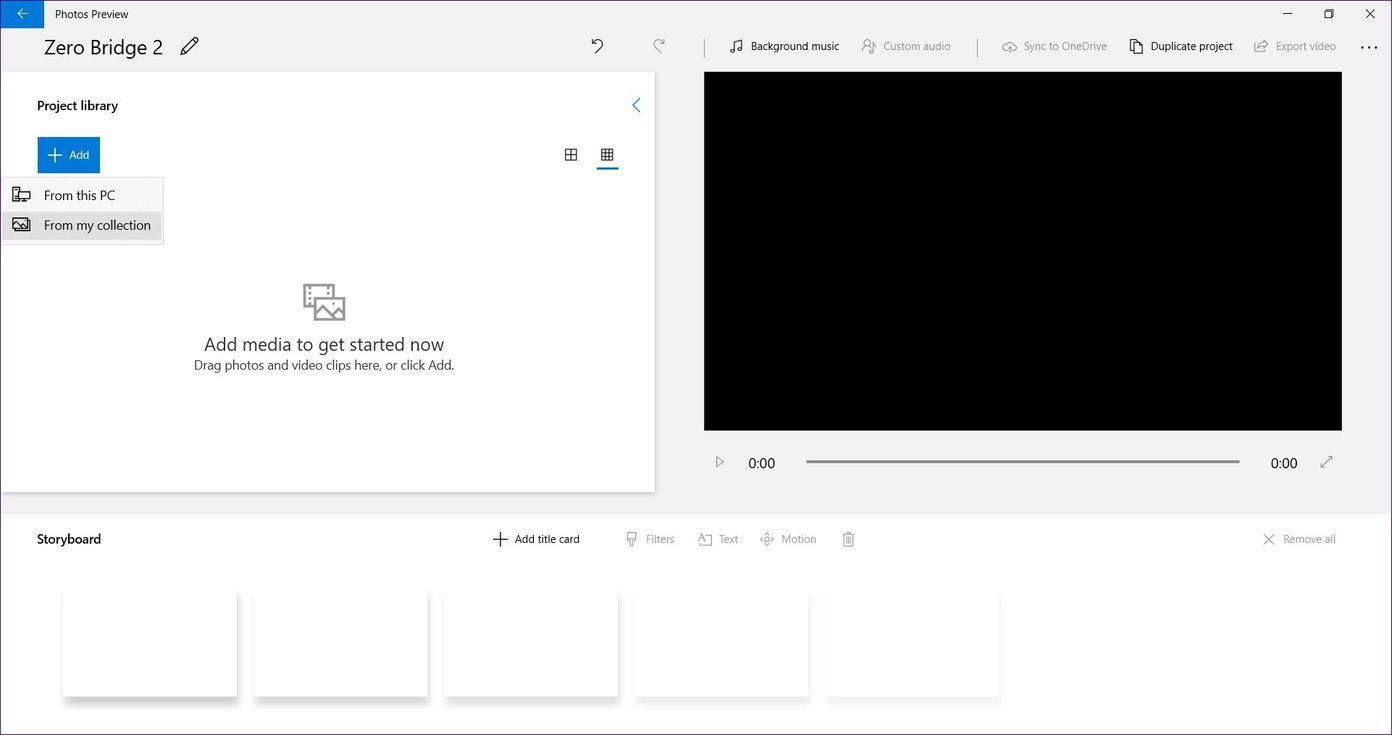
In case you want to style the video on our own, click on the New video option followed by New video project on the home screen of the Photos app. Give a name to your video.

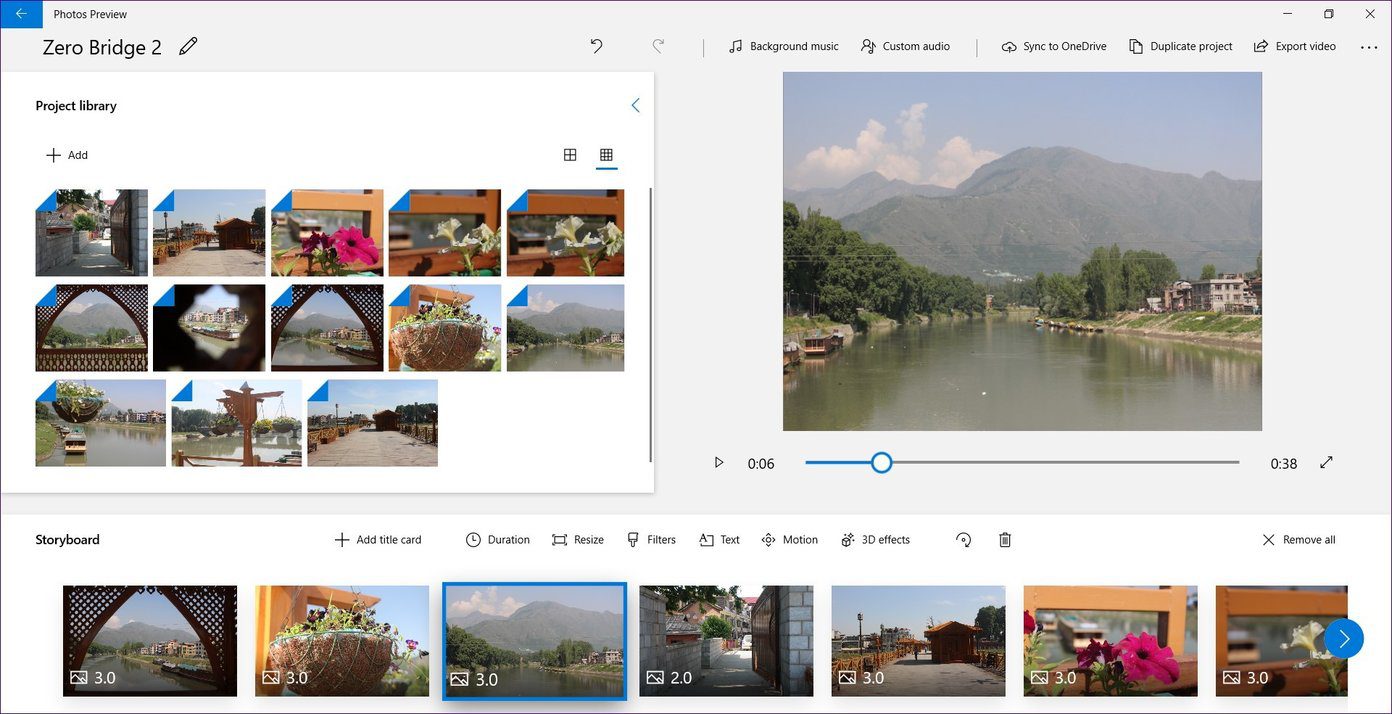
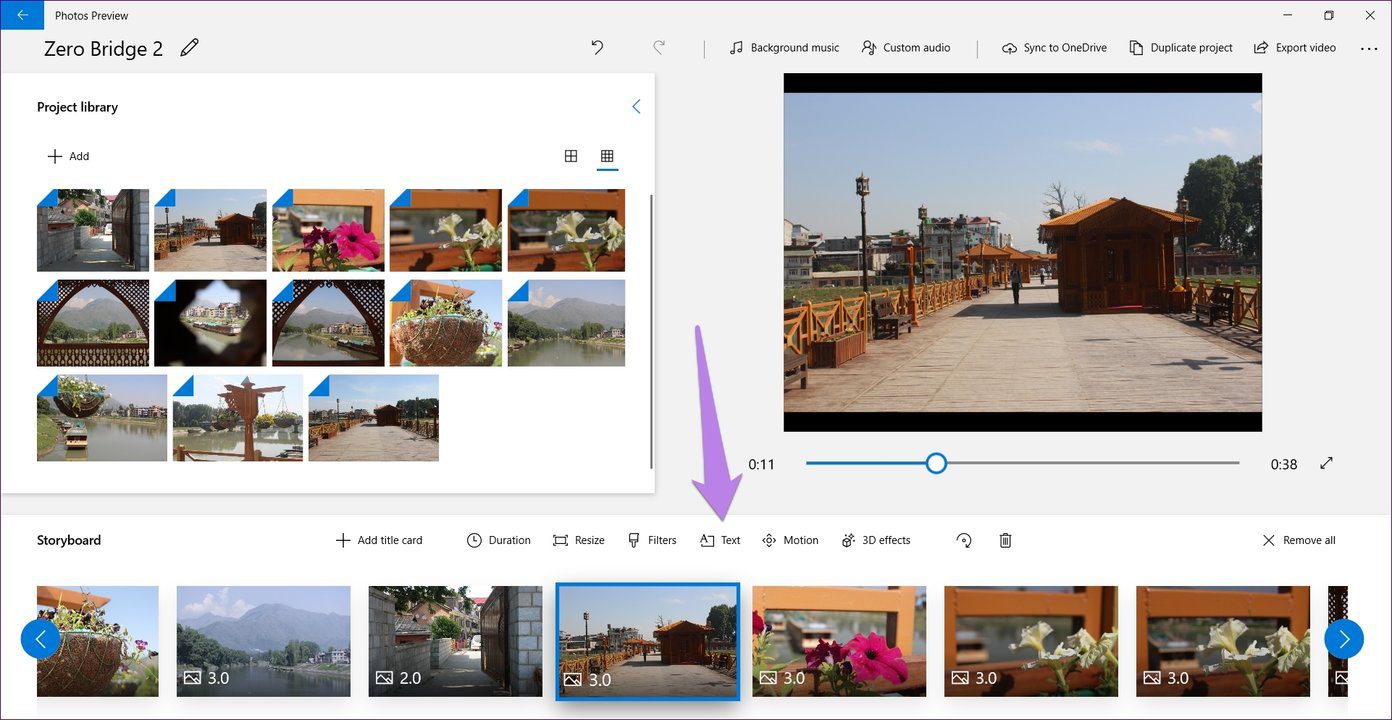
You will now be offered a blank template with different sections — project library, storyboard, and video preview. While the project library will house all the selected photos and videos, the storyboard will only have the ones that you want in your video. You can always drag and drop files from the project library to your storyboard.

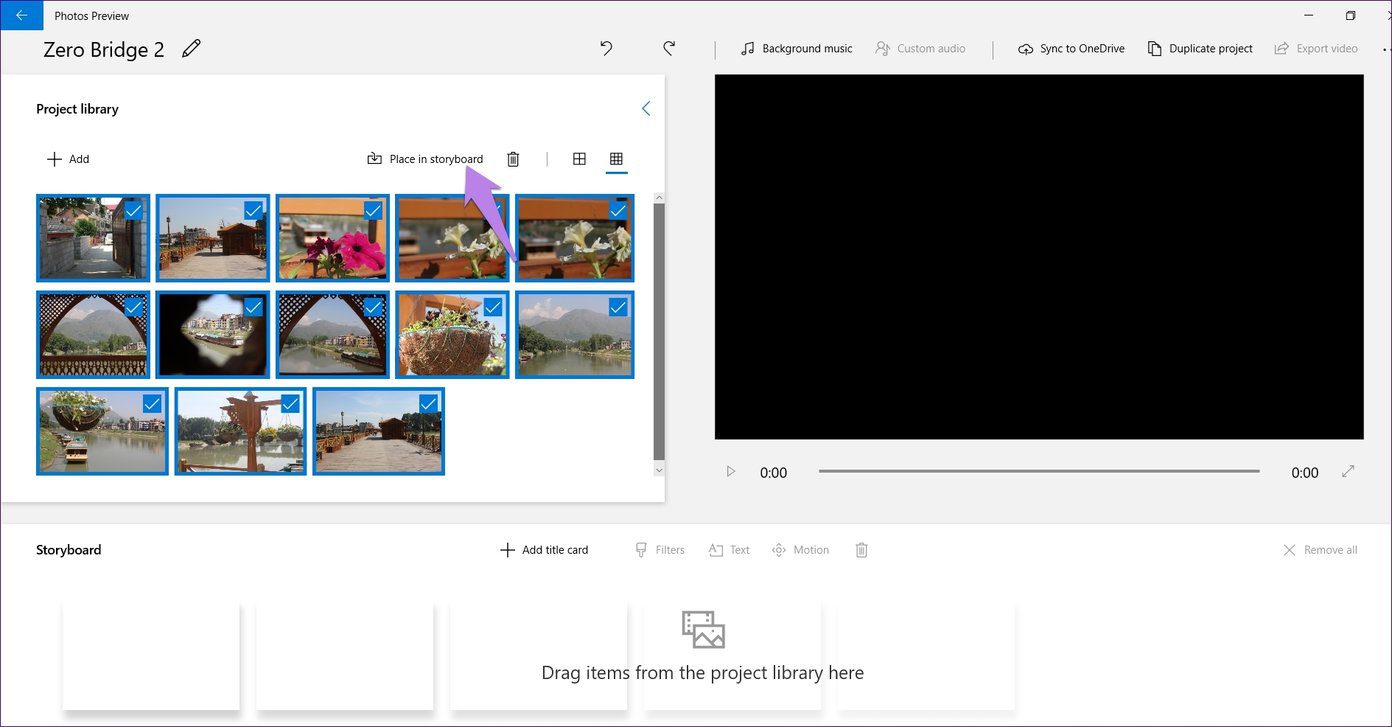
Now, click on the Add button under the Project library to add photos and videos. If the pictures are available in the Photos app, click on From my collection. Otherwise, select From this PC and navigate to the files that you want to add.
If you want the selected files to be added to the storyboard, click on Place in storyboard option. Alternatively, select the files and drag them to the storyboard. Once you do that, you can click on the play button and your video will start playing. However, it will not have any effects or sound. To add those, you have to edit the video.
Edit a Video
Here are some parameters that can be modified:
Duration of Each Clip
By default, each photo stays on the screen in the video for 3 seconds indicated by the text 3.0 on each photo.
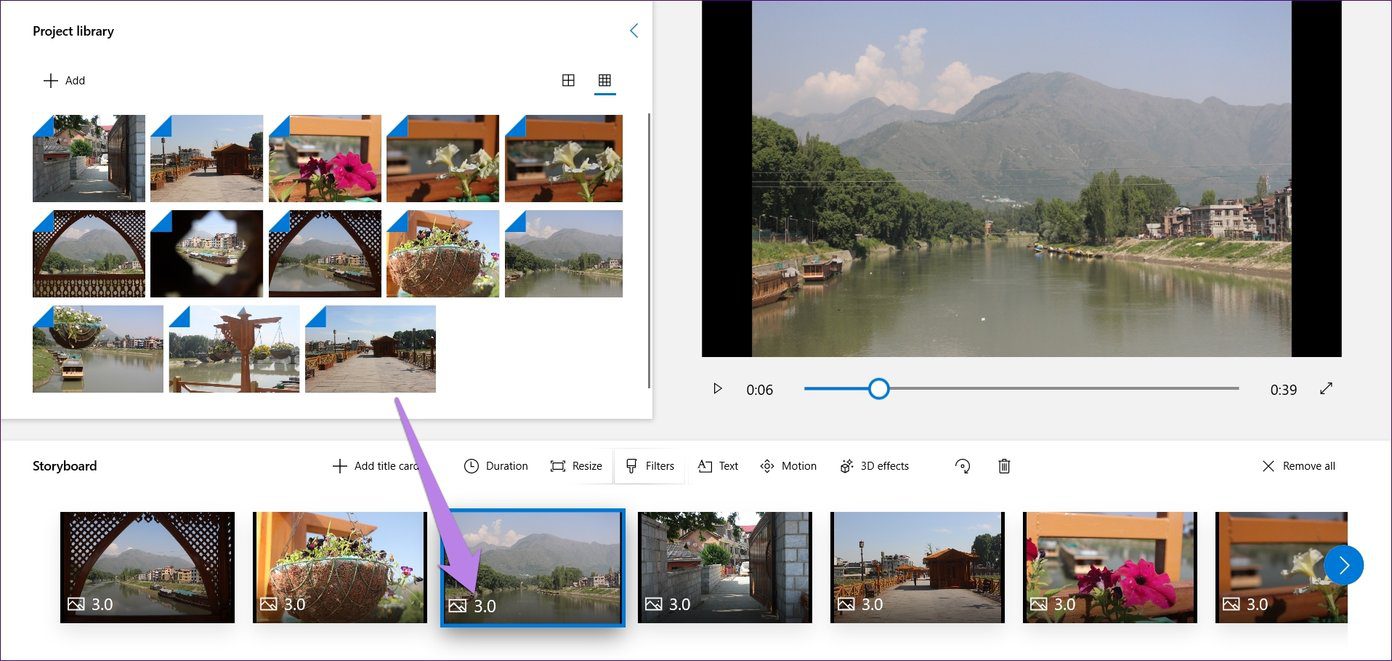
You can increase or decrease the time for each clip. For that, right-click on each photo in the storyboard and select Duration. Alternatively, click on the photo once and hit the Duration option.

Then, choose the duration in the pop-up dialog box. You can also set a custom time. Sadly, you will need to do it individually for all files.

Resize Photos
If the size of the photo doesn’t match the orientation, it will have black borders around it. To remove those, right-click on the photo and select Resize followed by Remove black bars. The photo will be zoomed a bit to remove the border.

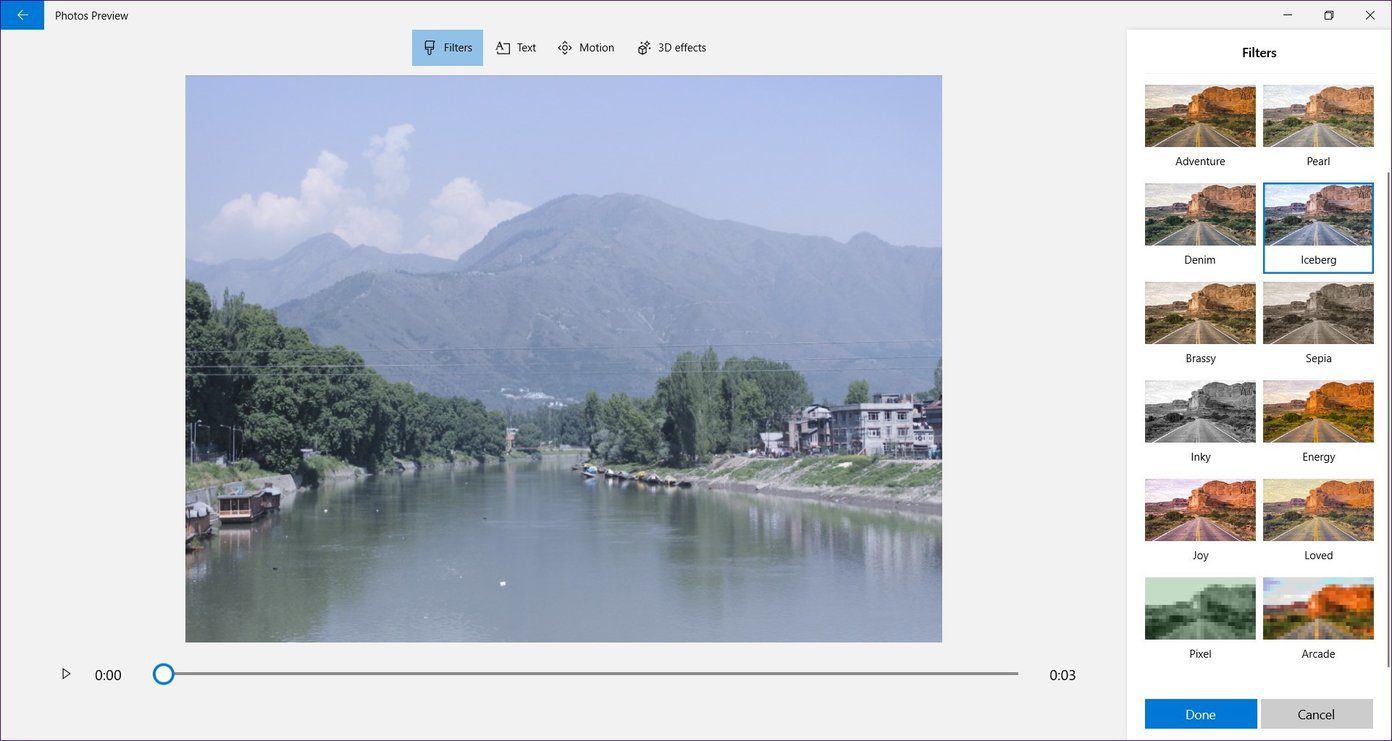
Add Filters
The video editor gives you the ability to add effects to your photos while creating a video. To add an effect to a photo, click on it and hit the Filters option. Alternatively, right-click on the photo and select Edit followed by Filters.

You will be taken to the editing screen. Click on a filter to apply it to the photo. Press Done to save it. Repeat the steps for other pictures.
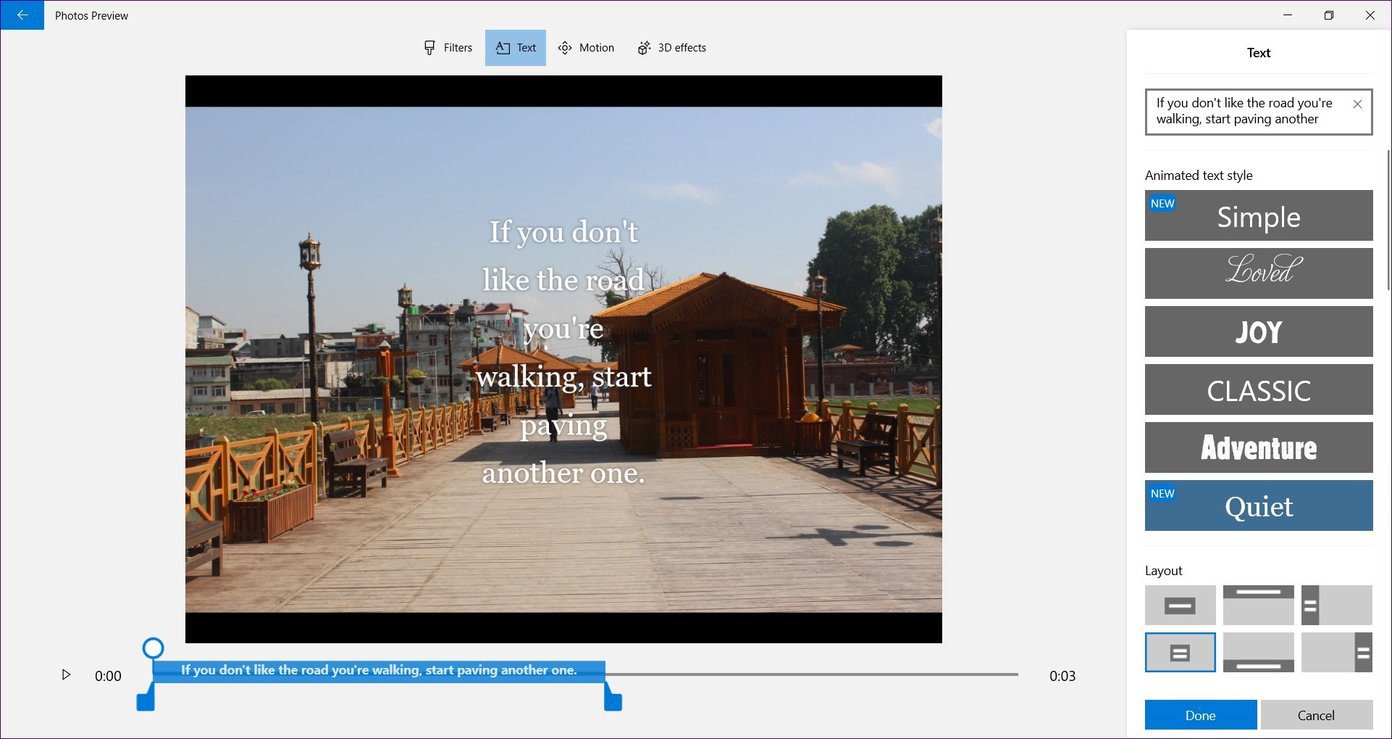
Add Text
To add text to your photo, click on it, and hit the Text option.
On the next screen, type your text in the text box on the right side. Then select the text style and position. Once you add the text, you can even change the duration of the text by using the blue slider at the bottom. Hit Done to save it.
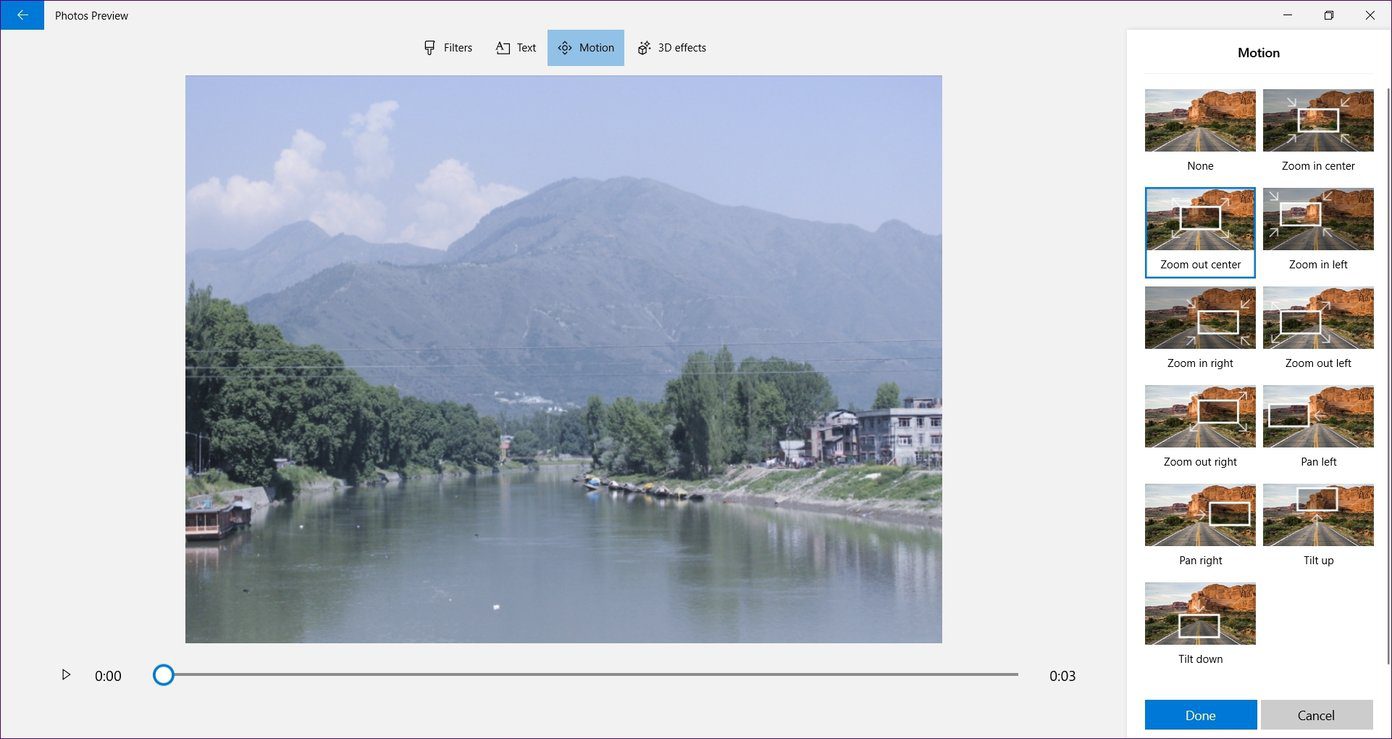
Add Camera Motion
Adding a camera motion is important if you are creating videos using only pictures and want to give your video a realistic feel. To do so, click on the photo and hit the Motion option. Then choose the motion effect on the next screen. Hit Done to save changes.

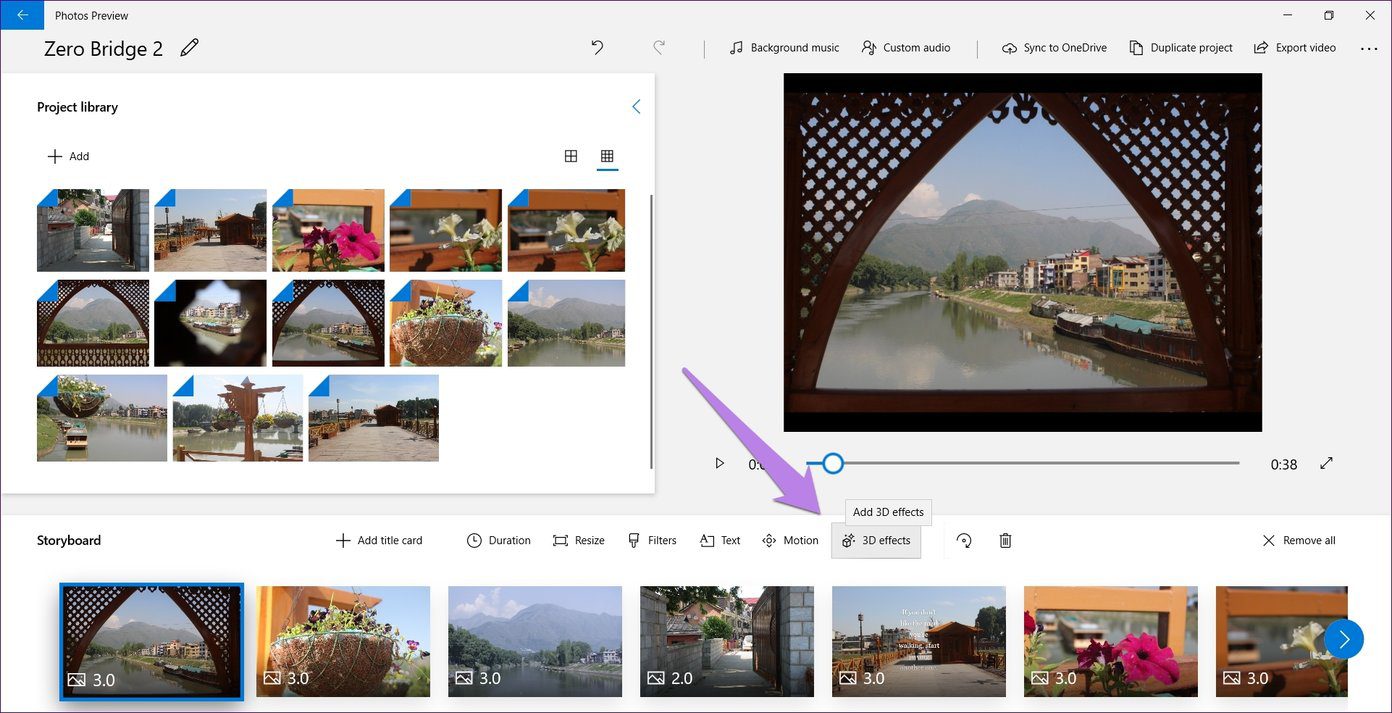
Add 3D Effects
To further enhance your videos, you can add 3D effects to them such as fireworks, breaking news, leaves, etc. For that, click on the photo and press the 3D effects option.
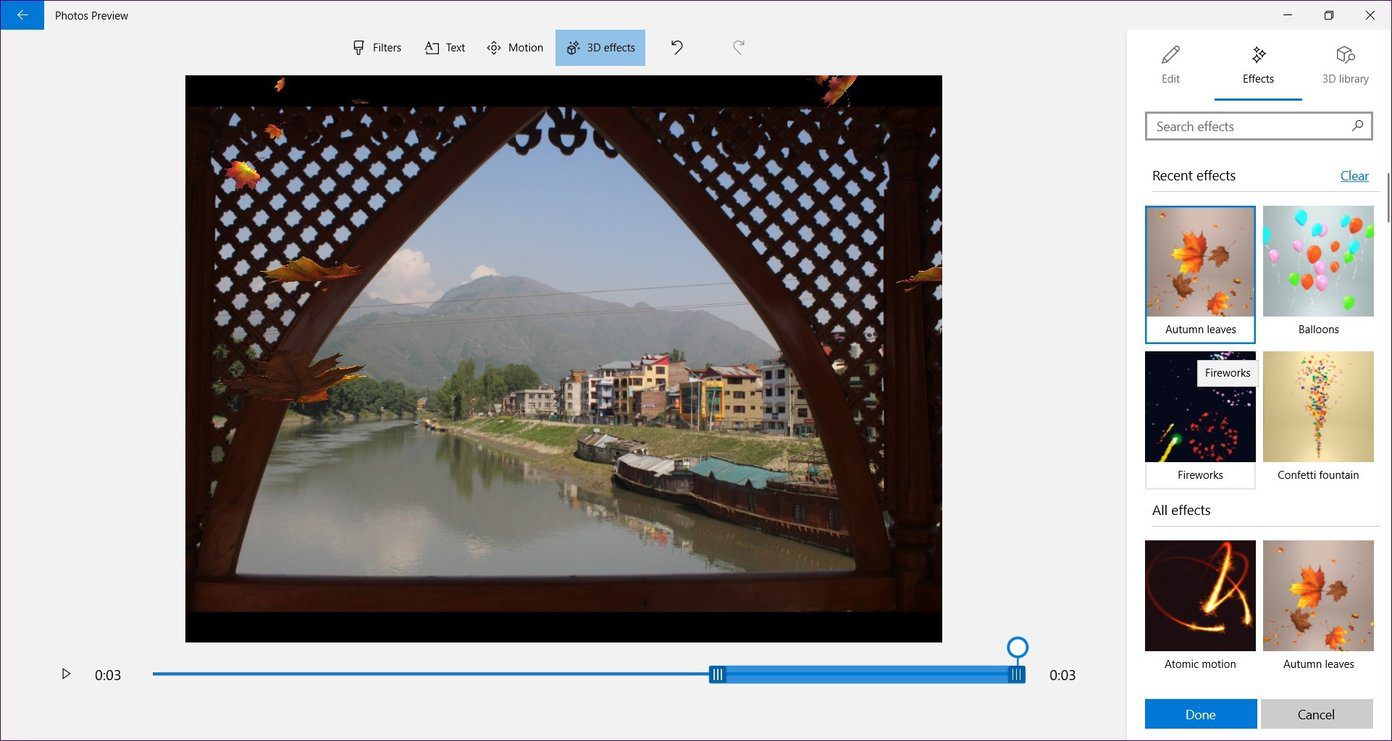
On the next screen, choose the 3D effect of your choice to add it to the picture. Use the slider at the bottom to change the duration of the effect. Click on the Edit tab in the right sidebar to change the volume of the effect. Press Done to apply the changes.
Change Orientation
If you are making the video for Instagram, then you will need it to be in 4:3 ratio. In the Photos app, you can switch between 16:9, 4:3, portrait, and landscape orientations. For that, click on the three-dot icon at the top-right corner and hover over the orientation option. You can then choose the one you want.

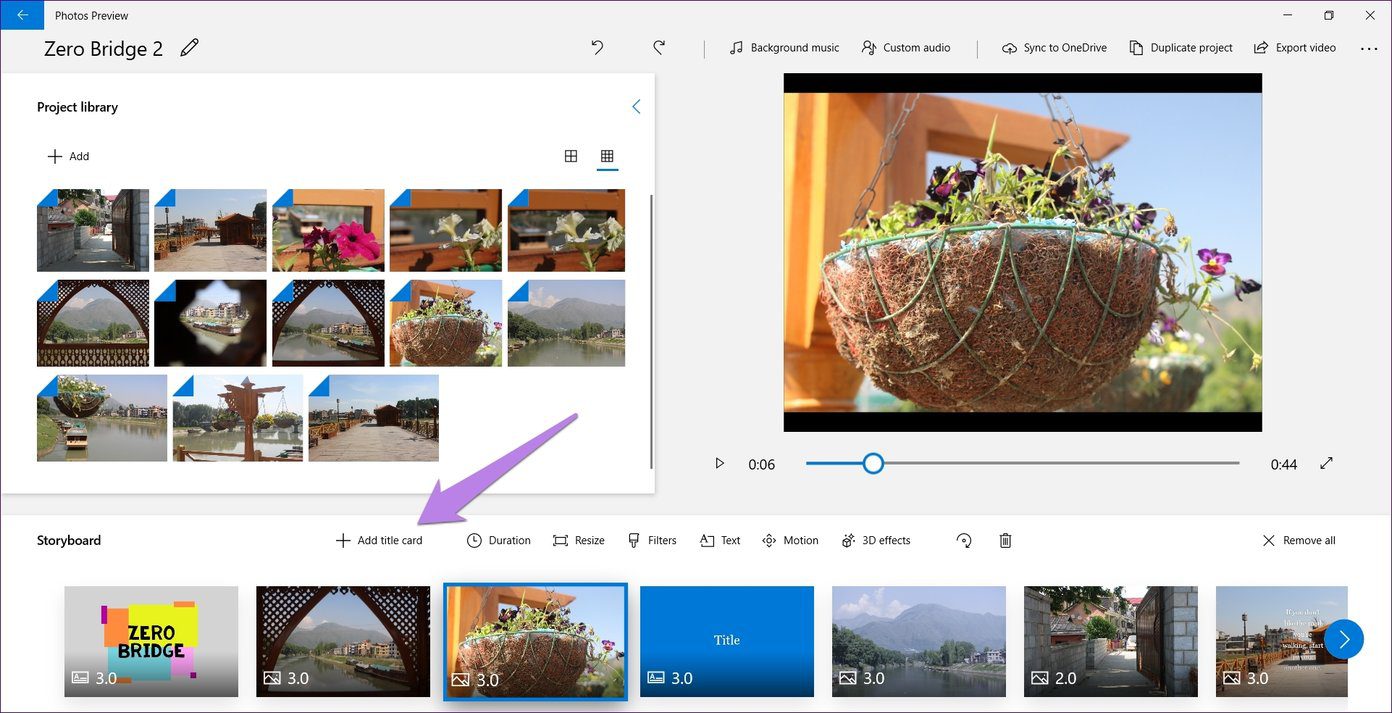
Add Title Card
To identify the main idea of your video, you can add titles to it. For that, click on the Add Title Card option. By default, it will be added before the photo where you clicked on Add title card. You can change its position by dragging it.
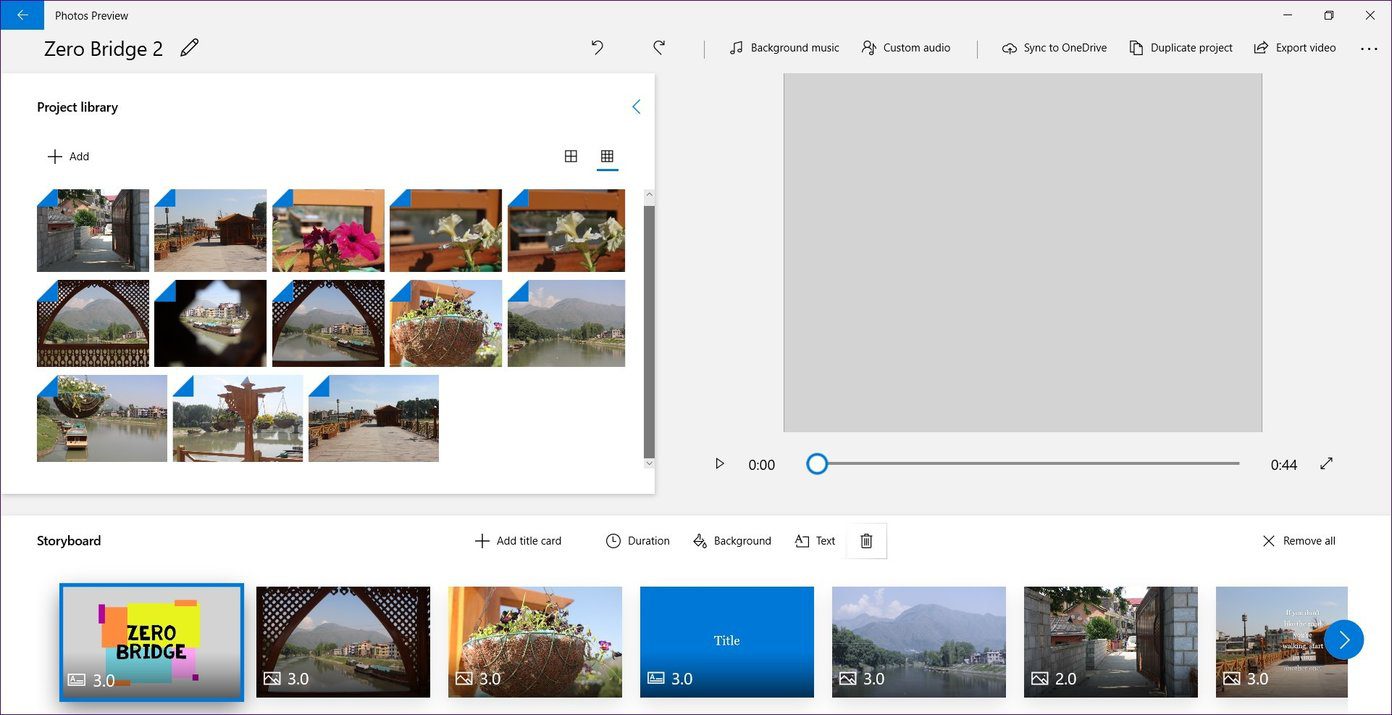
To change the title card properties, click on it once and select the desired options such as background, text, and duration. Then modify them as per your need.
Change Position of Photo
Just because you added the photos in a certain order doesn’t mean you cannot reorder them. Simply drag them to change their position.
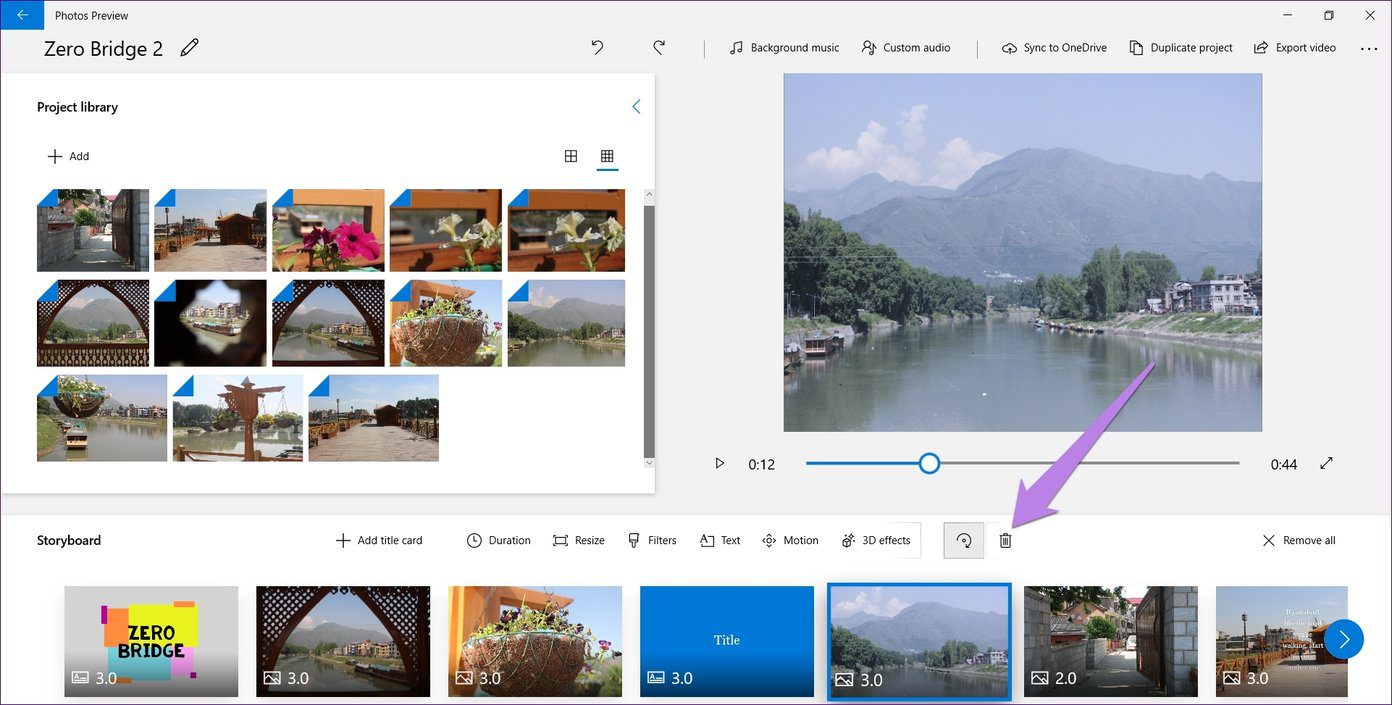
Remove Photo
If you don’t want a particular photo to be part of your video, click on it once in the storyboard and hit the delete icon.
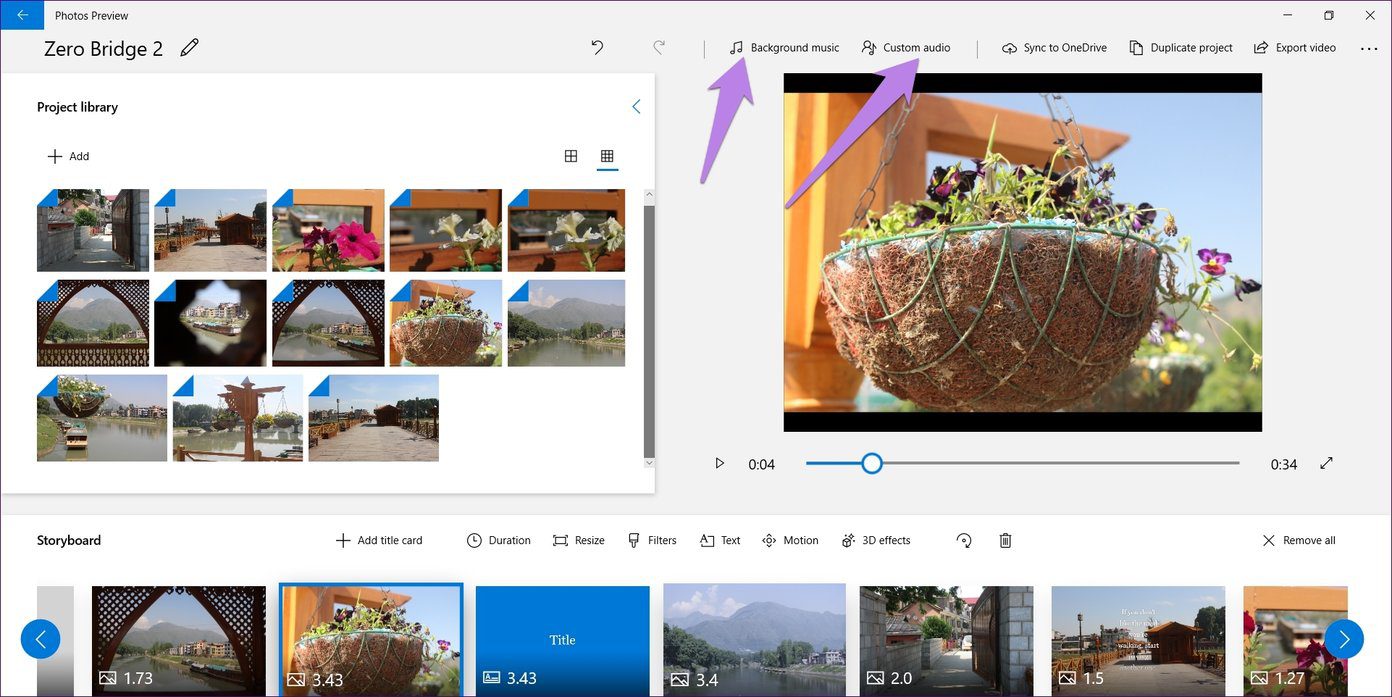
Add Music
You can add two types of audio in the Photos app. First, you can choose from the available audio files provided by Microsoft under Background music. Secondly, if you want to add your music or narration, choose the Custom audio option.
Keep in mind that the background music is added to the entire video while the audio added via Custom audio applies to individual clips only.
Save Videos
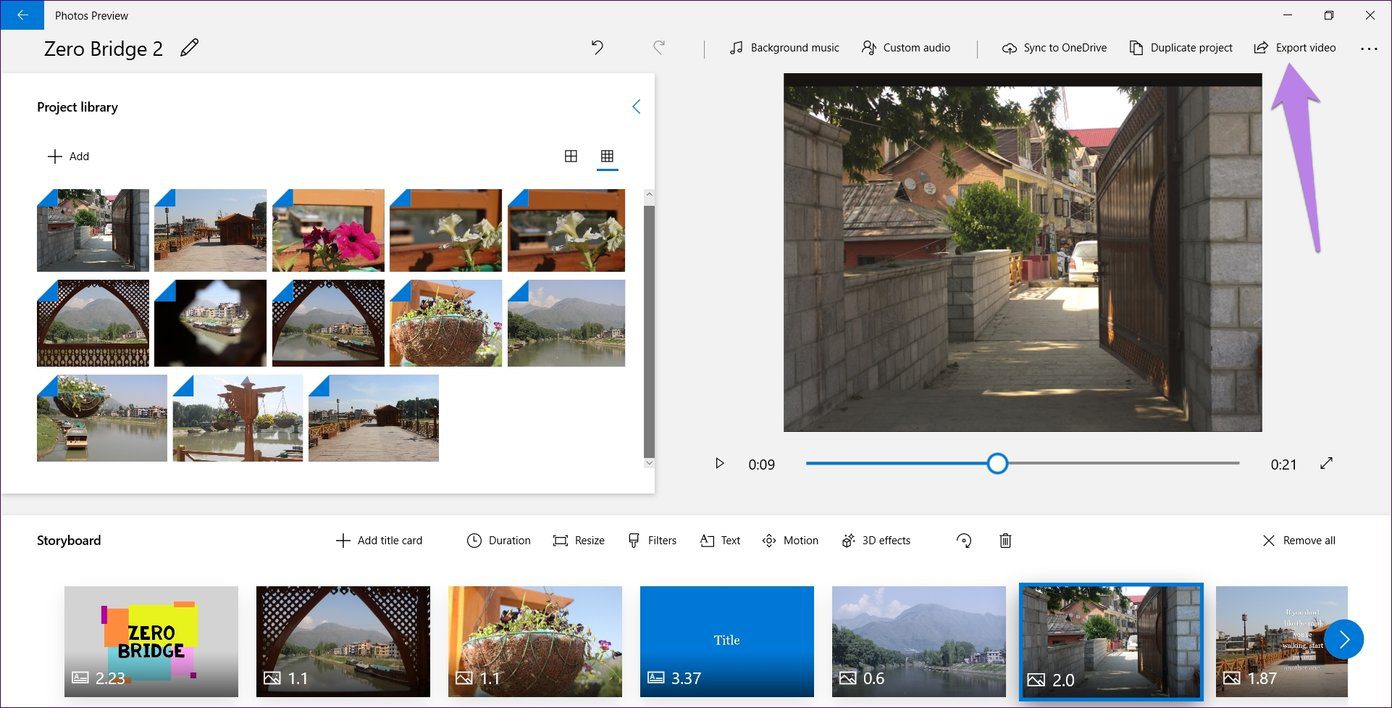
Finally, when you are done editing the video, click on the Export video option to save it. You will then have to choose the video size. Select the one that you like. The video will be saved on This PC > Pictures > Exported videos.

Make the Most of It
So that’s how to make a video slideshow from pictures and music. While the video editor may look simple at first glance, it’s not. Obviously, it’s not as powerful as the actual video editors, but you can use it occasionally for creating videos.
Next up: Did you know the Photos app has a dark mode? Here’s how to switch between themes in the app.
Was this helpful?
Last updated on 13 July, 2021
Read Next
 7 Cool Android Apps To Make Videos With Pictures and Music
Thanks to social networks and chat apps, online photo sharing has seen a tremendous growth.
7 Cool Android Apps To Make Videos With Pictures and Music
Thanks to social networks and chat apps, online photo sharing has seen a tremendous growth.
 Top 8 Fixes for PowerPoint Not Displaying Pictures on Windows
Microsoft PowerPoint can be frustrating when it fails to display pictures in your presentation on your Windows 10 or 11 PC.
Top 8 Fixes for PowerPoint Not Displaying Pictures on Windows
Microsoft PowerPoint can be frustrating when it fails to display pictures in your presentation on your Windows 10 or 11 PC.
 How to Make All Pictures of Same Size in Microsoft Word
Picture this — you want to insert several images in your Word document.
How to Make All Pictures of Same Size in Microsoft Word
Picture this — you want to insert several images in your Word document.
 7 Samsung Camera Settings to Take Instagram-Worthy Pictures
Facebook is kind of dead for millennials and they have found its replacement — Instagram.
7 Samsung Camera Settings to Take Instagram-Worthy Pictures
Facebook is kind of dead for millennials and they have found its replacement — Instagram.
 How to Save Pictures or Videos From Files to Photos App on iPhone and iPad
The Files app on iPhone shows you files on your iPhone or iPad and those available in iCloud storage.
How to Save Pictures or Videos From Files to Photos App on iPhone and iPad
The Files app on iPhone shows you files on your iPhone or iPad and those available in iCloud storage.
 Top 12 Ways to Fix Facebook Messenger Not Sending Pictures
Facebook Messenger integrates messages from Facebook and Instagram.
Top 12 Ways to Fix Facebook Messenger Not Sending Pictures
Facebook Messenger integrates messages from Facebook and Instagram.
 9 Best Fixes for iMessage Not Downloading Pictures on iPhone
iMessage is a convenient primary messaging tool for iPhone users.
9 Best Fixes for iMessage Not Downloading Pictures on iPhone
iMessage is a convenient primary messaging tool for iPhone users.
 Top 4 Ways to Send Pictures From Android to iPhone
Cross-platform media sharing is still cumbersome between Android and iPhone.
Top 4 Ways to Send Pictures From Android to iPhone
Cross-platform media sharing is still cumbersome between Android and iPhone.
The article above may contain affiliate links which help support Guiding Tech. The content remains unbiased and authentic and will never affect our editorial integrity.