When we want to edit an image on our Windows 10 PC, we think of downloading third-party software. However, there’s no need for that now unless you plan on creating high-end graphics. You can use the pre-installed Microsoft Photos app or Paint 3D to edit pictures. Here you will find a detailed guide on how to edit photos using Paint 3D in Windows 10.

Paint 3D carries a bunch of exciting features. Those include stickers, 2D shapes, the ability to use PNG images, a wide variety of brushes, and much more. We have covered all of them in this post.
Let’s check how to use Paint 3D to edit images.
Open Photo
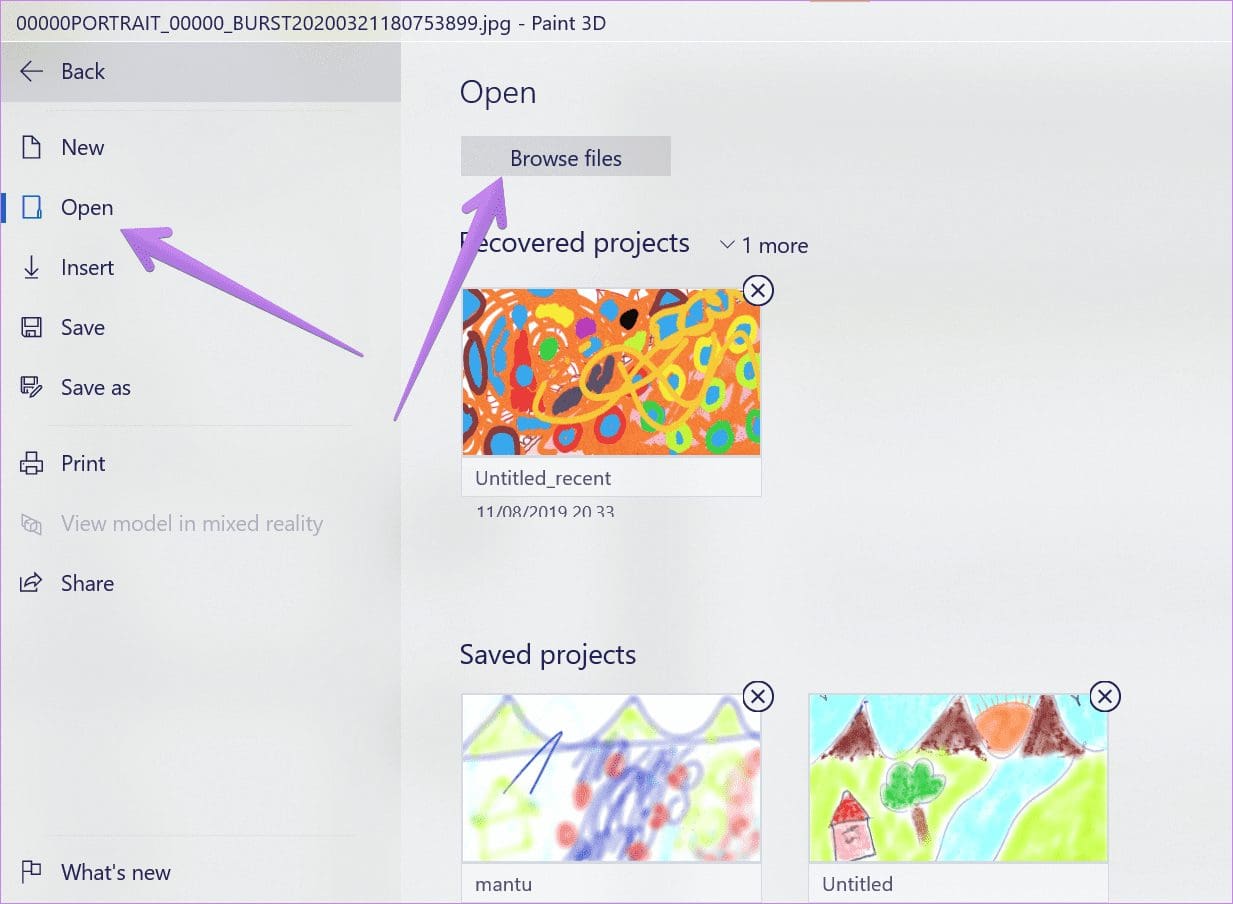
You can either start drawing on the blank canvas in Paint 3D or edit any existing photo. To edit an old image, go to Menu in Paint 3D.
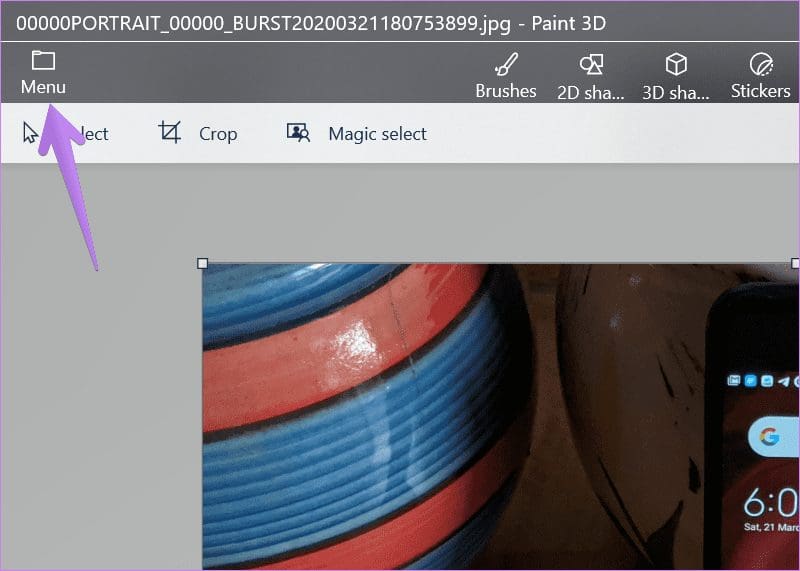
Click on Open followed by Browse files. Select the file that you want to edit.
Tip: Right-click on your image in File Explorer and select Edit with Paint 3D to quickly open pictures in Paint 3D.
Add Image on Top of Existing Photo
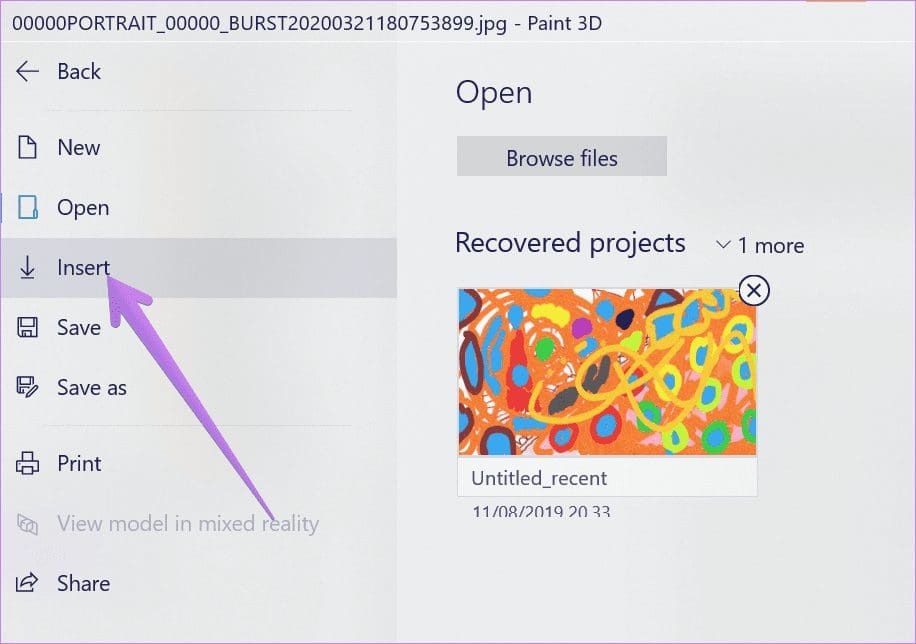
If you want to add images on top of the current image, you can do it with the Insert tool’s help located under the Menu option.
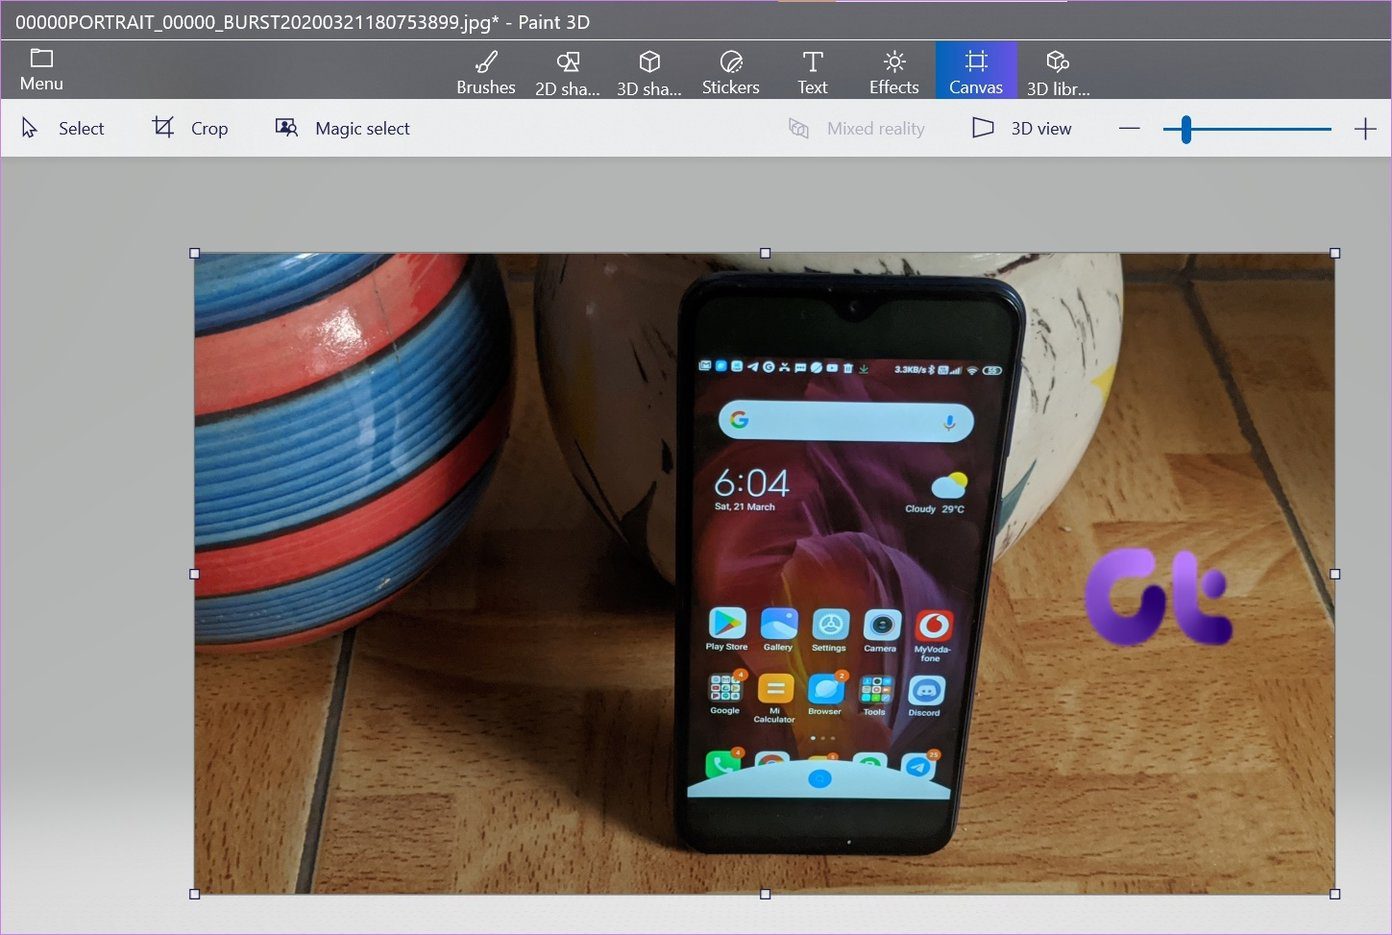
The same concept can add logos and watermarks to pictures, as shown in the following screenshot.
Tip: Find out how to put a transparent image over another image in Paint 3D.
How to Use Select Tool
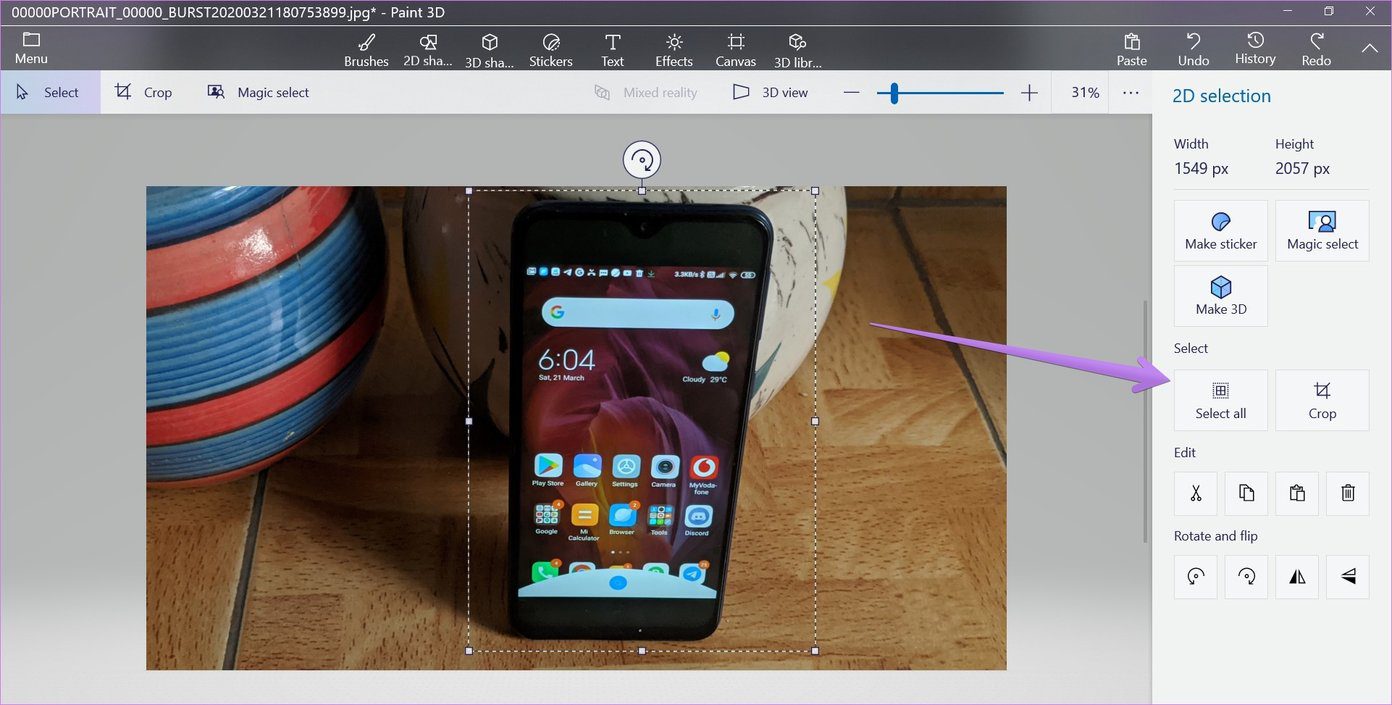
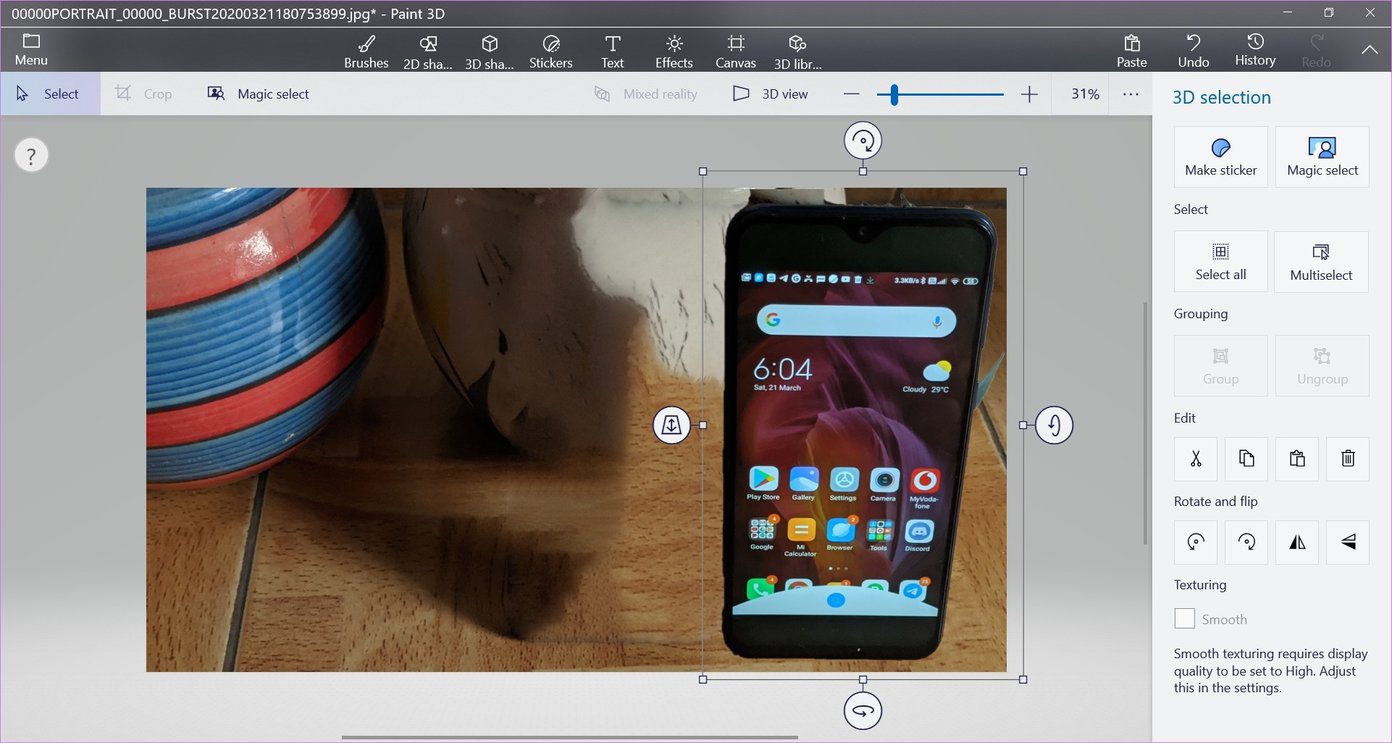
Like MS Paint, you can use the Select tool to cut out a portion of the picture. Click on the Select tool to activate it. Then drag the area that you want to cut out using the mouse.

Moreover, with the Select tool, you can create stickers and carve out 3D objects. You can even copy the selected area (used to duplicate objects), rotate, or flip it as well. You can access all of these options from the right sidebar that opens on selecting any area.
How to Crop Images
Fortunately, Paint 3D makes it relatively easy to crop your pictures. You can either use the pre-defined dimensions to crop images or select a custom area. You can even lock the aspect ratio to keep a balance between the width and height.
To crop an image, click on the Crop tool at the top. Then choose a framing of your choice. Alternatively, use the Select tool to define the area and choose Crop from the right sidebar.

Use Magic Select Tool
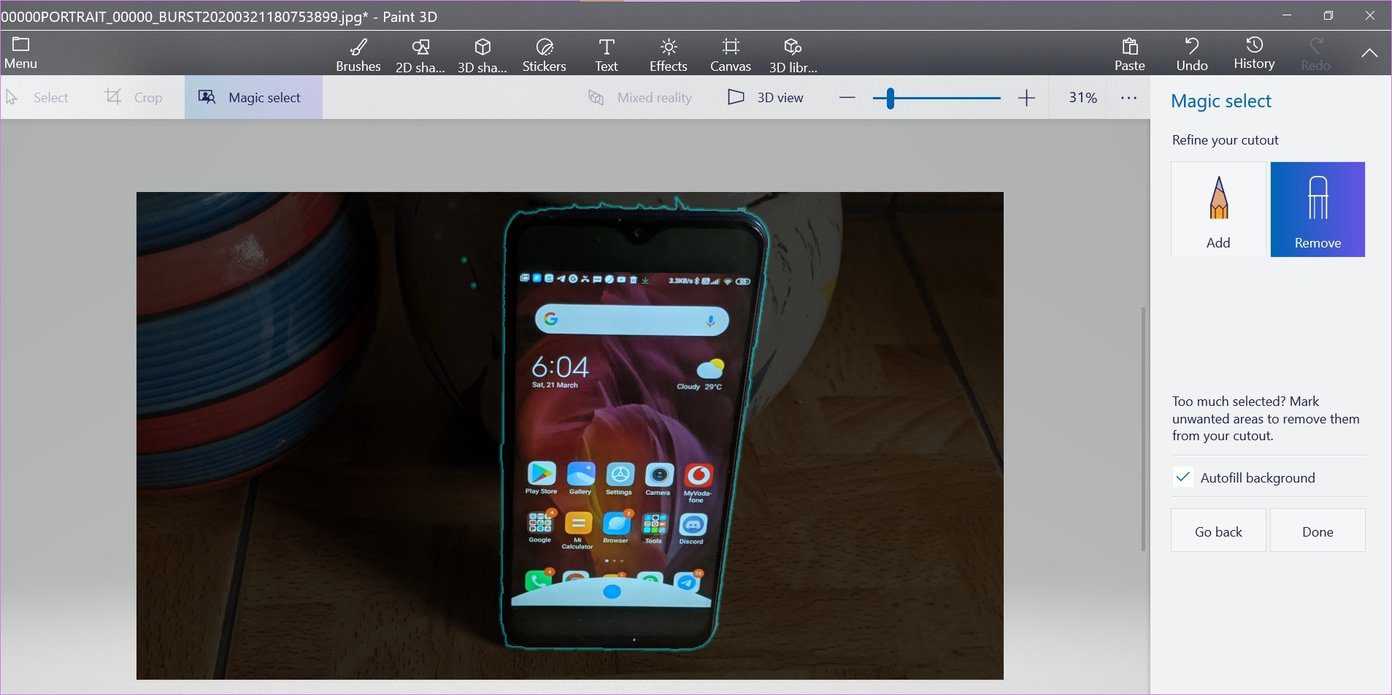
As the name suggests, the Magic select tool is your usual selection tool but with magical powers. You can minutely define the area that you want to keep in your selection. This tool comes in handy to remove background or unnecessary parts from the image.
Click on the Magic select tool in the menu bar. Using the borders that appear around the image, select the area that you want to select. Click on Next from the right sidebar.

Use the Add or Remove tool in the right sidebar to refine your selection. Just click on the area with the correct tool selected. Once you have selected the right area, click on Done.
The portion that you cut out will act as an independent image now. You can save it as a sticker or save it as an image to use in other apps.
Draw Handsfree on Image
Paint 3D offers a variety of brushes such as markers, calligraphy pens, watercolor, pencils, and even a color fill tool. All of them are present under the Brushes tab. You can change the thickness, opacity, and color of the selected brush.

To erase any drawing, use the Eraser tool located in the set of brushes.

Add Straight Line, Arrows, and Other Shapes
Whether you are editing a screenshot or creating any other graphic such as a flowchart, shapes like arrows, circles, square boxes, etc., come in handy. Lots of such shapes are available in Paint 3D.
Click on the 2D shape tab and select the desired shape. Then draw that shape on the image.
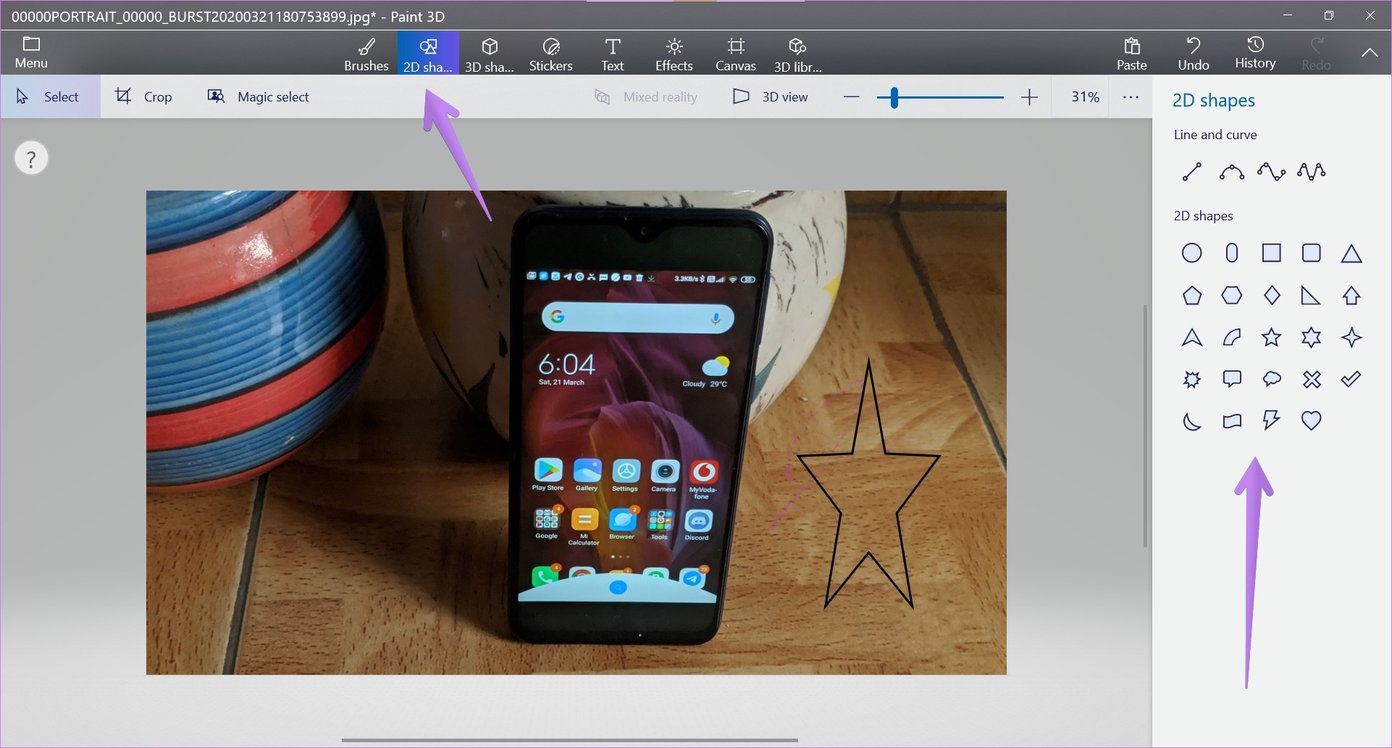
You can change the color of the shape, fill it with a color, adjust its thickness, rotate, and flip it using the options available in the right sidebar. You can even use the selection boxes on the shape to adjust its size and position.

Add 3D Shapes
Use the 3D shapes tab to add interesting 3D shapes to your picture. To add a 3D object, go to the 3D shape tab and select the 3D object.

Use Stickers
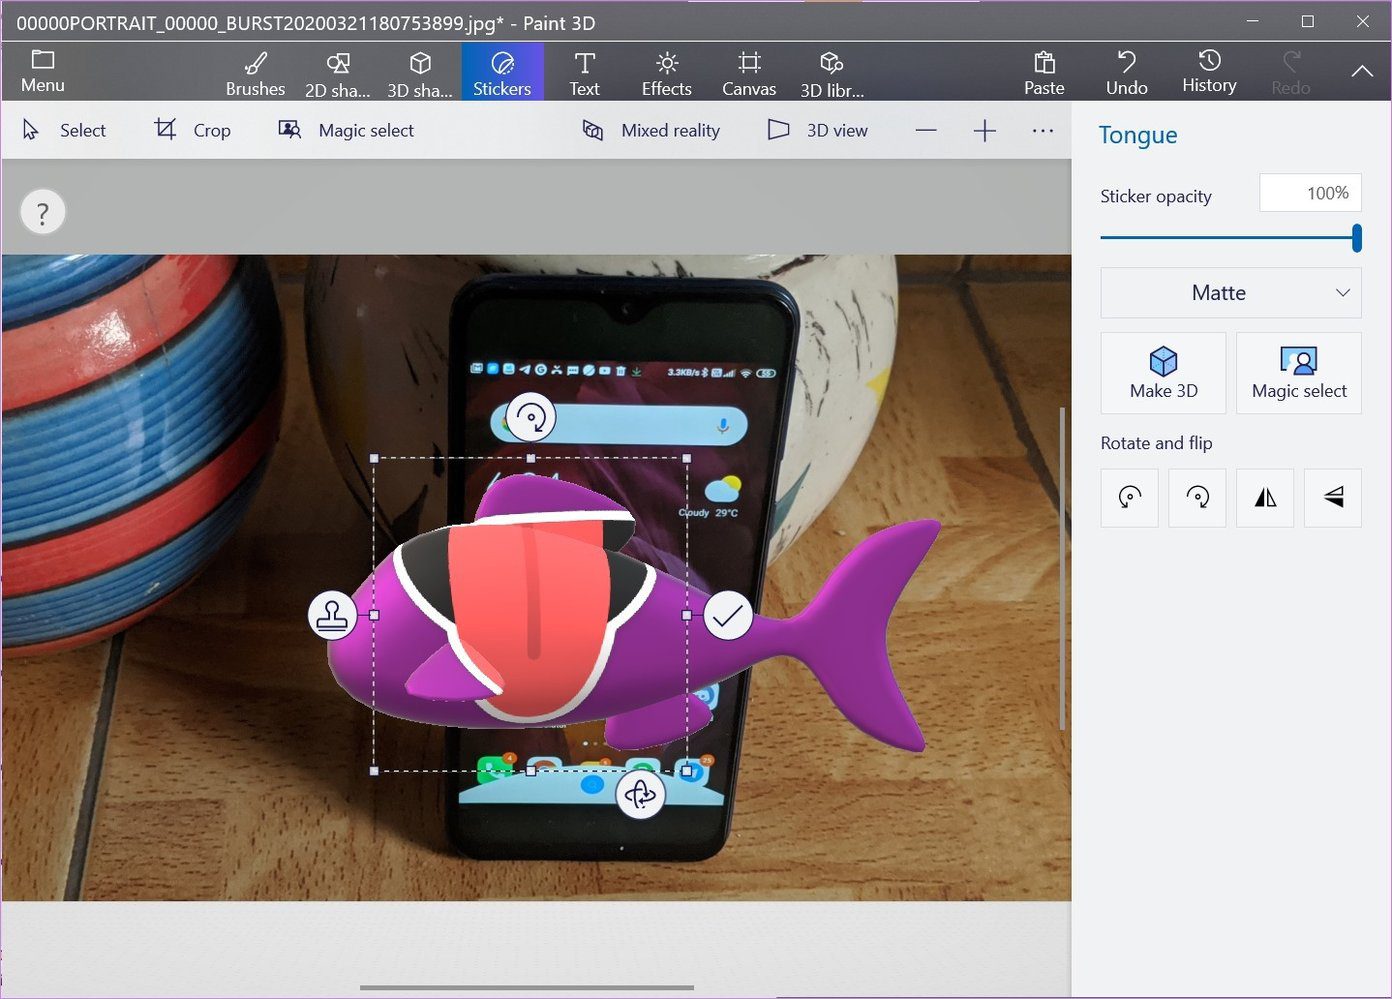
You can add stickers to your pictures in Paint 3D to enhance the look and give it a realistic touch. To add a sticker, click on the Stickers tab. Select a sticker of your choice and draw it on the picture using the mouse. You can add custom stickers using the last tab available in the right sidebar. You can create stickers with the help of the Magic select tool as well.
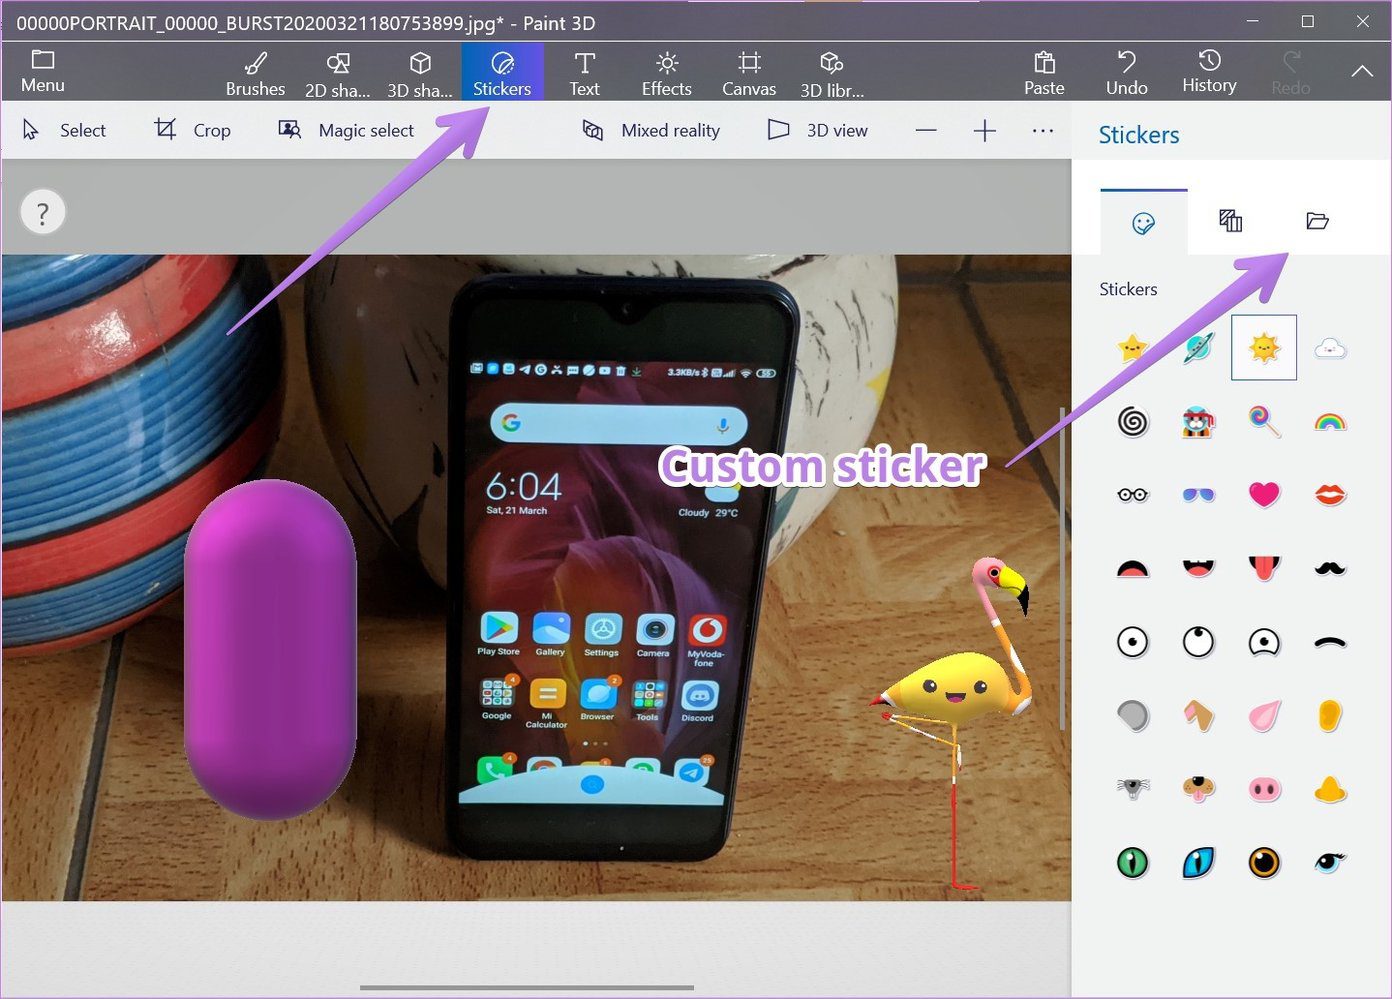
Another exciting thing about stickers is that you can add them to 3D objects. That is, 3D objects act as a placeholder for stickers. If you hover a sticker over any 3D object, it will be placed on the 3D object giving the overall look of a single image. In the following screenshot, I have used fish as a 3D object and placed the tongue sticker on top of it.
Add and Edit Text
Paint 3D lets you add and edit the text using the Text tool. You can add 2D and 3D text. The text can be formatted using the font style, size, color, and alignment tools. They’re accessible from the right sidebar. Refer our guide on how to add and edit the text in Paint 3D.
Add Photo Effects
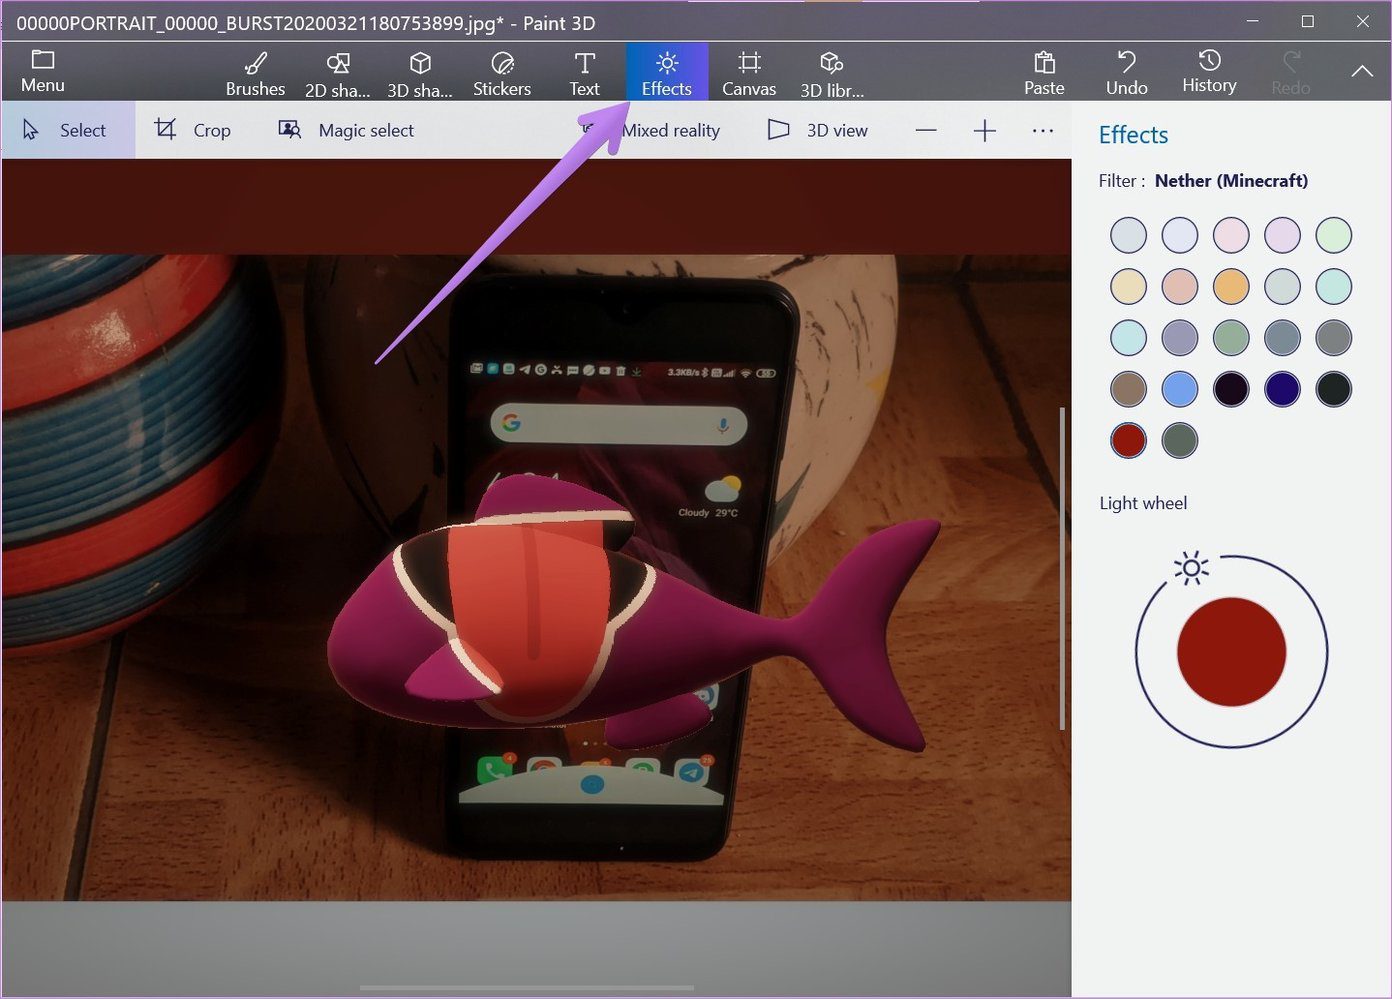
You won’t find filters in Paint 3D, but you can add color effects to pictures. To add an effect, click on the Effects tab in the top bar and select an effect of your choice.
Resize, Rotate, and Flip Image
The Canvas tab in Paint 3D holds some of the important functionalities. Those include tools like resizing, rotate, and flip. To use any of these features, click on the Canvas tab. Then select the required tool.
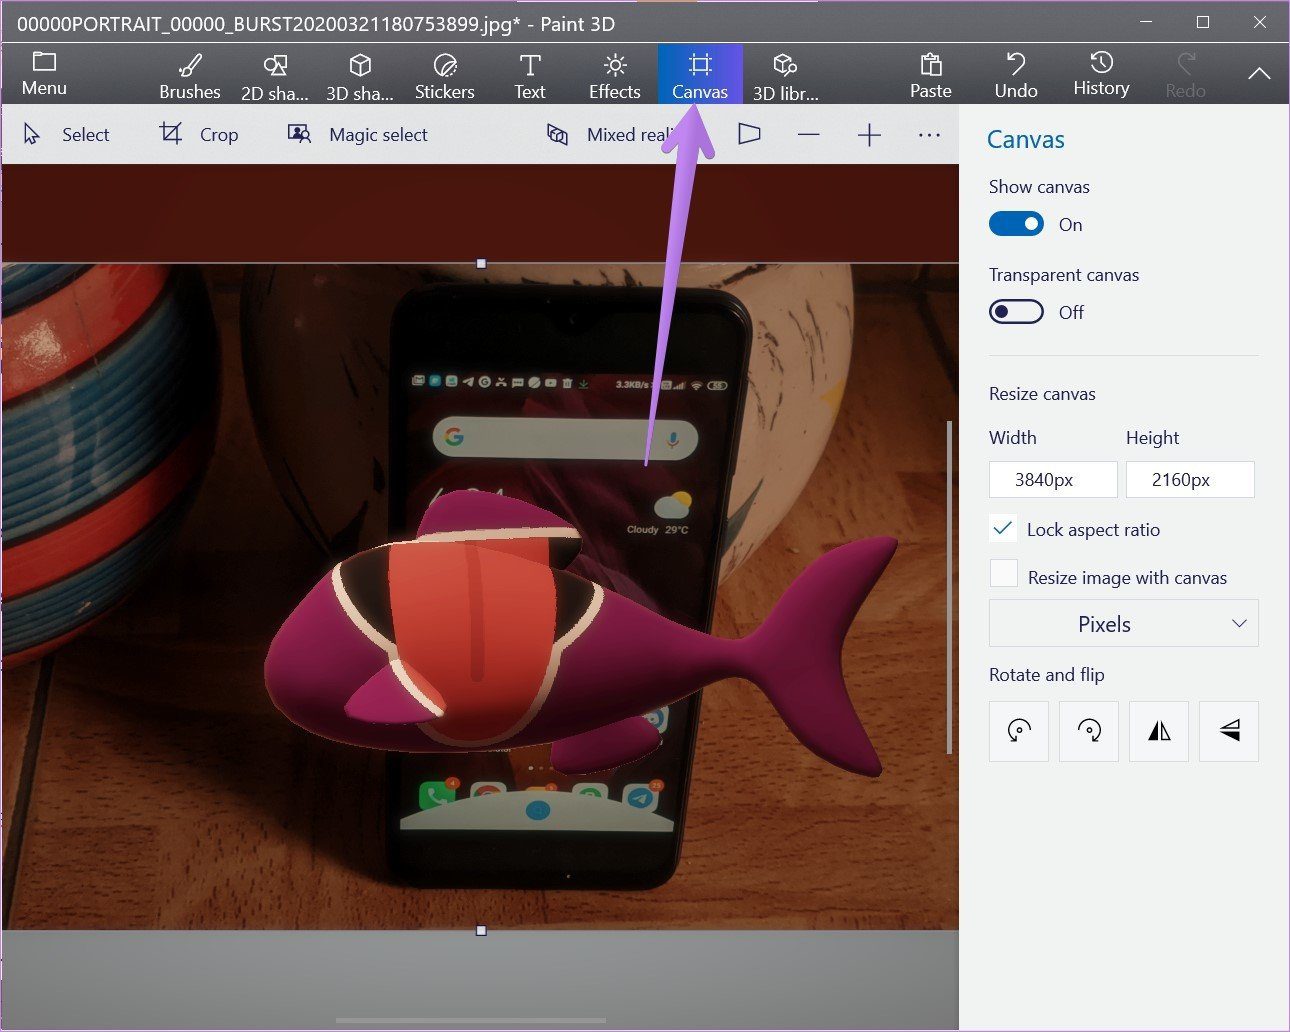
If you have noticed carefully, the Canvas tab also holds the Transparent canvas option. This tool is used to make the background transparent in Paint 3D and to change the background color.
Use History Tool
When we edit an image, we often feel that one of the previous steps was better than the current edit. Paint 3D makes it easy to switch to some of the recent edits. Click on the History tab and use the slider to view previous edits.
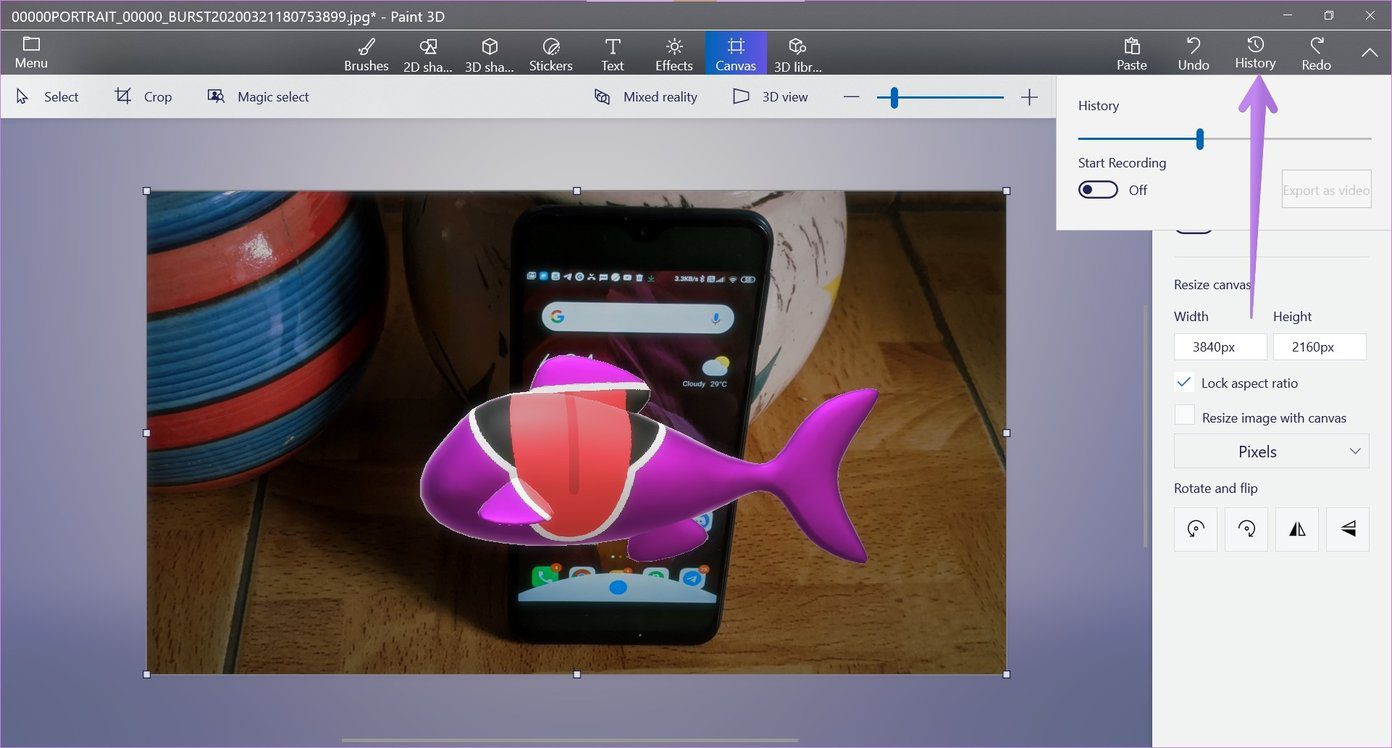
Tip: You can create a recording of the edits using the Start recording option in the History tab.
Crop Image in Shapes
Paint 3D doesn’t offer a direct way to cut out images in shapes. However, you can use the combination of 2D shapes and the Magic select tool to crop images in circles and other shapes. Check our guide on how to crop images in shapes in Paint 3D.
Save Image
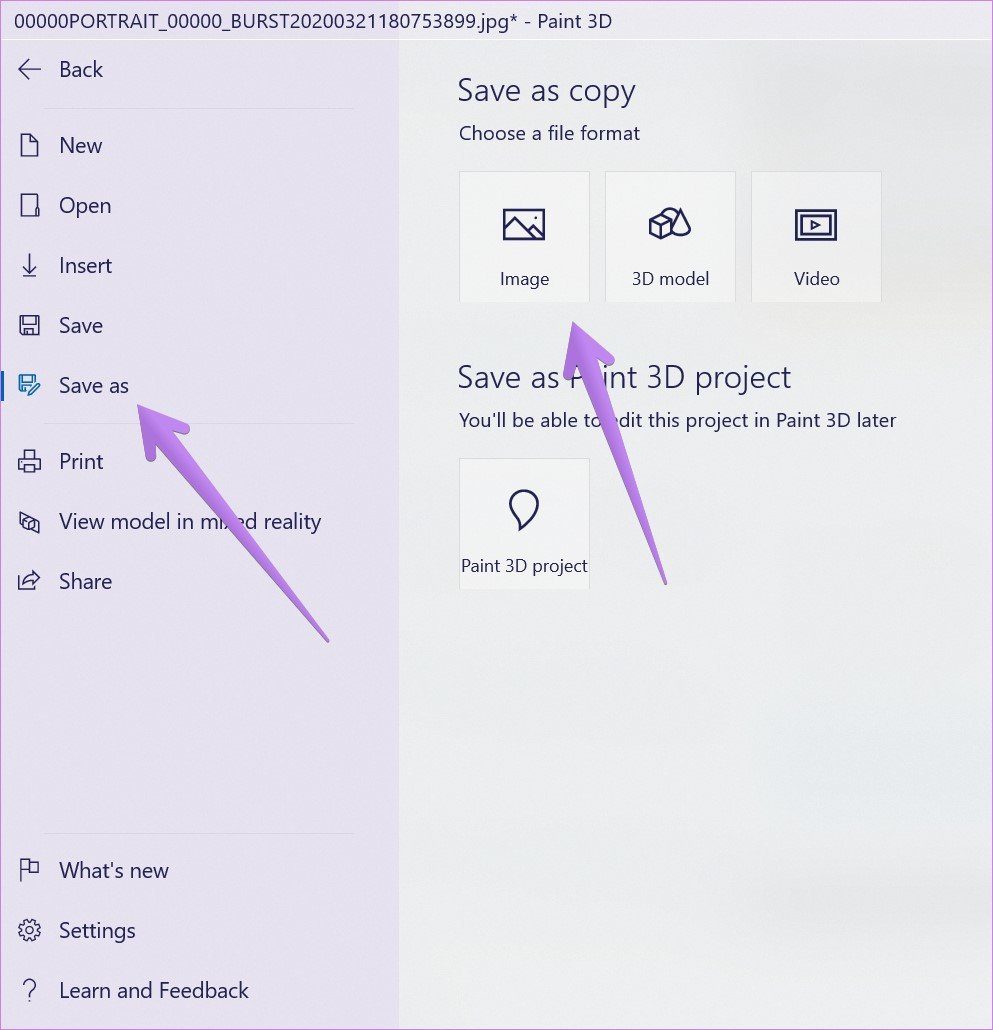
After editing your picture, you can save it as a JPG file or retain its transparency by saving it as a PNG file. To do so, go to Menu option > Save as > Image. Select the desired image type. Find out in detail how to convert JPG to PNG in Paint 3D.
Bring on the Edits
We hope you liked our guide on how to use Paint 3D to edit photos. Apart from the tools and features mentioned above, you can use Paint 3D to blur parts of pictures, create animated graphics, and merge images.
Was this helpful?
Last updated on 13 July, 2021
The article above may contain affiliate links which help support Guiding Tech. The content remains unbiased and authentic and will never affect our editorial integrity.

