The Kindle has to be one of our favorite purchases. It still fascinates us how we can carry thousands of books in a device that is so slim and handy to use. Now and then, we discover a new feature. Recently, we discovered that we can grab screenshots of what we are reading. If that excites you as well, here’s how to take a screenshot on Kindle Reader.

You can take a screenshot in a below-mentioned way on your regular Kindle, Kindle Oasis, and Kindle Paperwhite. The procedure to do so is quite easy. However, you need your computer to view and access the screenshots. We’ll show you everything you need to know, so let’s begin.
Why Take a Screenshot on Your Kindle Reader
Kindle has changed the way we read books. And with every edition, Amazon has been adding a few useful features to improve your experience. The ability to take a screenshot is underrated, for several reasons.
For one, the bookmarking or highlighting options to save a few lines of text in your book are quite cumbersome. We feel taking screenshots of a few pages for future reference is far easier. Another reason is that you can share what you read with your friends quickly, instead of taking a picture of your Kindle.
Now, let’s understand how to do it.
How to Screenshot on Kindle
Note: This method works for all Kindle, Kindle Paperwhite, and Kindle Oasis editions with a touchscreen.
Step 1: Open the page on Kindle that you want to take a screenshot of.
Step 2: Now, long-tap on the top left and the bottom right corner of the screen, as shown in the screenshot below.

That’s it. Now that you have captured your Screenshot on Kindle, you need to connect it to your PC to view it. Unfortunately, there is no way to view or edit it on your Kindle itself.
Access Your Kindle Screenshots Using File Explorer
Here’s how you can access the captured screenshots on your computer. The procedure is more or less similar for both Windows and Mac, but wherever there is a change, we have mentioned it in the step. Once you access the screenshots, you can edit, copy, and share them.
Step 1: Connect your Kindle to your PC.
Step 2: Open the Kindle drive in the ‘Your PC’ section.

Step 3: As soon as you open the drive, you can access the screenshots.
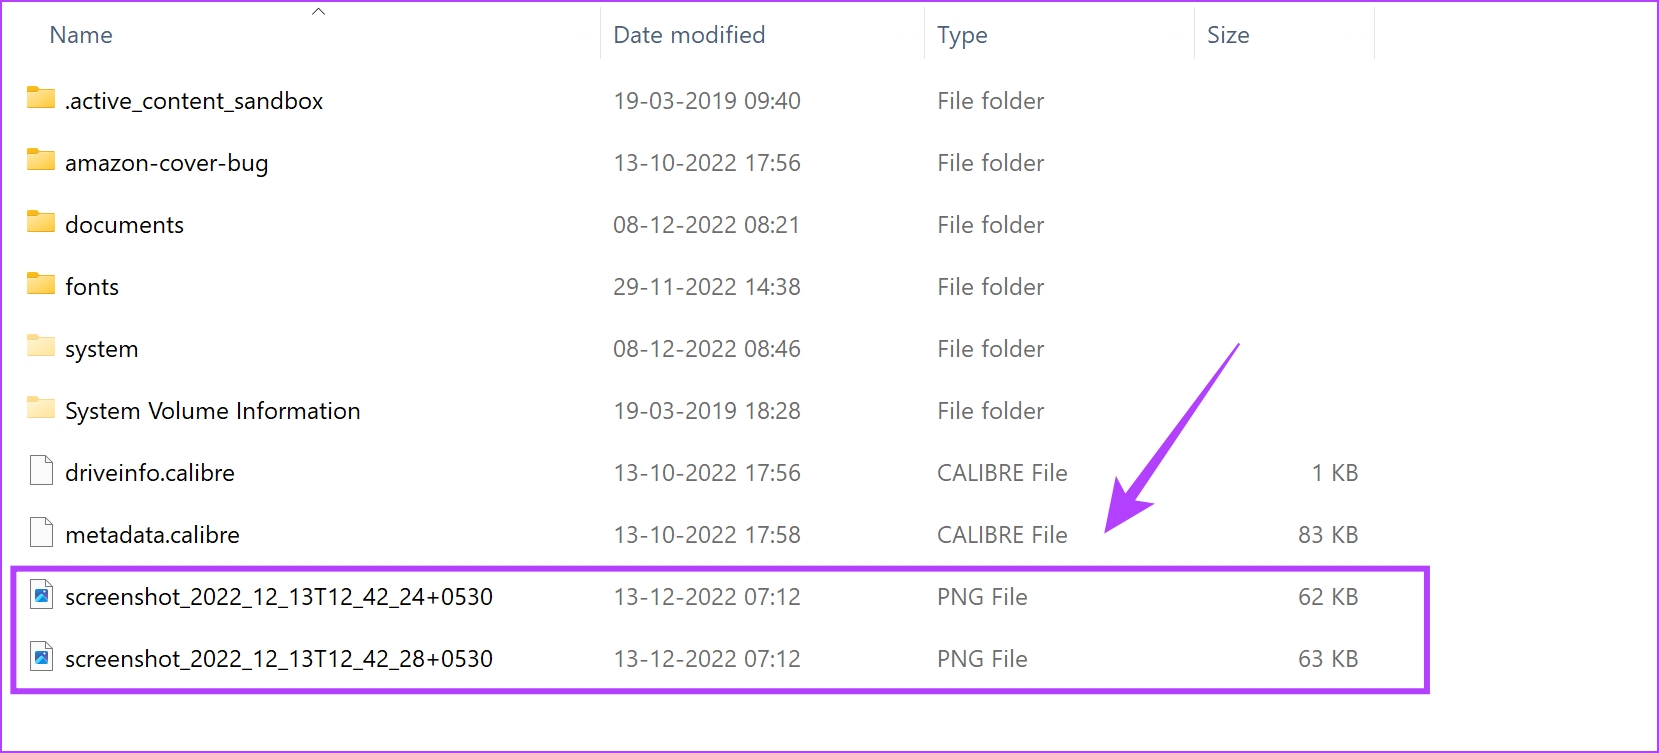
If you are using Mac, you just need to expand the Kindle folder to find the screenshots.
This is what your screenshot will look like. Say goodbye to the blurry pictures of text on your Kindle.

And that is everything you need to know on how to take a screenshot on Kindle, and then view and access them. However, if you have more questions, you can take a look at our FAQ section below.
Frequently Asked Questions
As long as you have enough storage space available, you can capture as many screenshots as possible on Kindle.
Kindle screenshots are captured in PNG format.
Apart from highlighting, you cannot annotate on your Kindle.
No. You cannot transfer screenshots captured on your Kindle over Wi-Fi.
No More Blurry Images on Kindle
That is everything that you need to know on how to take a screenshot on Kindle. We hope you found this guide helpful. Having said that, we are quite excited about the future of E-Ink devices. Amazon announced the new Kindle Scribe, which offers a lot more features than just reading ebooks. We can’t wait to get our hands on it. What are your thoughts on the same? Share in the comments below.
Was this helpful?
Last updated on 15 December, 2022
Read Next
 6 Best Cases for Kindle Paperwhite 11th Generation in 2023
If you're a bit of a bookworm, you must have the Kindle Paperwhite 11th Generation at your disposal.
6 Best Cases for Kindle Paperwhite 11th Generation in 2023
If you're a bit of a bookworm, you must have the Kindle Paperwhite 11th Generation at your disposal.
 4 Best Kindle Scribe Alternatives: Take Notes in Style
The Kindle Scribe not only lets you read your favorite books but also lets you scribble notes.
4 Best Kindle Scribe Alternatives: Take Notes in Style
The Kindle Scribe not only lets you read your favorite books but also lets you scribble notes.
 Kindle Not Charging: 8 Ways to Fix the Issue
A Kindle reader offers a huge amount of convenience over a physical book.
Kindle Not Charging: 8 Ways to Fix the Issue
A Kindle reader offers a huge amount of convenience over a physical book.
 5 Ways to Fix the Kindle Won’t Turn On Issue
Amazon's Kindle might carry the moniker of a 'book reader', but at the end of the day, it is still an electronic device that runs on an operating system, connects
5 Ways to Fix the Kindle Won’t Turn On Issue
Amazon's Kindle might carry the moniker of a 'book reader', but at the end of the day, it is still an electronic device that runs on an operating system, connects
 How to Use Dictionary in Any Kindle: A Comprehensive Guide
How to Download Dictionary on Kindle By default, an English dictionary will be downloaded onto your Kindle.
How to Use Dictionary in Any Kindle: A Comprehensive Guide
How to Download Dictionary on Kindle By default, an English dictionary will be downloaded onto your Kindle.
 3 Ways to Fix Kindle Not Downloading Books
Fix 1: Register Your Kindle Again Step 1: On your Kindle home page, tap the downward-facing arrow to open Control Panel.
3 Ways to Fix Kindle Not Downloading Books
Fix 1: Register Your Kindle Again Step 1: On your Kindle home page, tap the downward-facing arrow to open Control Panel.
 6 Best Fixes for Kindle Not Showing Up on Windows 11
Using a Kindle or Kindle Paperwhite can give a more comfortable reading experience.
6 Best Fixes for Kindle Not Showing Up on Windows 11
Using a Kindle or Kindle Paperwhite can give a more comfortable reading experience.
 How to Use Text-To-Speech on Amazon Kindle
Enable Text-To-Speech on Kindle The VoiceView Screen Reader is an accessibility feature that lets you listen to Kindle books over Bluetooth.
How to Use Text-To-Speech on Amazon Kindle
Enable Text-To-Speech on Kindle The VoiceView Screen Reader is an accessibility feature that lets you listen to Kindle books over Bluetooth.
The article above may contain affiliate links which help support Guiding Tech. The content remains unbiased and authentic and will never affect our editorial integrity.