It is highly likely that you will get lost in the flurry of comments on your Instagram posts if your Instagram account is extremely active and engaged. However, you can pin the important comments (whether yours or your followers) on your post to highlight them. In this article, we’ll guide you on how to pin a comment on Instagram easily.
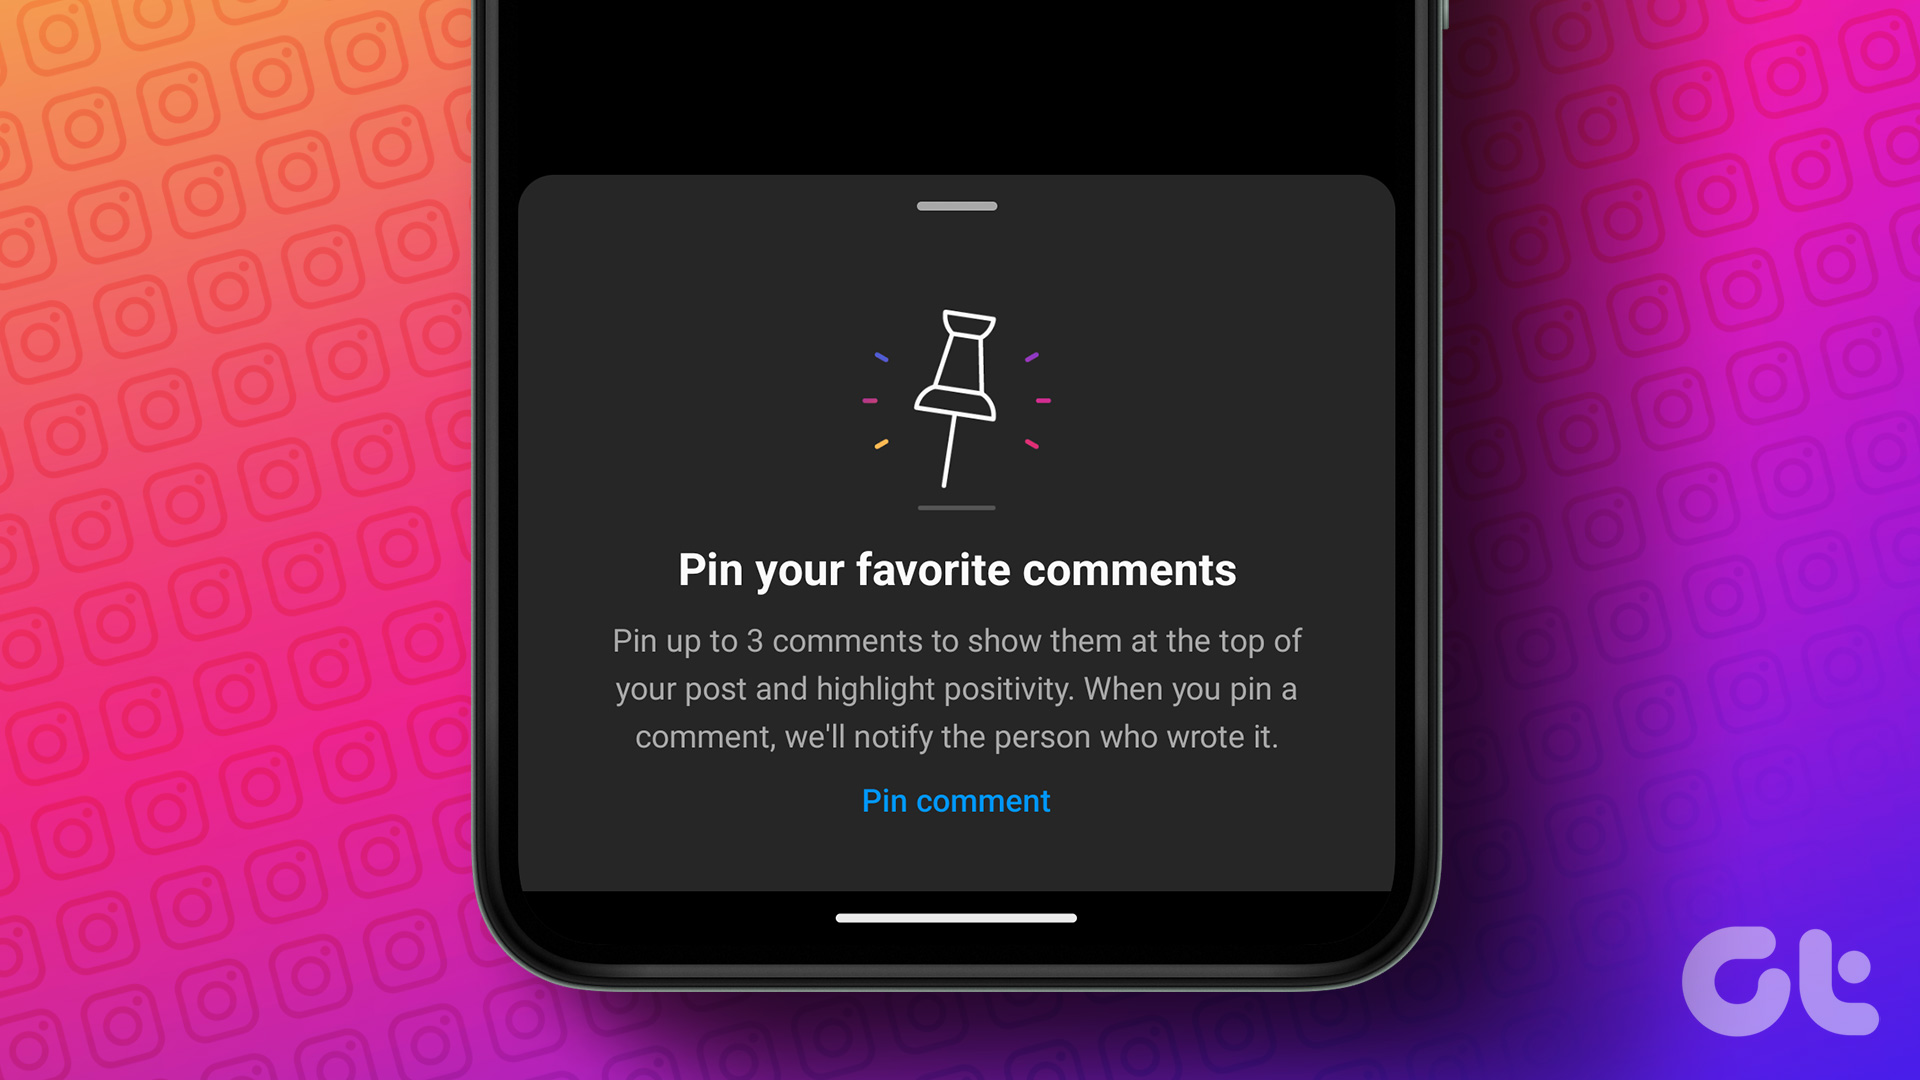
If you pin a comment, it’ll appear at the top of your comment section for all to see and give it the spotlight it deserves. Whether you’re a content creator looking to engage with your followers, this feature is helpful.
Do note that some steps mentioned in the article may vary depending on your region. And you can only pin up to 3 comments on your Instagram posts, not someone else’s. With this out of the way, let’s begin with the article.
How to Pin a Comment on IG Live
In recent years, Instagram allowed its users to pin comments on Instagram Live. Pinning a comment gives prominence to a particular comment made by a viewer or the host during a live broadcast.
When a comment is pinned, it stays at the top, even if new comments are added. Let’s begin with the steps.
Note: The Instagram Live feature is not yet available on PC; however, you can access it on Android or iOS. The steps are the same for both. However, for the sake of demonstration, we are going with Android.
Step 1: Open the Instagram app and click the create (+) button at the bottom (at the top if you’re using an iPhone).
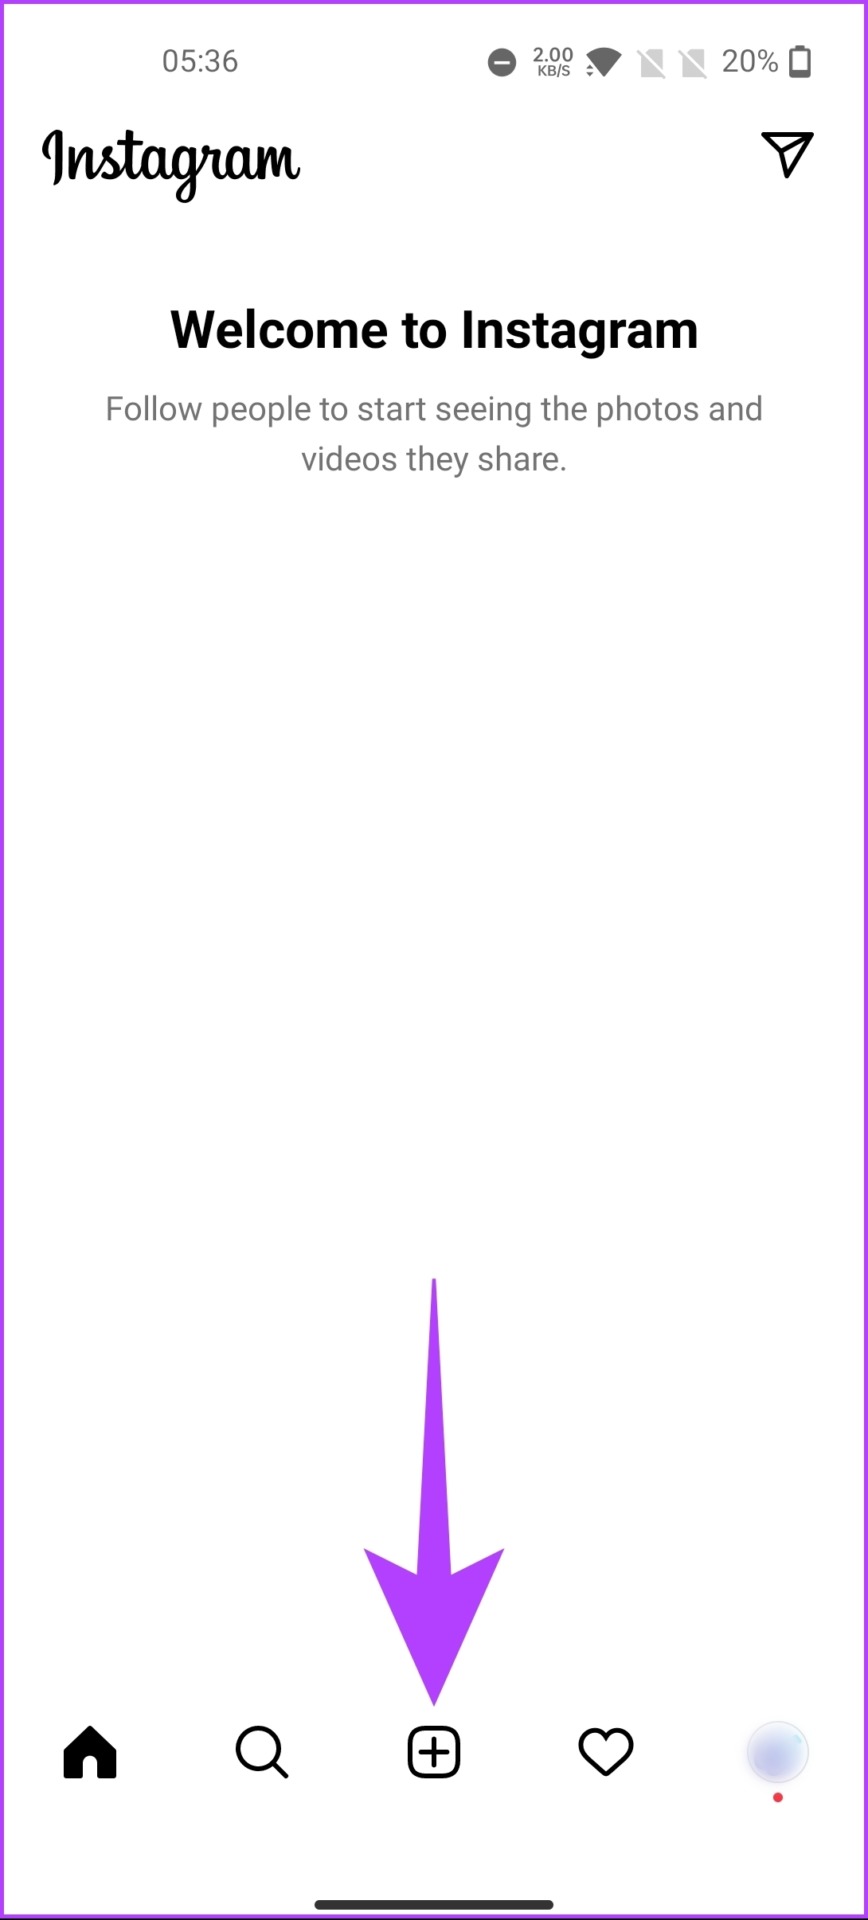
Step 2: It will display your phone’s gallery. From the bottom option, swipe to Live.

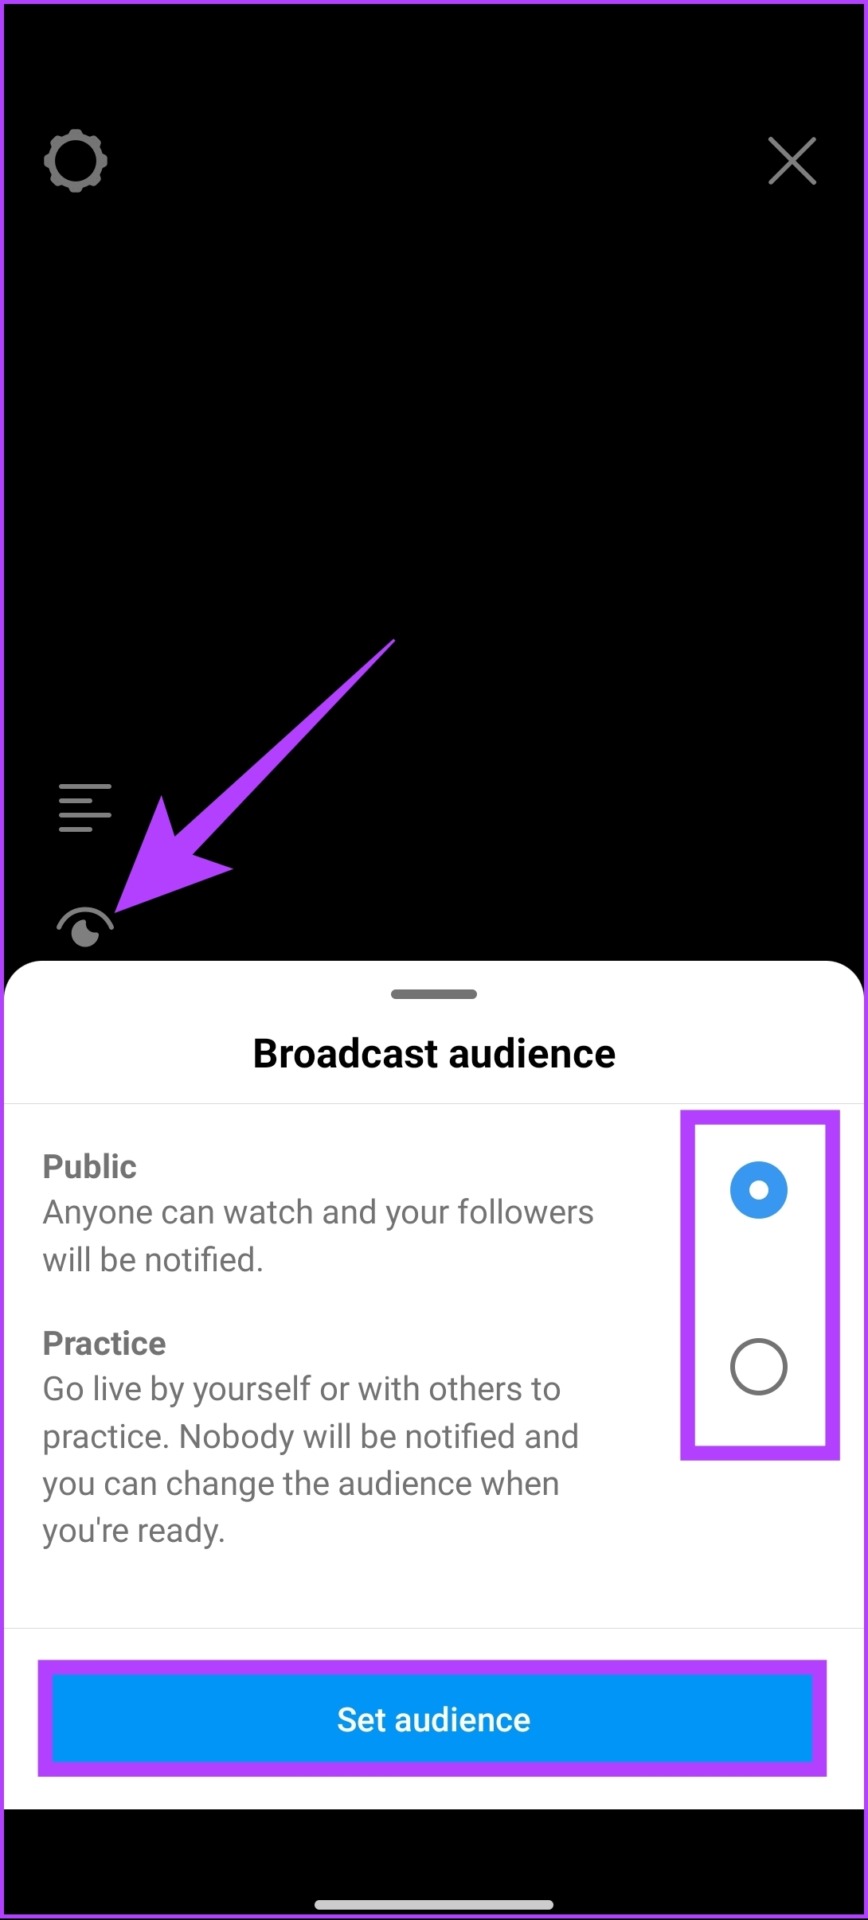
Step 3: [Optional] Tap the Title icon on the left to add a title. You can also select the Broadcast audience by tapping the icon below the Title icon.

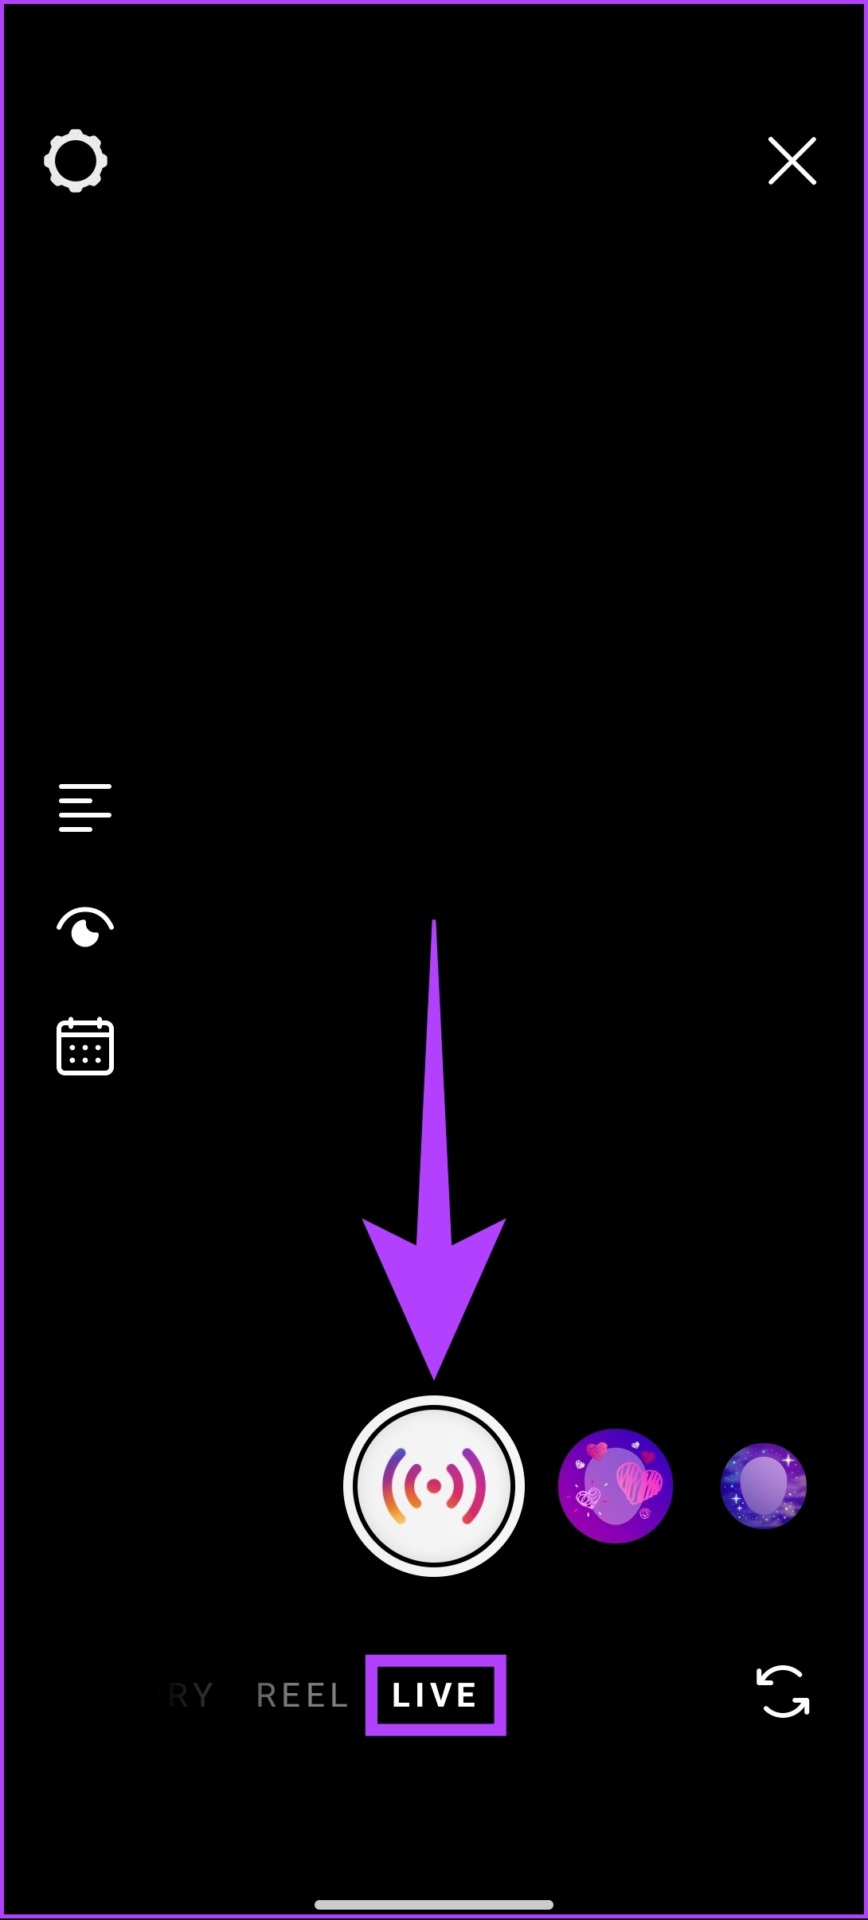
Step 4: Finally, click the Live button to start a Live session.
Step 5: Long-press on a comment you want to pin, and from the option, select Pin Comment.
Note: You can also add and pin your comment to your Instagram Live.

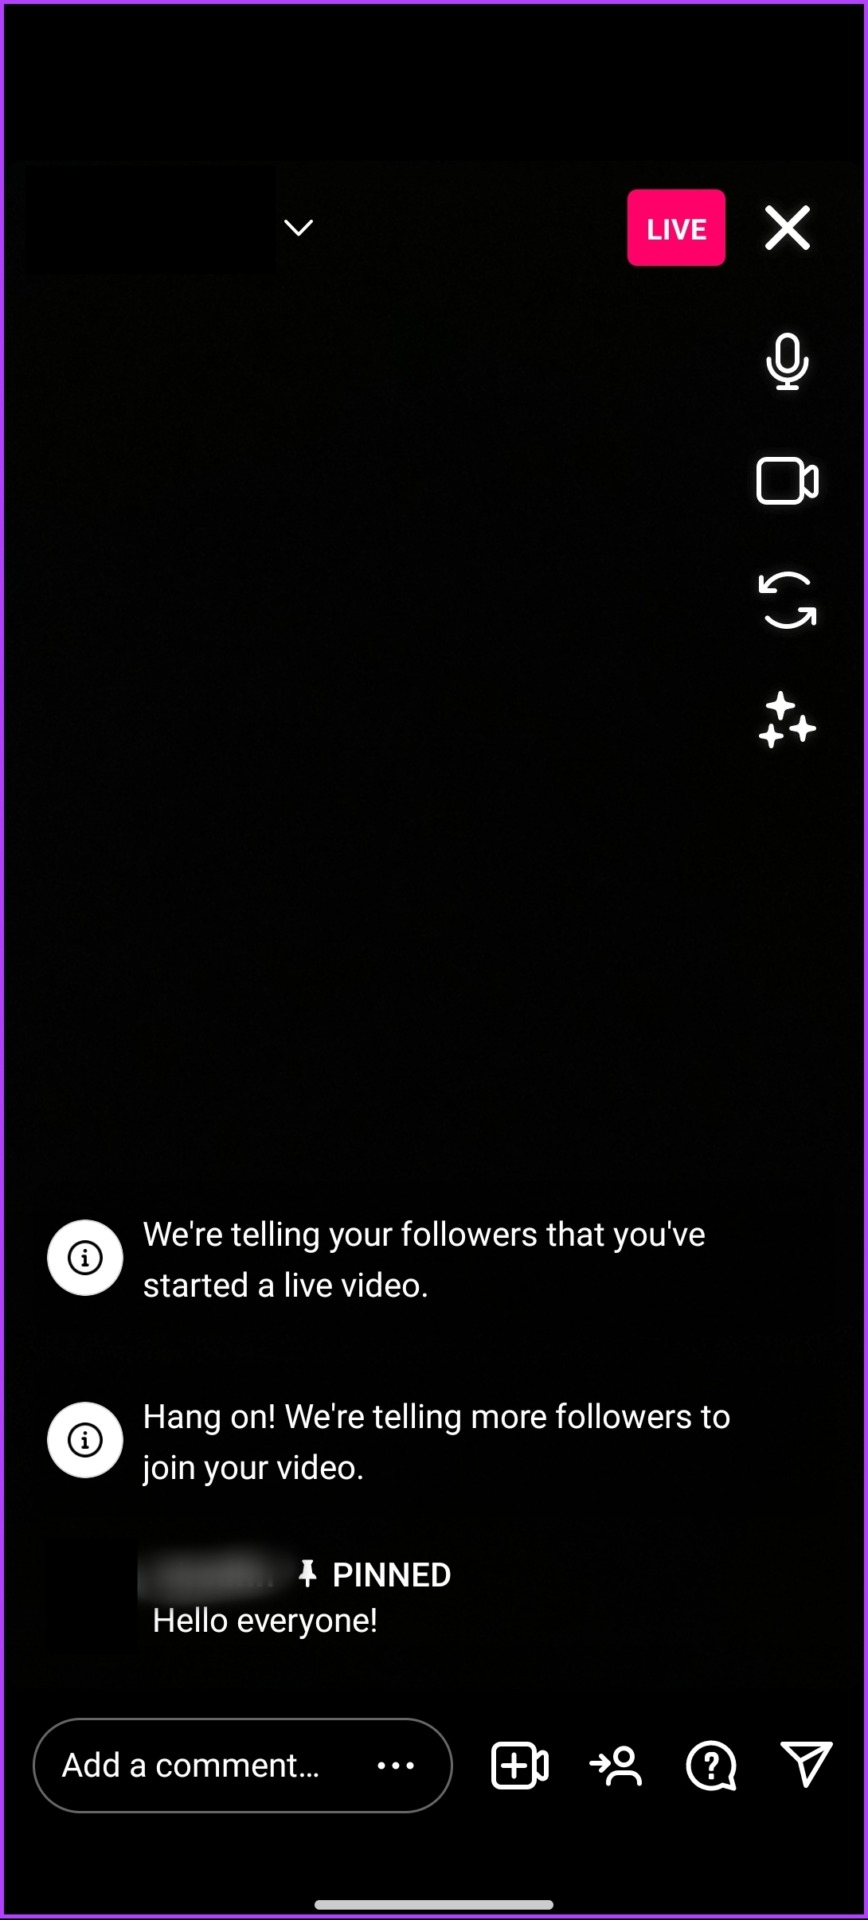
There you go, you have successfully pinned a comment to your Instagram Live. If you want to remove the pinned comment, follow the same steps and select Unpin comment.
How to Pin a Comment on an Instagram Reel
Pinning a comment on Instagram Reels is similar to pinning a comment on Instagram Live. When pinned, the comment stays at the top of the comment section, even if new comments are added.
Note: The steps are the same for Android and iOS. However, for the sake of demonstration, we are going with Android.
Step 1: Open the Instagram app on your Android and go to your Profile by tapping on the profile picture in the bottom right corner.
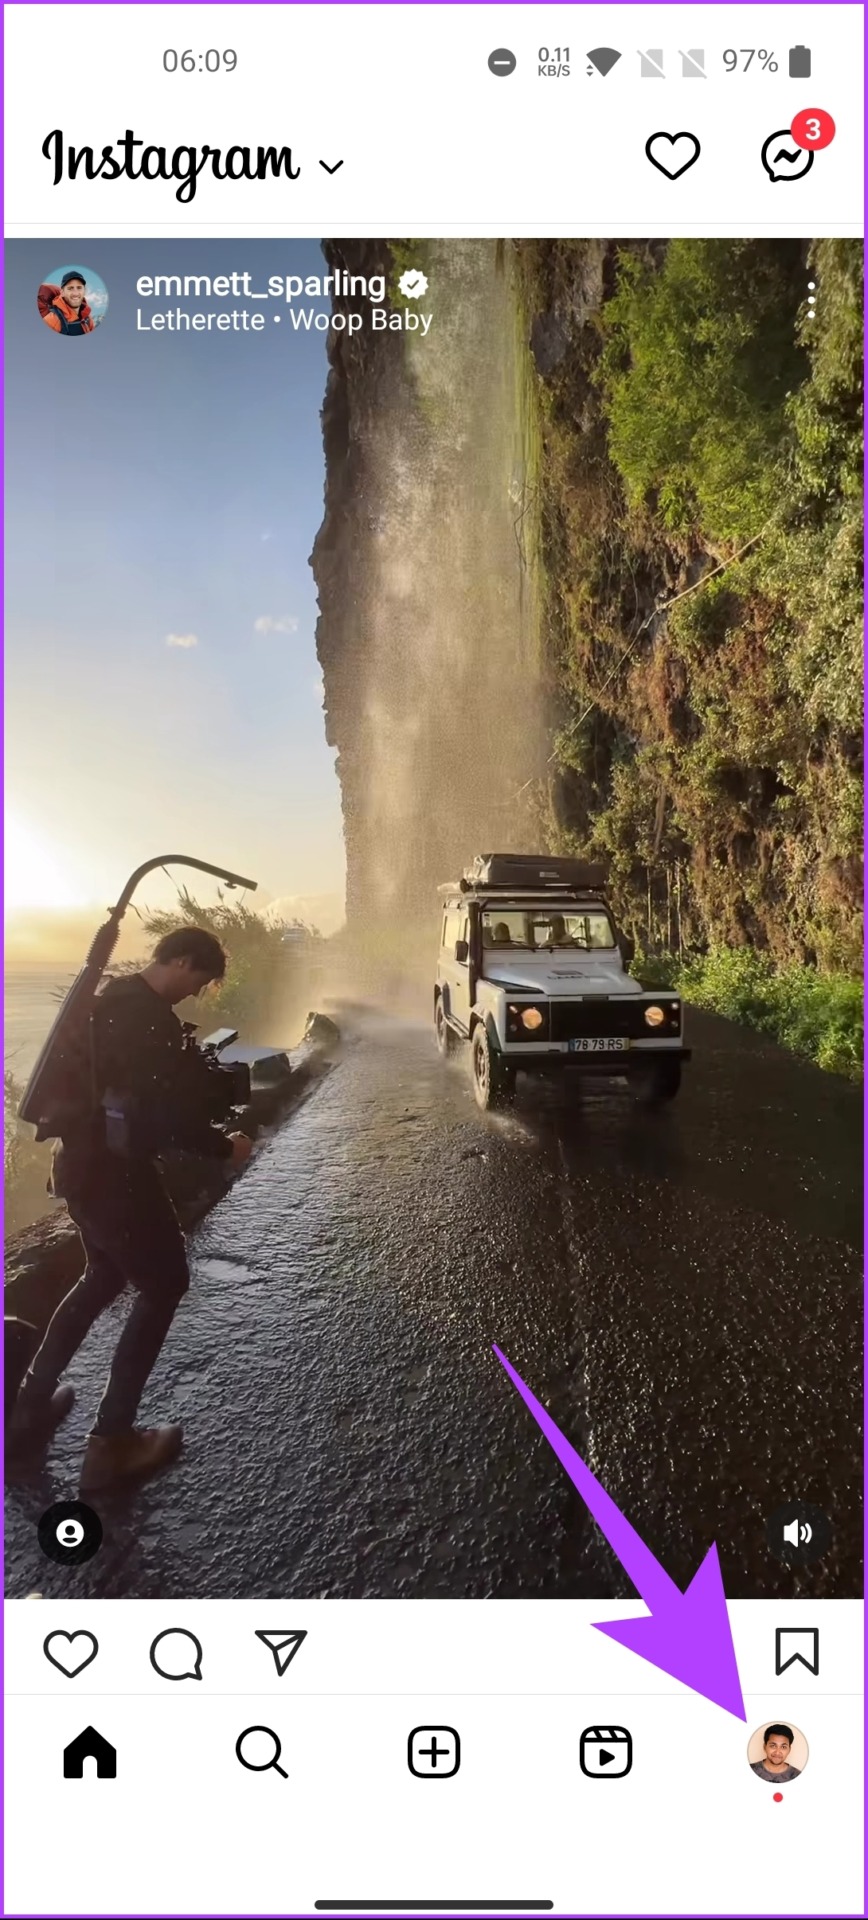
Step 2: Select the Reel in which you want to pin the comment.
Note: If the Reel is not visible, go to the Reels tab and check out.

Step 3: Click on the comment icon to view comments.
Step 4: Long-press on any comment and from the toolbar appears at the top, and tap on the thumbtack icon.
Note: If you are on iOS, swipe on the comment from the right instead of a long press.


There you go. You have pinned a comment on your Instagram Reels. You can pin 3 comments at a time. If you want to unpin any, follow the same steps and select Unpin.
How to Pin a Comment on an Instagram Post
Pinning a comment on an Instagram post makes it more noticeable to other users who view the post. That said, let’s begin with the steps.
Note: You can only pin comments on Android or iOS. The steps are pretty much the same; however, for demonstration purposes, we are going with iOS.
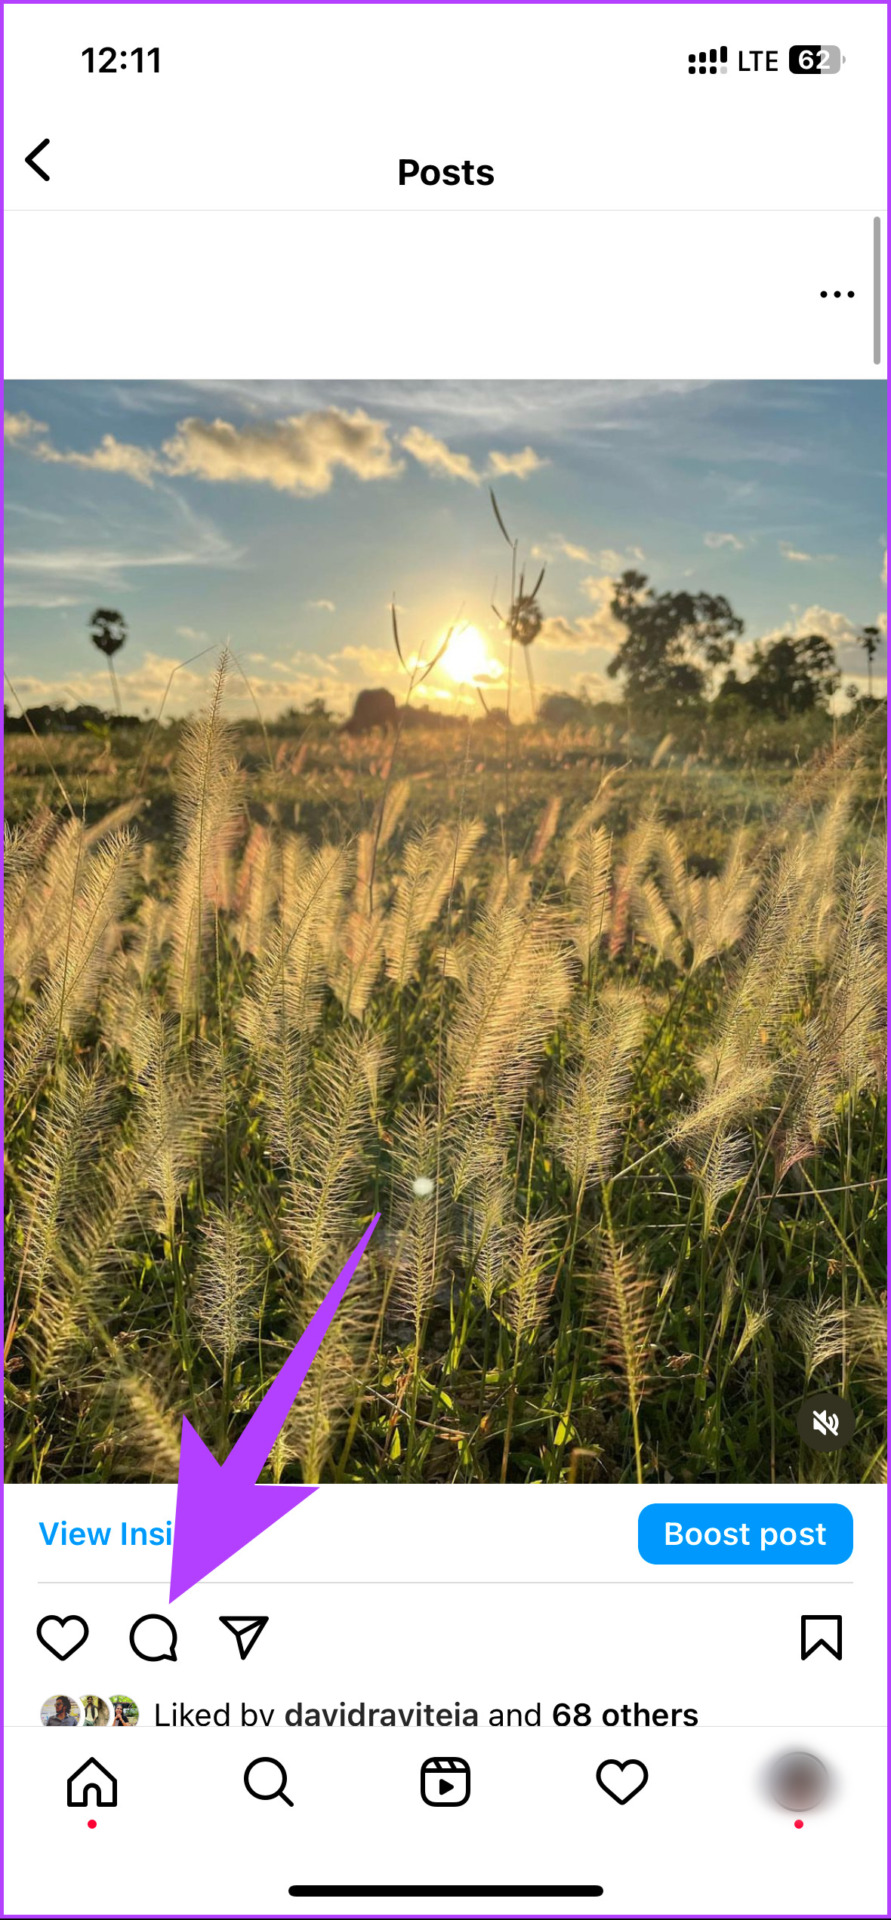
Step 1: Open the Instagram app and click on your profile picture at the bottom right corner.

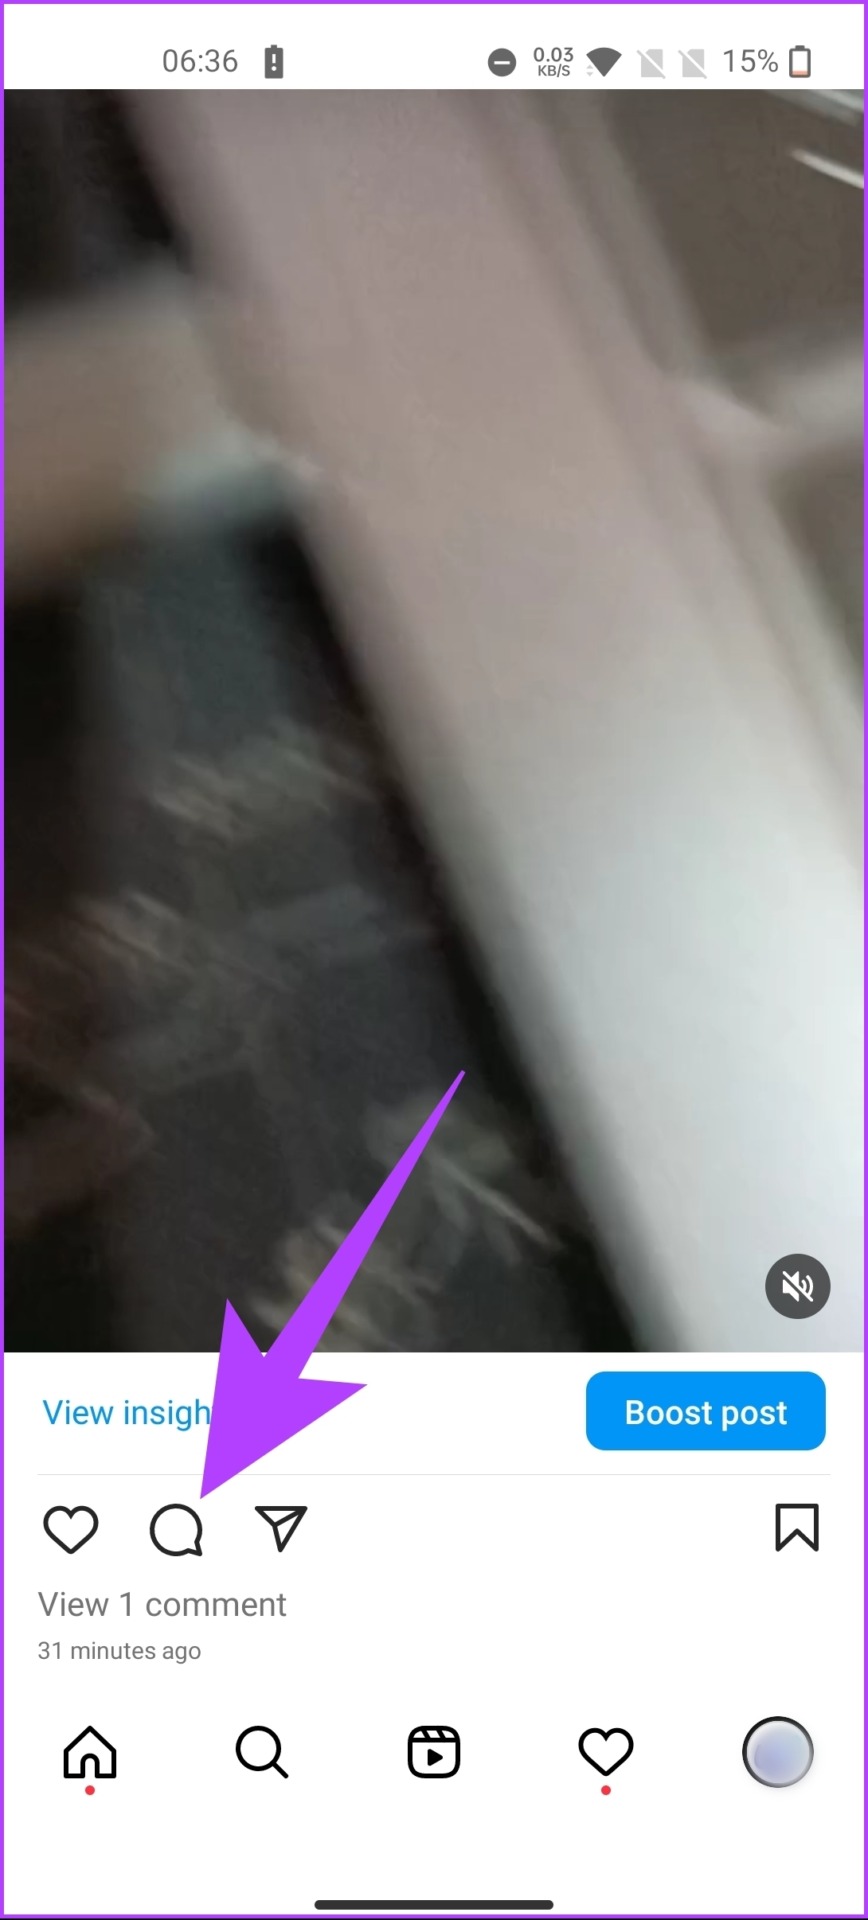
Step 2: Select the post where you want to pin a comment and tap the comment button.

Step 3: Find the comment you want to feature at the top.
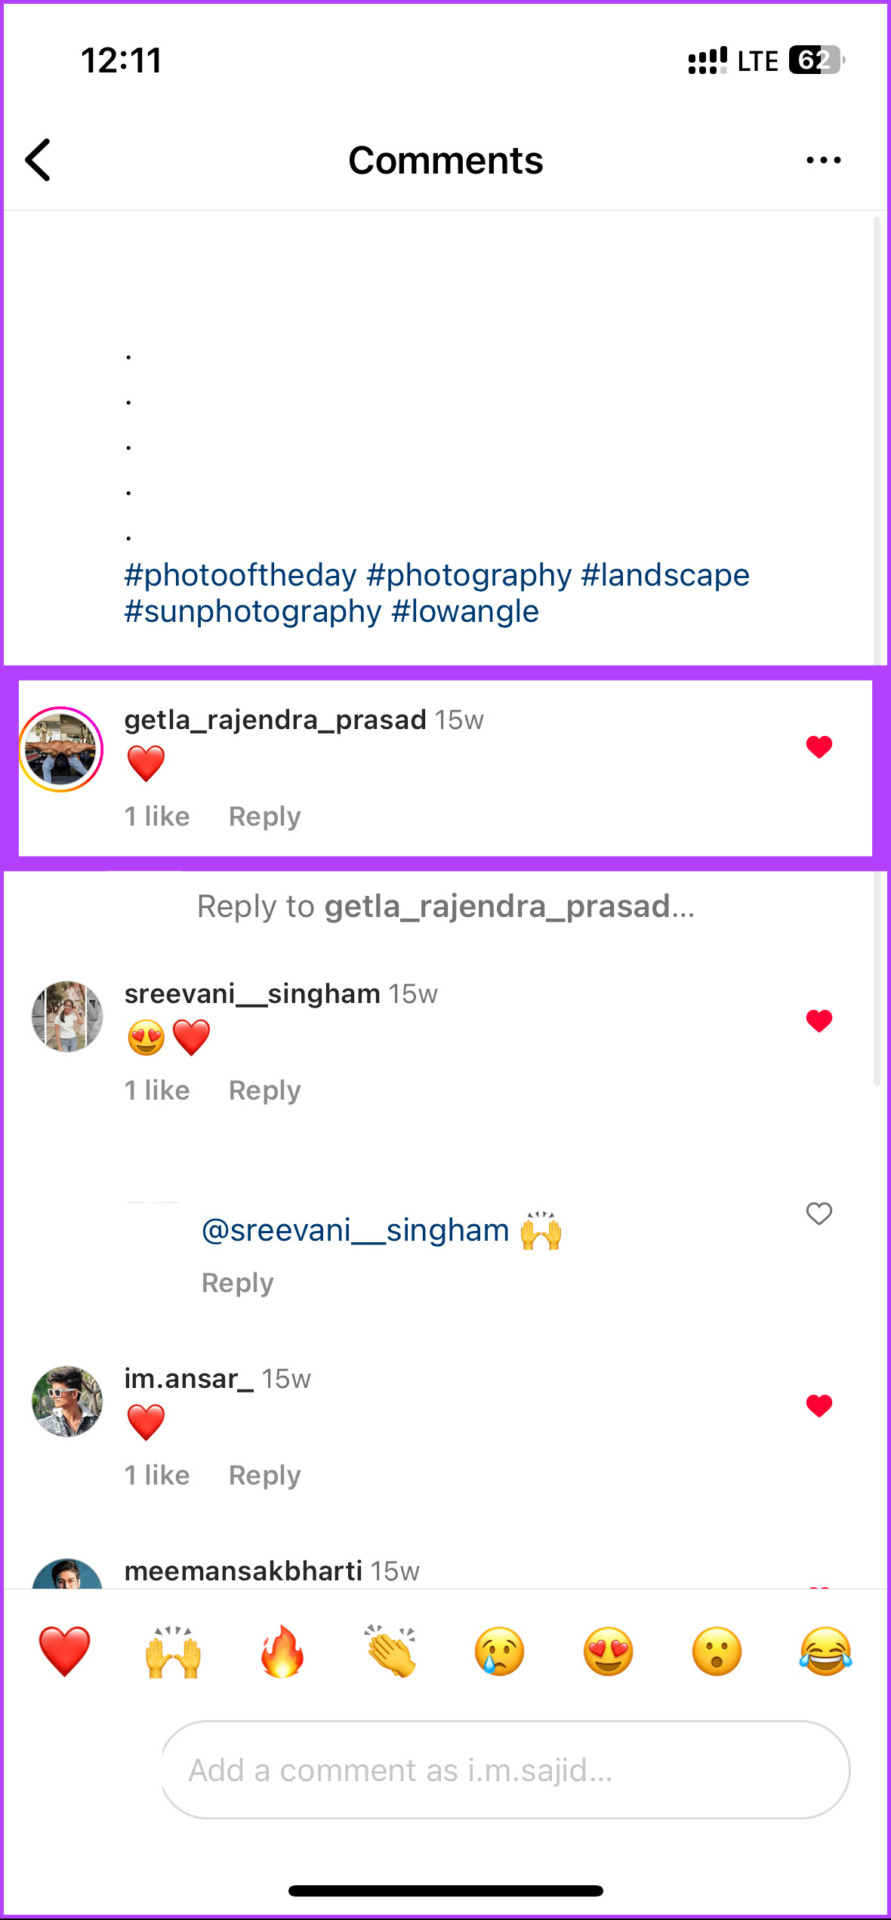
Step 4: Swipe on the comment from the right and select the thumbtack icon to pin the post.
Note: If you are on Android, long-press the comment you want to pin and select the thumbtack icon to pin it.

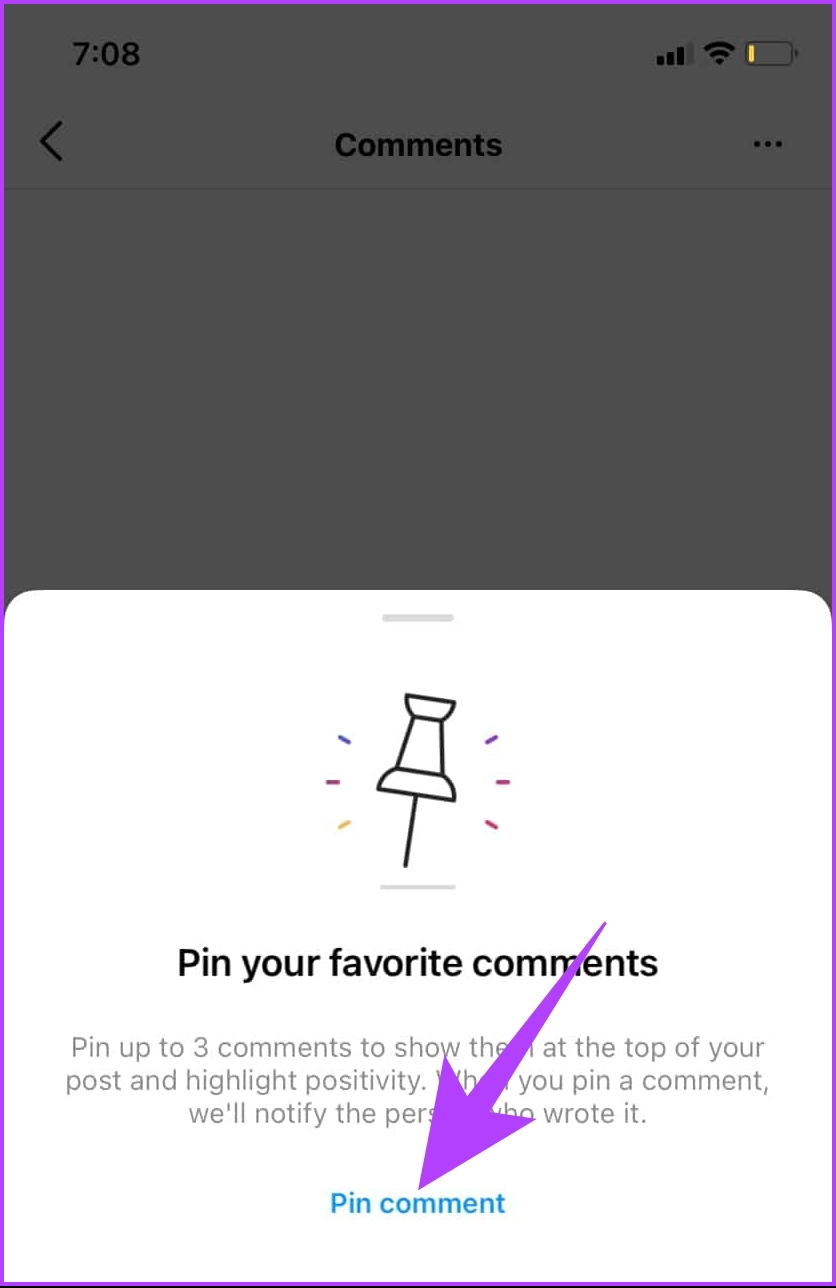
Step 5: Tap the Pin comment button if the verification message appears. It usually comes up the first time you pin a comment.
There you have it. You have successfully pinned a comment on your Instagram post. If you want to unpin, you can tap and hold the comment until the toolbar appears at the top and use the thumbtack icon to pin the comment.
Bonus: How to Pin Your Instagram Post
Now that you know how to pin a comment, it would be ideal to understand how to pin your Instagram post onto your profile. Pinning post drives more engagement, especially when someone comes to your account for direct interactions. Follow the steps below.
Note: The steps are similar on Android and iOS. For the sake of demonstrating, we are going with an Android device.
Step 1: Open Instagram and tap on your profile picture at the bottom right corner.
Step 2: Tap on the post you want to pin and click three dots from the top right.


Step 3: Tap the ‘Pin to your profile’ option to pin the post on your profile.

That’s it. You have successfully pinned the selected post onto your profile. If you want to unpin the comment, follow the steps and click unpin the post.
FAQs on Pinning an Instagram Comment
In the comment section, pinned comments are displayed at the top and are visible to all users who can view the comments. These comments highlight important or relevant information for all users to see.
The account owner or a designated moderator can delete a pinned comment on Instagram. The account owner or a designated moderator can delete all comments on an Instagram post, including pinned comments.
Highlight Your Comment
With Instagram’s Pin a Comment feature, you can showcase and highlight relevant comments on your posts simply and straightforwardly. Following the steps outlined in this article, you can pin comments in no time and raise your Instagram commenting game. So, give it a try, and make the most of your Instagram experience. You may also want to read how to schedule Instagram posts and reels for free via the mobile app.
Was this helpful?
Last updated on 08 February, 2023
Read Next
 How to Comment a GIF On Instagram Posts
GIFs are such a fun part of online conversations.
How to Comment a GIF On Instagram Posts
GIFs are such a fun part of online conversations.
 How to Recover Deleted Instagram Posts, Stories, Reels, and IGTV Videos
To save people from losing their Instagram data when their account gets hacked, Instagram launched the Recently Deleted feature.
How to Recover Deleted Instagram Posts, Stories, Reels, and IGTV Videos
To save people from losing their Instagram data when their account gets hacked, Instagram launched the Recently Deleted feature.
 Top 9 Fixes for Can’t Post Comment on Facebook Posts
Whether you want to express thoughts on a friend's post, engage in lively discussions on a group page, or react to a shared article, Facebook's comments section facilitates all these
Top 9 Fixes for Can’t Post Comment on Facebook Posts
Whether you want to express thoughts on a friend's post, engage in lively discussions on a group page, or react to a shared article, Facebook's comments section facilitates all these
 11 Ways to Fix the Couldn’t Post Comment Error on Instagram App
So, you come across a hilarious meme on Instagram and want to tag your buddies, only to realize Instagram won't let you comment on the post.
11 Ways to Fix the Couldn’t Post Comment Error on Instagram App
So, you come across a hilarious meme on Instagram and want to tag your buddies, only to realize Instagram won't let you comment on the post.
 Instagram Reels vs Story: What Are the Differences
Instagram’s journey has been predictable.
Instagram Reels vs Story: What Are the Differences
Instagram’s journey has been predictable.
 How to Download Instagram Reels on iPhone and Android: 5 Best Ways
Instagram Reels allows you to create and share 15-second videos.
How to Download Instagram Reels on iPhone and Android: 5 Best Ways
Instagram Reels allows you to create and share 15-second videos.
 14 Easy Ways to Fix Reels Option Not Showing on Instagram
Instagram started as an image-sharing platform and has come a long way to become a place with a wide variety of content formats to view.
14 Easy Ways to Fix Reels Option Not Showing on Instagram
Instagram started as an image-sharing platform and has come a long way to become a place with a wide variety of content formats to view.
 Why Are My Instagram Reels Blurry and How to Fix It
As one of the most popular short-form video content, Instagram Reels need no introduction.
Why Are My Instagram Reels Blurry and How to Fix It
As one of the most popular short-form video content, Instagram Reels need no introduction.
The article above may contain affiliate links which help support Guiding Tech. The content remains unbiased and authentic and will never affect our editorial integrity.

