Personalizing the Lockscreen of your Windows 11 computer is a first step to make the system looks yours. Microsoft has made the Lockstreen more customizable with Windows 11 apart from adding several other features and improvements.
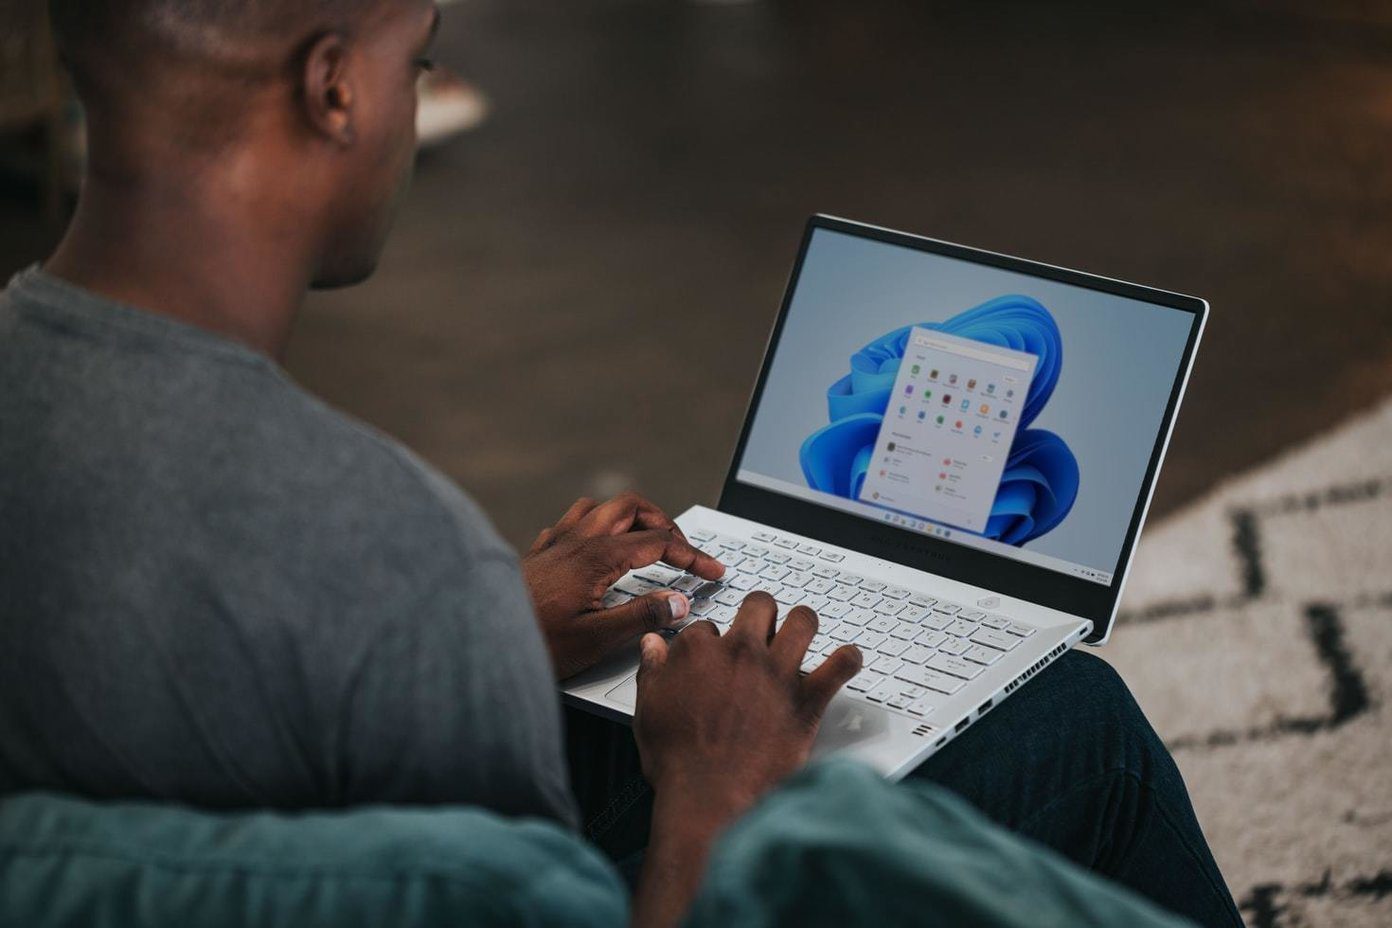
With that, Microsoft has updated the interface of Windows 11. Apart from personalizing the Start Menu, you can customize the Lock screen too. This means that your previous lock screen customization settings have been reset when you updated to the new OS.
However, the streamlined menus make personalizing your operating system easier than ever. Keep reading to see exactly how you can alter the look and functionality of your lock screen.
How to Personalize Your Lock Screen
While Windows 11 lets you customize the Lock screen, but Microsoft has yanked out a few things. For starters, the Windows 11 no longer supports multiple lock screen widgets, but you can use widgets otherwise on your computer. That said, you can use a widget that will appear at the bottom. Here’s how to do it:
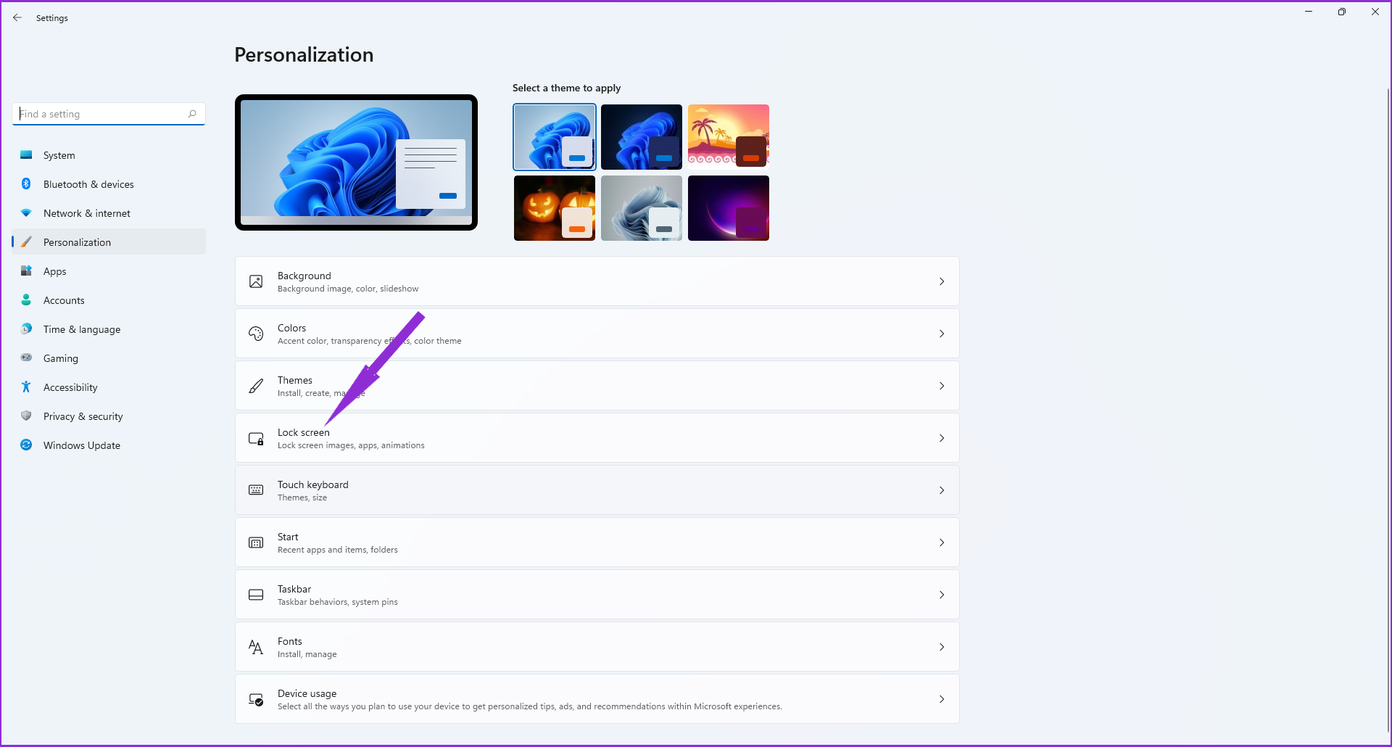
Step 1: Right-click on an empty space on your desktop to bring down the contextual menu and select Personalize.
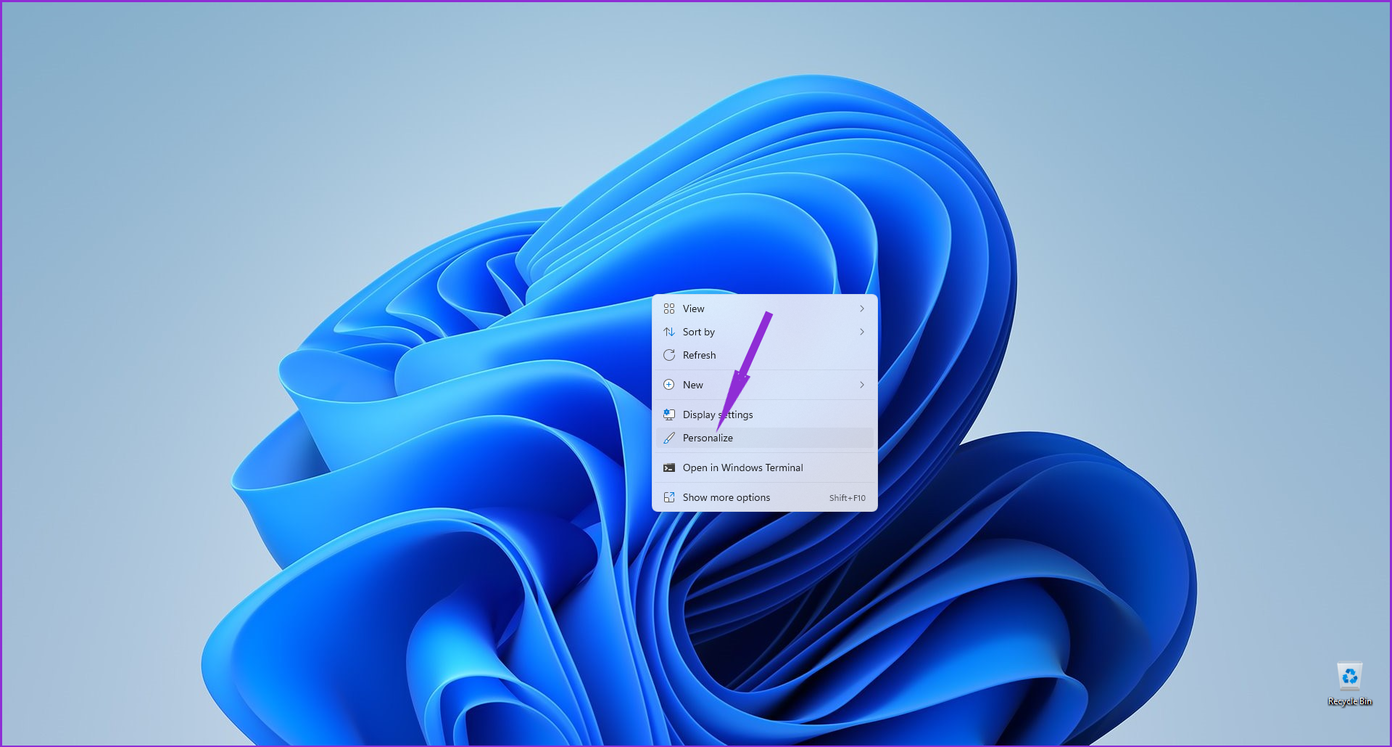
Step 2: Click on the Lock screen option from the personalization settings menu.
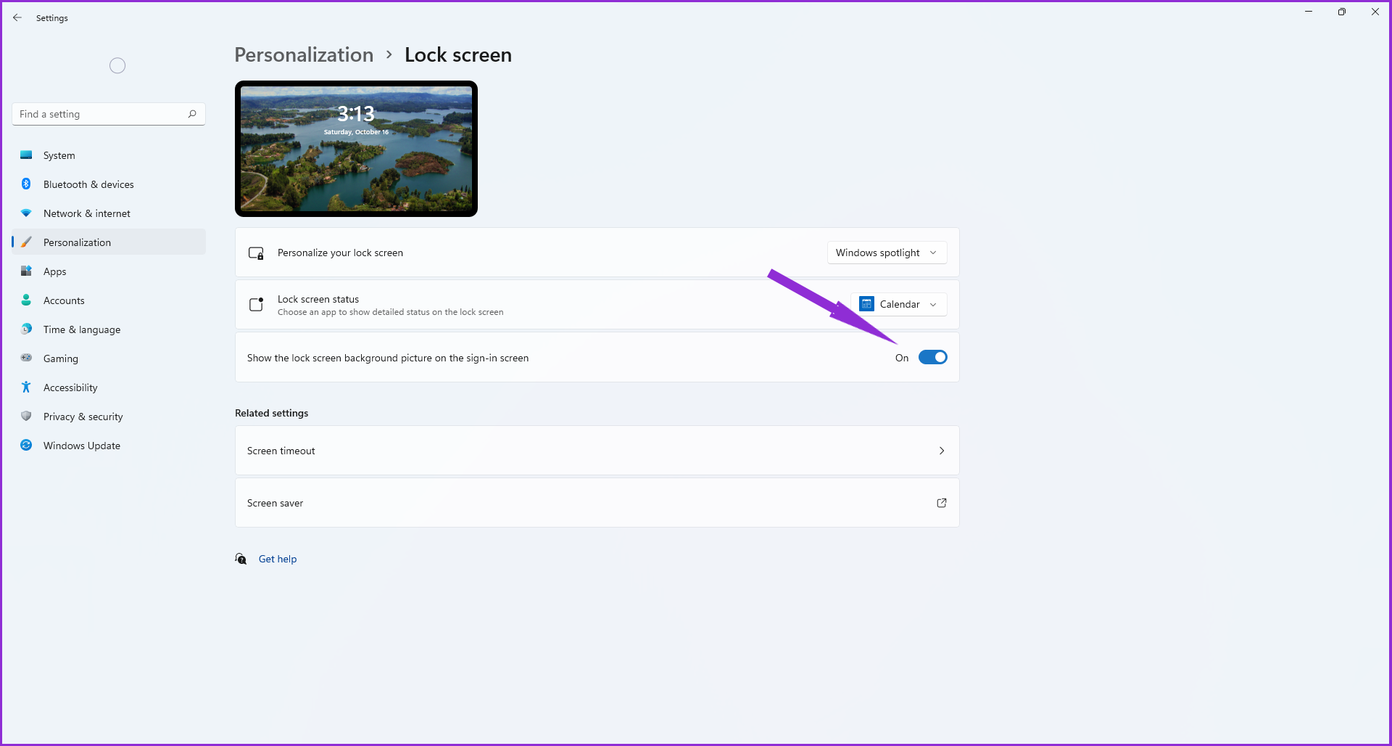
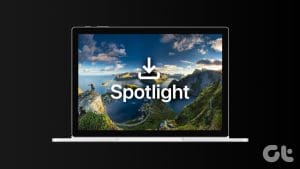
Step 3: Select the drop-down next to ‘Personalize your lock screen’ option to choose between Windows Spotlight, Picture, or Slideshow.

Keep in mind that for Windows Spotlight to work, your computer needs to be connected to the internet since it automatically downloads new backgrounds daily.
The Slideshow option allows you to choose a folder that contains photos and automatically rotates them from time to time. Lastly, Picture will make it possible to choose an image file from your computer and set it as your lock screen background.
Step 4: Click on the drop-down menu from the Lock screen status to choose the widget that you want to be displayed at the bottom of the lock screen

The widgets that you will see in the list depend on what applications you have installed. If you’ve just updated, the only widget options will be the stock ones like Mail to show your emails and Calendar to display your appointments.
Productivity, financial, or shopping apps offered through the Microsoft Store are more likely to contain lock screen widgets. Currently, software that is manually installed using executable files does not appear in the widget list.
Step 5: Enable the ‘Show lock screen background picture on the sign-in screen’ option. That will allow Windows to display your lock screen wallpaper on the sign-in screen.
You will only see the PIN security screen if you have set a password for your user account. Also, the themes that you install and apply will not have any impact on your lock screen.
Additional Settings That You Can Change
The Lock Screen personalization page also contains related settings that affect how your lock screen behaves. You can change how long the display stays active when you’re not using your computer by taking the following steps:
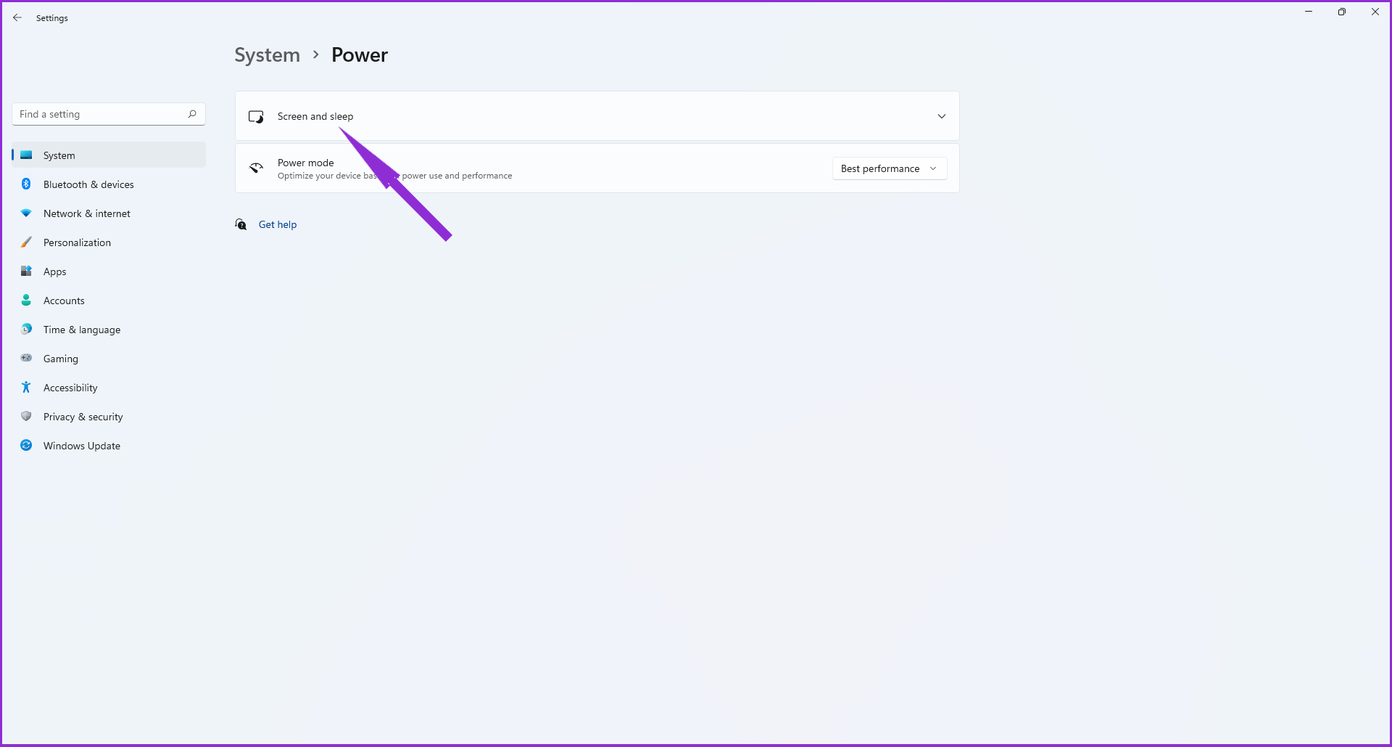
Step 1: Open the Settings app, click on Personalization and select Lock Screen on the right-hand pane. Then, click on Screen timeout.

Step 2: Select the Screen and sleep option.
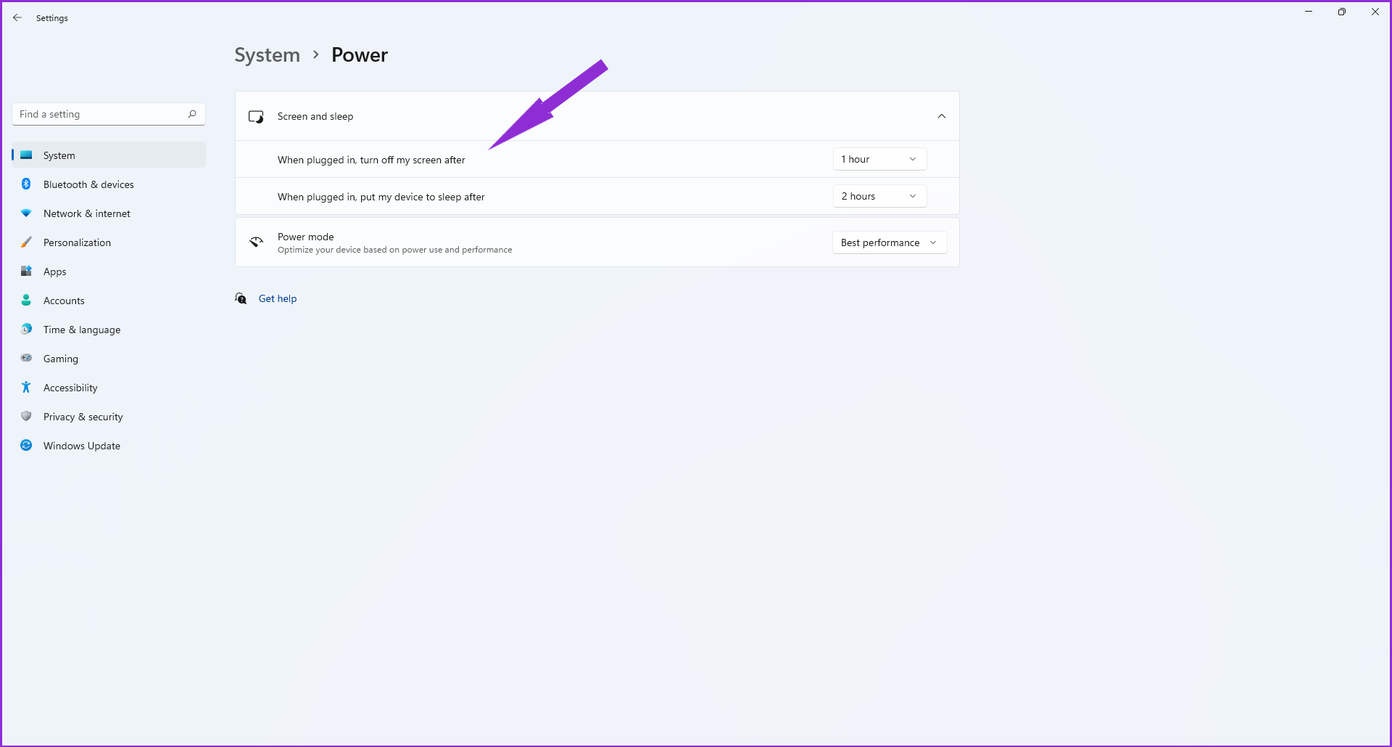
Step 3: You can modify the two values and set the timeout to anything from 5 minutes to Never.
Some of these settings will only be useful if you’re using a laptop. You can also set a screen saver to appear on your display when you’re not using your computer:
Step 1: Open the Settings app, click on Personalization and select Lock Screen on the right-hand pane.
Step 2: Select the Screen Saver from the Lock Screen personalization page.

Step 3: Open the drop-down menu under the Screen Saver section. That will open another pop-up window.

Step 4: Select a screen saver from the list.

Step 5: Modify the Wait value to set how long Windows 11 waits before displaying the screen saver. That means the screen saver will show up only after the time you specify.
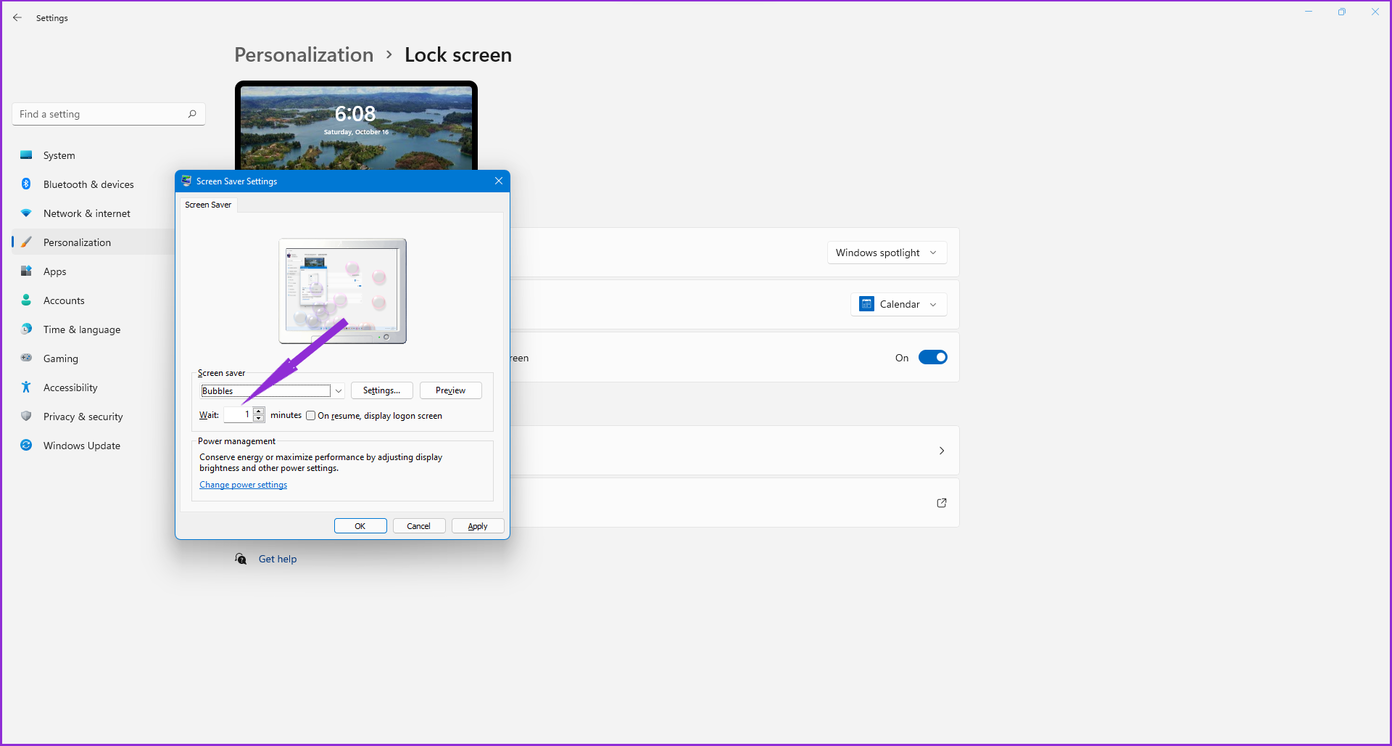
You can also check the ‘On resume, display logon screen’ option which will show the logon screen option whenever you want to use your computer again.
Personalize the Lock Screen
Although Microsoft has reduced some of the personalization freedom that Windows 10 had offered, you can still tweak the operating system to look however you want.
Everything from the Start menu to the taskbar and cursor can be customized. Follow the steps presented above and make your Windows 11 installation reflect your personality.
Was this helpful?
Last updated on 07 February, 2022
Read Next
 How to Personalize an iPad Lock Screen With Widgets and Live Wallpapers
Apple introduced lock screen customization on iPhone with the iOS 16 update last year.
How to Personalize an iPad Lock Screen With Widgets and Live Wallpapers
Apple introduced lock screen customization on iPhone with the iOS 16 update last year.
 How to Personalize Siri’s Response and Actions on iPhone
Siri is a virtual assistant available on Apple products.
How to Personalize Siri’s Response and Actions on iPhone
Siri is a virtual assistant available on Apple products.
 iOS 16: How to Set Different Lock Screen and Home Screen Wallpaper on iPhone
iOS 16 mainly focused on bringing changes to wallpapers on iPhone.
iOS 16: How to Set Different Lock Screen and Home Screen Wallpaper on iPhone
iOS 16 mainly focused on bringing changes to wallpapers on iPhone.
 7 Best Ways to Fix Hibernate Goes to Lock Screen Error on Windows 10
The Hibernate mode, not to be confused with the Sleep feature, on Windows OS saves battery, but the best part is, you can close your lid to activate it.
7 Best Ways to Fix Hibernate Goes to Lock Screen Error on Windows 10
The Hibernate mode, not to be confused with the Sleep feature, on Windows OS saves battery, but the best part is, you can close your lid to activate it.
 How to Save Windows Spotlight (Lock Screen) Wallpapers
Windows Spotlight's stunning landscapes and vibrant scenes might just be the refresh you need.
How to Save Windows Spotlight (Lock Screen) Wallpapers
Windows Spotlight's stunning landscapes and vibrant scenes might just be the refresh you need.
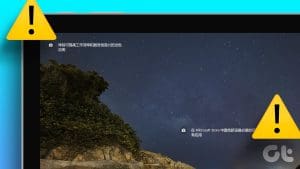 Top 4 Ways to Fix Chinese Characters on Windows Lock Screen
Is the lock screen on your Windows 10 or 11 PC suddenly displaying Chinese characters?
Top 4 Ways to Fix Chinese Characters on Windows Lock Screen
Is the lock screen on your Windows 10 or 11 PC suddenly displaying Chinese characters?
 How to Delay Android Phone Screen Lock Time
If you have activated security lock on your Android device (PIN, Password or Pattern) you must have noticed that your Android locks instantly when the screen times out or when
How to Delay Android Phone Screen Lock Time
If you have activated security lock on your Android device (PIN, Password or Pattern) you must have noticed that your Android locks instantly when the screen times out or when
 Top 2 Ways to Remove Ads from Samsung Galaxy Phone Lock Screen
Ads and pop-up banners appearing on your Galaxy phone’s lock screen and home screen can ruin the whole One UI experience for you.
Top 2 Ways to Remove Ads from Samsung Galaxy Phone Lock Screen
Ads and pop-up banners appearing on your Galaxy phone’s lock screen and home screen can ruin the whole One UI experience for you.
The article above may contain affiliate links which help support Guiding Tech. The content remains unbiased and authentic and will never affect our editorial integrity.