There are plenty of photo editing apps on your phone and PC. But, those built-in photo editors hardly ever give you anything more than an option to crop, rotate and slap a filter over your image. Imagine using a powerful tool that’s also available online, and that’s where Canva can make a difference.

Popularly known for creating logos and Instagram posts, Canva also carries a powerful photo editing tool that gives you way more tools than an average photo editing app yet is simple to use. We’ll show you how to use Canva’s image editor to make eye-catching photos.
How to Crop, Resize, and Flip Image in Canva
First, let’s see how you can upload your image in Canva’s image editor to start editing it.
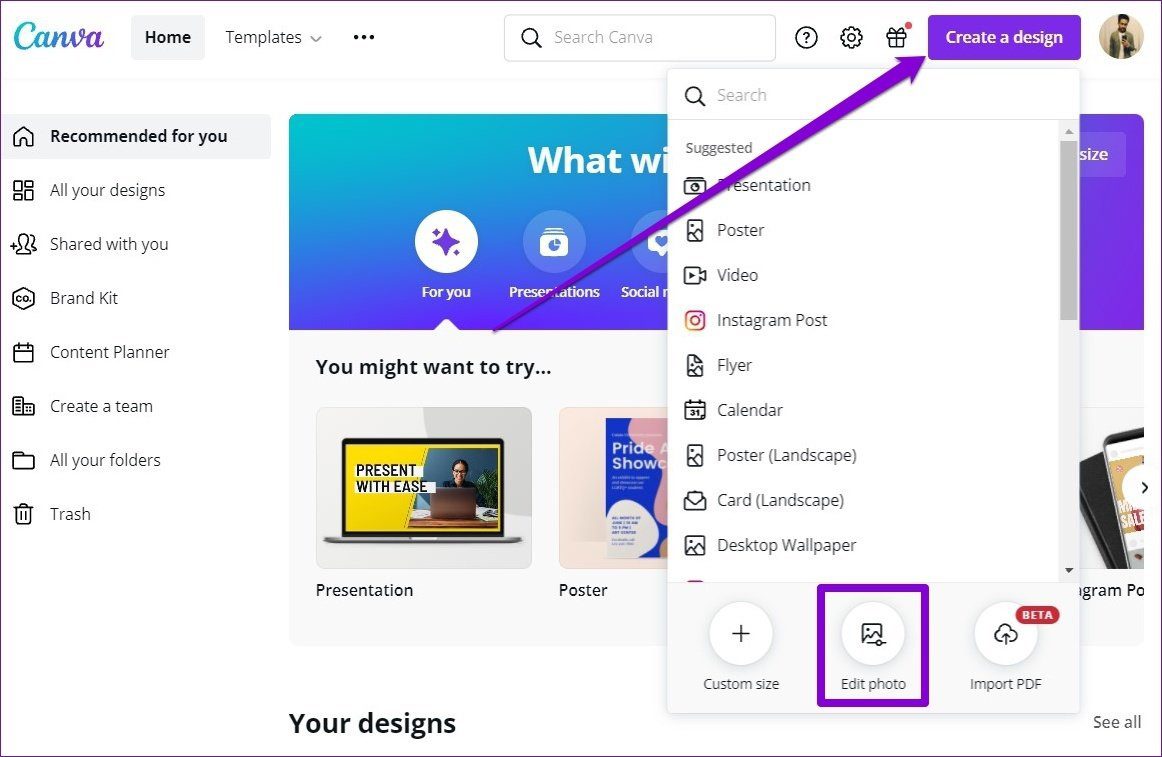
Step 1: Open up your web browser and navigate to Canva. Click on the Create a design button to choose the Edit photo option from the menu.
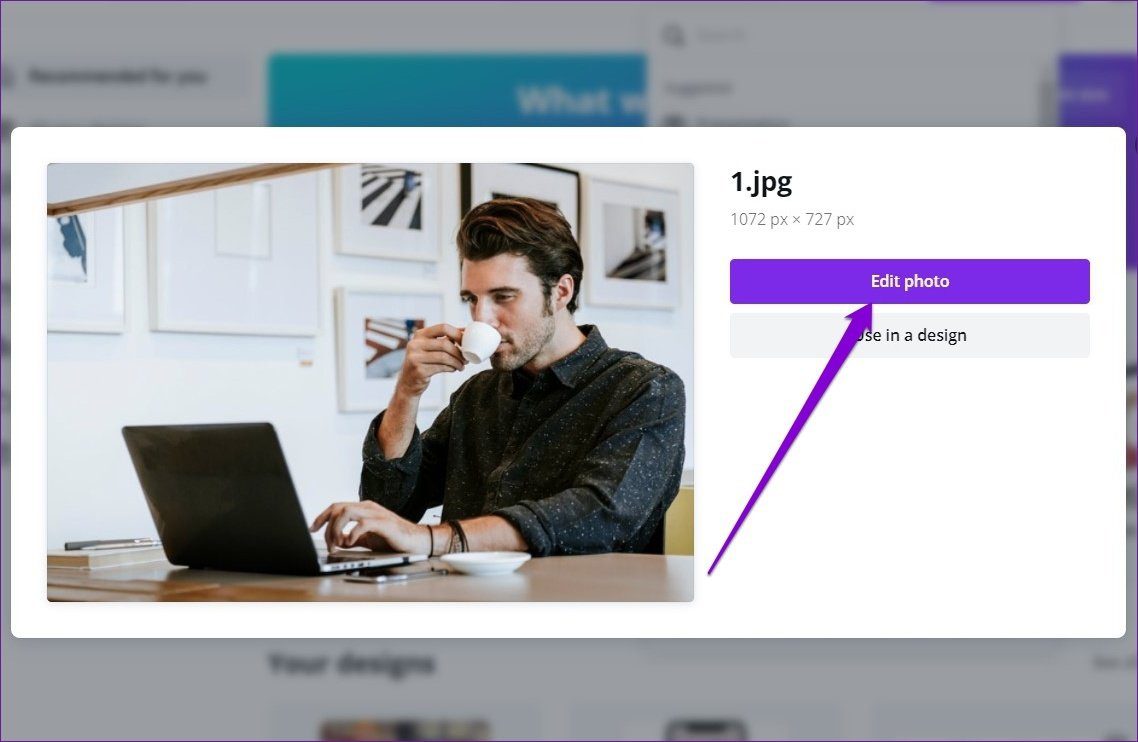
Step 2: Upload the photo from your PC and click on the Edit photo option.
Step 3: Once uploaded, a project window will appear, and you’re all set to edit your photo using Canva’s image editor.
Crop Images in Canva
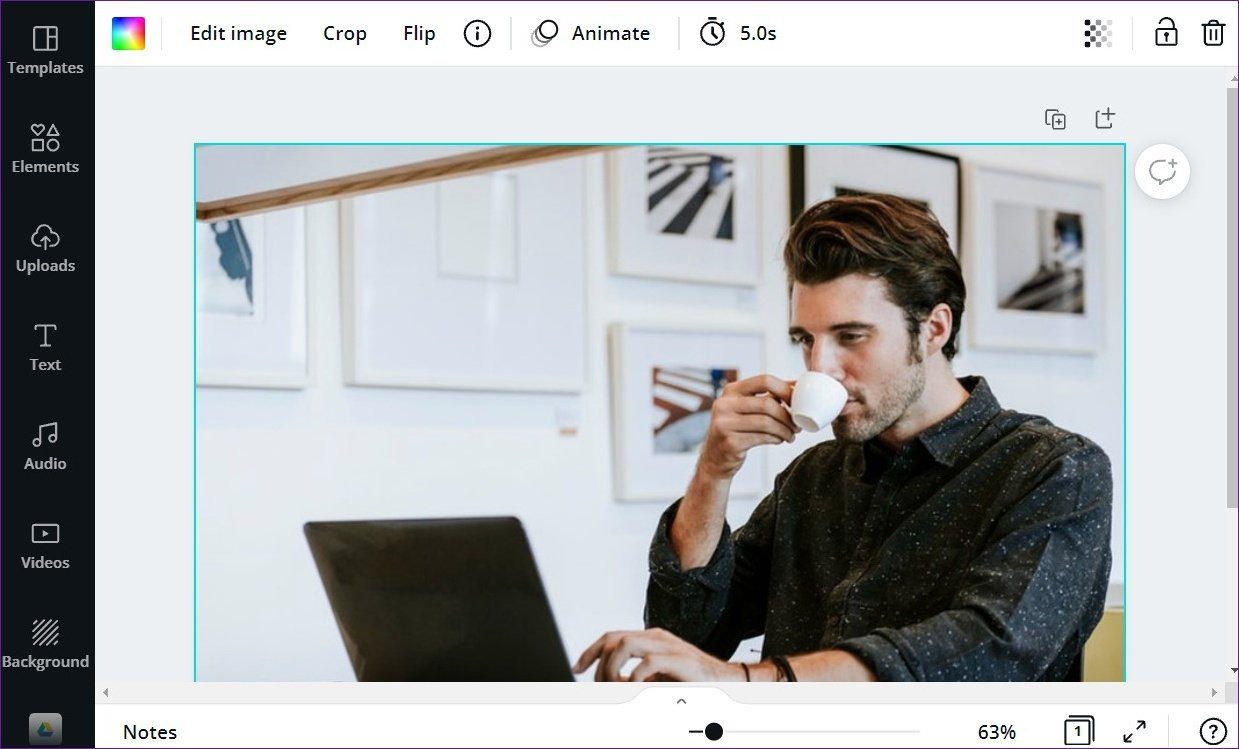
Cropping your image allows you to focus on the main subject of the photo by removing distracting elements. To crop your image in Canva, select the image in the project window and click on the Crop button at the top.
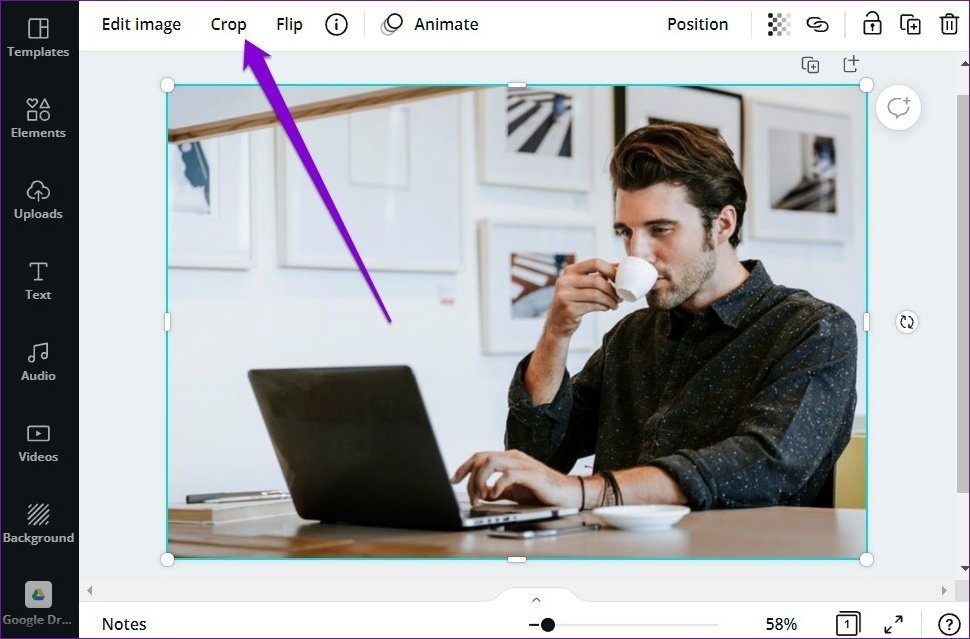
Now adjust the frame surrounding the image to crop your photo. Lastly, click on Done to save changes.

Besides this, you can also crop images into shapes using the elements tab.
Resize Images in Canva
Aside from cropping, you can also resize your photo to a particular dimension in Canva. To do that, click on the Resize button on your top left and enter your preferred width and height under Custom size.

Flip Images in Canva
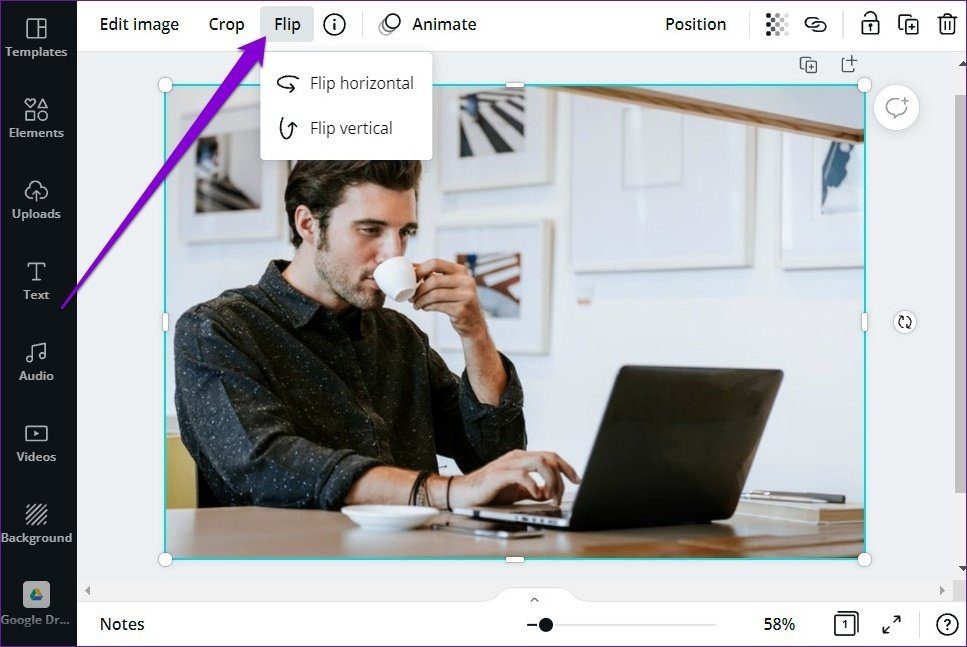
You can also flip images in Canva’s image editor to give them a fresh perspective. To do that, select the image in the project window and click on the Flip button to mirror your image horizontally or vertically.
How to Apply Filters in Canva
Aside from the basic editing tools, Canva also offers a few captivating filters that you can apply to your photo. Here’s how.
Step 1: Select the image inside the photo editor and click on the Edit image option.

Step 2: In the menu that appears on your left, scroll down to the Filters section. You can apply any of the filters by clicking on them. Additionally, you can also double-click on the filter to modify its intensity.
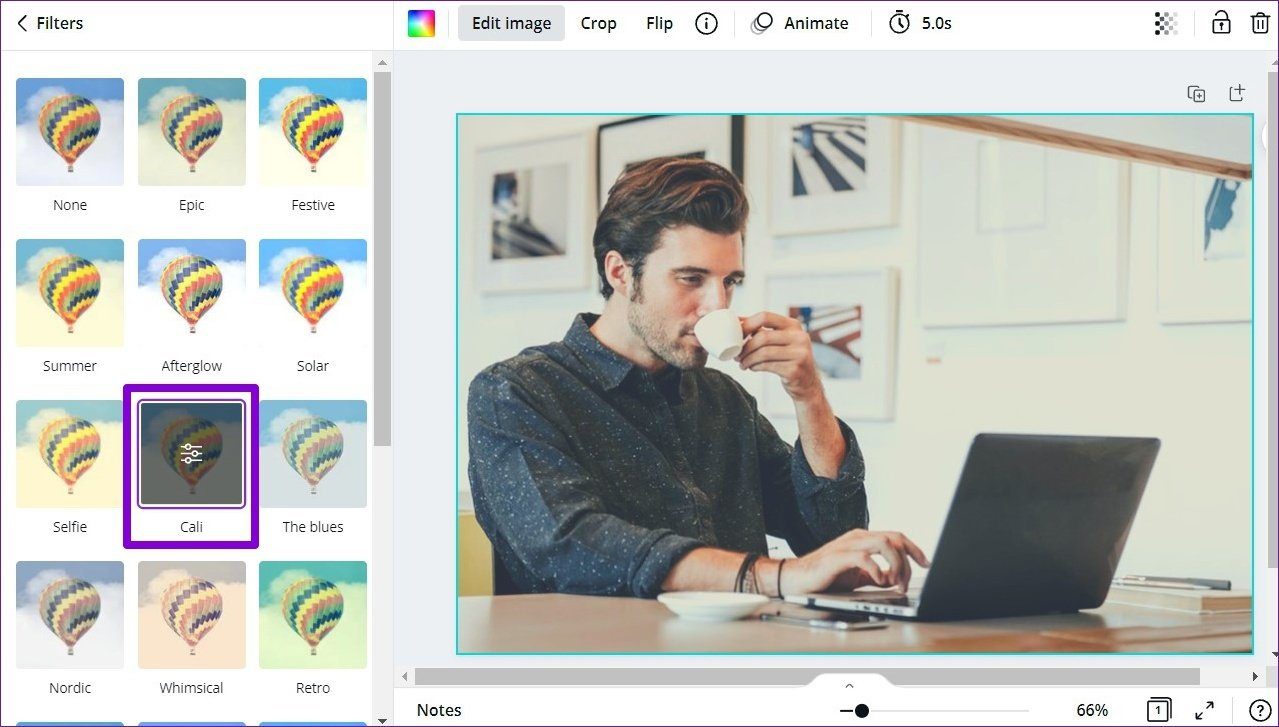
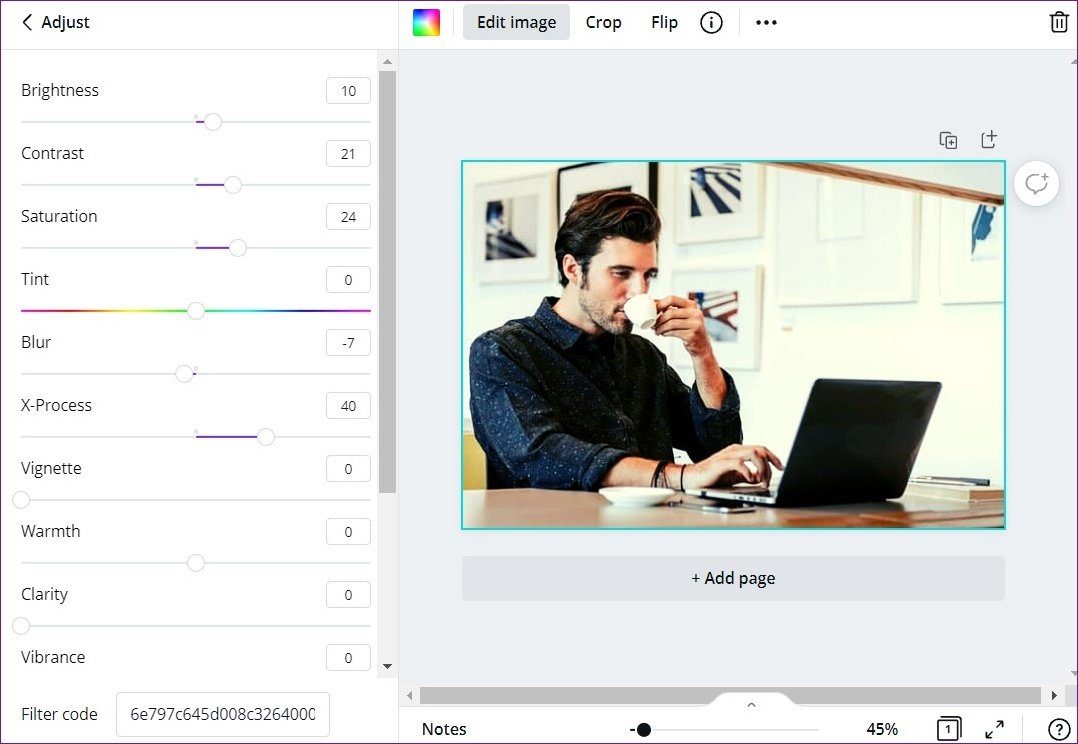
Alternatively, you can also enhance the image manually by using a few adjustments tools. To do that, click on the Edit image button on your top left and go to Adjust section. Click on the See all button next to it expand it.
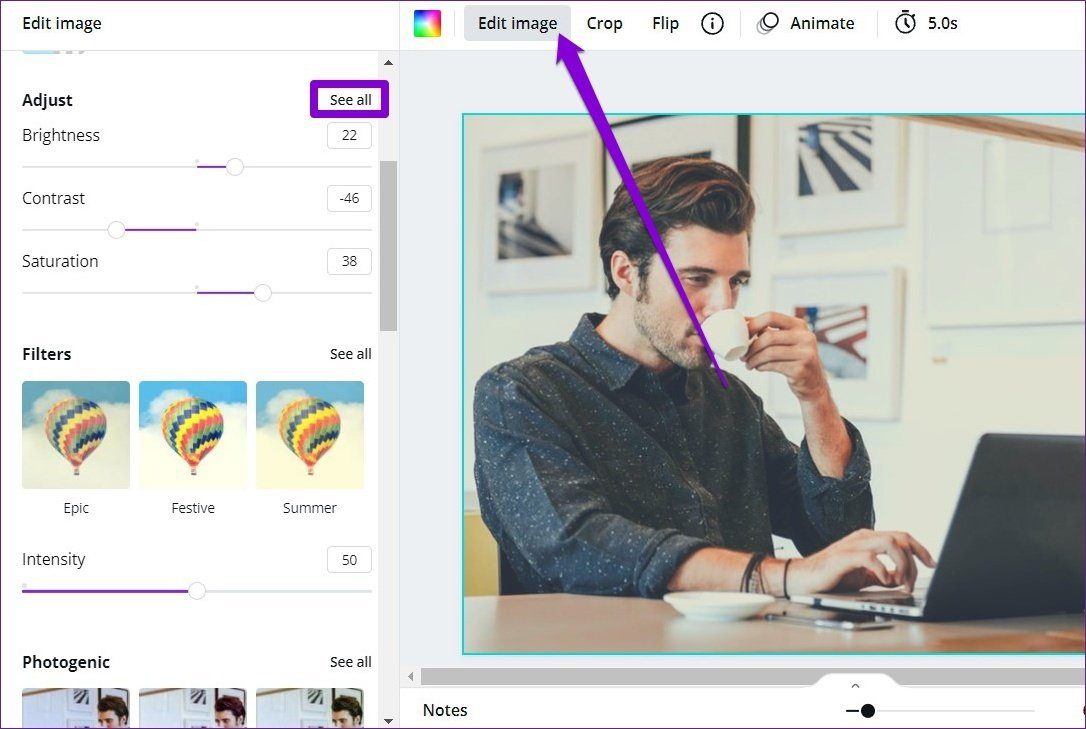
Here, you can manually tweak things like brightness, contrast, saturation, clarity, and more to liven up your image.
How to Remove Background from Image in Canva
Gone are the days when you had to use a brush and an eraser to remove the background from a photo. With Canva, you can easily remove the background from your photo in a few clicks.
To remove background from photo, select it and click on the Edit image button at the top. Now choose the Background Remover option from the list.

That’ll remove the background.
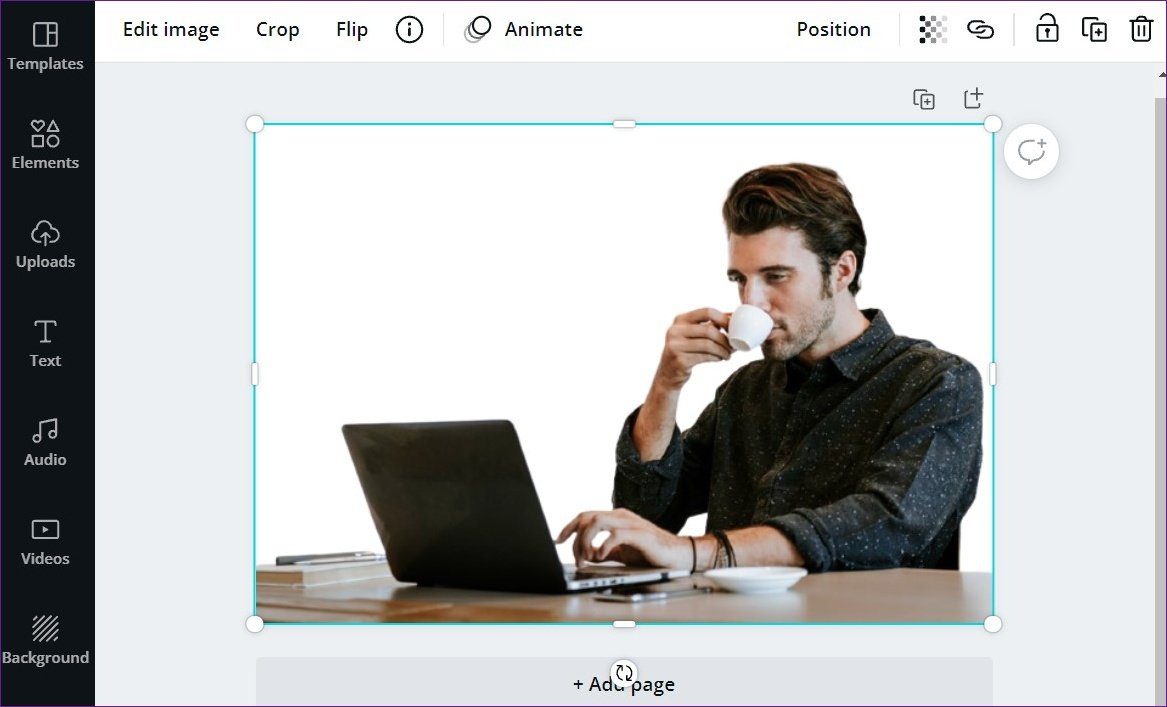
Once removed, you can now add elements and text to your photo to make it more interesting.
How to Add Elements and Text in Canva
While you can crop and apply filters to an image on almost any photo editing app, what separates Canva from the competition is its comprehensive library of elements and text styles that you can use to make them more professional-looking.
Add Elements on Image
Step 1: Switch to the Elements tab on your left. Here, you can go through Canva’s extensive library of various stickers, graphics, photos, charts, and more.
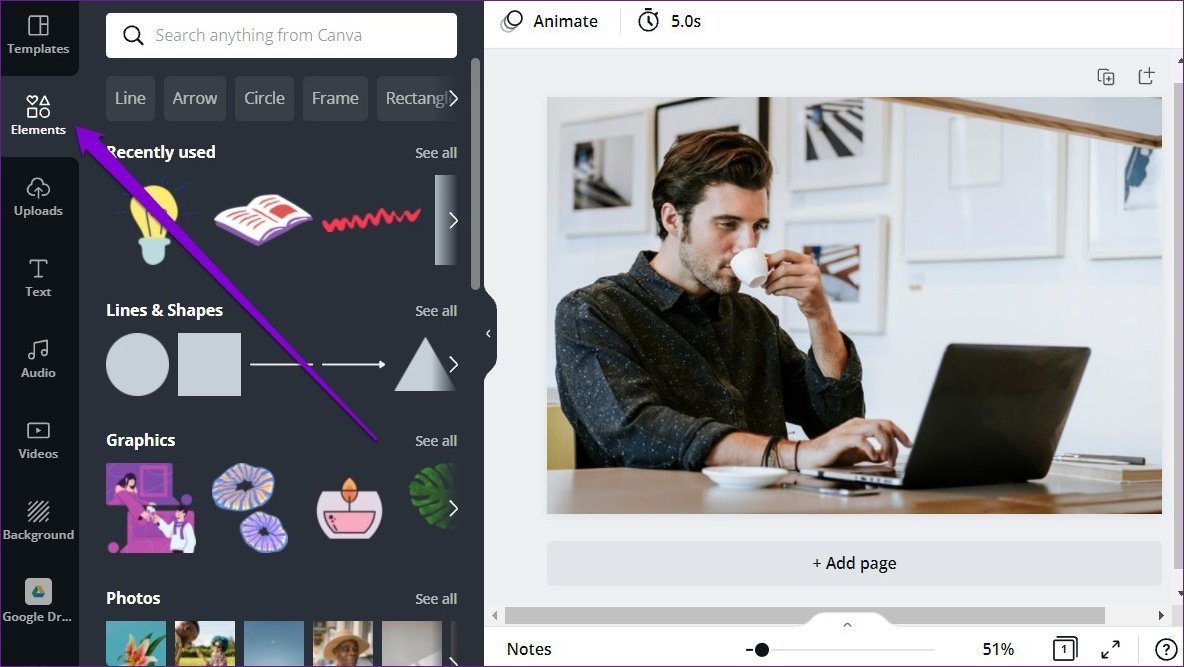
Step 2: Click on the preferred element to add it to your image. Once added, you can move, resize, and crop the element using the toolbar above.

Additionally, you can also lock the added element so that you don’t accidentally move it. To lock an element, select it and click on the lock icon in the top right.

Similarly, you can also remove an element using the trash icon next to it.
Add Text on Image
Apart from stickers and photos, you can add text to your image to make it more descriptive.
Step 1: Navigate to the Text tab on your left. Now, choose from the available text styles to add a text box.
Alternatively, you can also explore and use a readily available font combinations to add text to your image.

Step 2: Edit the text inside the text box and move it to your preferred location. Additionally, you can change the font style, size, color, position, spacing, and more using the toolbar at the top.
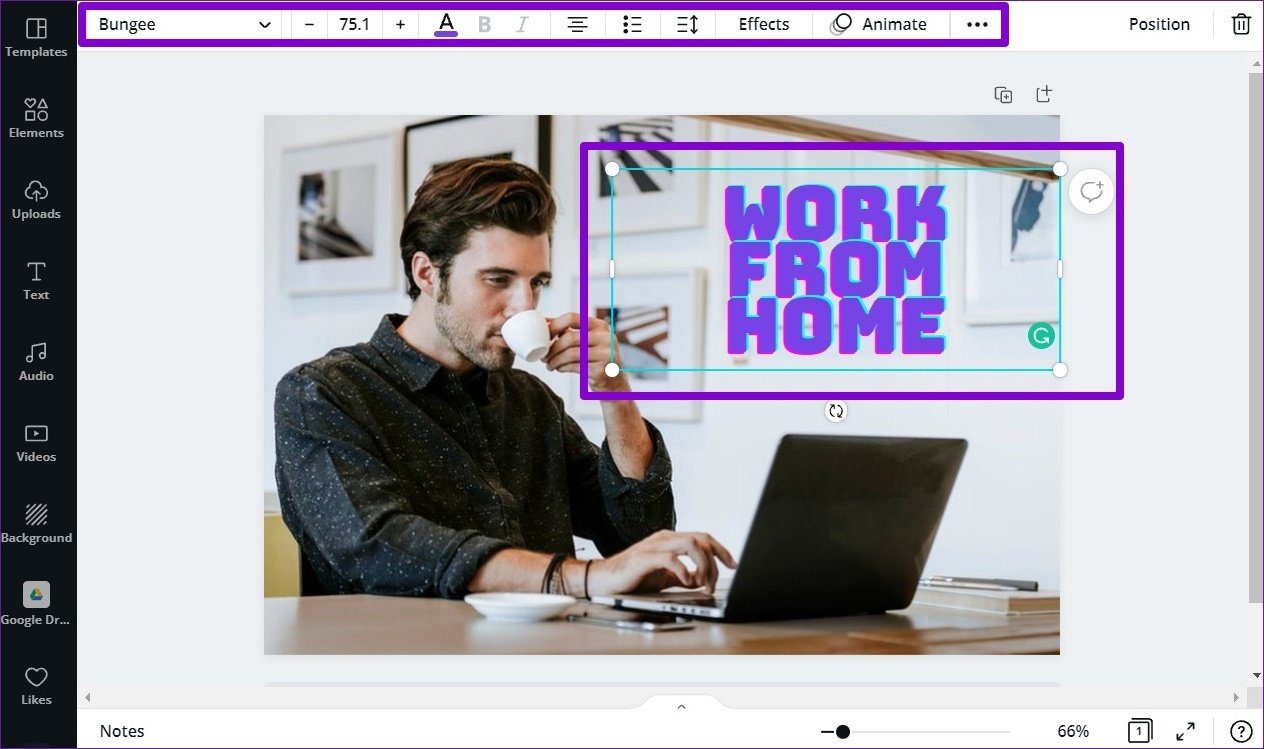
Again, you can lock or remove the added text boxes using the toolbar above.
How to Download Edited Photo
After editing your photo, you’ll need to download it. You can download it by following the steps below.
To download your photo, click on the download button in the upper right corner and use the drop-down menu under File type to pick from the available formats. Lastly, click on the Download button to get your image.
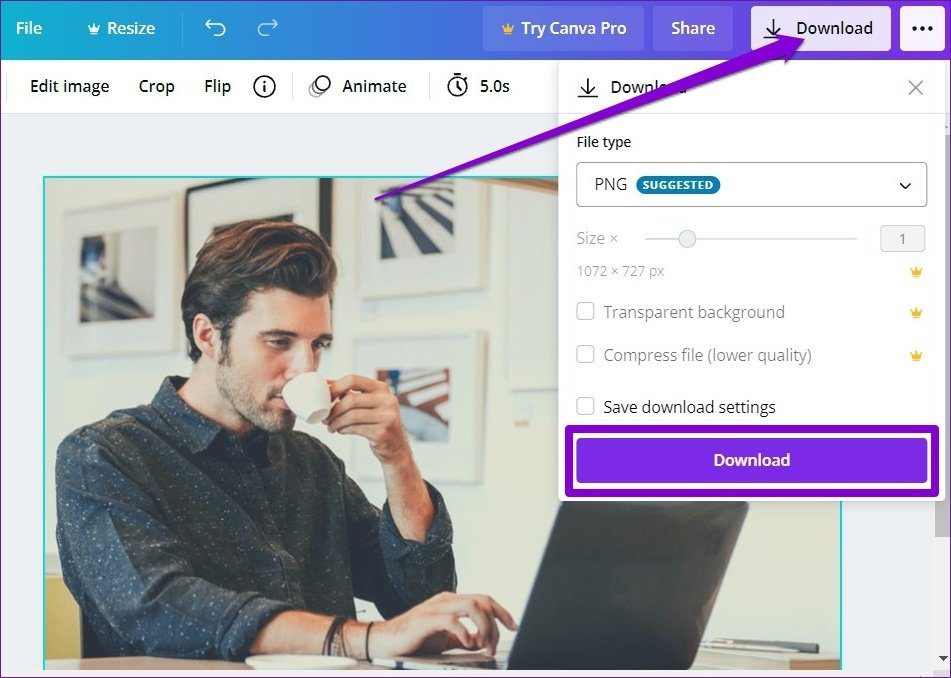
Besides downloading, you can also share your photo directly from Canva to your Facebook, Instagram, and Google Drive accounts.
Photo Editing Made Simple
Canva hits the sweet spot between a light photo editor like Google Photos and a professional Photoshop. It tries to bring the best of both worlds by giving you more editing options without overcomplicating things. Plus, if you consider Canva’s video editing capabilities, it sure does become a one-stop shop for all your editing needs.
Was this helpful?
Last updated on 07 February, 2022
The article above may contain affiliate links which help support Guiding Tech. The content remains unbiased and authentic and will never affect our editorial integrity.


