Microsoft Outlook leats you create a Form. easily Typical examples of Outlook Forms as features include business cards, meeting requests, appointments, and email messages. All these forms are stored in a location known as the Standard Forms Library.

You can customize some of the sections of these Standard Forms by adding, replacing, or hiding certain parts. The customization of forms is particularly important if you need to send out emails with certain information requests. Here are the steps to follow to customize a unique form on Outlook.
Setting up the Developer Tab
The first thing to note is that you can only create a custom form on Outlook using the Developer tab. Here’s how it works:
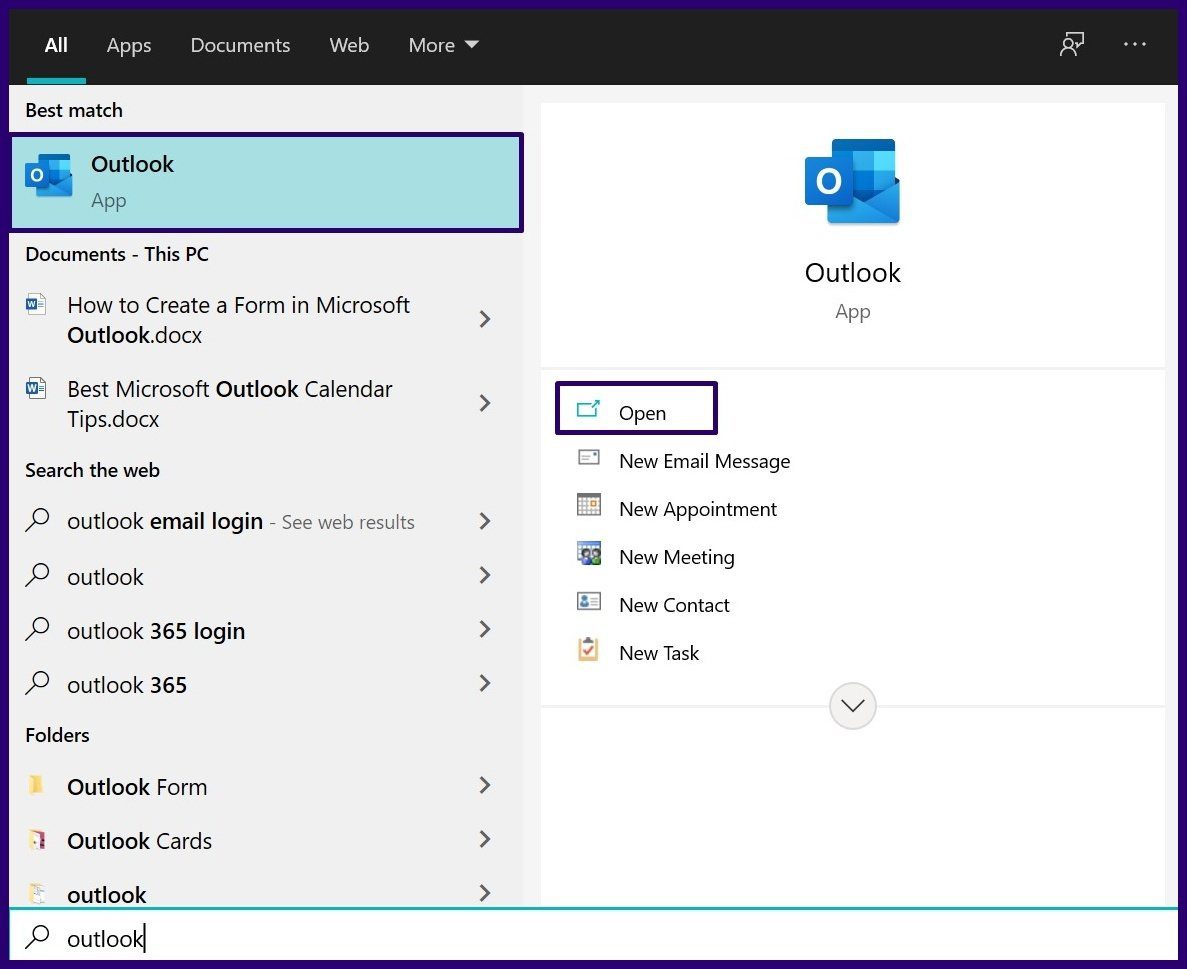
Step 1: Launch Microsoft Outlook.
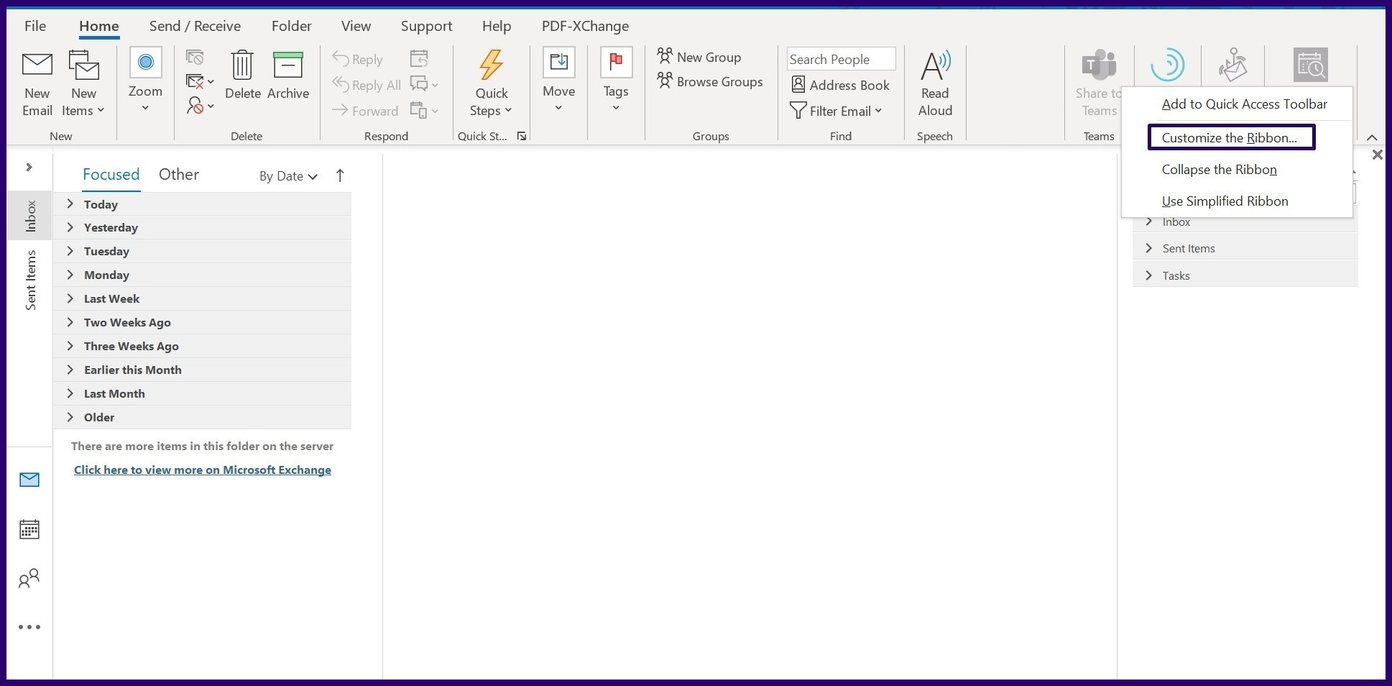
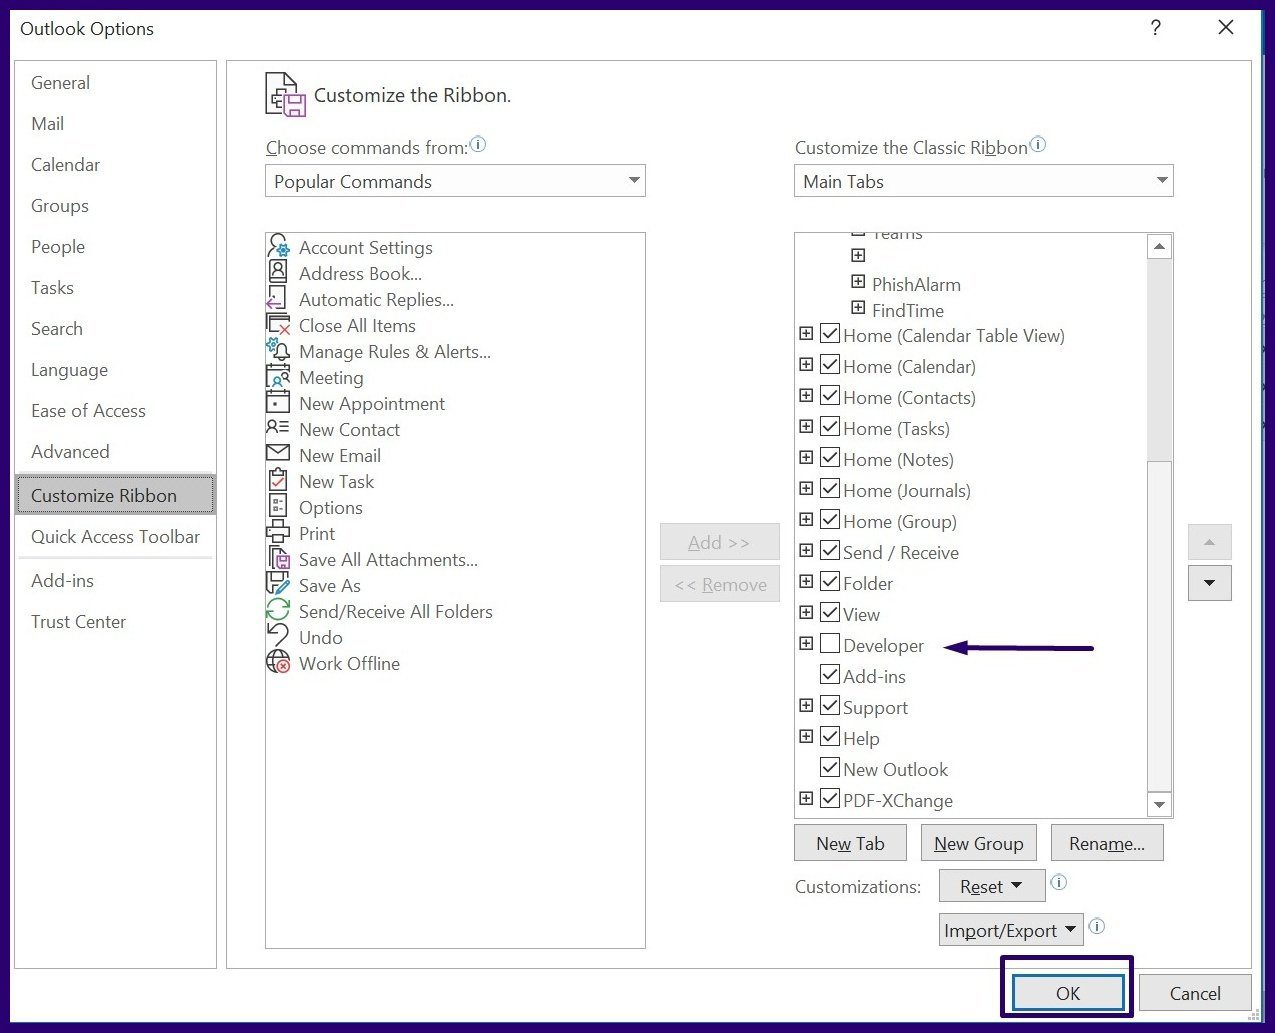
Step 2: Right-click on the Ribbon then select Customize Ribbon from the list of options.
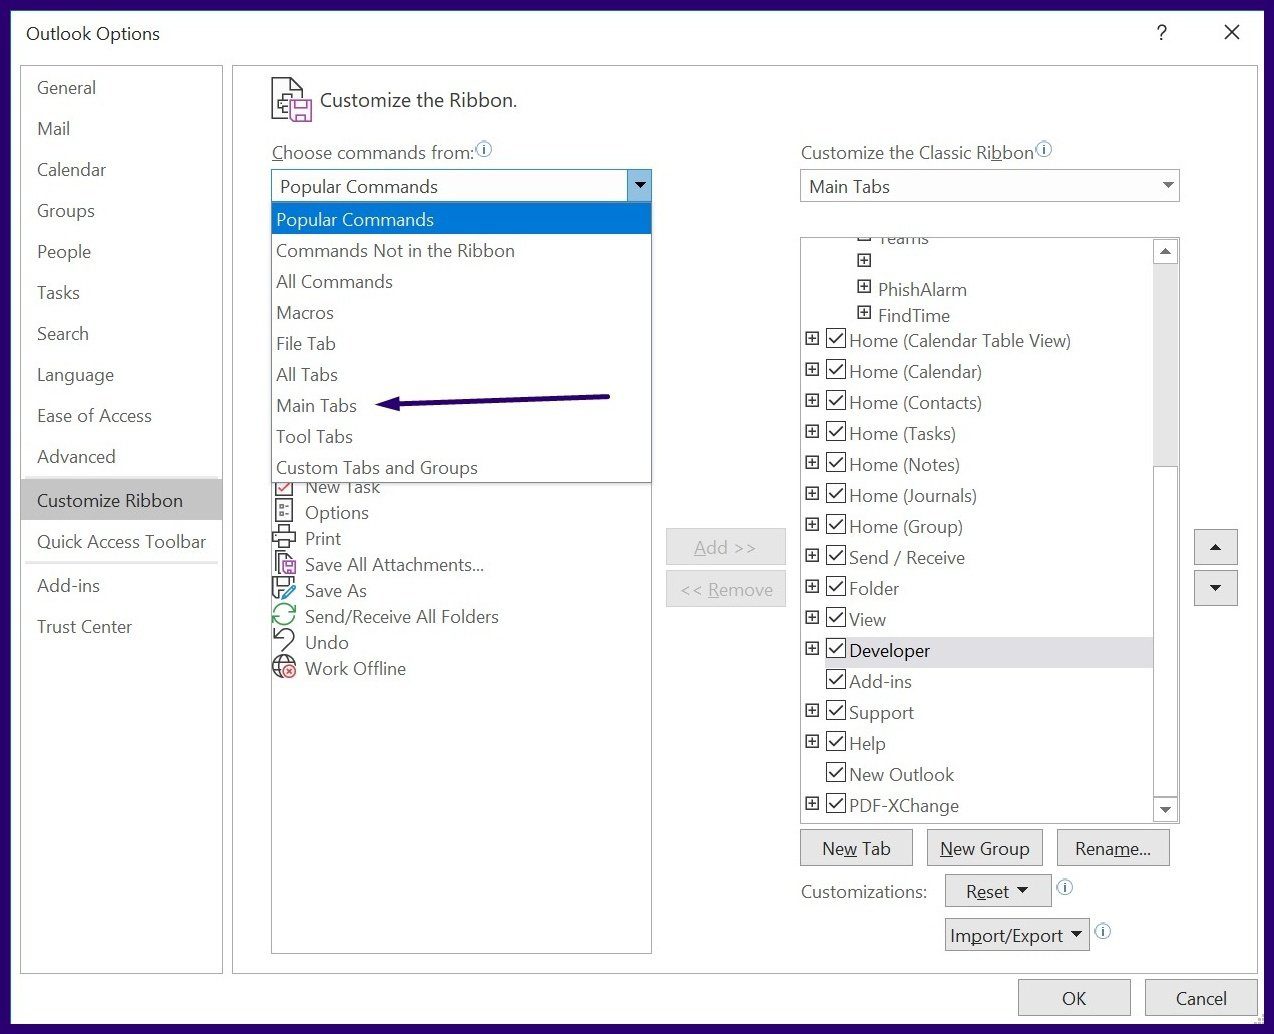
Step 3: On the new dialog box beneath the group titled Choose Commands From, select the drop-down and choose Main Tabs.
Step 4: Select Developer from the Options listed and click on Add located at the center of the dialog box.
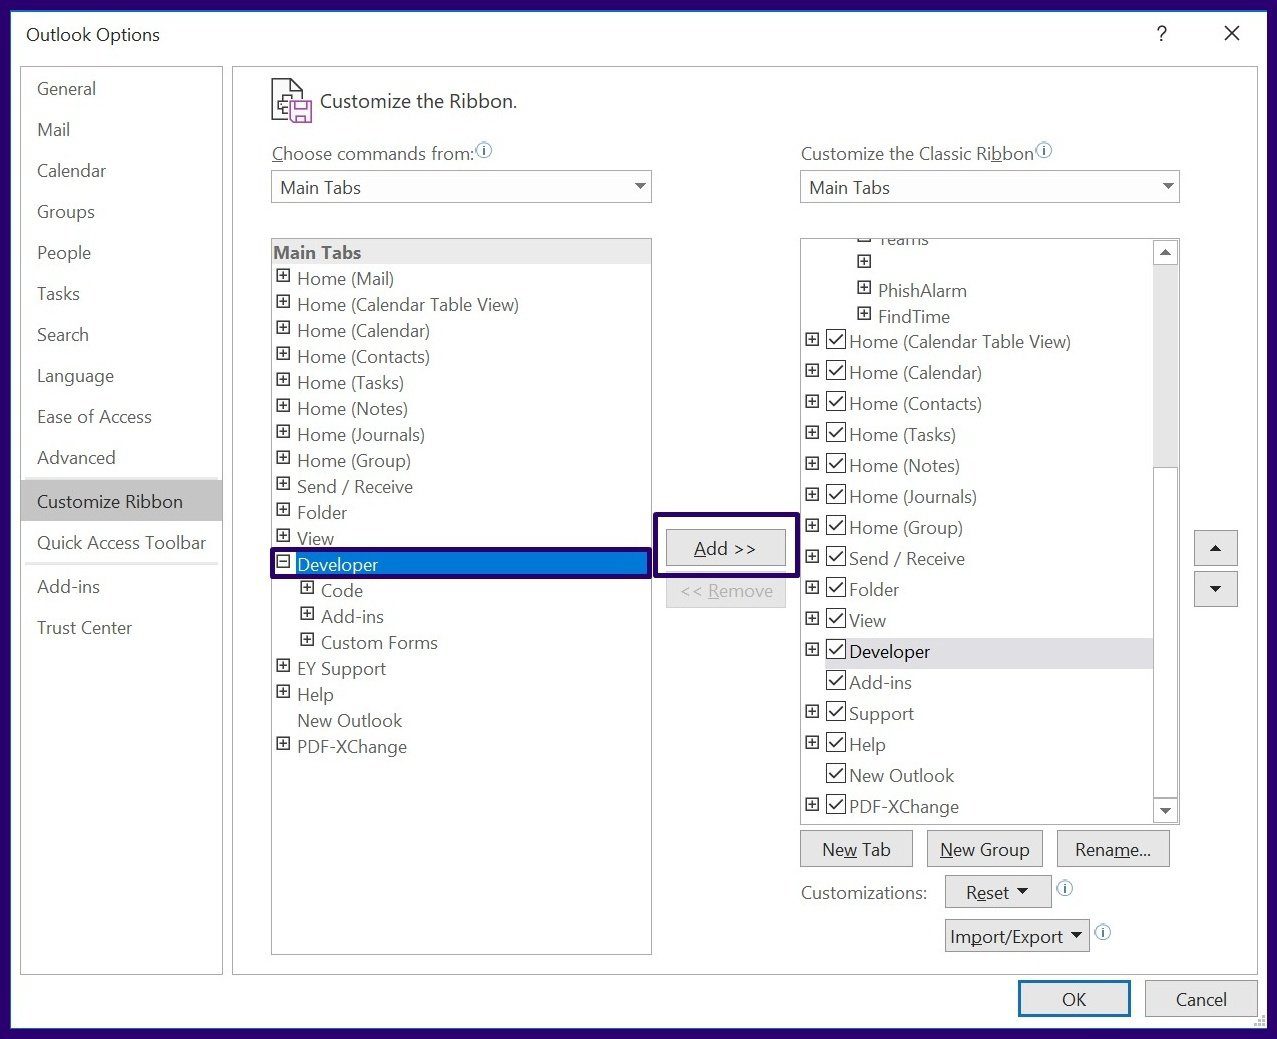
Step 5: Beneath the group titled Customize the Classic Ribbon, tick the box beside Developer, then click on OK to close the dialog box.
Designing a Custom Form
With Developer now available on your Ribbon, you can access the Design a Form feature to create your new From.
Step 1: Within the Search Menu, type Design a Form. Alternatively, you can go to the Developer tab on the Ribbon, click on the Custom Forms group then click on Design a Form.

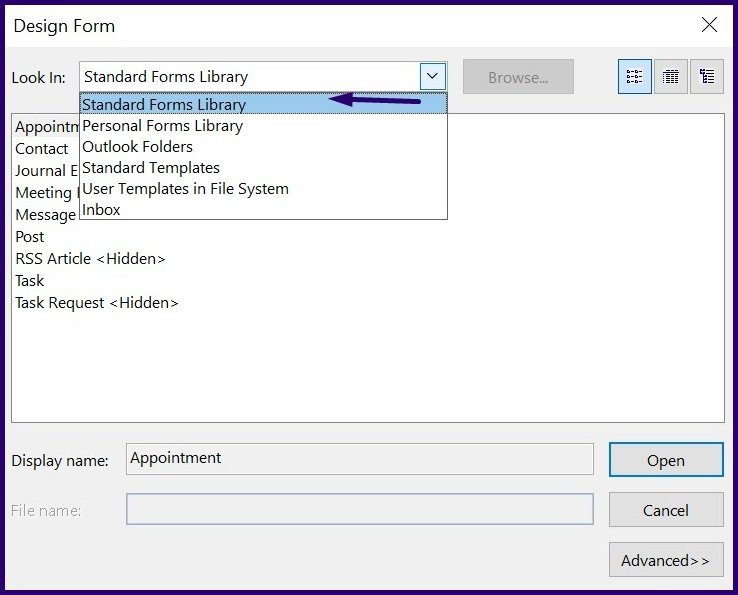
Step 2: On the new dialog box, select the drop-down and choose Standard Forms Library.
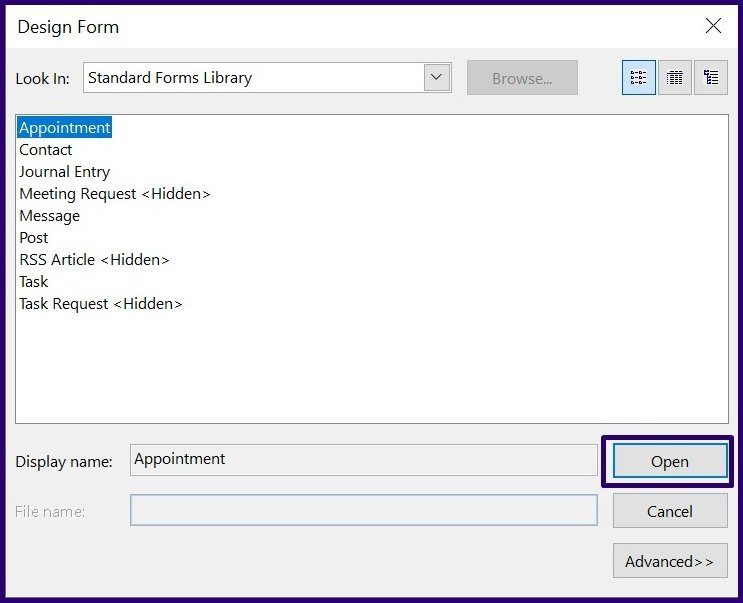
Step 3: Select the Form you would like to customize (we picked Appointment) from the listed options and click on Open.
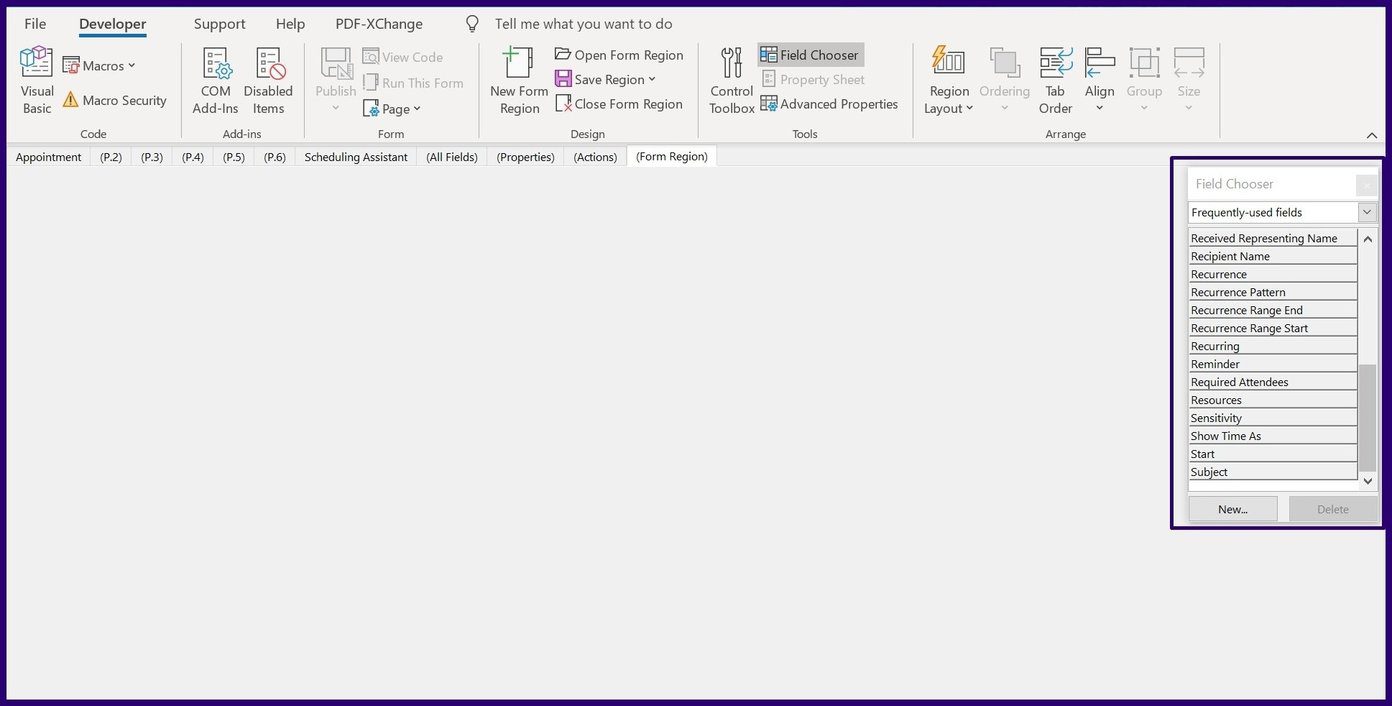
Step 4: To add a new field or region to the open Form, select New Form Region from the Ribbon.

Step 5: From the list of fields shown, select a new field and click on New.
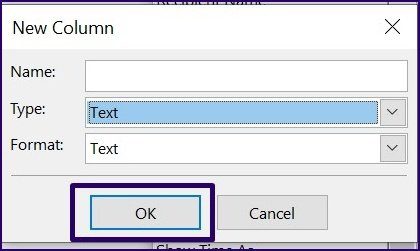
Step 6: Input details of the name of your new field, the type of data to be entered, the format for the data and select OK.
Step 7: On the tab beside your Form Name, select P.2 option.
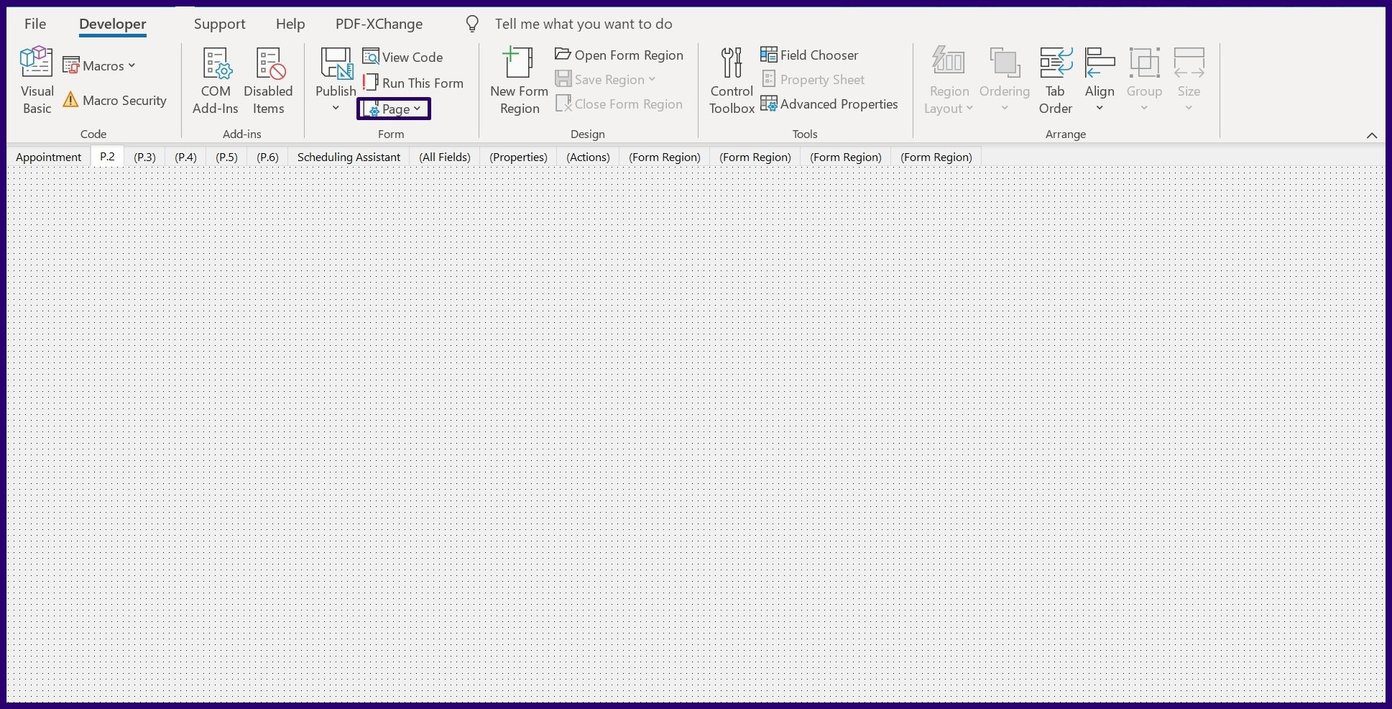
Step 8: From the Ribbon, select the Page button.

Step 9: From the drop-down select Rename Page.

Step 10: Enter the name for the new Page and click on OK.

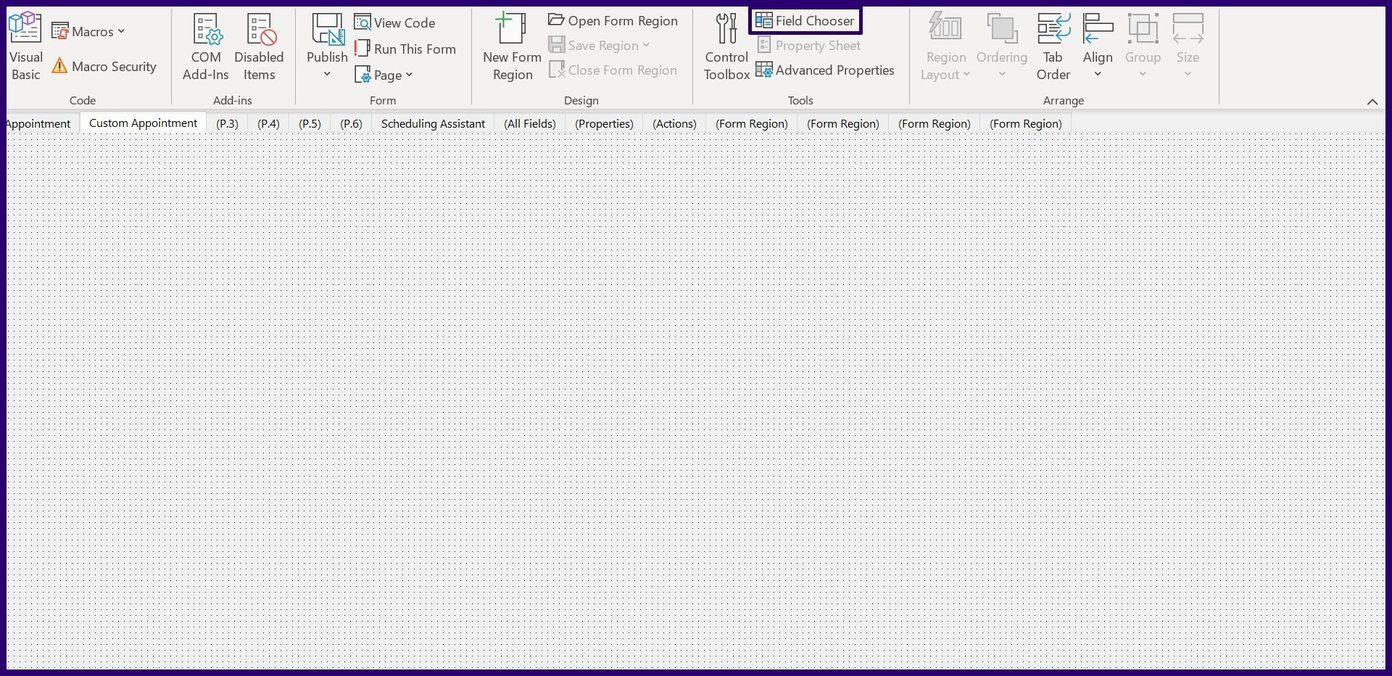
Step 11: Select Field Chooser from the Ribbon
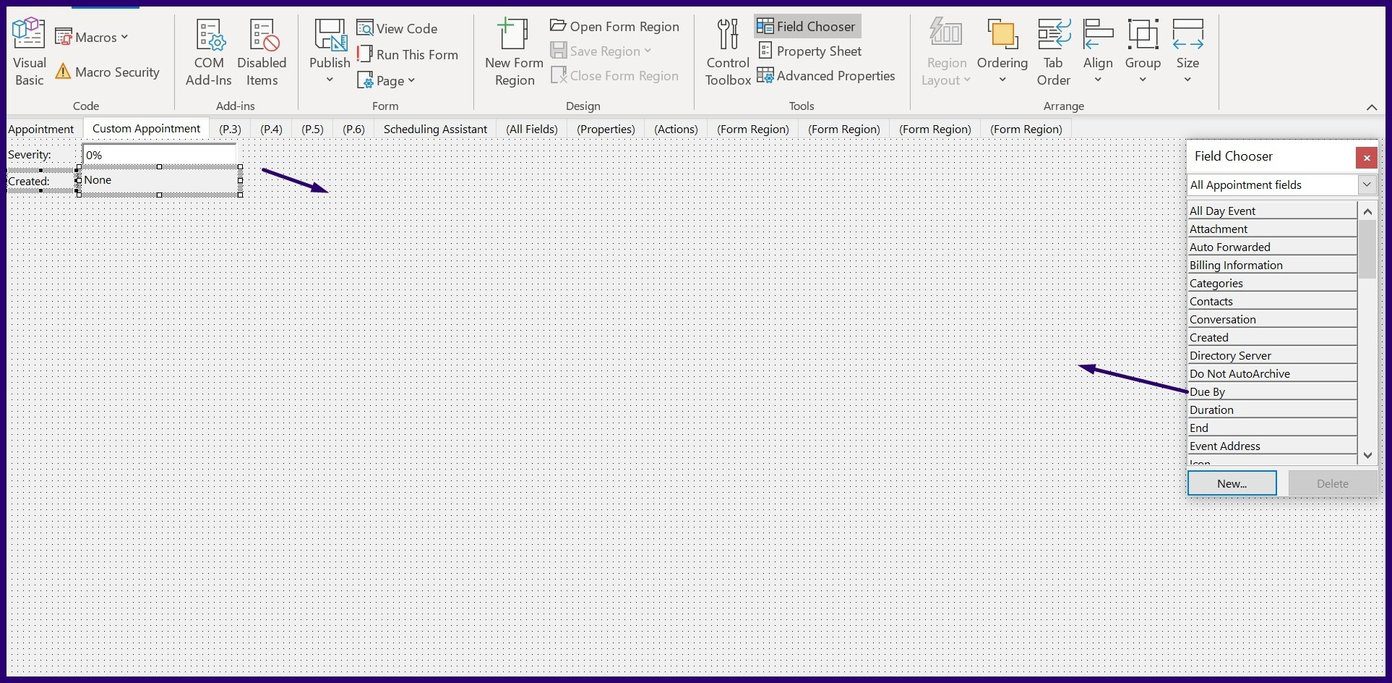
Step 12: From the Field Chooser, drag the new fields created to the new Page.
Saving and Publishing a Form in Microsoft Outlook
Now that you have created your custom form, you need to save and distribute it. You can either save the form as a template or publish it directly to a folder. Here’s how it works:
Saving a Form on Microsoft Outlook
To save the new form as an Outlook Template, here’s what you need to do:
Step 1: On the Ribbon tab select File.

Step 2: Click on Save As.
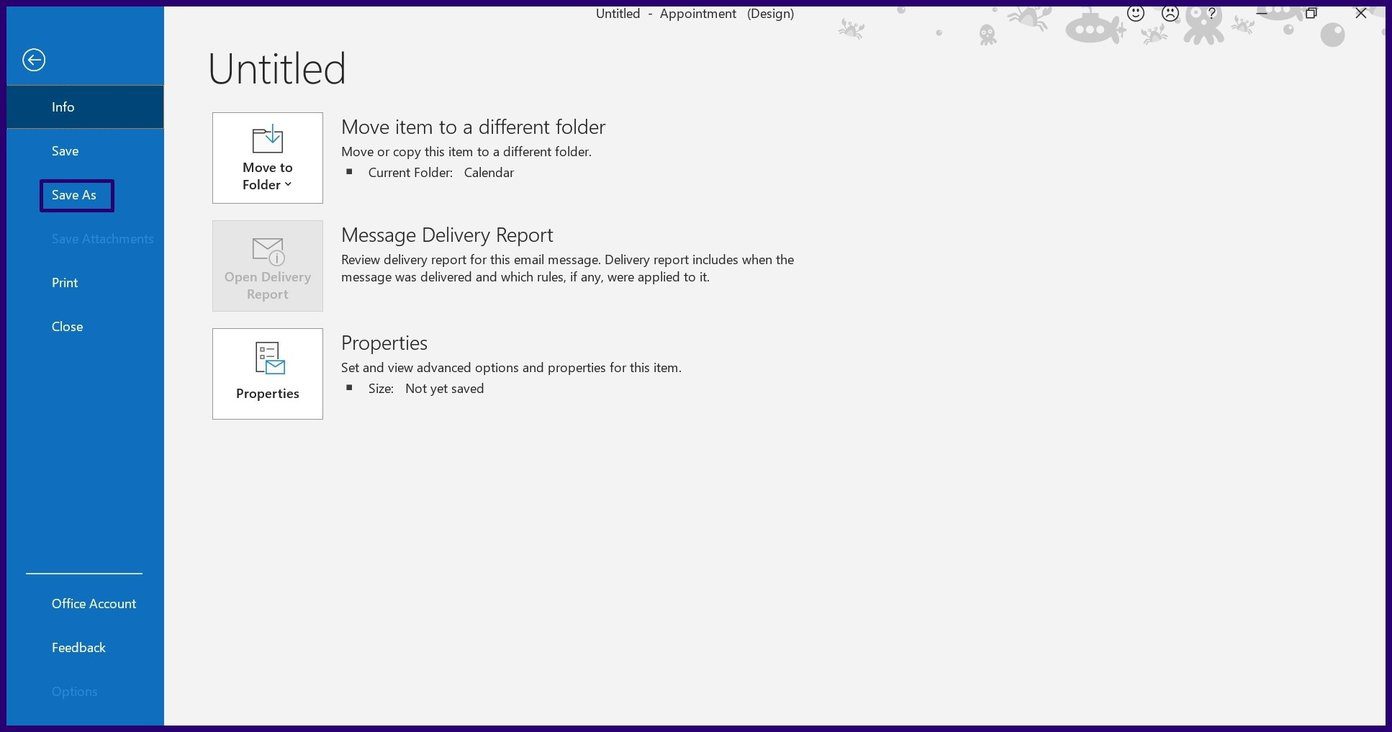
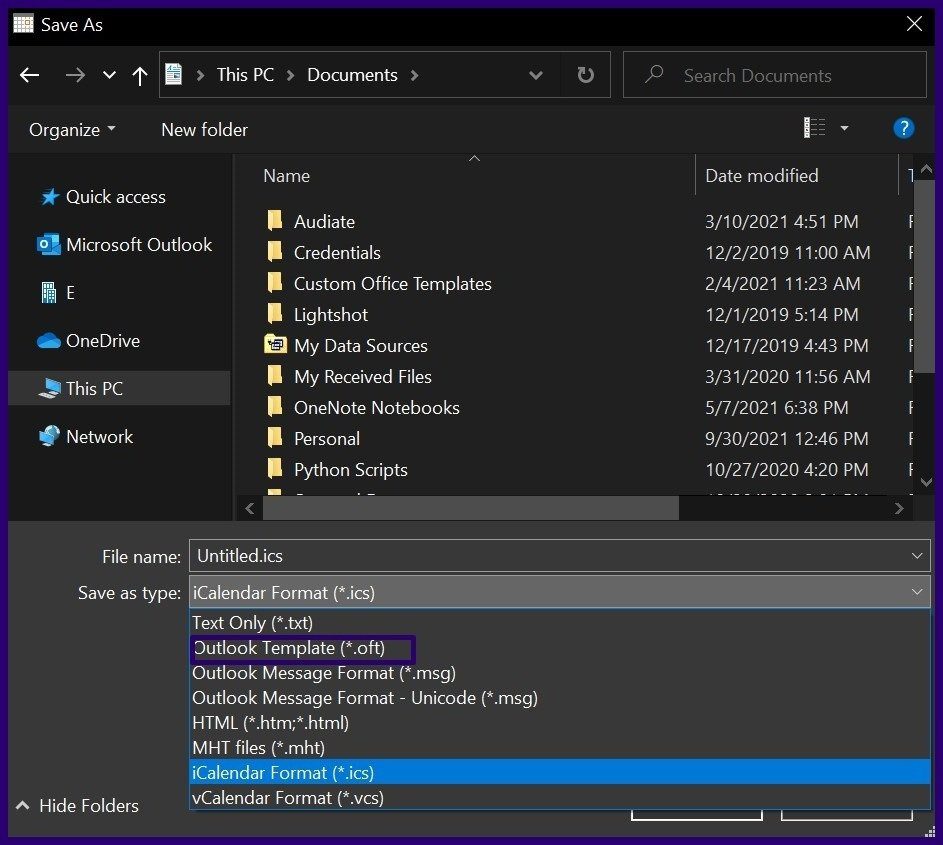
Step 3: Input File Name and Save File Type as Outlook Template.
In the future, you can always access the Form by selecting Choose Form from the Developer tab.
Note: By choosing Outlook Template, the file gets saved as .ost. However, on Microsoft Outlook 2013 users are not allowed to save certain forms as templates.
Publishing a Form in Microsoft Outlook
Another way to save a custom form is by publishing it. Here’s how it works:
Note: This doesn’t work in Office 2013 version.
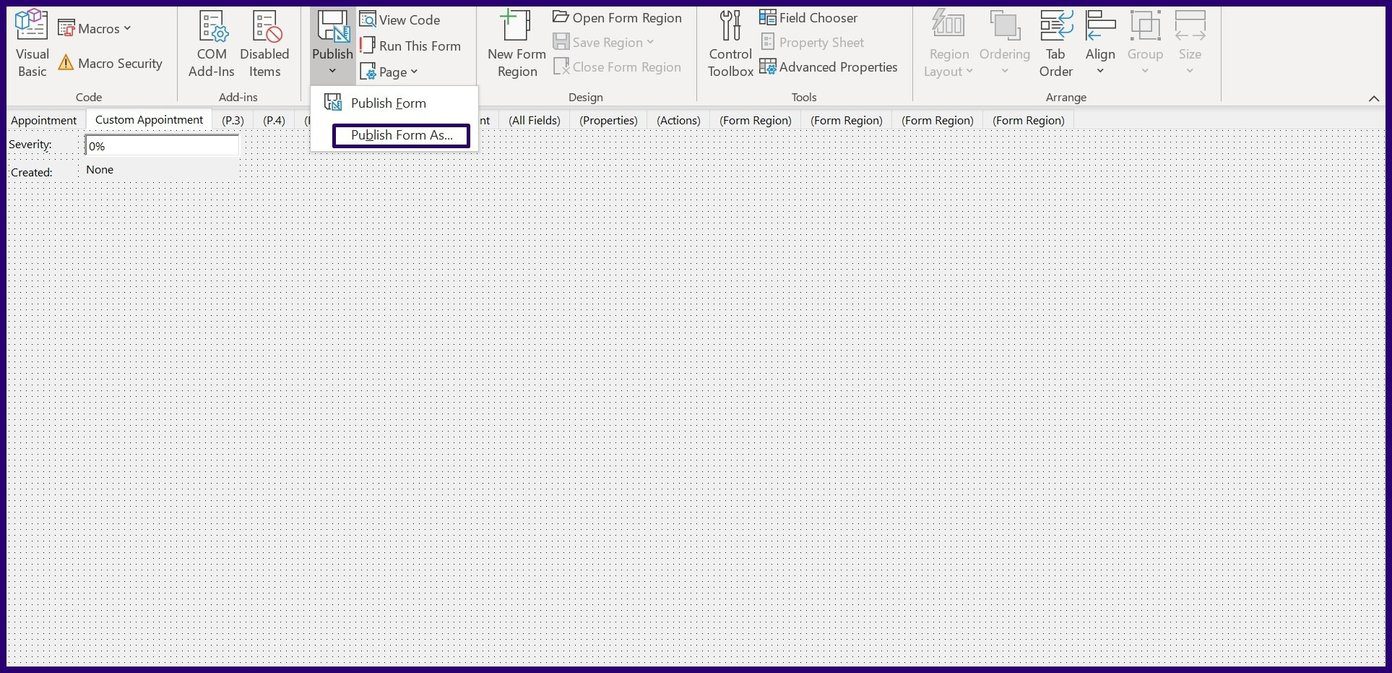
Step 1: On the Ribbon tab select Publish.

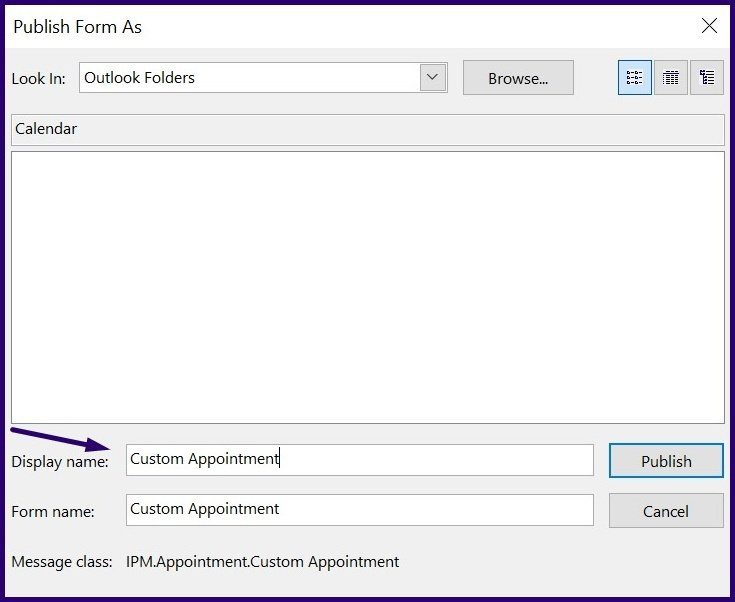
Step 2: Select Publish Form As.
Step 3: On the new dialog box, select the drop-down beside Look In to choose a location for the new form.
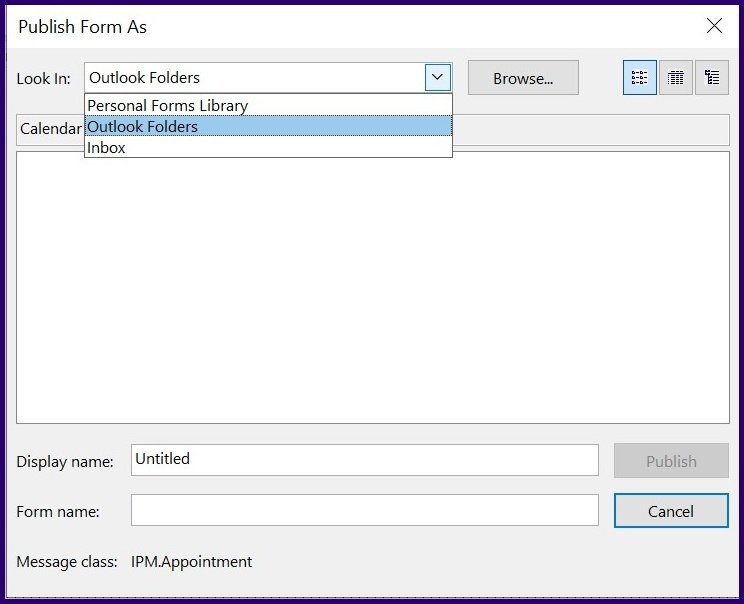
Step 4: Enter a Display Name for the Form.

Step 5: Select Publish.
To access the Form, Select New Items from your Outlook Ribbon, More Items, and then Choose Form.
Creating Voting Buttons in Microsoft Outlook
Creating forms in Microsoft Outlook helps you can customize the type of information you collect or send out. Another feature on Microsoft Outlook that allows you to collate data is the voting button. With the voting button, you can create a poll and track the responses received.
Was this helpful?
Last updated on 07 February, 2022
Read Next
 How to Create an RSVP Form Using Google Forms
Here's how to create an RSVP invite on Google Forms, share it with your guests, and collect their responses in a few steps.
How to Create an RSVP Form Using Google Forms
Here's how to create an RSVP invite on Google Forms, share it with your guests, and collect their responses in a few steps.
 How to Create a Fillable Form in Google Docs
Method 1: The Native Way Using Tables and Other Form Elements One of the best methods to create a form in Google Docs is to use Tables.
How to Create a Fillable Form in Google Docs
Method 1: The Native Way Using Tables and Other Form Elements One of the best methods to create a form in Google Docs is to use Tables.
 How to Create a Custom Dictionary in Microsoft Word
Have you ever typed a certain word in Microsoft Word only to get the red zig-zag line underneath?
How to Create a Custom Dictionary in Microsoft Word
Have you ever typed a certain word in Microsoft Word only to get the red zig-zag line underneath?
 How to Create and Use Custom Document Templates in Microsoft Word
Whether you use Microsoft Word for your school projects or your business, repetitive tasks like formatting and using the same elements can be time-consuming.
How to Create and Use Custom Document Templates in Microsoft Word
Whether you use Microsoft Word for your school projects or your business, repetitive tasks like formatting and using the same elements can be time-consuming.
 How to Create or Edit Custom Properties for a Microsoft Word File
The title of your Microsoft Word file is not the only descriptor it has.
How to Create or Edit Custom Properties for a Microsoft Word File
The title of your Microsoft Word file is not the only descriptor it has.
 How to Make a Fillable Form in Microsoft Word
Digital fillable forms are as important as their physical counterparts.
How to Make a Fillable Form in Microsoft Word
Digital fillable forms are as important as their physical counterparts.
 How to Create and Use Custom Table Templates in Microsoft Word
Performing repetitive tasks while making documents can quickly get boring, but that's fixable.
How to Create and Use Custom Table Templates in Microsoft Word
Performing repetitive tasks while making documents can quickly get boring, but that's fixable.
 How to Create a Custom Color Set and Theme in Microsoft Word
To personalize your document, you are not limited to the default color sets and themes in Microsoft Word.
How to Create a Custom Color Set and Theme in Microsoft Word
To personalize your document, you are not limited to the default color sets and themes in Microsoft Word.
The article above may contain affiliate links which help support Guiding Tech. The content remains unbiased and authentic and will never affect our editorial integrity.