Windows 10 computer stores temporary files, commonly known as cache data, to make the apps and other services load faster. While this data is aimed to speed up your PC, those cache files can occupy a significant storage space which can be tricky if you’re using a small SSD. Thus, it’s regarded as a good practice to remove the temporary and unwanted cache files from Windows periodically.
Clearing cache files can also help troubleshoot any performance issues, free up disk space, and improve the overall performance of your PC. Rest assured, deleting cache data on Windows 10 is a completely safe affair and won’t interfere with your files or settings.
We’ll cover how to remove all kinds of cache files stored on your Windows 10 PC in this guide. So without any further ado, let’s get started.
1. Clear Temporary Files Cache on PC
Windows 10 comes with a built-in Disk Cleanup tool. That can find and delete temporary files clogging up the storage space. Here’s how to use the Disk Cleanup tool
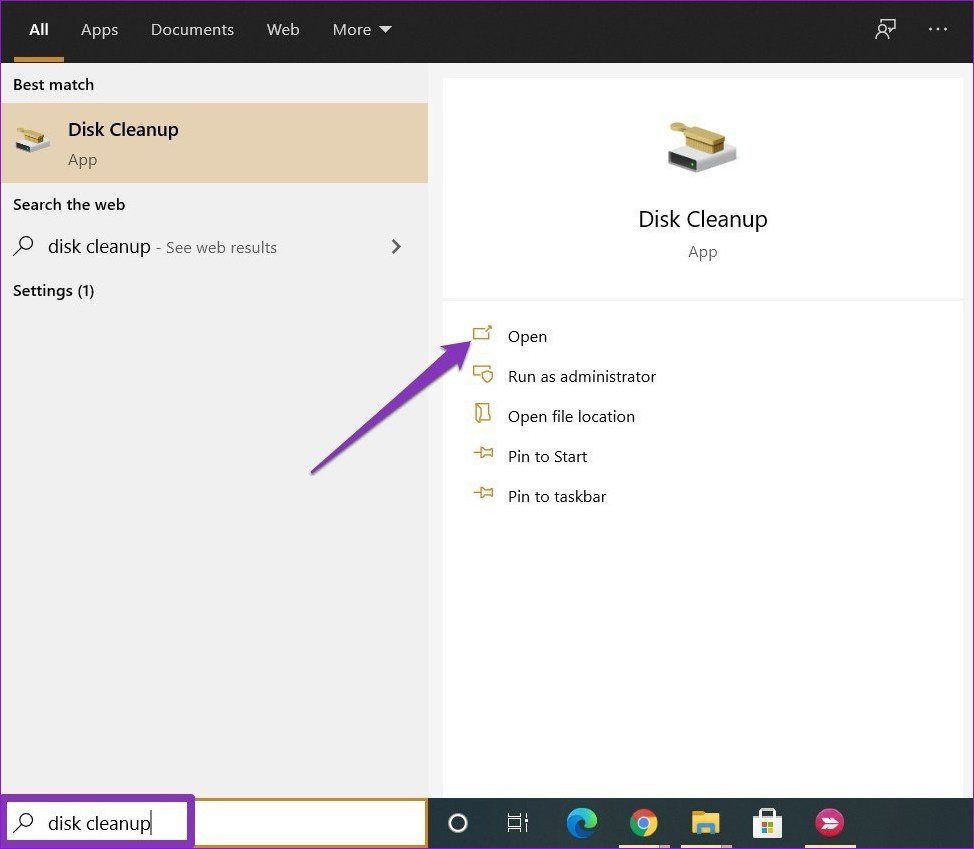
Step 1: Click Start, type disk cleanup in the Windows Search, and press Enter to open the Disk Cleanup app.
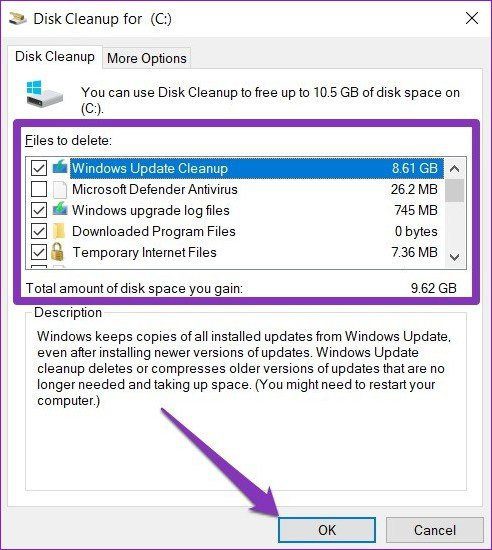
Step 2: In the Disk Cleanup window that appears, under ‘Files to remove’, make the appropriate selection of files that you’d like to remove. After that, click on the ‘Clean up system files’ button.

Step 3: Now, the app will calculate how much space will be freed up after deleting selected files. Once done, the same window will appear.
Step 4: Make the appropriate selection again and press OK. Then click on the ‘Delete Files’ button when prompted.
Note: This process may take a while, so try not to use anything else on your computer.
Wait for the process to finish, and it will delete all the selected files.
2. Clear Windows Store Cache
The Windows Store on your PC also creates cache files whenever you download or update apps. Over time this can take up space on your PC. Thankfully, you can clear that cache to free up storage space.
To clear the Windows Store cache, press Ctrl+R to open the Run dialog. Now type in WSReset.exe and press Enter. A blank window will appear. Wait for the process to finish, and the Windows Store will launch automatically.
Clearing the Windows Store cache will also help if you’re having trouble while downloading apps and games.
3. Clear Location Cache
You can clear the location cache stored on your Windows 10 PC right from the settings menu. Here’s how.
Step 1: Use the Ctrl+I shortcut to open Settings. Then tap on Privacy.
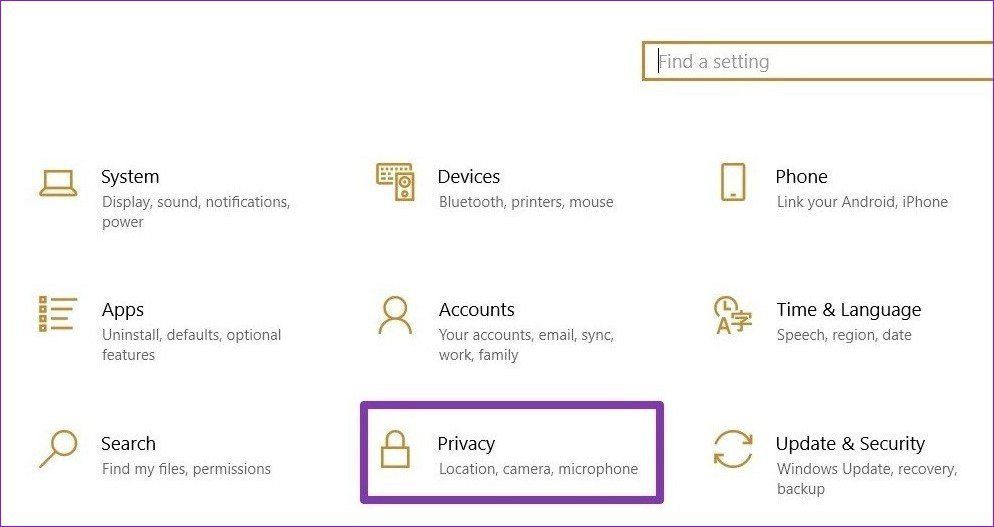
Step 2: In the Privacy section, go to Location under ‘App permission’ on your left. Now on your right, scroll down to find ‘Location history’ and tap on the Clear button.

This way, all location cache data stored on your PC will be deleted.
4. Clear DNS Cache
DNS cache contains information about previous DNS lookups on your PC or web browser. These files can pile up over time eat up valuable storage space in the form of a DNS cache. You can delete the DNS cache in a few simple steps mentioned below.
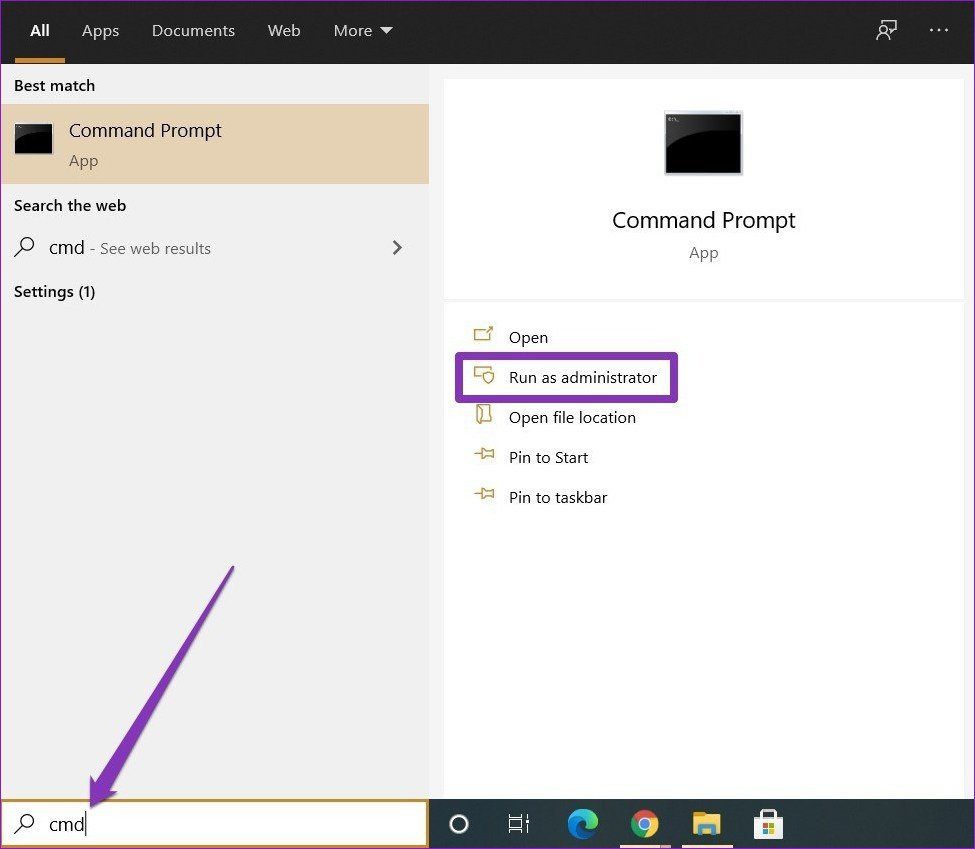
Step 1: Open the Start menu and type in cmd. Select ‘Run as administrator’ to open the command prompt with admin rights.
Step 2: Type the command mentioned below and press Enter.
ipconfig/flushDNS

Once the process is finished, you’ll see a message that reads ‘Successfully flushed the DNS Resolver Cache’.
Tip: If you’re facing problems with your web browser, flushing out the DNS cache can help.
5. Clear Browser Cache
When you surf the internet, your browser creates cache files to speed up the sites you frequent. While this data is meant to help, it can slow down your browser or make you vulnerable to data breaches over time. Thus, all the popular browsers inherent the option to clear cache in their settings.
How to Clear Cache in Chrome
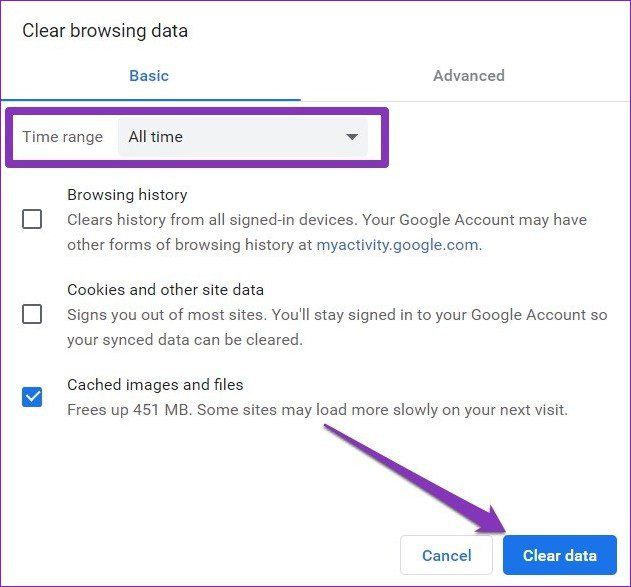
Step 1: Launch Google Chrome and press Ctrl+Shift+Delete keys to quickly open the ‘Clear browsing data’ panel in the Settings tab.
Step 2: Select ‘All time’ in the Time range option and check the box that reads ‘Cached images and files’. Finally, tap on the ‘Clear data’ button at the bottom.
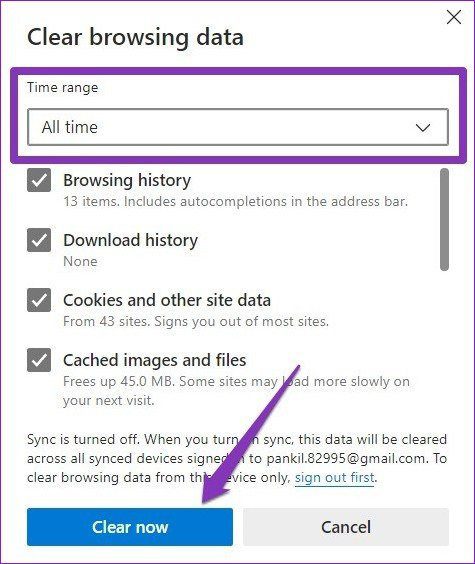
How to Clear Cache in Microsoft Edge
Step 1: Launch Microsoft Edge. Click on the three-dot icon on the far-right and select Settings from the list.
Step 2: Go to the ‘Privacy, search, and services’ tab on your left and tap on the ‘Choose what to clear’ button on your right.
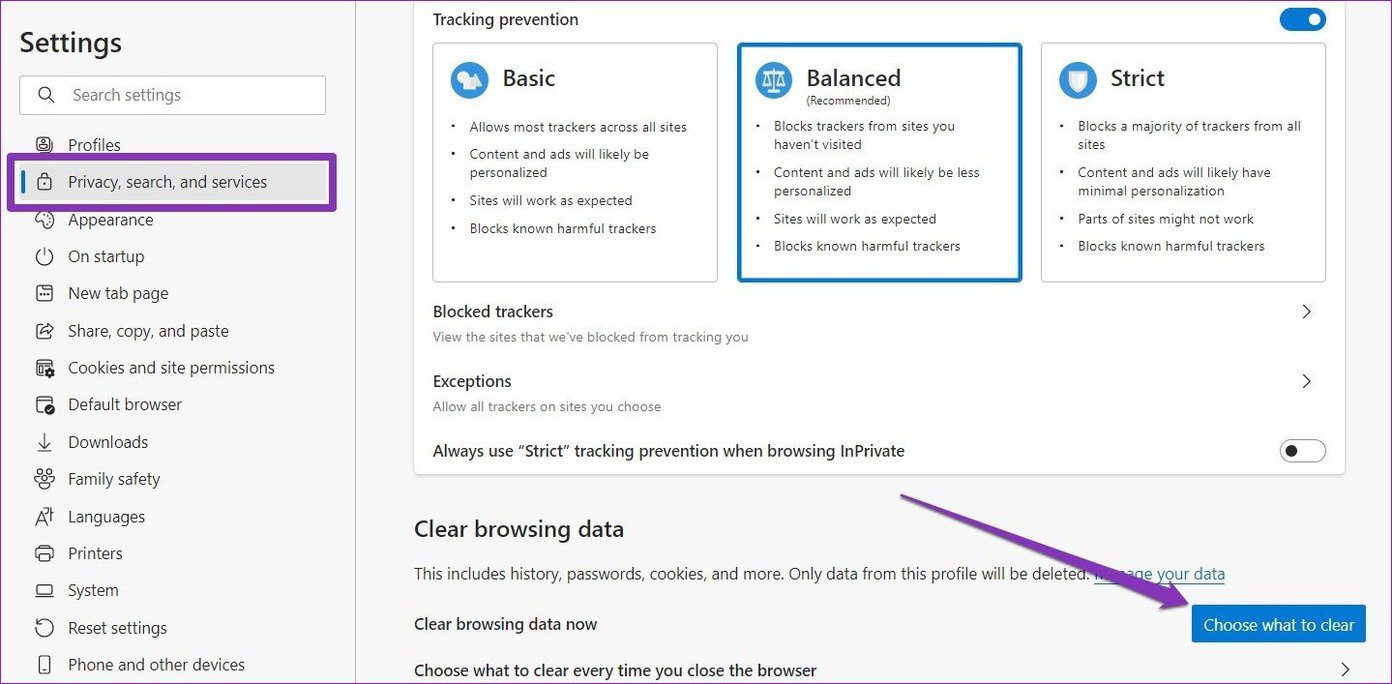
Step 3: Select ‘All time’ in the Time range option and tap on the ‘Clear now’ button.
Clear the Clutter
Deleting cache files can significantly free up storage. And removing them from time to time can help your PC run smoother and faster. Additionally, you can also try using cleaning tools to find and purge unwanted data from your PC.
Was this helpful?
Last updated on 07 February, 2022
Read Next
 3 Best Ways to Clear RAM Cache on Windows 11
Would you like to improve your computer's performance?
3 Best Ways to Clear RAM Cache on Windows 11
Would you like to improve your computer's performance?
 How to Clear DirectX Shader Cache on Windows 11
Stuttering graphics, lagging gameplay, and frustrating performance drops are nightmares for any PC gamer.
How to Clear DirectX Shader Cache on Windows 11
Stuttering graphics, lagging gameplay, and frustrating performance drops are nightmares for any PC gamer.
 How to Clear Discord Cache on Windows, Mac, iPhone, and Android
There are many reasons to delete the Discord cache from your device.
How to Clear Discord Cache on Windows, Mac, iPhone, and Android
There are many reasons to delete the Discord cache from your device.
 How to Clear OneDrive Cache on Android and iOS
Method 1: Clear OneDrive Cache on Android On Android, you can clear the cache using settings.
How to Clear OneDrive Cache on Android and iOS
Method 1: Clear OneDrive Cache on Android On Android, you can clear the cache using settings.
 What Happens When You Clear Cache on Instagram?
What Does Clearing Instagram Cache Do Here are a few queries regarding clearing the Instagram app cache: Will this delete your Instagram photos and messages: No, clearing the cache doesn't
What Happens When You Clear Cache on Instagram?
What Does Clearing Instagram Cache Do Here are a few queries regarding clearing the Instagram app cache: Will this delete your Instagram photos and messages: No, clearing the cache doesn't
 4 Ways to Clear Cache in Samsung Galaxy Phones
Did someone tell you to clear an app's cache on a Samsung Galaxy phone to troubleshoot it?
4 Ways to Clear Cache in Samsung Galaxy Phones
Did someone tell you to clear an app's cache on a Samsung Galaxy phone to troubleshoot it?
The article above may contain affiliate links which help support Guiding Tech. The content remains unbiased and authentic and will never affect our editorial integrity.