Google Forms lets you collect answers and opinions from your respondents in various ways, whether it’s a simple quiz or a long questionnaire. Though it has several handy native features, Google Forms doesn’t yet allow you to send email notifications to yourself or the respondent natively.
The latter comes to the picture if you want to thank the user for their response and time. On the other hand, if your form caters to a wide audience and has several departments involved, sifting through all the form answers is time-consuming.
Thankfully, there are a few workarounds by which you can send emails to the owner or individuals. Now, there are two ways of going forward with this.
You can either shoot off an email based on any response on your form. Or, you can send one depending on the answers that the users have chosen. And as noted earlier, both methods need the aid of an external add-on. Since you will be shooting off an email from your account, you’ll need to provide the relevant permissions to the add-on or the function.
Now that we have it settled, let’s get started, shall we?
How to Send a Generic Email Using Google Forms
Sending a generic email either to the user or to the owner is thankfully no rocket science. The aptly named Form Notifications add-on lets you send simple thank you emails to the users.
Step 1: Once you have created the form, click on the three-dot menu on the right and select Add-ons from the list. This will take you to the Google Marketplace.

Step 2: Now, search for Form Notifications and click on it to install it.
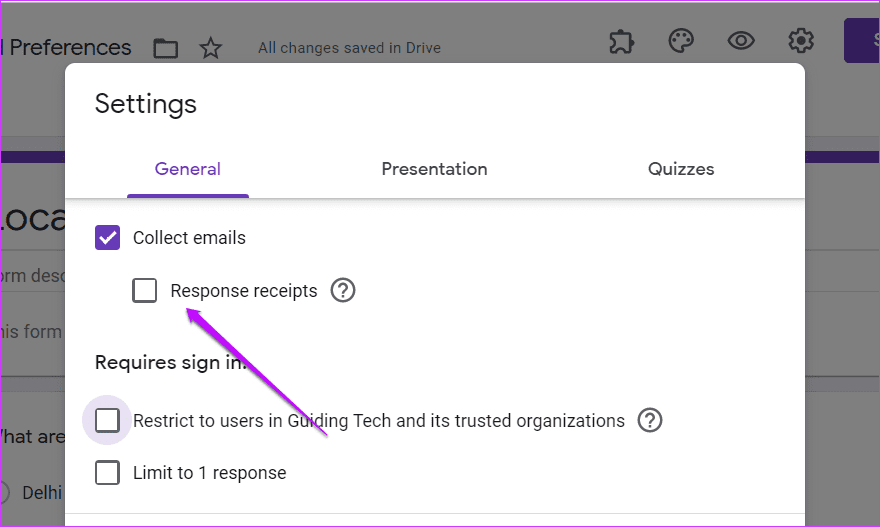
Next, create the form. If you want to send the emails to the respondent directly, check the Collect emails checkbox under Settings.
Or else, you can set a form question asking for the email from the user and mark it as Required as shown below.

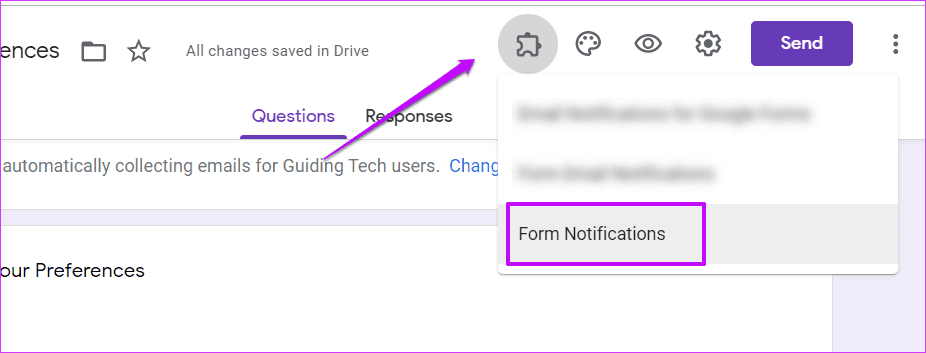
Step 3: Once done, click on the little Add-on icon and select Form Notifications. You will see a prompt in the lower-right corner.
Toggle the button for Thank you email.

As noted earlier, you can either go with the Automatically field or the Form field. Select the one which fits your requirement the best. At the same time, you can also add a Bcc for the email by filling the ‘Send a copy to’ field.
Step 4: Next, add the Subject and Body of the email, and that’s about it! Save the settings and click on the Preview icon at the top to see if the current configurations work for you.

This is a simple add-on and configuring it is simple and straightforward. And the Published by Google Cloud tag makes it a tad reliable as well.
Other than the above, you can also send an email to yourself (or to the creator) when the form hits a fixed number of responses.
To do so, toggle the button for ‘Notify on form response’. The creator’s email will be auto-populated on the recipient field. It’s not hard-coded and you can enter other email addresses as well.
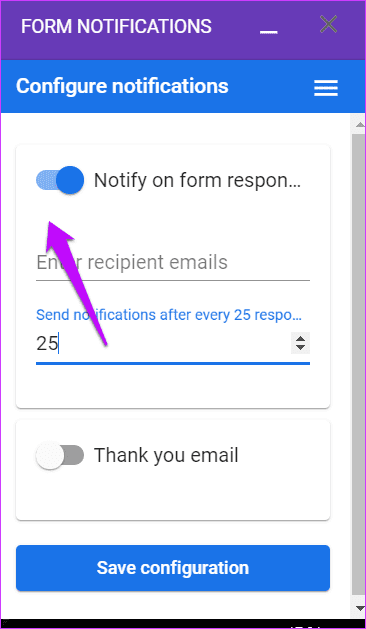
Once done, add the notification threshold and hit the Save button. From now on, your form will shoot off an email once it crosses the response threshold.
How to Send Responses Based on Responses
Let us put it right there. If you want to send responses based on the answers on your form, it’s not easy as the process above. Here, you will have to tinker with the App Script of the connected Spreadsheet.
Thankfully, if you have a simple form, it should be easily doable. In our case, we have a simple form where we ask the respondents for their preferred holiday location.

And depending on the answers they provide on the form, an email will be triggered to a set email address. Naturally, the code can be tweaked as per the requirement of your form.
Step 1: Once your form is created, click on the Responses tab and tap on the little Spreadsheet icon on the right. This will connect your form to a spreadsheet.

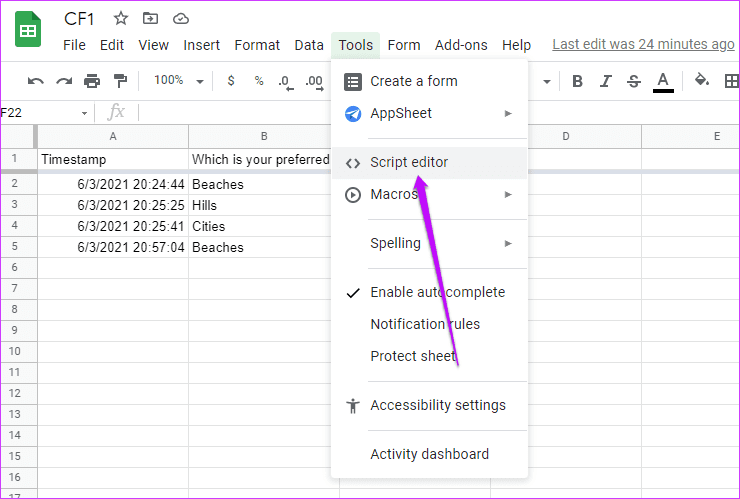
Step 2: Head over to the spreadsheet and click on Tools > Script Editor.
On the Script editor, paste the following lines of code,
function checkLocation(e) { var subject=""; var values = e.namedValues; var prefLocation=""; for (Key in values) { var label = Key; var data = values[Key]; prefLocation=data; Logger.log(data); } } Here e is the event that will be triggered when the form is submitted, while the e.namedValues object will bring the form data to you in the form of an array.
Once that data is captured, the For statement will cycle through the array to bring you the data. In the end, the form data for that particular response will be assigned to the prefLocation variable.
Step 3: Meanwhile, click on the little clock icon on the left panel to access the Triggers, and select Add Triggers.

Here, select From Spreadsheet as the Event Source and On Form Submit as the Event Type.
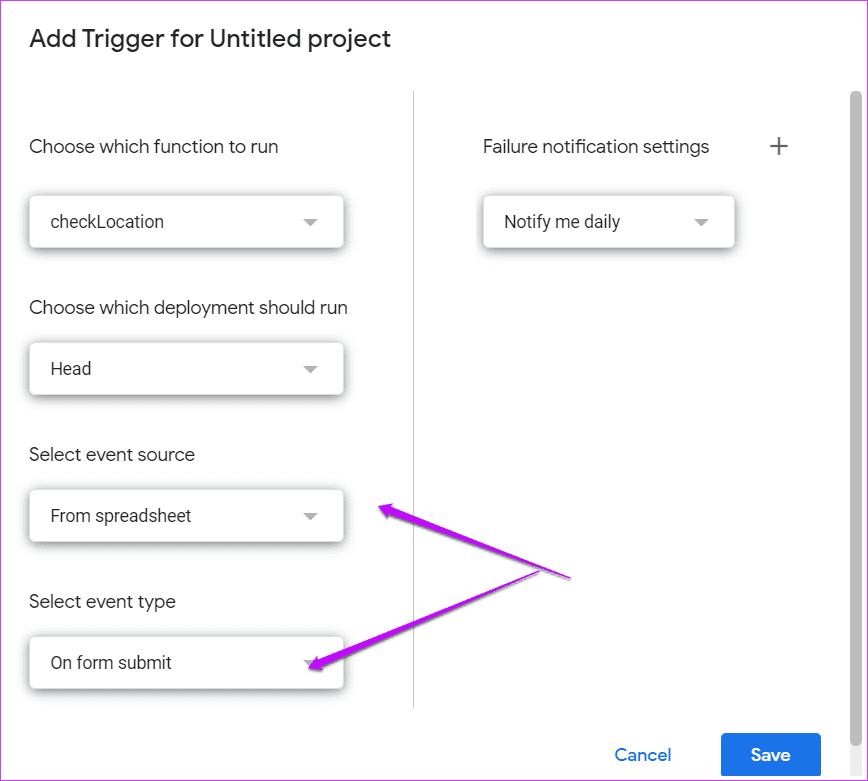
The above will make sure that the function we have written above will only be triggered when the form is submitted. And on submission, it will only pull data from the connected spreadsheet.
Step 4: Now, head back to the Script Editor to modify the code as per your requirement.
In our case, we want an email to be shot off to a particular email ID when a respondent answers Hills, and so on.
So, we have added a simple If and Else-If condition to the code,
function checkLocation(e) { var subject=""; var values = e.namedValues; var prefLocation=""; for (Key in values) { var label = Key; var data = values[Key]; prefLocation=data; Logger.log(data); if (prefLocation=="Hills"){ subject="You have an email for Hills Location"; GmailApp.sendEmail('abc@.gmail.com', subject, prefLocation); }else if (prefLocation=="Beaches"){ subject="You have an email for Beaches Location"; GmailApp.sendEmail('xyz@gmail.com', subject, prefLocation); } else if(prefLocation=="Cities") { subject="You have an email for Cities Location"; GmailApp.sendEmail('ghy@gmail.com', subject, prefLocation); } } }Naturally, you will have to provide permission for the GmailApp.sendEmail function to work. It’s a one-time process though.
Step 5: Now that, everything is in place, save your code by clicking on the Save icon as shown below.

Now, run the code. Unfortunately, in the absence of an event, you won’t be able to run the code directly from the Script Editor.
To get your code running, submit your form. If everything is in the right place, the odds are that you will get an email.
Once done, you can tweak the code as per your requirement and add individual If-Else conditions. At the same time, you can also draft the body of the email as per the data.
How to Check for Errors
To run a code without errors at the first go is rare, and to be honest, there are plenty of things that can go wrong. To check for error, head over to the Executions tab, and you will see all the instances the function has been called.
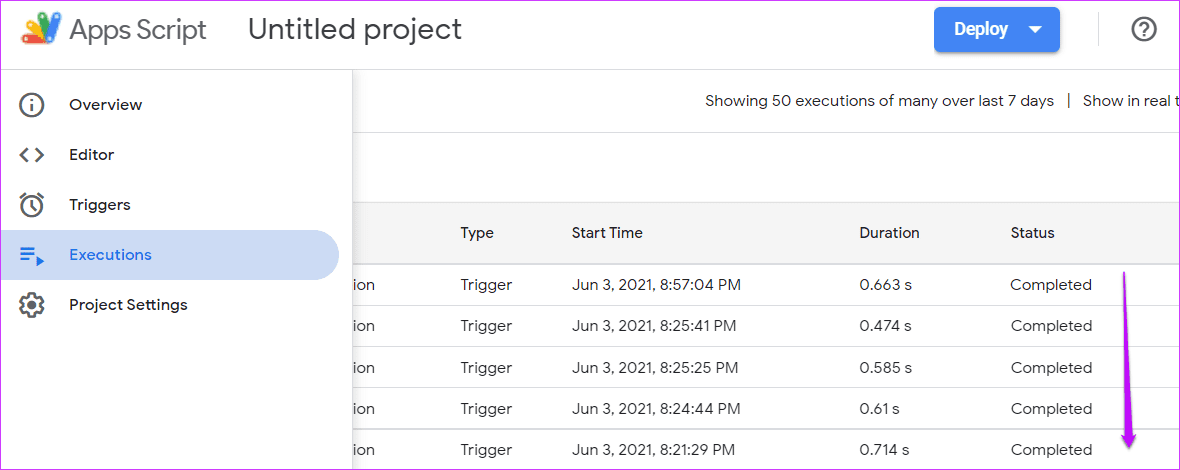
Click to see the errors. Here, you can also see how the function has been called. A Trigger tag translates into a form submission, while an Editor tag means that the function was run through the Editor.
At the same time, if you want to cross-check the value of the function, just add the Logger.log(variable) to log the data.

For instance, we had invoked Logger.log(prefLocation) inside the individual If-Else conditions, and our log looked like the one above.
To Code or Not to Code
The second method may look a tad complicated. But once you get the hang of how the individual functions are called, the odds are the going will get a little easier.
But at the end of the day, if you do not want to get your hands dirty, you can check out the Email Notifications Forms add-on. This one is designed for sending emails based on conditional responses. However, the Conditional Formatting feature is not free and approximately costs around $4 per month for a single user license.
So, if you need to send responses for your forms on an occasional basis, you can paste the code above on the App Script editor.
Was this helpful?
Last updated on 13 July, 2021
Read Next
 How to Send Google Forms Responses to Multiple Email Addresses
Google Forms is one of the world's best online data collection tool.
How to Send Google Forms Responses to Multiple Email Addresses
Google Forms is one of the world's best online data collection tool.
 6 Best Bookshelf Speakers With Good Bass Response
Bookshelf speakers are becoming increasingly popular, and for good reason.
6 Best Bookshelf Speakers With Good Bass Response
Bookshelf speakers are becoming increasingly popular, and for good reason.
 6 Best Ways to Fix Steam ‘Your Response to the CAPTCHA Appears to Be Invalid’ Error in Windows
Besides the large games library, Steam's popularity is due a strong security policy.
6 Best Ways to Fix Steam ‘Your Response to the CAPTCHA Appears to Be Invalid’ Error in Windows
Besides the large games library, Steam's popularity is due a strong security policy.
 How to Personalize Siri’s Response and Actions on iPhone
Siri is a virtual assistant available on Apple products.
How to Personalize Siri’s Response and Actions on iPhone
Siri is a virtual assistant available on Apple products.
 2 Best Ways to Import Questions Into Google Forms From Google Sheets
Typically, when you create a Google Form, you need to perform several steps.
2 Best Ways to Import Questions Into Google Forms From Google Sheets
Typically, when you create a Google Form, you need to perform several steps.
 How to Convert Google Forms to PDF, Google Docs, or Word
There are multiple ways to share Google Forms.
How to Convert Google Forms to PDF, Google Docs, or Word
There are multiple ways to share Google Forms.
 4 Blockchain Based Chat Messenger Apps to Try
Blockchain has been the buzzword of 2018.
4 Blockchain Based Chat Messenger Apps to Try
Blockchain has been the buzzword of 2018.
 How to Add Images to Outlook Email and Email Body on Mobile and Desktop
Microsoft Outlook is a popular email client that lets you manage your emails.
How to Add Images to Outlook Email and Email Body on Mobile and Desktop
Microsoft Outlook is a popular email client that lets you manage your emails.
The article above may contain affiliate links which help support Guiding Tech. The content remains unbiased and authentic and will never affect our editorial integrity.