Method 1: Add Audio Files
Since Canva has limited customization options, you must ensure the audio files are trimmed before uploading. Also, all your files must be appropriately named and uploaded to avoid confusing you later.
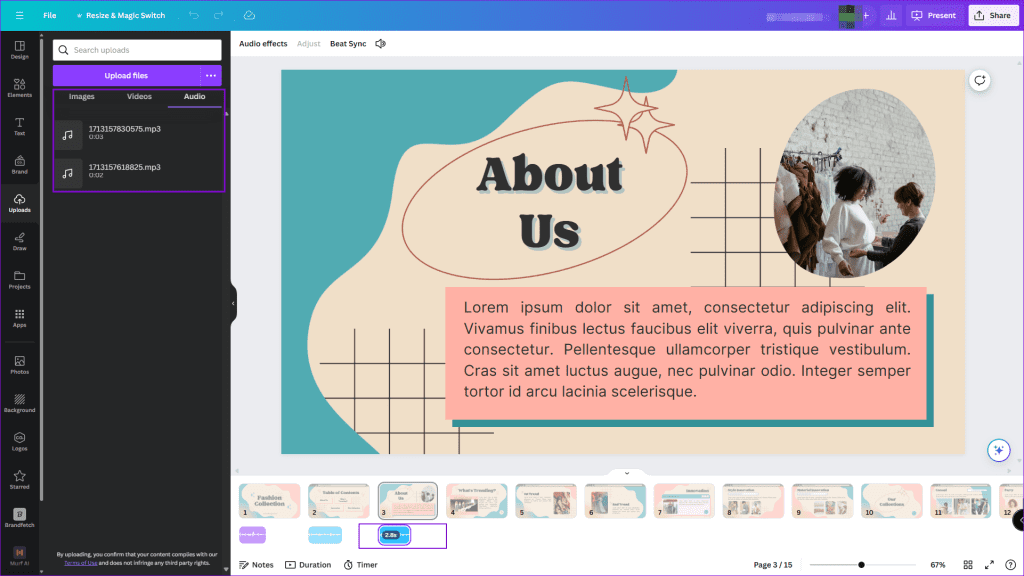
Step 1: Open the presentation and select the slide where you want to add the voice-over.
Step 2: Click the Uploads section on the left, then switch to the Audio tab to reveal all the audio files.
Step 3: Drag and drop the audio at the bottom of the selected slide, and position it appropriately using drag.
Repeat the above steps for all the slides. Once everything is in place, tap the Play button to view and hear your voiceovers. If you have missed uploading an audio file, you can manually do it when editing the presentation.
This method comes in handy when you cannot access the Present and Record option, which we have explained next.
Method 2: Present and Record
Canva has a built-in method—Present and Record—for adding voice-overs to already-made presentations. One of the most significant drawbacks is that you need a quiet room and don’t have the option to trim the recorded audio.
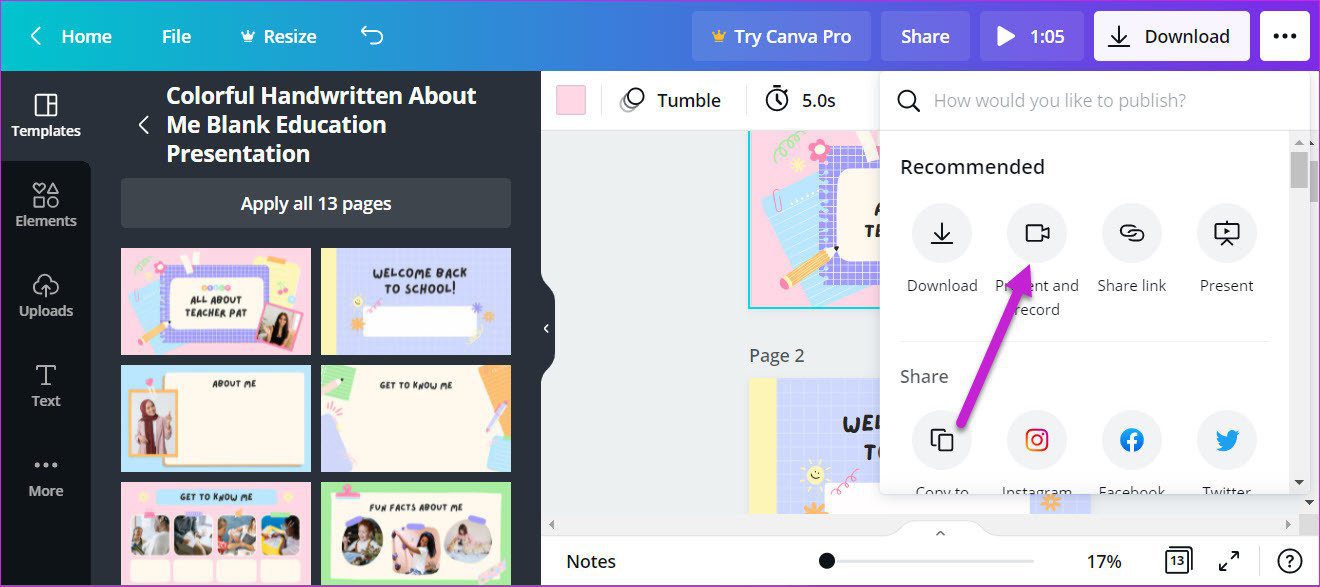
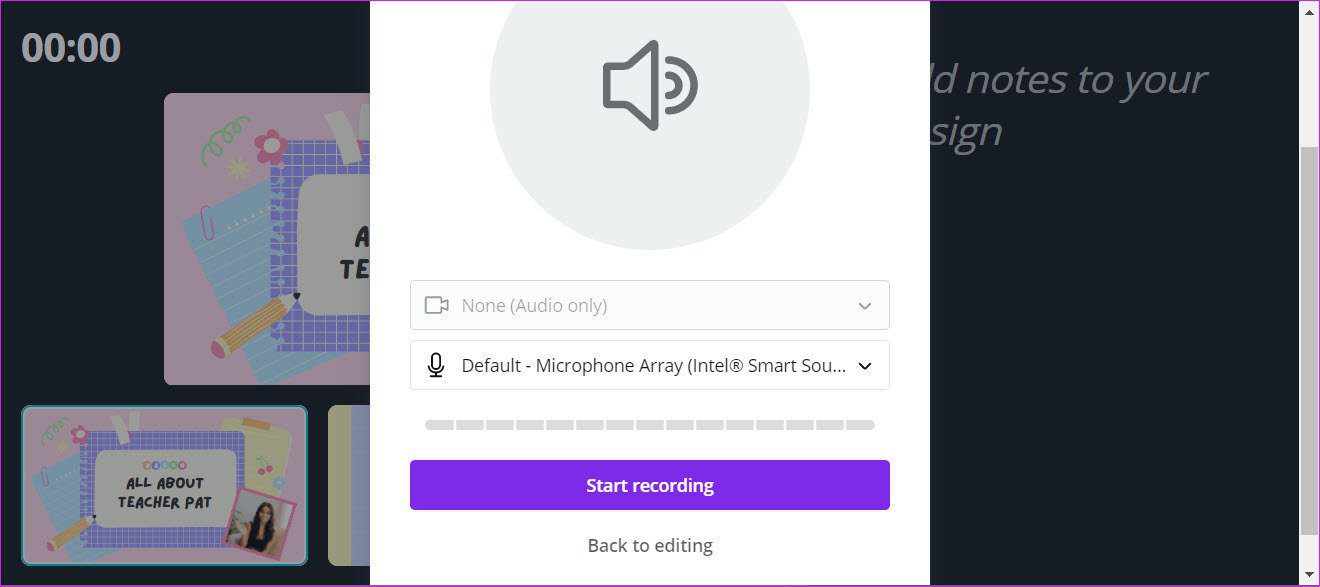
Step 1: Open the presentation and click on the three-dot menu at the extreme right corner. Select Present and Record from the list of options, and then select Start Recording.
Step 2: It will prompt you to allow access to the camera and microphone. Since you only need to perform a voice-over, you can skip the camera permission and only give access to your microphone. Once done, press the Start recording button.
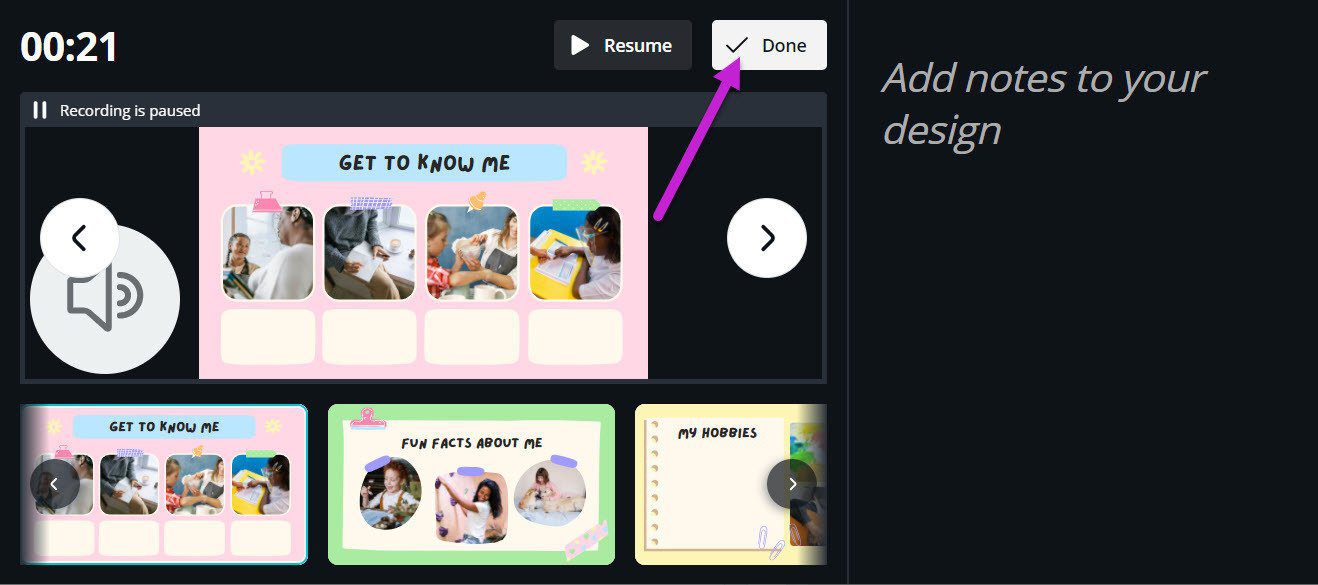
Step 3: Now, you only need to record your voice for all the slides. The slides with recorded audio are marked in red. Remember to move along the slides as the presentation asks.
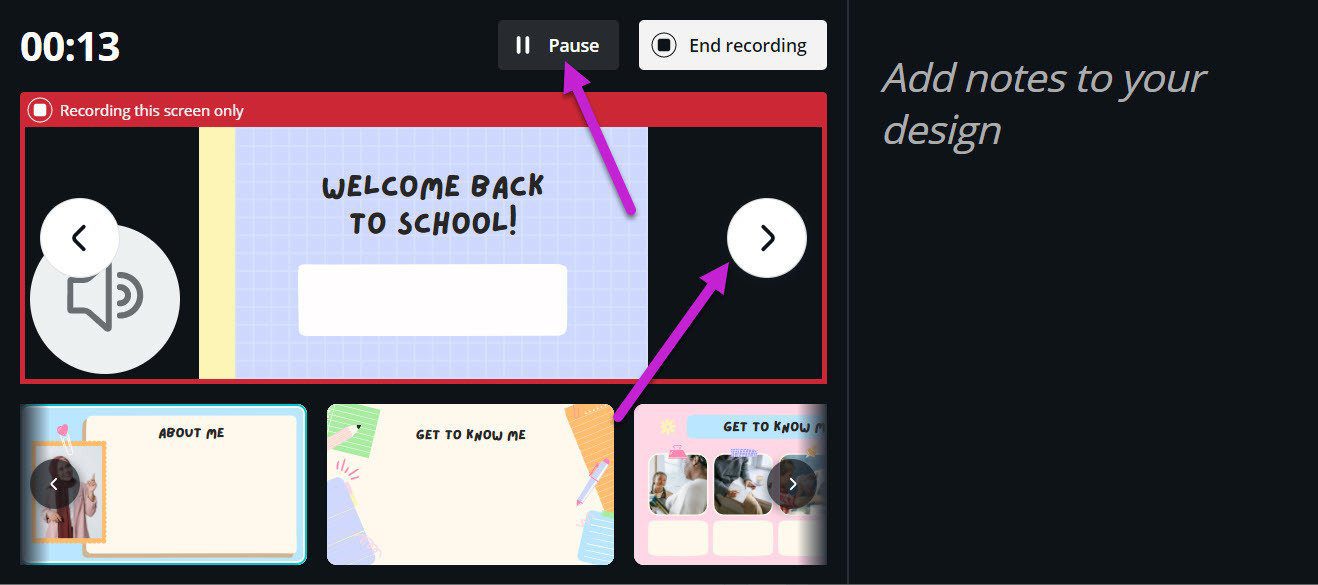
When you need to pause, click on the Pause button above. This way, you can also skip a few slides where you do not want any voiceovers.
Step 4: Once the recording is complete, click the Done button at the top-right corner.
Depending on the length of the audio and the presentation’s content, the download might take time.
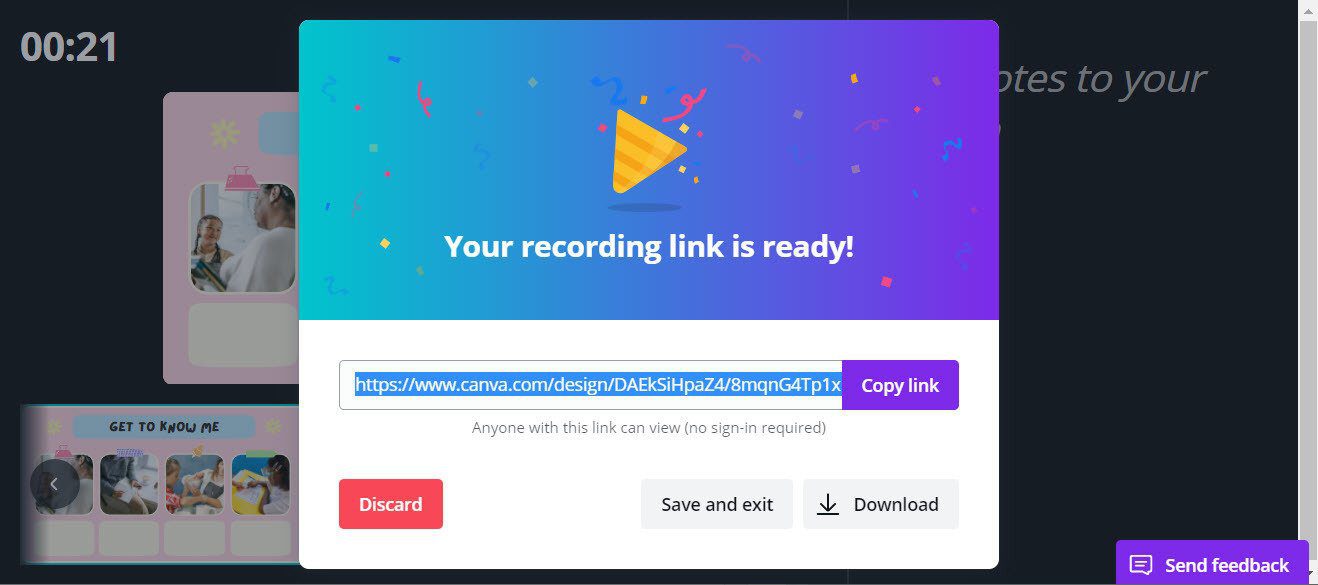
In addition to the direct download, Canva allows you to copy and share the link to the presentation directly.
Method 3: Using AI
Many Voiceover AI apps can connect to Canva and help you convert text to voice using multiple voice profiles. Here, we are using Murf AI.
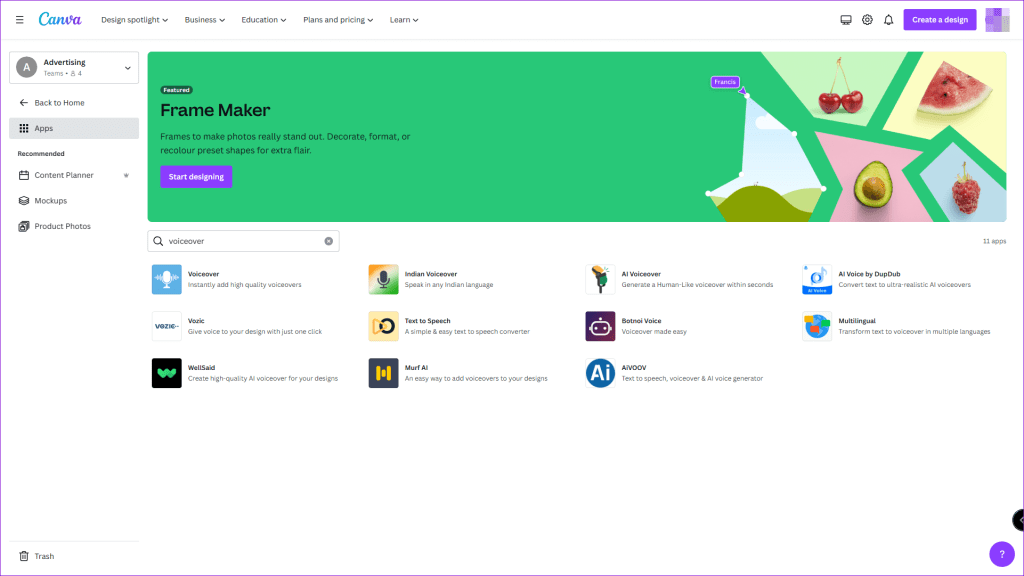
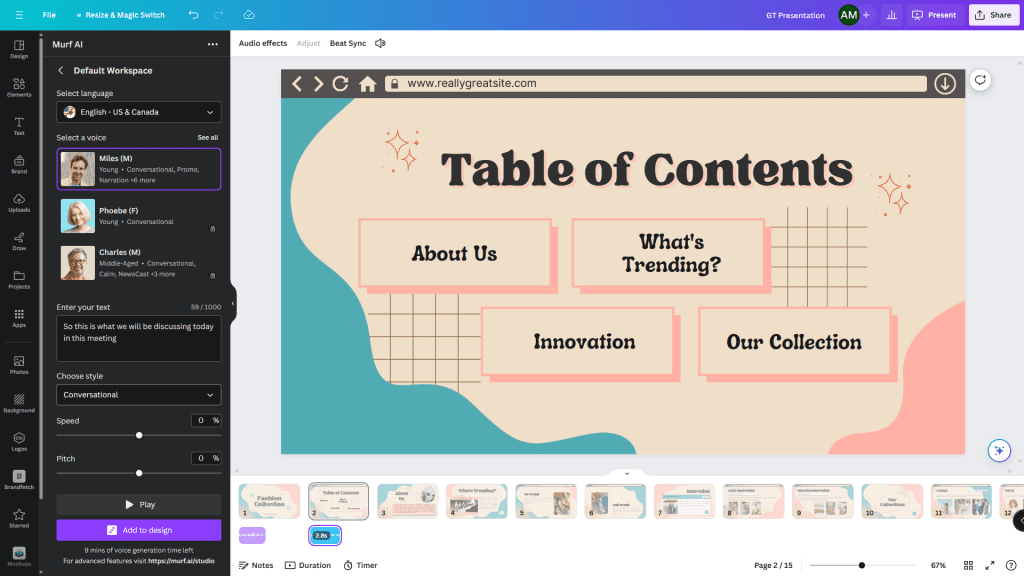
Step 1: Open Canva, go to Apps, and search for Murf AI.
Step 2: Click on it, sign in using your existing account, or sign up.
Step 3: Done that; it will prompt you to use it in the existing or new design.
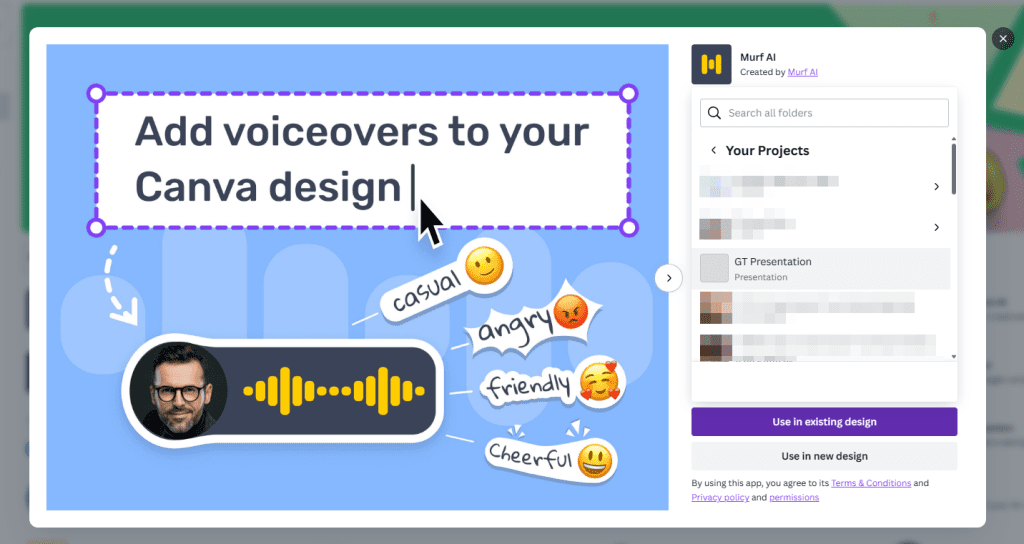
Step 4: In the Canva presentation editor, you will have access to Murif AI on the left, where you can select language, a voice profile, and a text box where you can type the text and choose style, speed, and pitch.
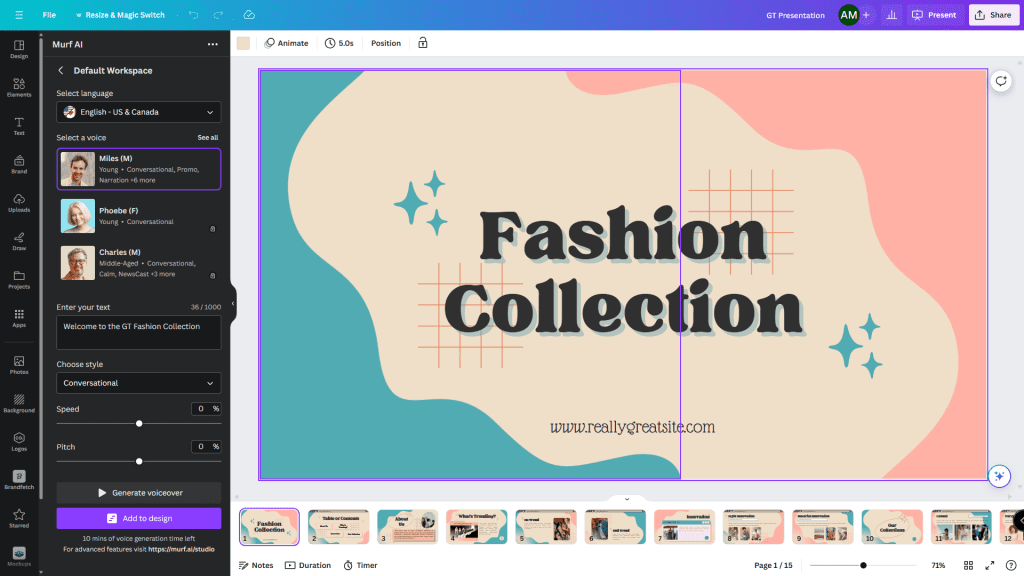
Step 5: Select the slide where you want to add the voiceover, click on Generate voiceover, and Add to the design.
It’s easy to add voiceover using AI apps, but there are limitations when using a free account. For example, Murf AI limits voiceover time to 12-15 minutes.
Was this helpful?
Last updated on 20 April, 2024
Read Next
 How to Create Presentations in Canva
Canva recently introduced new tools to create docs, whiteboards, videos, websites, and presentations.
How to Create Presentations in Canva
Canva recently introduced new tools to create docs, whiteboards, videos, websites, and presentations.
 3 Best Ways to Convert PowerPoint Presentations to Keynote
There are numerous reasons you would want to convert a PowerPoint presentation to the Keynote format.
3 Best Ways to Convert PowerPoint Presentations to Keynote
There are numerous reasons you would want to convert a PowerPoint presentation to the Keynote format.
 How to Restrict Voice Calls and Voice Messages on Telegram
Telegram keeps adding a bunch of new features in its app for Android and iPhone.
How to Restrict Voice Calls and Voice Messages on Telegram
Telegram keeps adding a bunch of new features in its app for Android and iPhone.
 How to Add Canva Email Signature to Gmail
If you are someone who works with multiple emails daily, you will understand the importance of having a professional-looking email signature.
How to Add Canva Email Signature to Gmail
If you are someone who works with multiple emails daily, you will understand the importance of having a professional-looking email signature.
 How to Crop Pictures Into Shapes in Canva
Crop an Image Into a Shape on Canva Web Here's how to convert an image into a shape using Canva on your web browser.
How to Crop Pictures Into Shapes in Canva
Crop an Image Into a Shape on Canva Web Here's how to convert an image into a shape using Canva on your web browser.
 How to Group and Ungroup Elements in Canva on Mobile and PC
Grouping elements in any photo-editing tool comes in handy when you want to accomplish a task on multiple objects together.
How to Group and Ungroup Elements in Canva on Mobile and PC
Grouping elements in any photo-editing tool comes in handy when you want to accomplish a task on multiple objects together.
 How to Create and Customize Tables in Canva
While reading a table might not be as engaging as analyzing a chart or a graph, their importance when presenting information is second to none.
How to Create and Customize Tables in Canva
While reading a table might not be as engaging as analyzing a chart or a graph, their importance when presenting information is second to none.
 How to Create and Edit Videos in Canva
Video editing is demanding and often limited to hardware and software.
How to Create and Edit Videos in Canva
Video editing is demanding and often limited to hardware and software.
The article above may contain affiliate links which help support Guiding Tech. The content remains unbiased and authentic and will never affect our editorial integrity.