Typically, if you have several questions in your form, all of them will appear on the same page for a user. And that will freak out anyone. To avoid such a mishap, you can break down your form into separate pages with sections’ help. Only when a person completes the first page, he/she can move onto the next page or section and so on. Sections give superpower to your forms. Wondering how to use sections in Google Forms? We have covered that in detail in this post.

As a form’s creator, you can merge, duplicate, and move sections. You can even move questions between sections. Interestingly, you can modify the form so that a selected section can show up for some users, depending on their answer. Others won’t be able to see those sections. With sections, you can split down your long forms into smaller sections so that it’s easy to manage for you as well.
Let’s see how to create and edit sections in Google Forms on desktop and mobile (Android and iOS) using these tips.
Note: The steps are the same on PC and mobile unless otherwise mentioned.
How to Create Sections in Google Forms
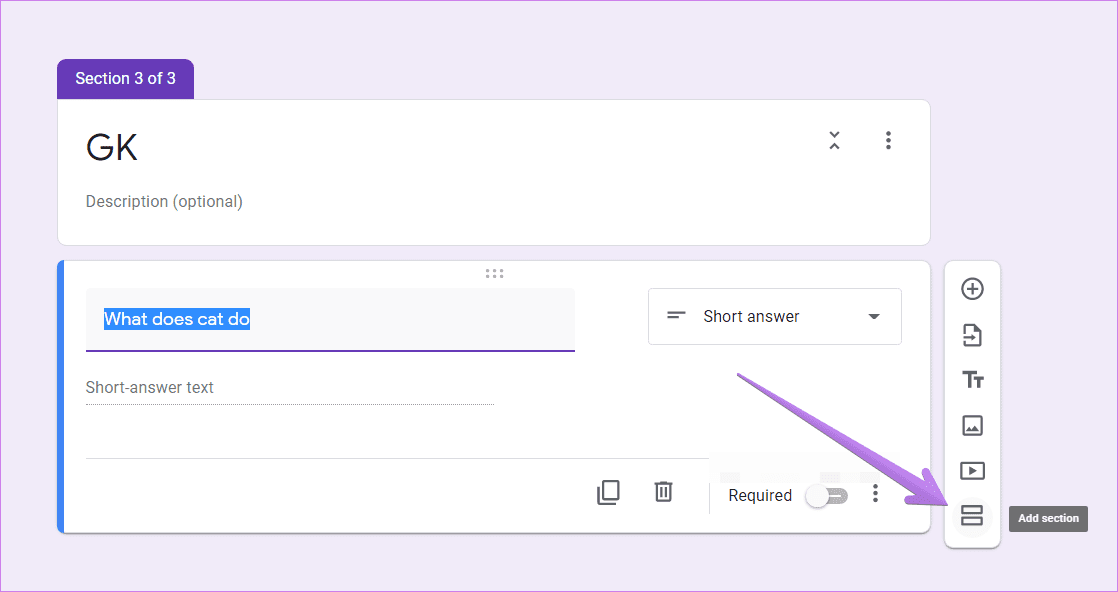
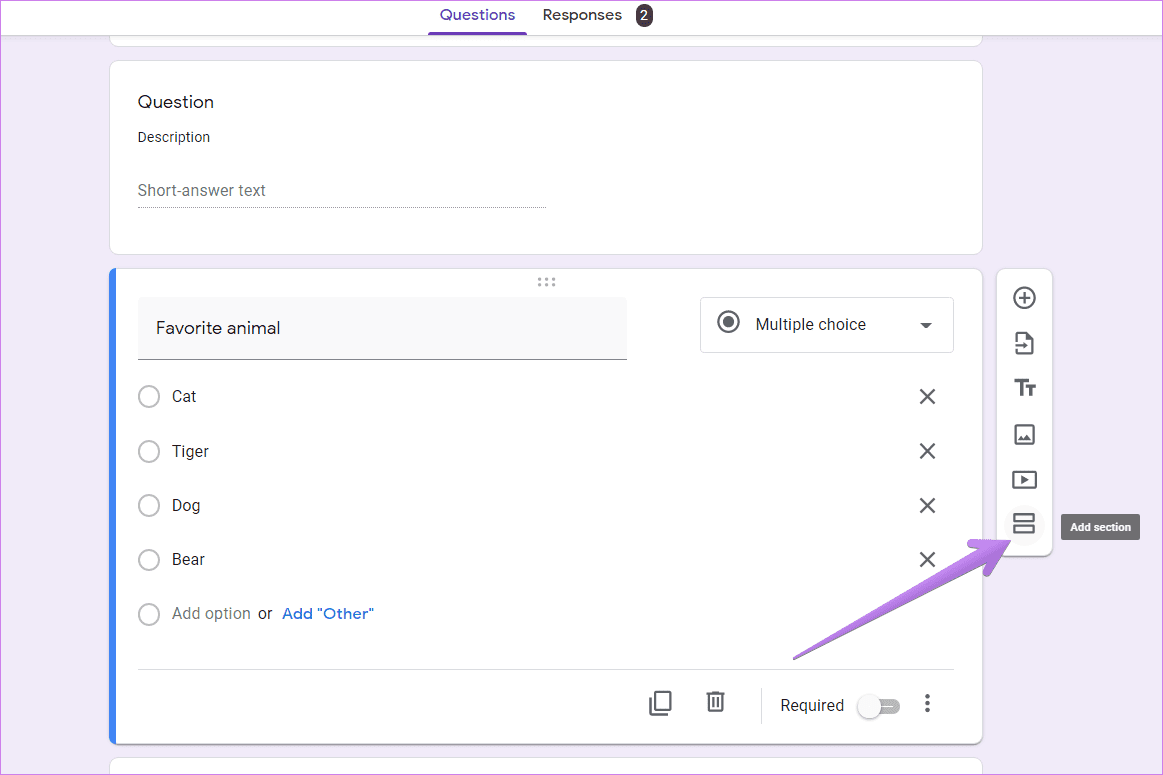
To make a section on PC, open your form and click on the Add a section icon (looks like two rectangular bars) on the floating panel of any question. A section will be added below the current section.
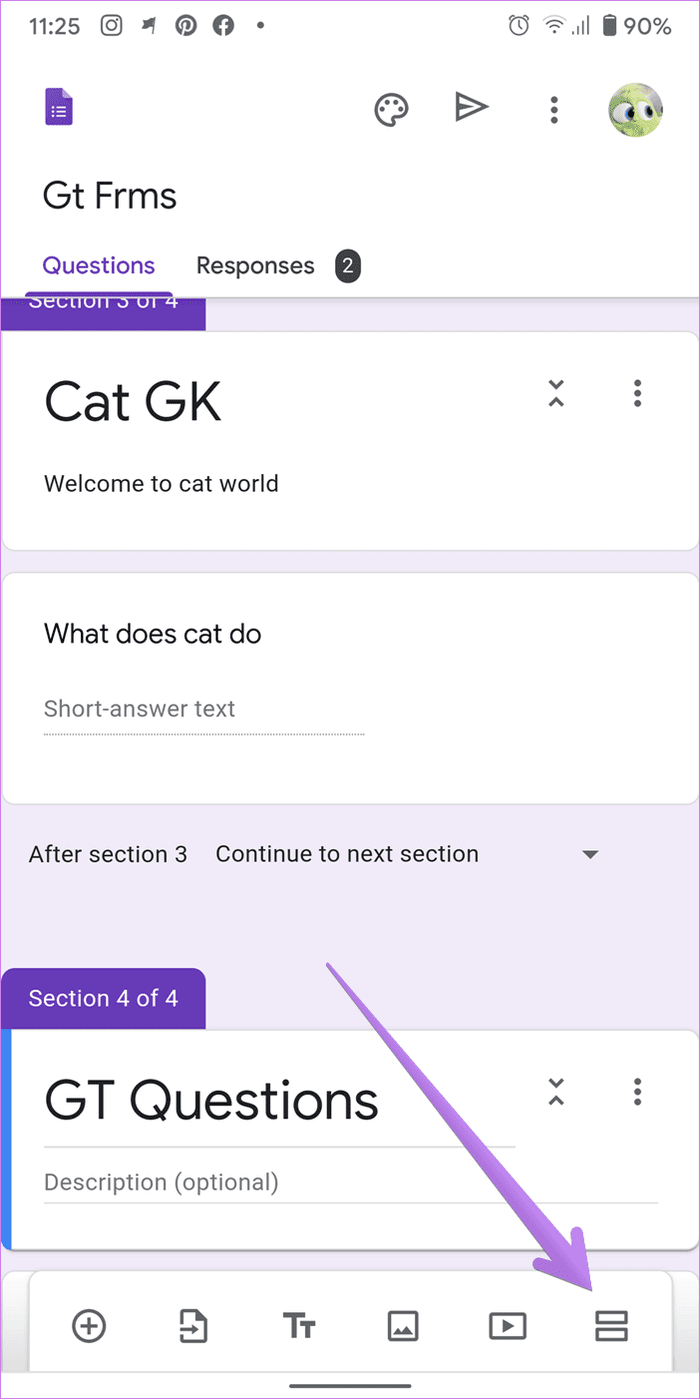
On mobile, tap on the question under which you want to add a section. Then tap on the Add section icon from the bottom menu.
Pro Tip: Find out how to create and edit Google Forms on mobile.
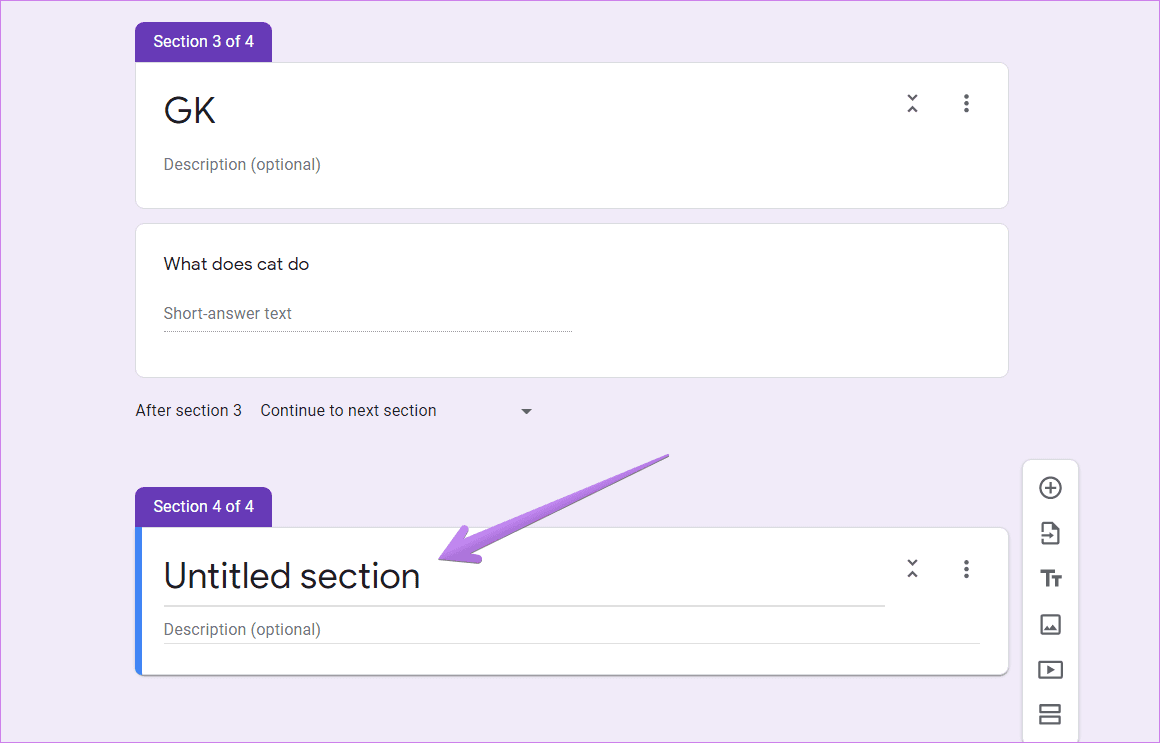
As you can see in the screenshots, each section is numbered for easier identification. Only the owner of the form can see it. Also, the form has a title and a description. Type your title and description (optional) in the available boxes. Then add as many questions as you would do regularly.
How to Move Sections in Google Forms
Once you have created a section, you might want to rearrange them. You don’t need to delete the sections and create them again. You can move them to their new location.
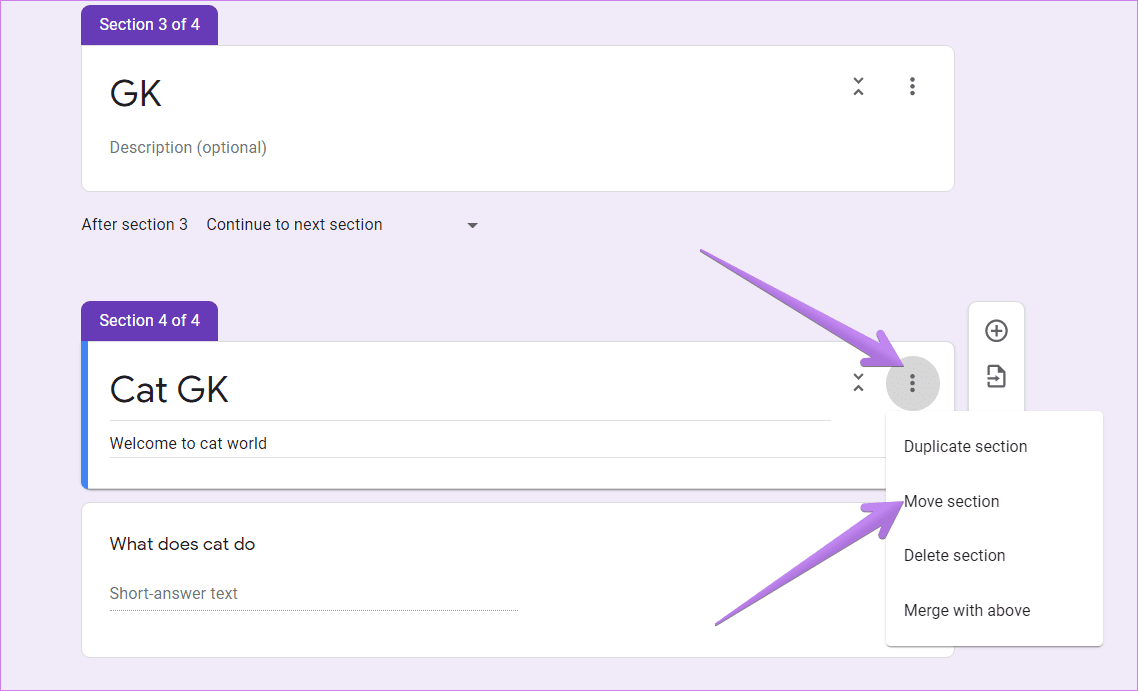
For that, click on the three-dot icon next to the section’s title and description on mobile and PC both. Select Move section from the menu.
A pop-up window will open. Use the arrows next to the section name to change the position of the section. Click on the Save button. On PC, you can also change their position by dragging the icons on the left side of the section names.

How to Merge Sections in Google Forms
You can merge two sections into one section on Google Forms. When you do so, the questions from both sections will merge into one section. You can only merge two sections at a time, and they should be near one another. That is, you can merge sections 1 and 2, 2 and 3, and so on. You cannot merge sections 1 and 3. To merge sections 1 and 3, you will have to change the position of one of the sections (1 or 3) so that there is no other section between them.
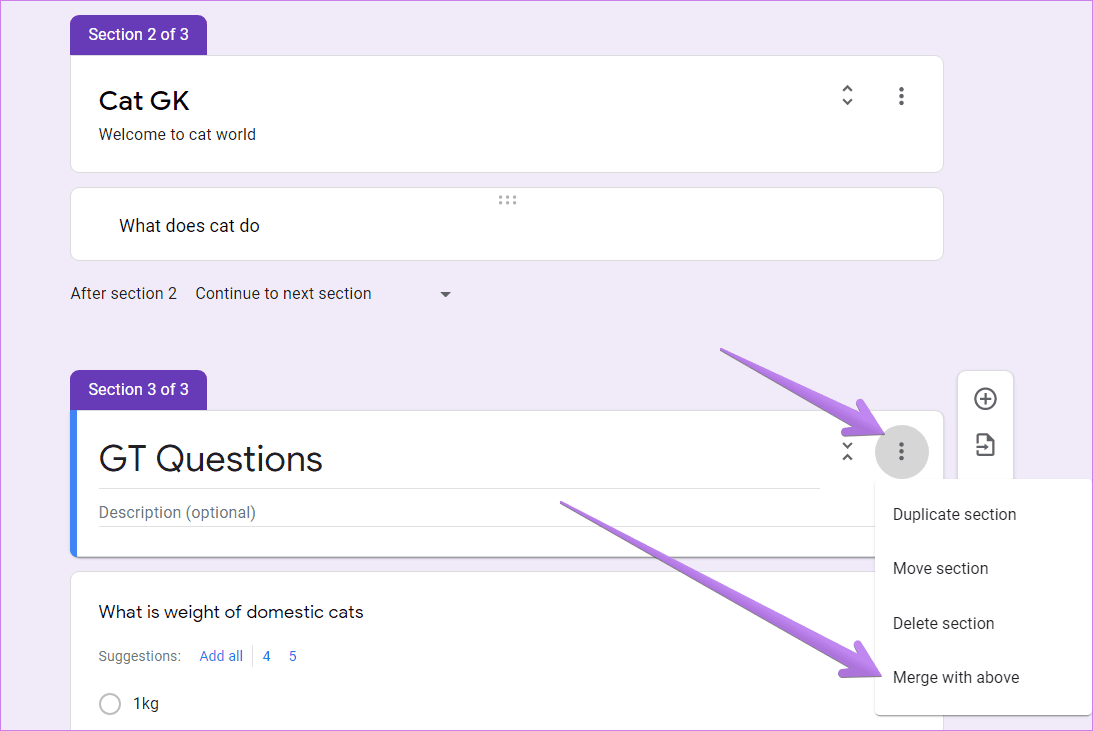
To merge two sections on a computer or mobile, click on the three-dot icon next to the section’s name and select Merge with above.
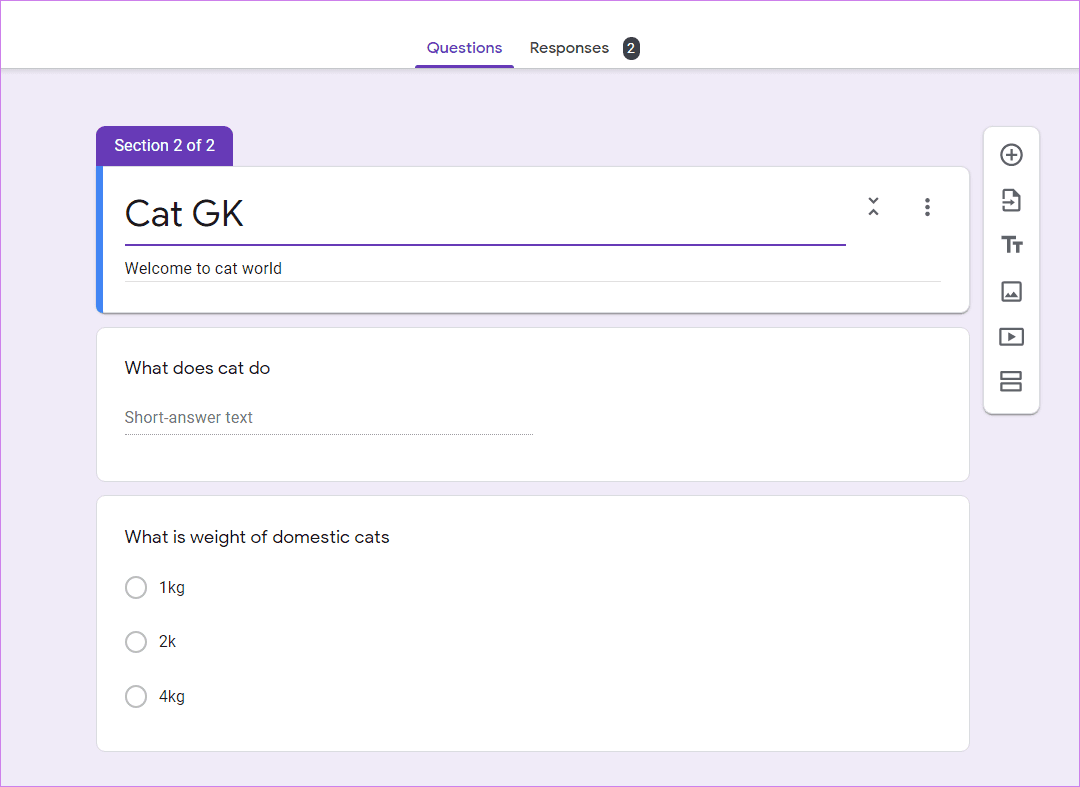
After you do that, the current section’s title and description will be deleted. And all the questions (from both the sections) will use the title and description of the above section.
Pro Tip: If you want to keep the title and description of your section, bring the other section down and hit Merge with above.
How to Duplicate a Section in Google Forms
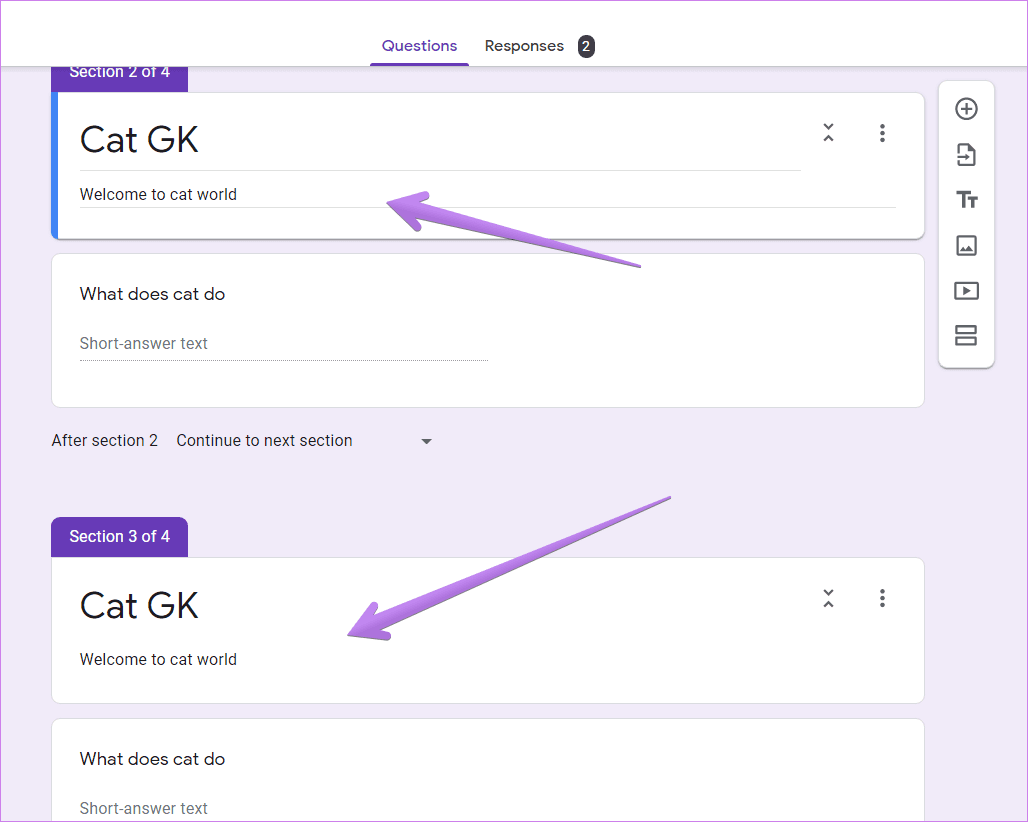
Sometimes, you might want to use questions from a section in another section of the same form. For that, you don’t have to type the questions again. You can duplicate the section and keep or remove the questions as per your need in the new section. When you duplicate a section, all the content, i.e., title, description, questions, and answers are duplicated.
To create a copy of a section, click on the section’s three-dot icon. Select Duplicate section.
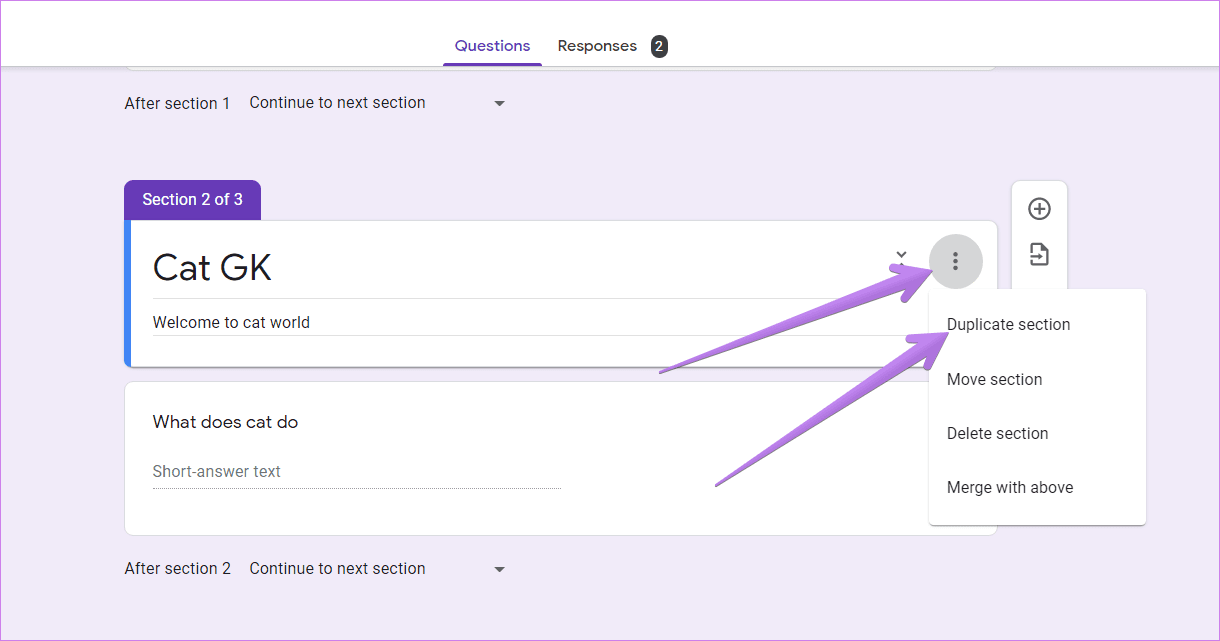
The section’s copy will be added below the current section.
How to Collapse a Section
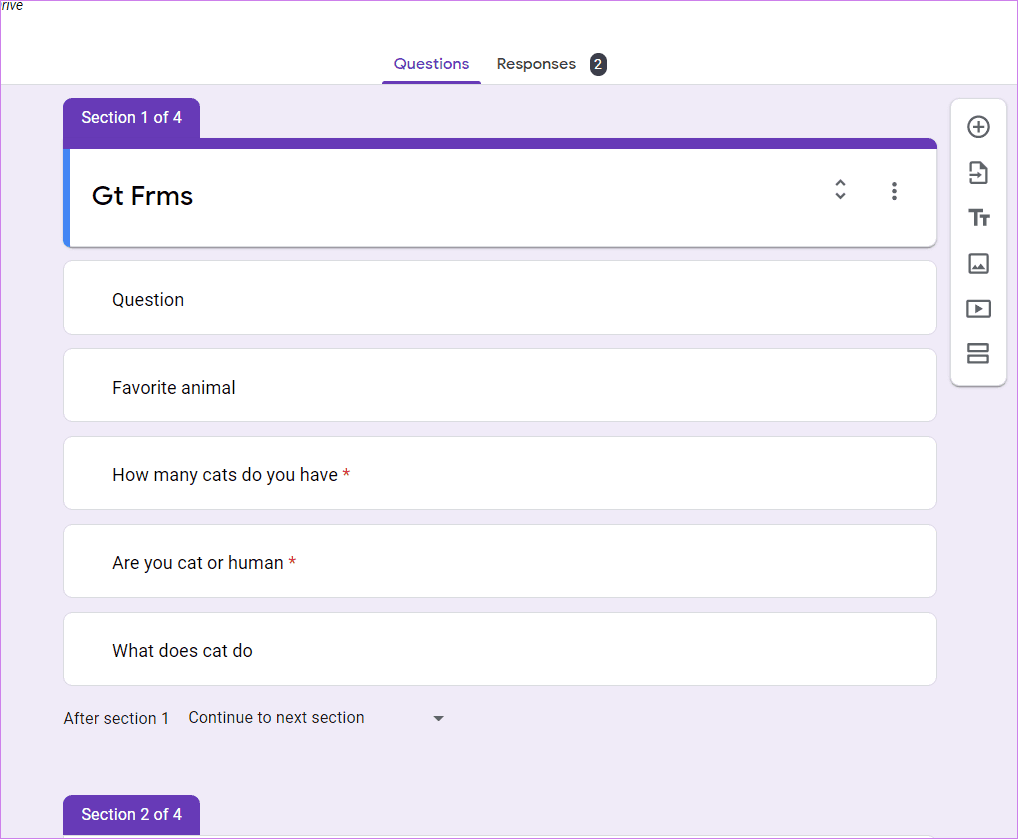
As a form’s owner, when you edit a form, all the questions and sections show up on a single page. That can get a bit intimidating and confusing. To make things easier, you can collapse a section to minimize its questions and answers. Later, if you want to make changes to that section, you can open it again.
To collapse a section, click on the two tiny arrows next to the section name.
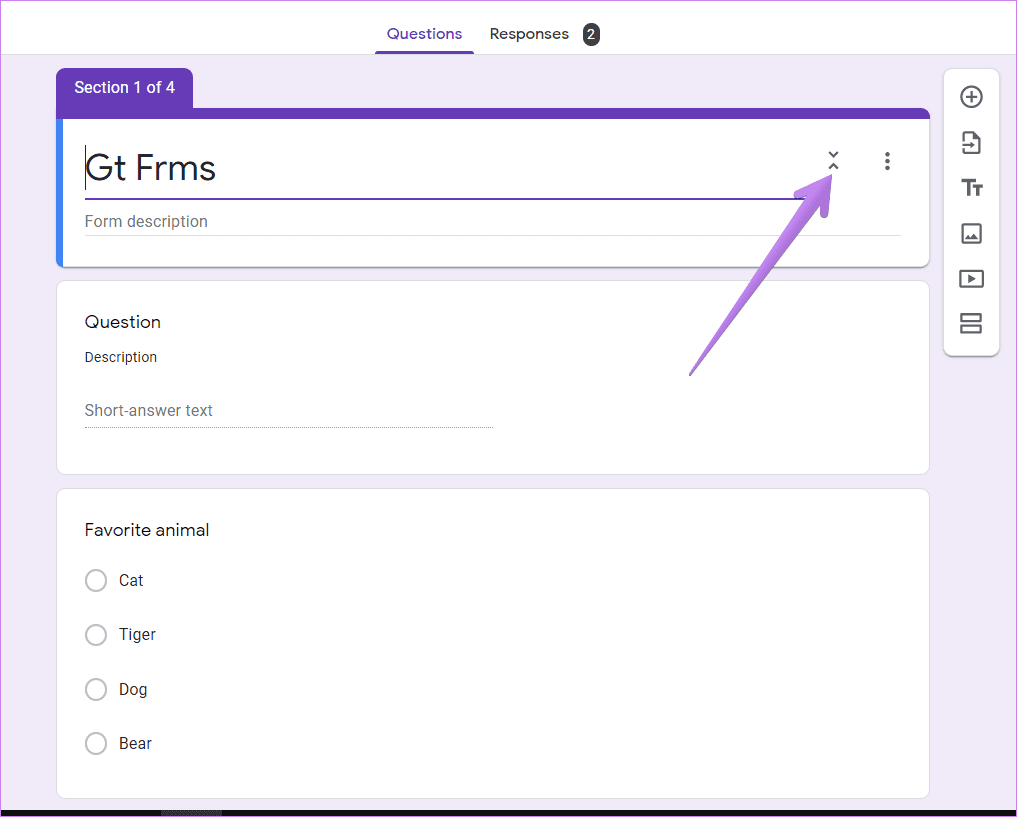
Click on the same arrow again to expand the section. Alternatively, click once on the section’s title or any of the questions to expand it.
Pro Tip: Find out how to send Google Form responses to multiple emails.
How to Move a Question to a Different Section
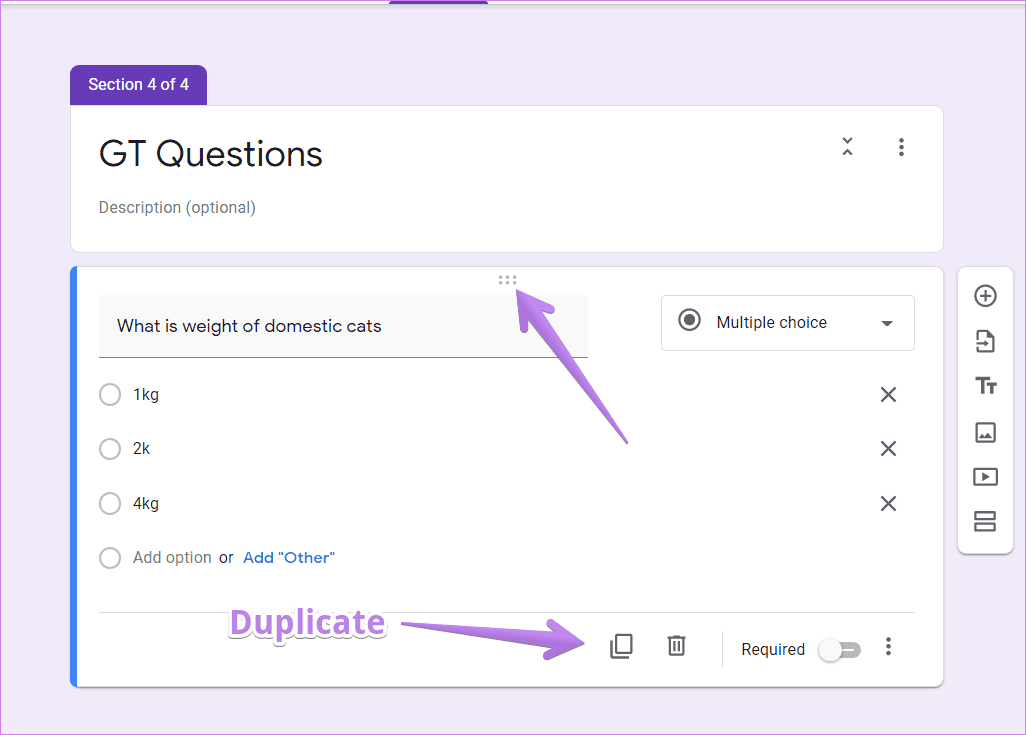
To move a single question to a different section, hover your mouse over the question (on PC) or tap on the question (on mobile). You will see a six-dotted icon in the top-middle area. Drag the question using that icon to its new section. You can even create a copy of the question using the Duplicate button and then move the copy to a new section.
Pro Tip: Find out how to import questions into Google Forms.
How to Move Multiple Questions to a Different Section
It’s not necessary to create sections right from the start. You can add questions to a single section until you complete your questionnaire. Once you are done and have an idea about framing your form, you can break your questions into sections.
For that, click on the question under which you want to start your section. When the floating menu appears next to the question, click on the Add section title. All the questions below that question will come under a new section. Similarly, you can create more sections depending on your need.
How to Add Conditional Logic to Google Forms
Have you ever wished for a way where a user could select an answer, and depending on that, could be taken to a specific section? Your wish is already a reality in Google Forms. You can change what section a user sees when they click on Next. We have covered this tip in detail in our guide. Do check how to create if this, then that logic in Google Forms using sections.
How to Remove a Section in Google Forms
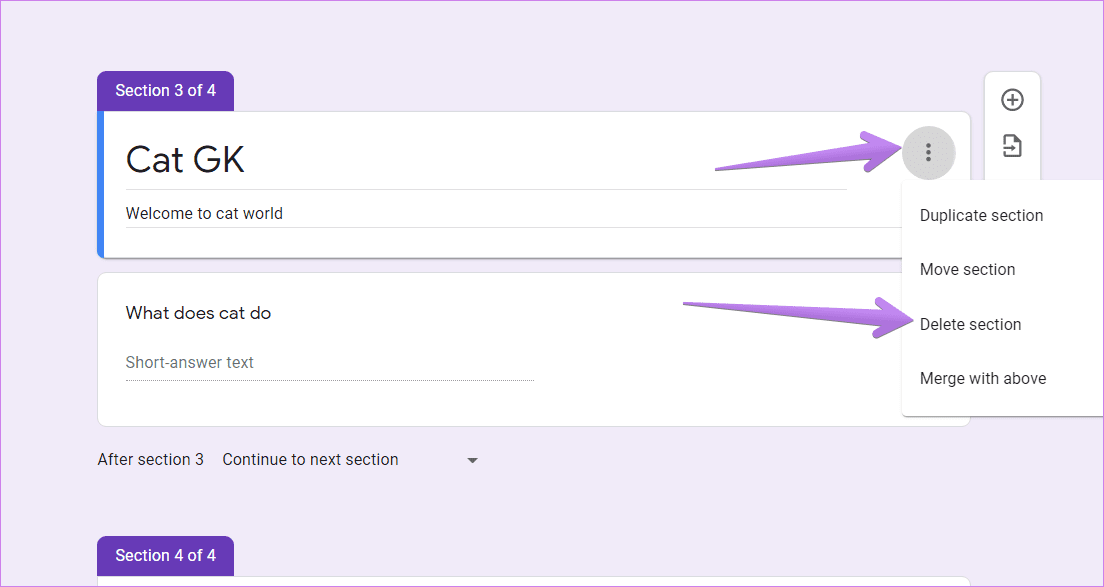
When you delete an entire section, all the questions in that section will get deleted too. To remove a section, click on the three-dot icon next to the section’s name. Select Delete section from the menu.
Undo Changes
At any point, if you feel you did something wrong to a section, you can undo your changes. On Windows, use Ctrl + Z keyboard shortcut and use the Command + Z shortcut on Mac. Check other useful tips related to Google Forms.
Next up: Do you want to let users upload files in your Google form? Find out from the next link how you can upload files to the Google Forms.
Was this helpful?
Last updated on 02 February, 2022
Read Next
 How to Link Paragraphs or Sections in Google Docs
The capability to jump between sections or pages using hyperlinks is one of the many reasons why people love digital documents.
How to Link Paragraphs or Sections in Google Docs
The capability to jump between sections or pages using hyperlinks is one of the many reasons why people love digital documents.
 How to Create Google Forms on Mobile: A Beginner’s Guide
Google Forms is the go-to option for many people when it comes to creating digital forms.
How to Create Google Forms on Mobile: A Beginner’s Guide
Google Forms is the go-to option for many people when it comes to creating digital forms.
 A Guide to Editing Google Forms on Mobile and Desktop
‘Can you edit Google Forms?’ Is that question bothering you?
A Guide to Editing Google Forms on Mobile and Desktop
‘Can you edit Google Forms?’ Is that question bothering you?
 A Complete Guide to Grouping Tabs in Google Chrome on Mobile
Rarely, you receive a feature on your phone that wows you.
A Complete Guide to Grouping Tabs in Google Chrome on Mobile
Rarely, you receive a feature on your phone that wows you.
 A Complete Guide to Adding Hyperlinks in Google Slides on Mobile and PC
Creating presentations using online tools like Google Slides helps to get work done at home quickly.
A Complete Guide to Adding Hyperlinks in Google Slides on Mobile and PC
Creating presentations using online tools like Google Slides helps to get work done at home quickly.
 A Complete Guide to Fixing Instagram Messages Not Sending
We all love sharing memes, Reels, and reactions on Instagram via direct messages.
A Complete Guide to Fixing Instagram Messages Not Sending
We all love sharing memes, Reels, and reactions on Instagram via direct messages.
 A Complete Guide to Fixing Audio Issues in Zoom
Work from home is the new norm this year.
A Complete Guide to Fixing Audio Issues in Zoom
Work from home is the new norm this year.
The article above may contain affiliate links which help support Guiding Tech. The content remains unbiased and authentic and will never affect our editorial integrity.