In the past few years, Microsoft has simplified file sharing on Windows a lot. Now, you just need to click a button or two to make your files visible to other users on the same network. Interestingly, the file sharing isn’t limited to just Windows computers for you can even view your files on an Android phone.
Sometimes, the file sharing stops working abruptly, or you aren’t able to view your files on other devices properly. That can get quite frustrating.
But, no need to worry as we will help you fix the issue. Here, you will find 7 solutions that will bring back the Windows 10 file sharing on the right track.
Let’s begin.
1. Restart Your Computer
Don’t be surprised. If you haven’t tried restarting your computer yet, it would be a good choice to do it right away.

2. Use File Sharing Properly
It’s important to follow all the steps correctly to make sure file sharing works as it is supposed to be. First, you need to enable file and network sharing. Secondly, you need to share the files. Here are the steps for both of them.
Enable File Sharing
Even though file sharing is enabled by default on Windows 10 for private networks, you should start by confirming the same. For that, follow these steps:
Step 1: Search for Control Panel in Windows Search and open it.
Step 2: Click on Network and Sharing Center.

Step 3: Click on Change Advanced Settings from the left sidebar.

Step 4: Under Private (current profile), ensure Turn on network discovery and Turn on file and printer sharing are checked.

Share Files
Just enabling the network discovery and file sharing doesn’t mean the computers on your network will have access to all your files automatically. You need to manually share the item, which can be a folder or a drive.
For that, follow these steps:
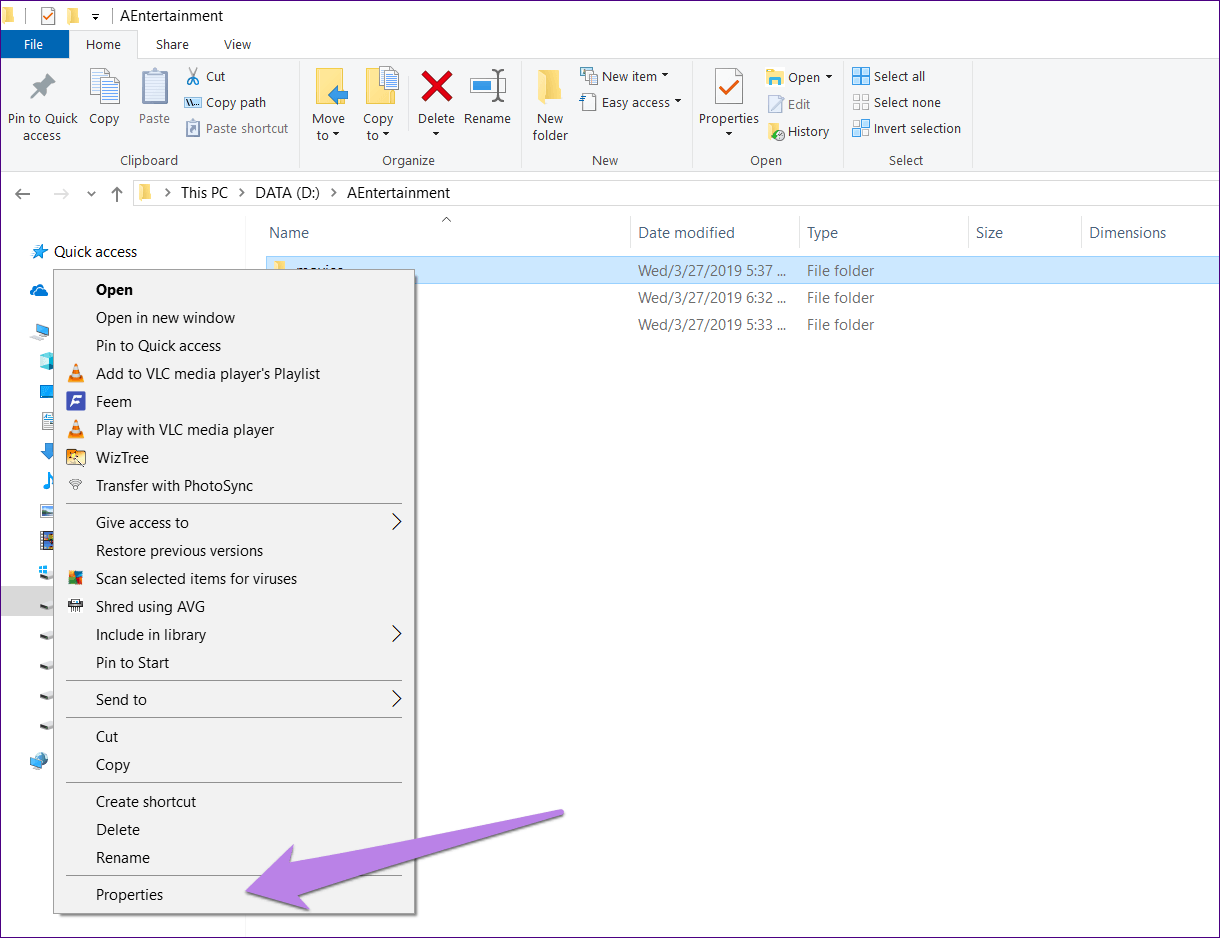
Step 1: Right-click on the item that you want to share. Click on Properties.
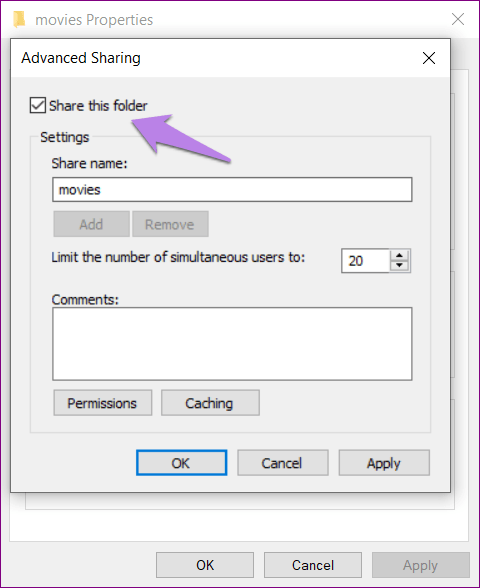
Step 2: Go to the Sharing tab and click on Advanced Sharing.
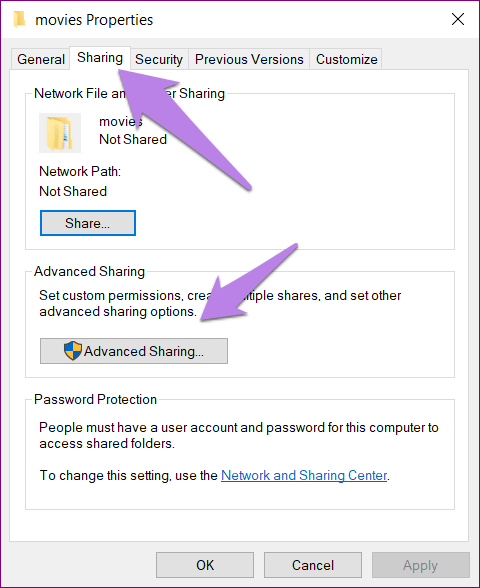
Step 3: Enable Share this folder and click on Apply followed by Ok. By default, the permissions are set to read only. That is, others can only view the folder and cannot modify it. To change the permissions, click on Permissions and alter them as per your need.
The above step makes your folder visible to all the users in your local network. To share it with a selected few people only, click on Share in step 2. From the drop-down box, select the user with whom you want to share the file.
Pro TipNow, you will be able to access the folder on other computers. Similarly, repeat the steps for other files and folders.
Verify If the Folder Is Shared or Not
Right-click on any folder and go to ‘Give access to’ and you will see the Remove access option. That doesn’t mean the folder is being shared. By default, the option is available for all folders.
To verify if the folder is being shared, right-click on it and go to Properties. Then, click on the Sharing tab. Under Network File and Folder Sharing, you will see the Shared label along with its path.

3. Turn Password Protection Off and On
When Password protected sharing is turned on, then other users either need to have a user account on your PC or they should be familiar with your username and password.
You can try disabling this feature and see if the sharing works. To turn it off, go to Control Panel > Network and Sharing Center > Change advanced sharing settings (from the left pane).
Then, under All Networks, check the box next to Turn off password protected sharing.

4. Use Correct Login Details
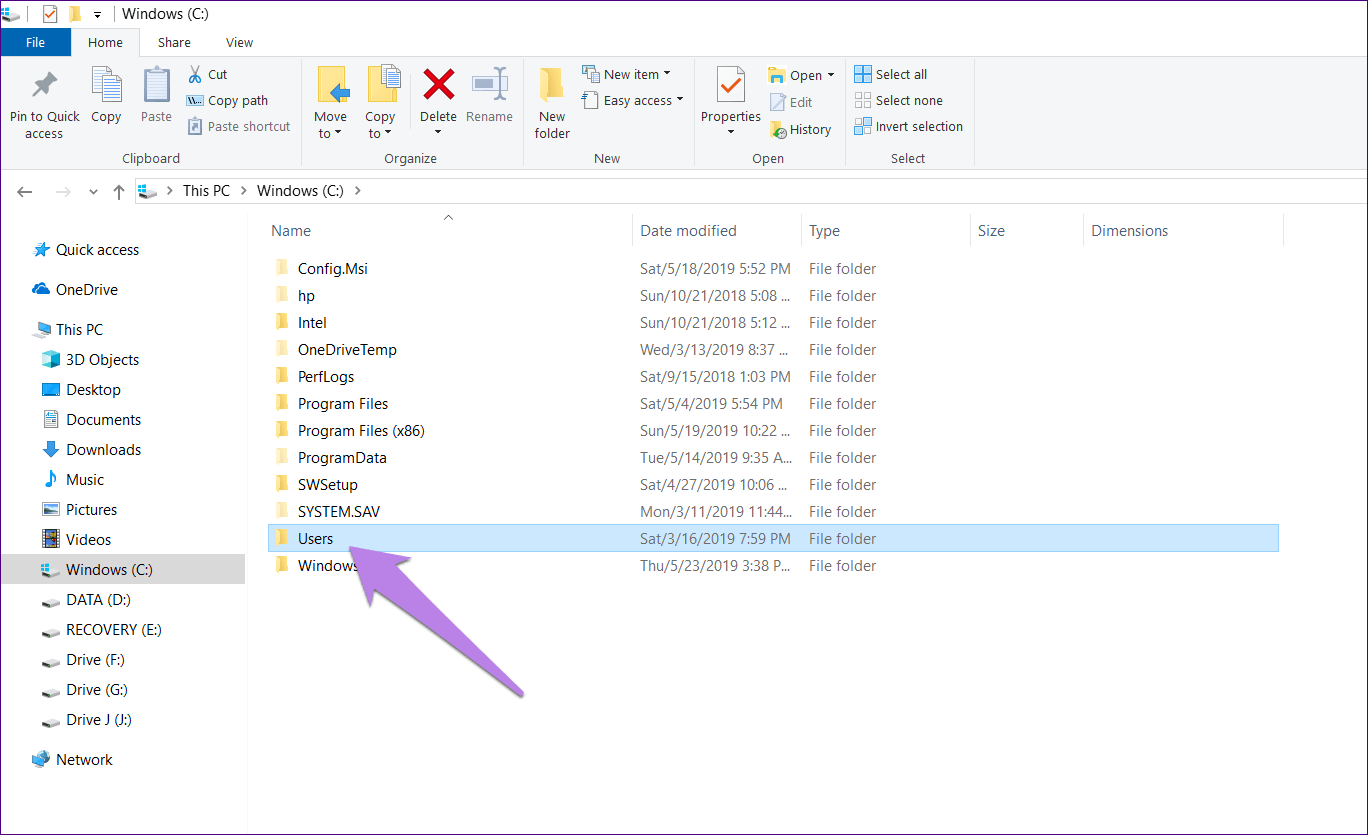
If you want to use the password, then make sure you are entering the right password on other computers. Try with both your local username and password and your Microsoft account details. To confirm the username, go to C Drive followed by Users. Here, the folder names represent the various users on your PC.

5. Switch Between File Sharing Connections
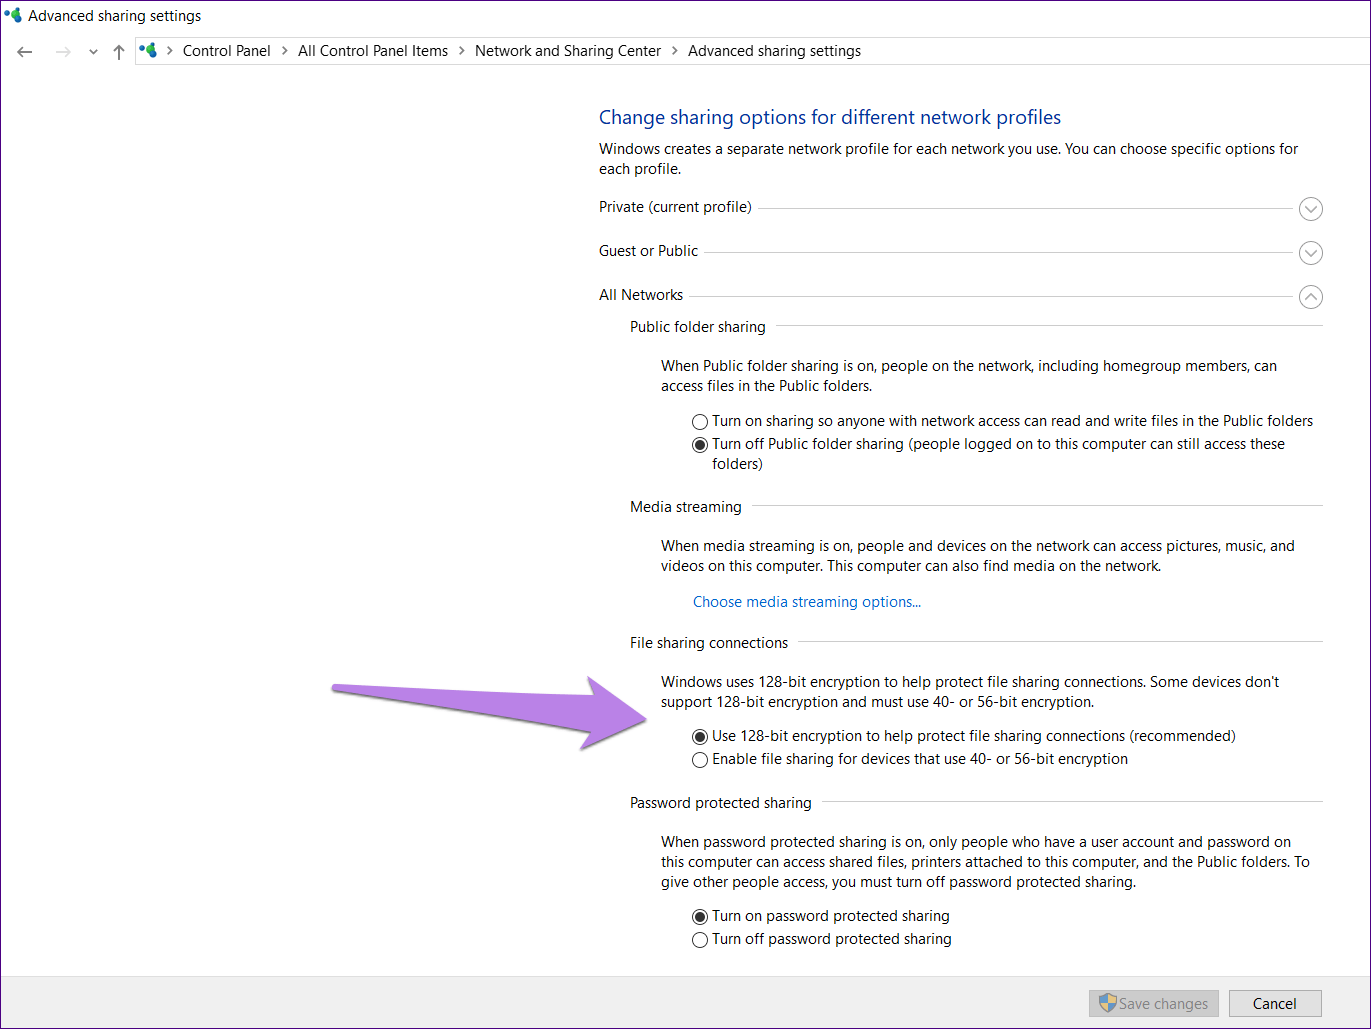
While the recommended way is to go with 128-bit encryption, some devices support 40 or 56-bit encryption. So, try switching to the other and see if that fixes the problem.
To do so, open Control Panel > Network and Sharing Center > Change advanced sharing settings (from the left sidebar). Under All Networks > File sharing connections, try both alternatively.
6. Allow File and Printer Sharing in Firewall Settings
To do so, follow these steps:
Step 1: Go to Control Panel followed by Windows Defender Firewall.

Step 2: Click on Allow an app or feature through Windows Defender Firewall.
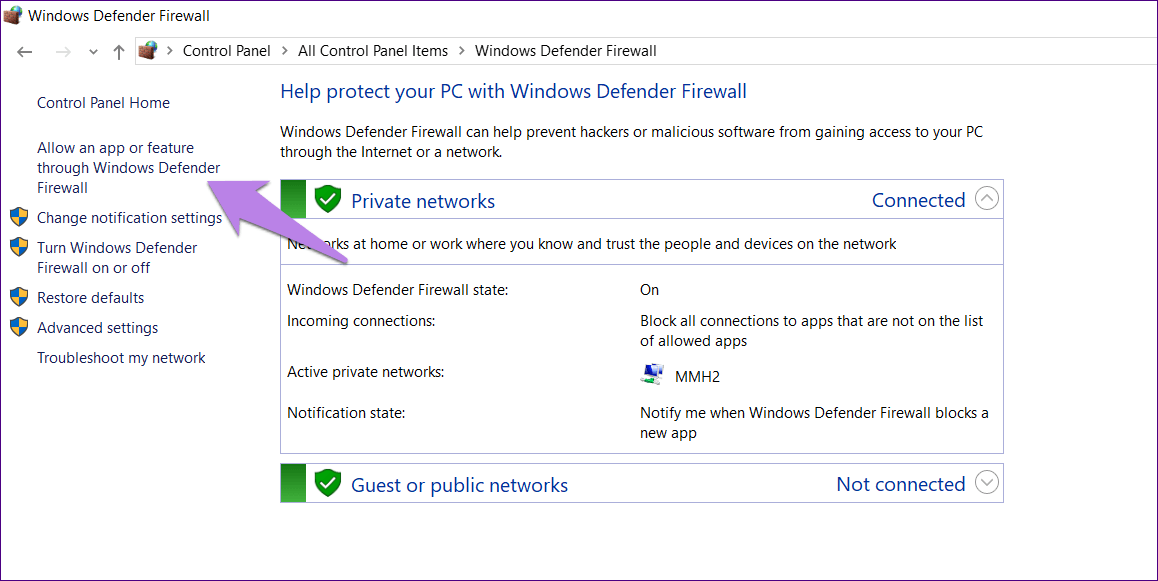
Step 3: Make sure File and Printer Sharing is enabled in the list.
Pro Tip: You can also try disabling the Windows Defender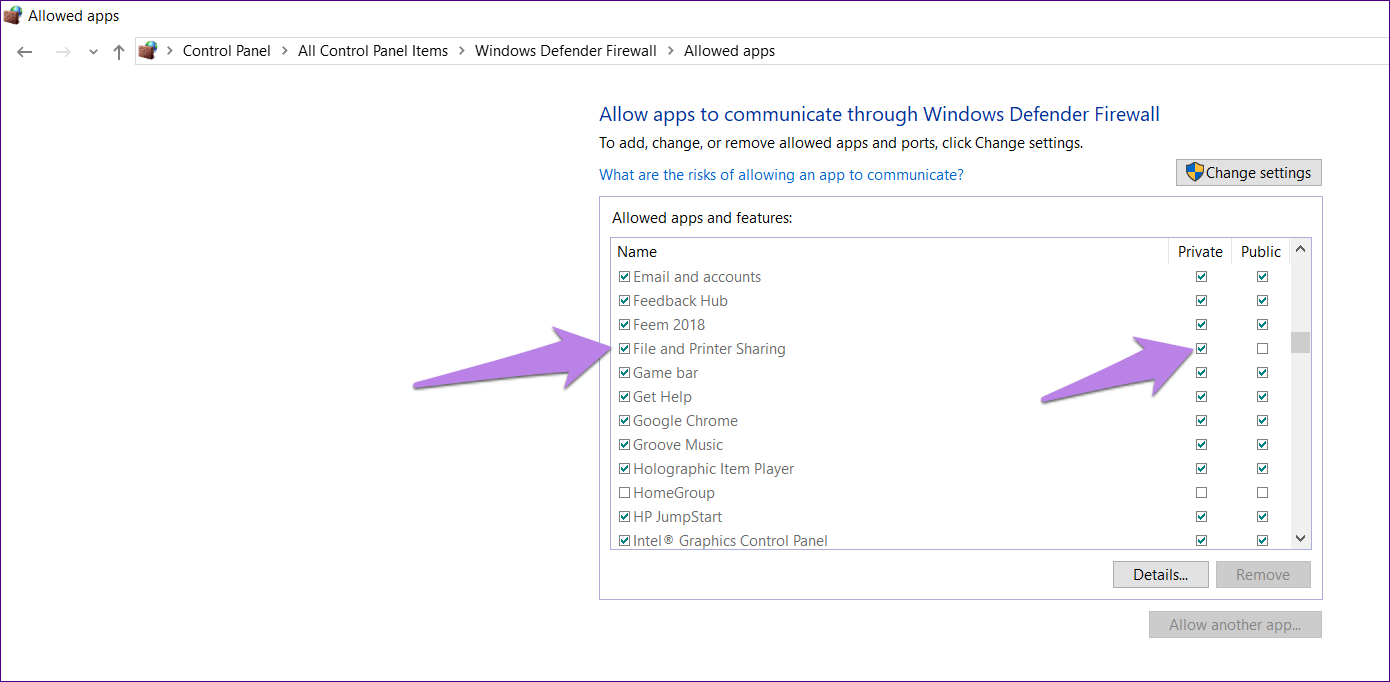
7. Disable Antivirus on Your PC
Sometimes, antivirus is also responsible for the erratic behavior of file sharing. So, try disabling it temporarily and see if it solves the issue. If file sharing works properly after disabling antivirus, check if an update is available for the antivirus or you might need to use a different one.
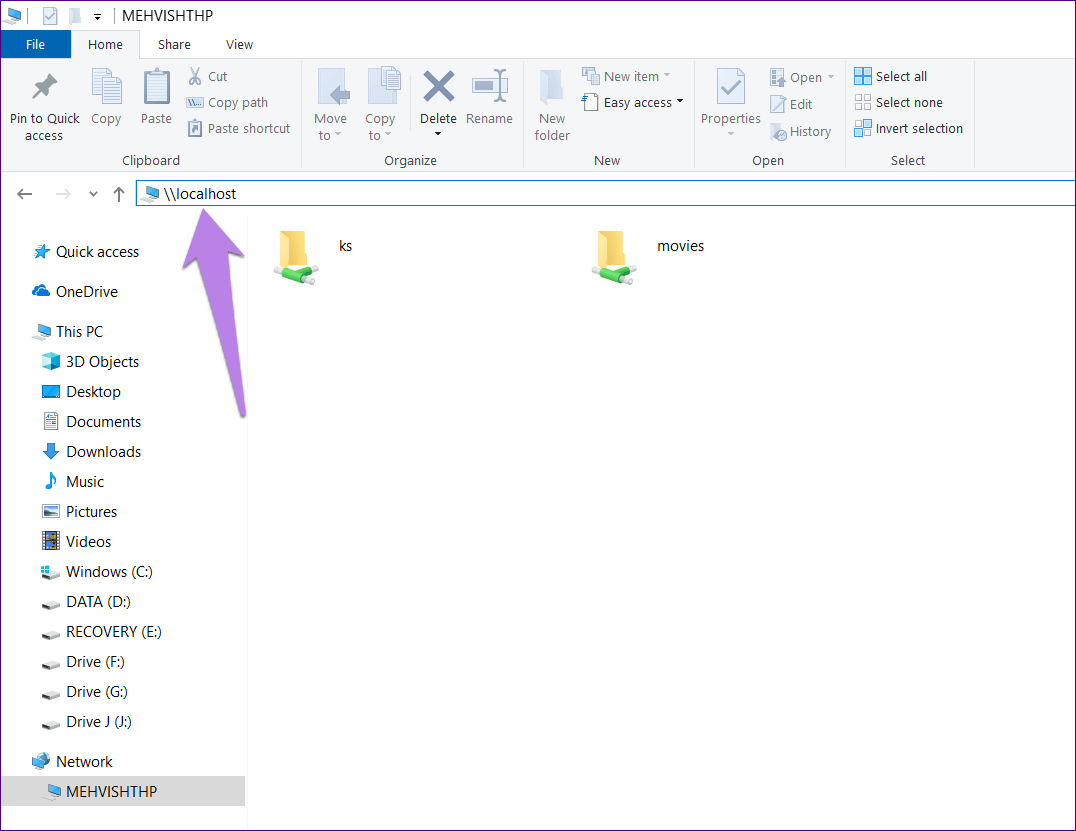
Tip: Identify Shared Folders
To find out the folders that are currently being shared, type \\localhost into the address bar of your File Explorer and press Enter.
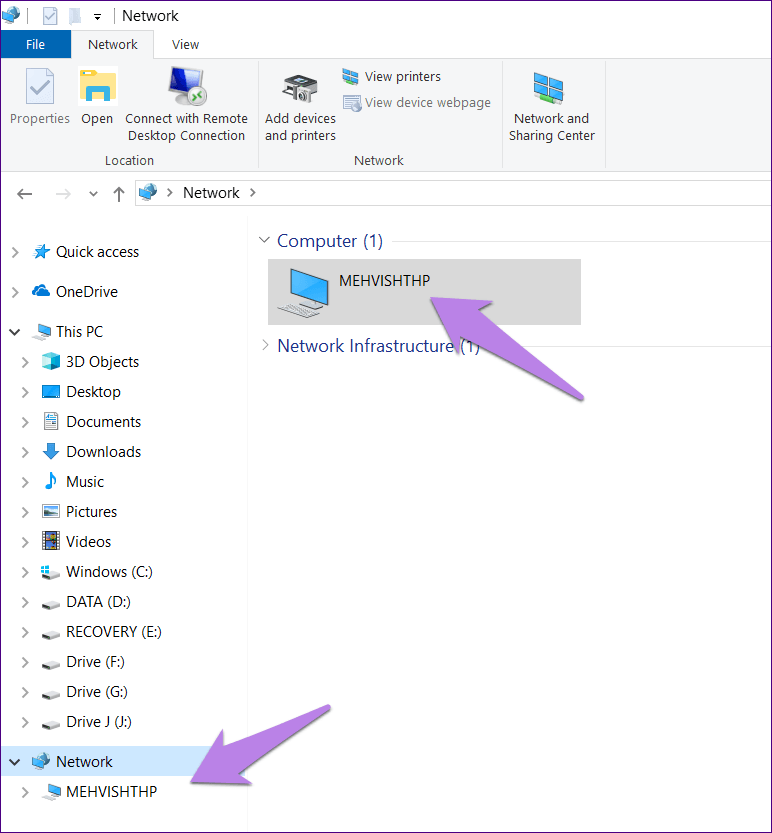
Alternatively, go to the Network from the left pane in the File Explorer. Here, click on your computer name.
Sharing Made Easy
We hope the above solutions would have helped you fix the file sharing issue. If you are trying to share files between PC and Android, you can take the help of third-party apps too. For file sharing between PC and iOS, third-party apps also come to the rescue.
Next up: You must have noticed the Focus Assist icon in the Action Center. What is it? How is it helpful? Read the next post to find all the answers.
Was this helpful?
Last updated on 13 July, 2021
Read Next
 4 Fixes for Microsoft Teams Screen Sharing Not Working on Windows 11
https://youtu.be/Wm3ds6ia05A Preliminary Fixes Internet connection: Sharing your screen on Teams requires high-speed internet connectivity.
4 Fixes for Microsoft Teams Screen Sharing Not Working on Windows 11
https://youtu.be/Wm3ds6ia05A Preliminary Fixes Internet connection: Sharing your screen on Teams requires high-speed internet connectivity.
 Top 12 Ways to Fix Nearby Sharing Not Working on Android
With Nearby Sharing, Android finally has a powerful file sharing functionality of its own.
Top 12 Ways to Fix Nearby Sharing Not Working on Android
With Nearby Sharing, Android finally has a powerful file sharing functionality of its own.
 Top 8 Ways to Fix Zoom Screen Sharing Not Working on Windows
Zoom screen sharing is a boon for those working from home to get things done.
Top 8 Ways to Fix Zoom Screen Sharing Not Working on Windows
Zoom screen sharing is a boon for those working from home to get things done.
 Top 7 Ways to Fix Microsoft Teams Screen Sharing Not Working on Mac
Aside from frequent sign-in errors, Microsoft Teams’ other glaring weakness remains in the screen sharing department.
Top 7 Ways to Fix Microsoft Teams Screen Sharing Not Working on Mac
Aside from frequent sign-in errors, Microsoft Teams’ other glaring weakness remains in the screen sharing department.
 8 Best Ways to Fix FaceTime Screen Sharing Not Working on Mac
FaceTime received a massive overhaul with iOS 15, iPadOS 15, and macOS Monterey updates.
8 Best Ways to Fix FaceTime Screen Sharing Not Working on Mac
FaceTime received a massive overhaul with iOS 15, iPadOS 15, and macOS Monterey updates.
 6 Best Ways to Fix Wireless Power Sharing Not Working on Samsung Galaxy Phones
Wireless charging is quite common on premium smartphones, you’d be surprised to find a phone without one.
6 Best Ways to Fix Wireless Power Sharing Not Working on Samsung Galaxy Phones
Wireless charging is quite common on premium smartphones, you’d be surprised to find a phone without one.
 6 Ways to Fix Apple Music Family Sharing Not Working on iPhone
Are you facing issues with Apple Music Family Sharing on your iPhone?
6 Ways to Fix Apple Music Family Sharing Not Working on iPhone
Are you facing issues with Apple Music Family Sharing on your iPhone?
 10 Ways to Fix Steam Family Sharing Not Working on Windows 11
Steam Family Sharing is designed to enhance the gaming experience by allowing you to share your game libraries with friends and family.
10 Ways to Fix Steam Family Sharing Not Working on Windows 11
Steam Family Sharing is designed to enhance the gaming experience by allowing you to share your game libraries with friends and family.
The article above may contain affiliate links which help support Guiding Tech. The content remains unbiased and authentic and will never affect our editorial integrity.