Stumbling upon the White Screen of Death(WSOD) can be a scary experience. For the most part, you wonder if there’s a delay in launching the app or booting. But when the white screen doesn’t go away after a while, you know it’s time to seek solutions.

A failure in the hardware is the major cause of the White Screen of Death. There are also instances where software issues can result in the white code-less screen. Most times, force-restarting your computer can fix the issue. But there are times you have to do a lot more to clear the White Screen of the Death.
1. Force Restart Your Device
An application or software that has suddenly stopped working can cause a WSOD. To resolve stuck applications, restart your device. Here’s how to do that.
Long-press the power button on your computer to turn it off. Give it about 10 seconds and press the power button to restart it.
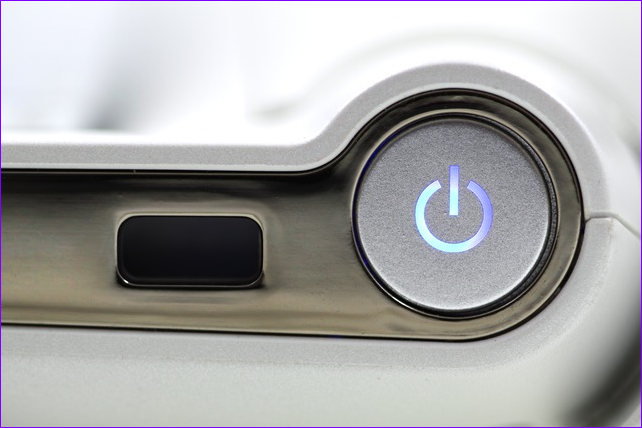
For laptops, you can unplug then re-plug the power cable. You can then restart the computer and check if the system starts correctly.
2. Update Graphic Drivers
Majority of times, the WSOD happens due to an issue with the display drivers. If there’s a graphic driver that is outdated or incompatible, the likelihood of facing the white screen are prevalent. Follow these steps to update your drivers.
Step 1: Right click on the Windows icon and tap Device Manager from the list.

Step 2: Locate the Display adapters option and expand the list.

Step 3: Right-click on each driver and press the Update driver option.

Step 4: Select how you want to search for the drivers, and follow the prompts on your screen to initiate the process.
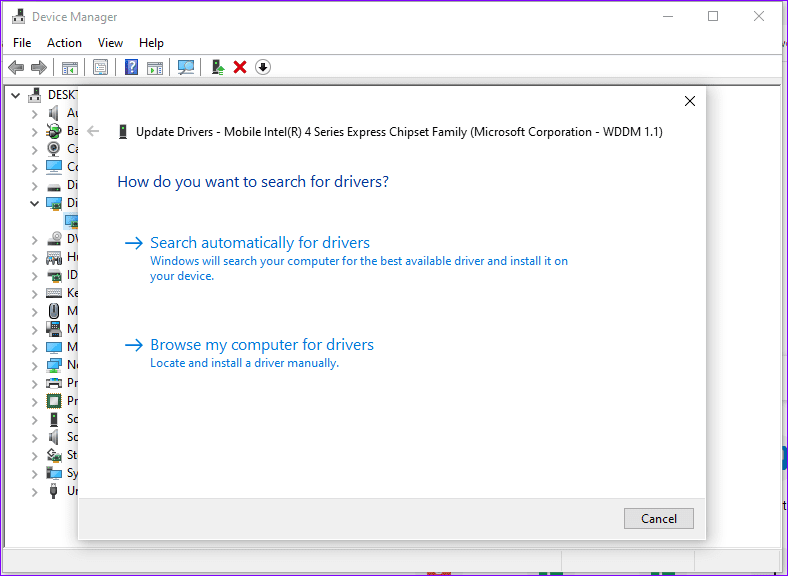
Step 5: Wait for the process to finalize and reboot your system to effect the changes.
Alternatively, you can select Uninstall drivers, then restart your computer, and Windows will reinstall updated drivers.
3. Boot System in Safe Mode
Operating your system with only the basic functions could help resolve the White Screen of Death. This is because booting your Windows in safe mode ensures minimum applications are running on your device. Safe mode also temporarily disables third-party applications and runs your system with default settings.
To open your system in safe mode, follow these steps.
Step 1: Press the Windows + R keys.
Step2: Type msconfig in the dialog box and press Enter.

Step 3: On the System Configuration window, select the Boot option.
Step 4: Scroll down and check the Safe boot button.
Step 5: If you want to use a network connection during safe mode, check the box for the Network option. You can then complete the process by pressing the OK and Apply tabs to update the changes.
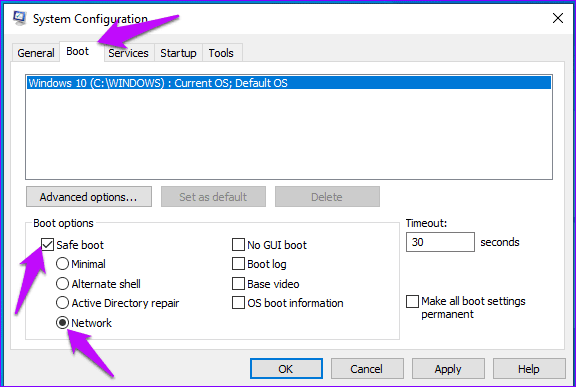
Step 6: Reboot your system and your computer will launch in safe mode.
4. Unplug External Devices
The USB stick, memory card, and other external peripherals could be cause of the problem. Try unplugging them, and other additional peripherals first, and then try to restart your Windows computer.
If the system starts without the error, then you will have to troubleshoot any of those peripherals separately.
5. Update Windows
Updating your Windows will ensure you are running on the latest features and bug fixes. By keeping the Windows OS updated, you can fix the potential bugs. Here’s how.
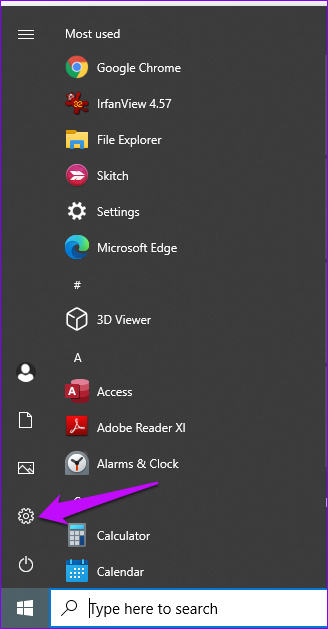
Step 1: Click the Start icon in the bottom-left corner and select the Settings tab.
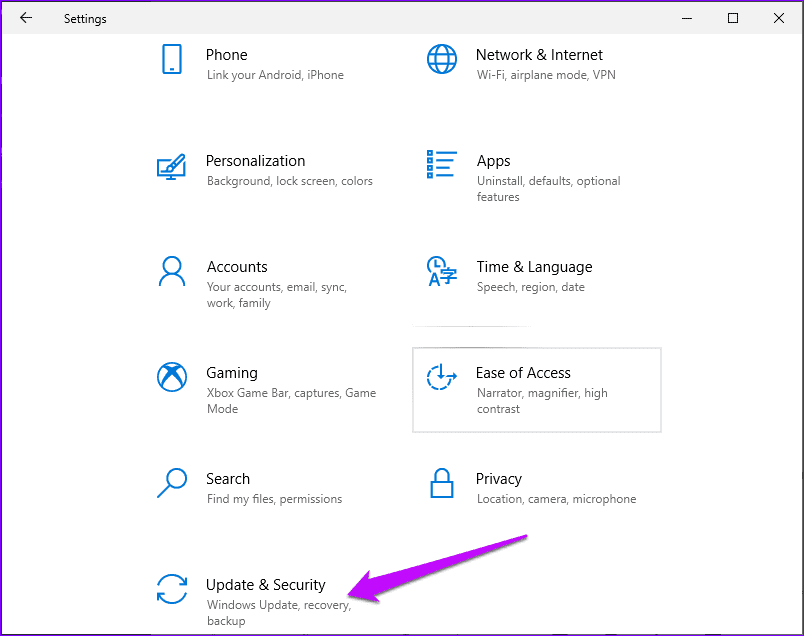
Step 2: Select Update and Security option.
Step 3: Select Windows update and on the right-hand pane, check for updates and if there are any, click the Download button.

Step 4: Wait for the process to complete and restart your device to install the changes.
Note: Do not restart or turnoff your computer during this process. Interrupting the process could deliver incomplete or faulty patches of the Windows update files.
6. Uninstall a Recent Window’s update
If you discover that the WSOD started appearing after a recent Windows update, you can revert to the old version to fix the issue. Here’s how you can do it.
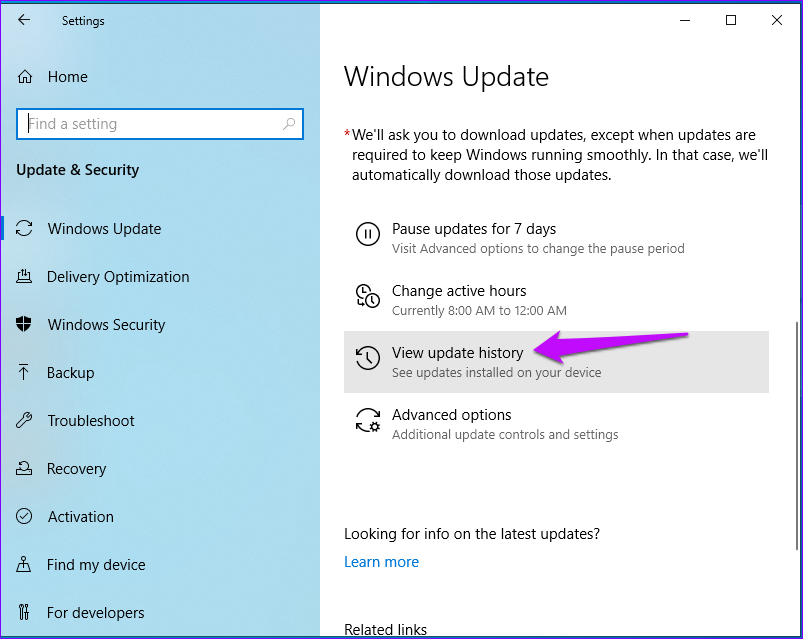
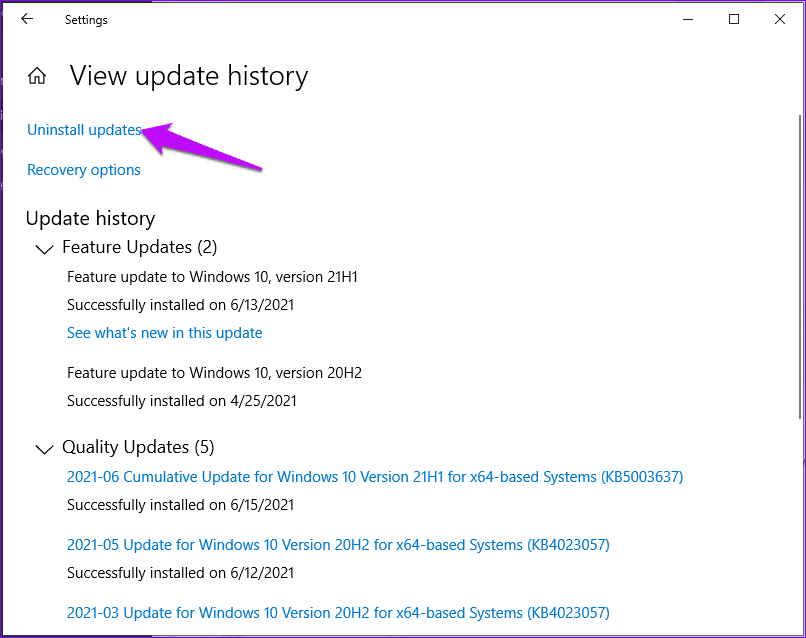
Step 1: Click Settings, then Update and Security, and on Windows Update page, press View update history.
Step 2: Click Uninstall updates to view the list of installed application.
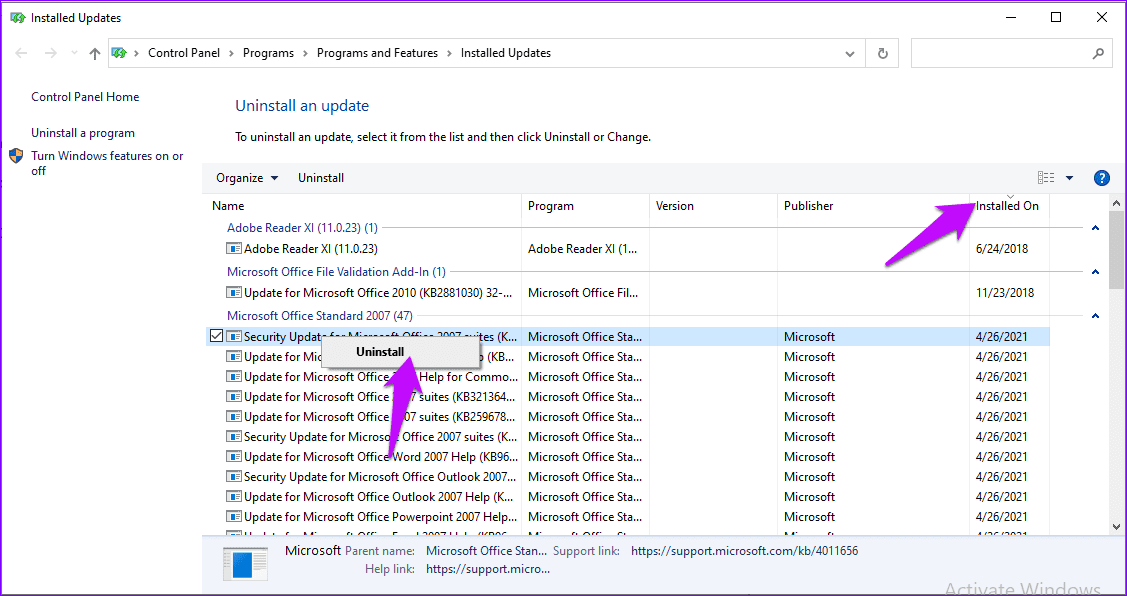
Step 3: Have a look at the installed dates to confirm recently updated applications. Right-click on your selection and press Uninstall.
Step 4: Reboot your computer and this should revert your system to the previous version.
Fixing the White Screen of Death
The above-mentioned methods should help fix the WSOD. To add to this, you can inspect the motherboard, processor, ram, hard drive, and screen for other underlying issues. Various software and hardware issues can trigger a White Screen of Death. It’s up to you to know which one you are dealing with so the issue can be fixed.
Was this helpful?
Last updated on 07 February, 2022
Read Next
 4 Ways to Fix Pink Screen of Death on Windows
Basic Fixes Disconnect external devices: Loose or damaged external peripherals can cause the pink screen of death.
4 Ways to Fix Pink Screen of Death on Windows
Basic Fixes Disconnect external devices: Loose or damaged external peripherals can cause the pink screen of death.
 Top 7 Fixes for Blue Screen of Death When PC Is Idle on Windows 11
A Blue Screen of Death (BSoD) is a random computer crash often accompanied by a blue screen and, in some cases, an error code.
Top 7 Fixes for Blue Screen of Death When PC Is Idle on Windows 11
A Blue Screen of Death (BSoD) is a random computer crash often accompanied by a blue screen and, in some cases, an error code.
 Top 9 Fixes for Blue Screen of Death When Playing Games on Windows 11
When Windows 11 encounters a severe error that stops it from completing a critical operation, you will experience a Blue Screen of Death.
Top 9 Fixes for Blue Screen of Death When Playing Games on Windows 11
When Windows 11 encounters a severe error that stops it from completing a critical operation, you will experience a Blue Screen of Death.
 Top 5 Fixes for Windows 11 Green Screen of Death
If you have been using Windows for a while, you may have encountered the Blue Screen of Death.
Top 5 Fixes for Windows 11 Green Screen of Death
If you have been using Windows for a while, you may have encountered the Blue Screen of Death.
 Top 7 Fixes for Black Screen of Death on Samsung Galaxy Phone
The black screen of death is a frustrating issue where your Samsung Galaxy phone screen goes black but still responds to your touch or rings and vibrates as usual.
Top 7 Fixes for Black Screen of Death on Samsung Galaxy Phone
The black screen of death is a frustrating issue where your Samsung Galaxy phone screen goes black but still responds to your touch or rings and vibrates as usual.
 6 Ways to Get an Off-Screen Window Back on Screen on Windows
While using Microsoft Windows, I had a window that had somehow fallen completely off of my screen.
6 Ways to Get an Off-Screen Window Back on Screen on Windows
While using Microsoft Windows, I had a window that had somehow fallen completely off of my screen.
 Top 6 Ways to Fix Print Screen on Windows Not Working Error
Every keyboard, whether external or laptop, comes with a print screen button abbreviated as PrtScr.
Top 6 Ways to Fix Print Screen on Windows Not Working Error
Every keyboard, whether external or laptop, comes with a print screen button abbreviated as PrtScr.
 Top 6 Ways to Fix On-Screen Keyboard Not Working on Windows 11
An on-screen keyboard might not work well with the touch screen display on a Windows 11 PC at times.
Top 6 Ways to Fix On-Screen Keyboard Not Working on Windows 11
An on-screen keyboard might not work well with the touch screen display on a Windows 11 PC at times.
The article above may contain affiliate links which help support Guiding Tech. The content remains unbiased and authentic and will never affect our editorial integrity.