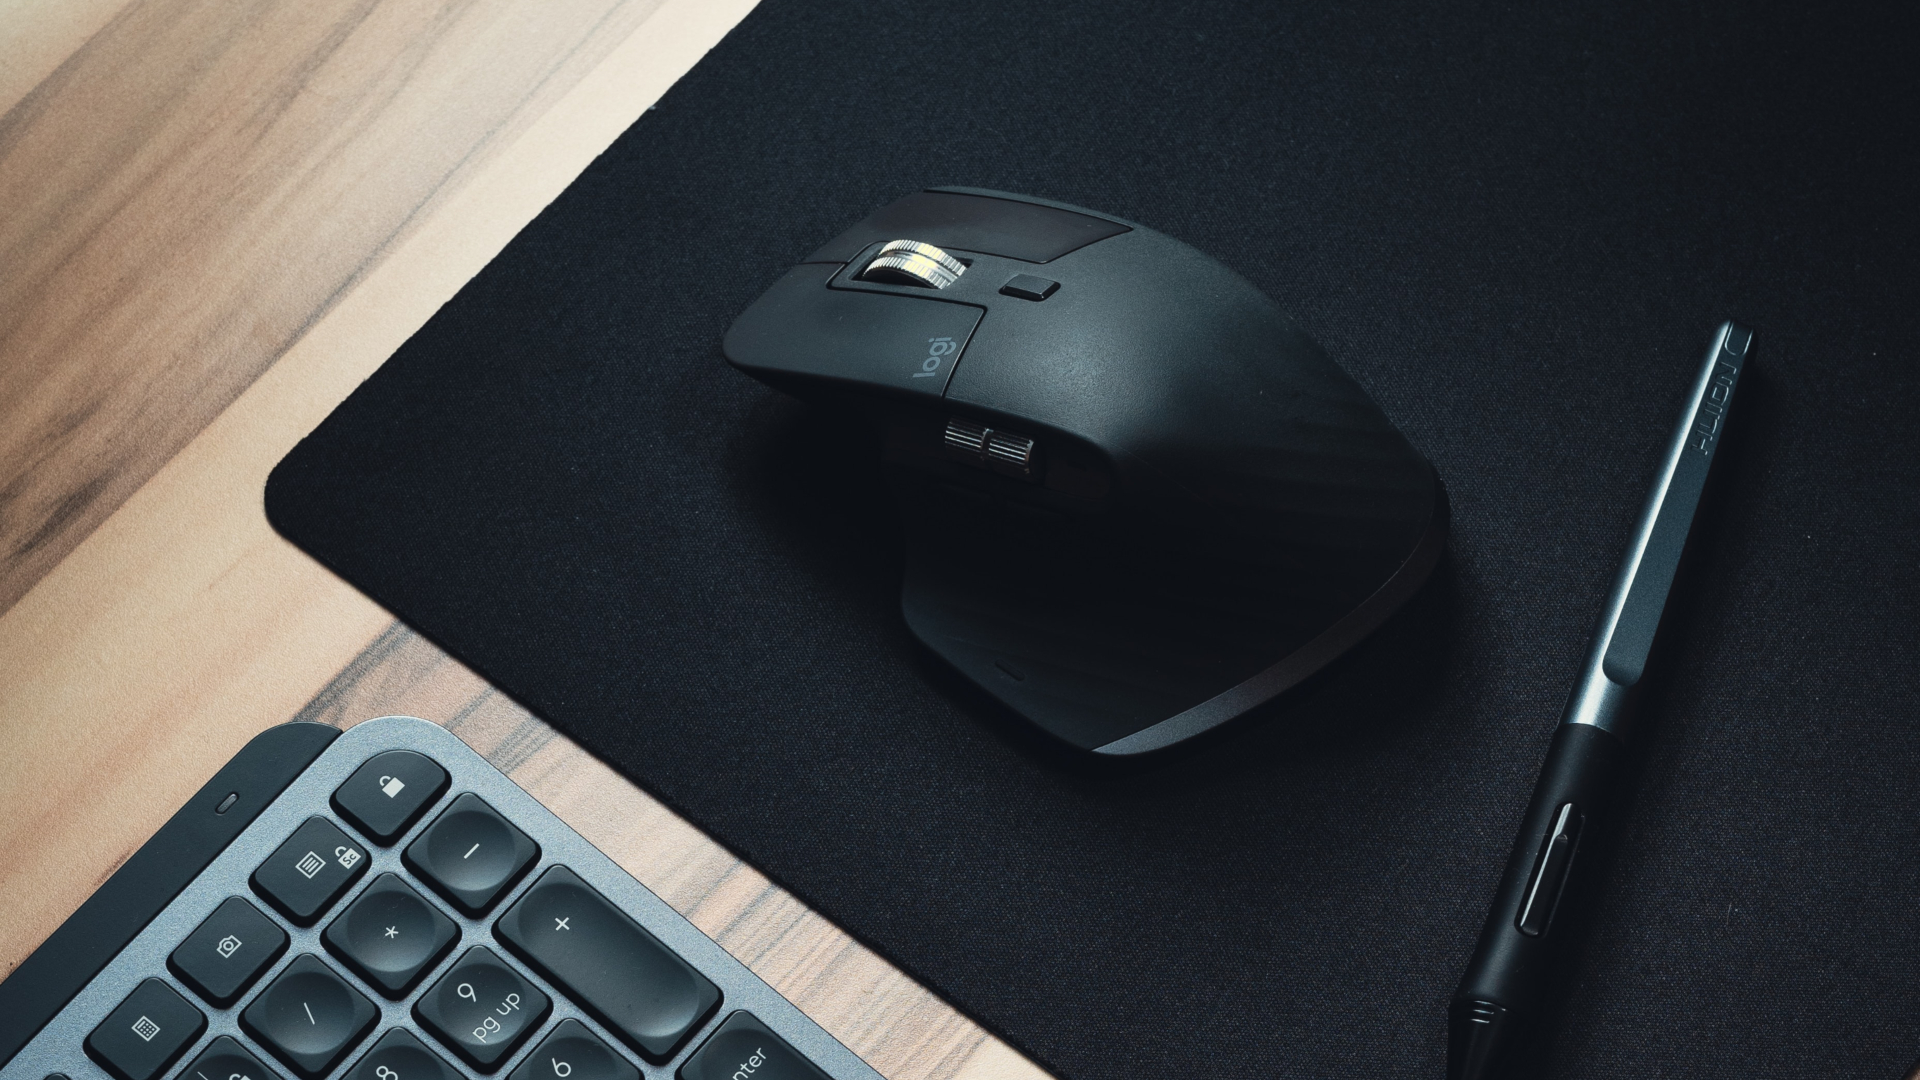
Machines are one of the best companions in our everyday lives and amaze us in more ways than one. But on the flip side, machines can act strange too. An amusing, yet frustrating problem we recently faced was that the mouse courser was moving on its own in our Windows PC.

If you’re in the same boat, and if the mouse pointer keeps moving on its own on your PC – we’re here to help. In this article, we want to show you all the effective ways by which you can get rid of the problem. Let’s begin!
Also Read: How to change mouse sensitivity (DPI) and other settings in Windows 11.
1. Change Old Mouse Pads
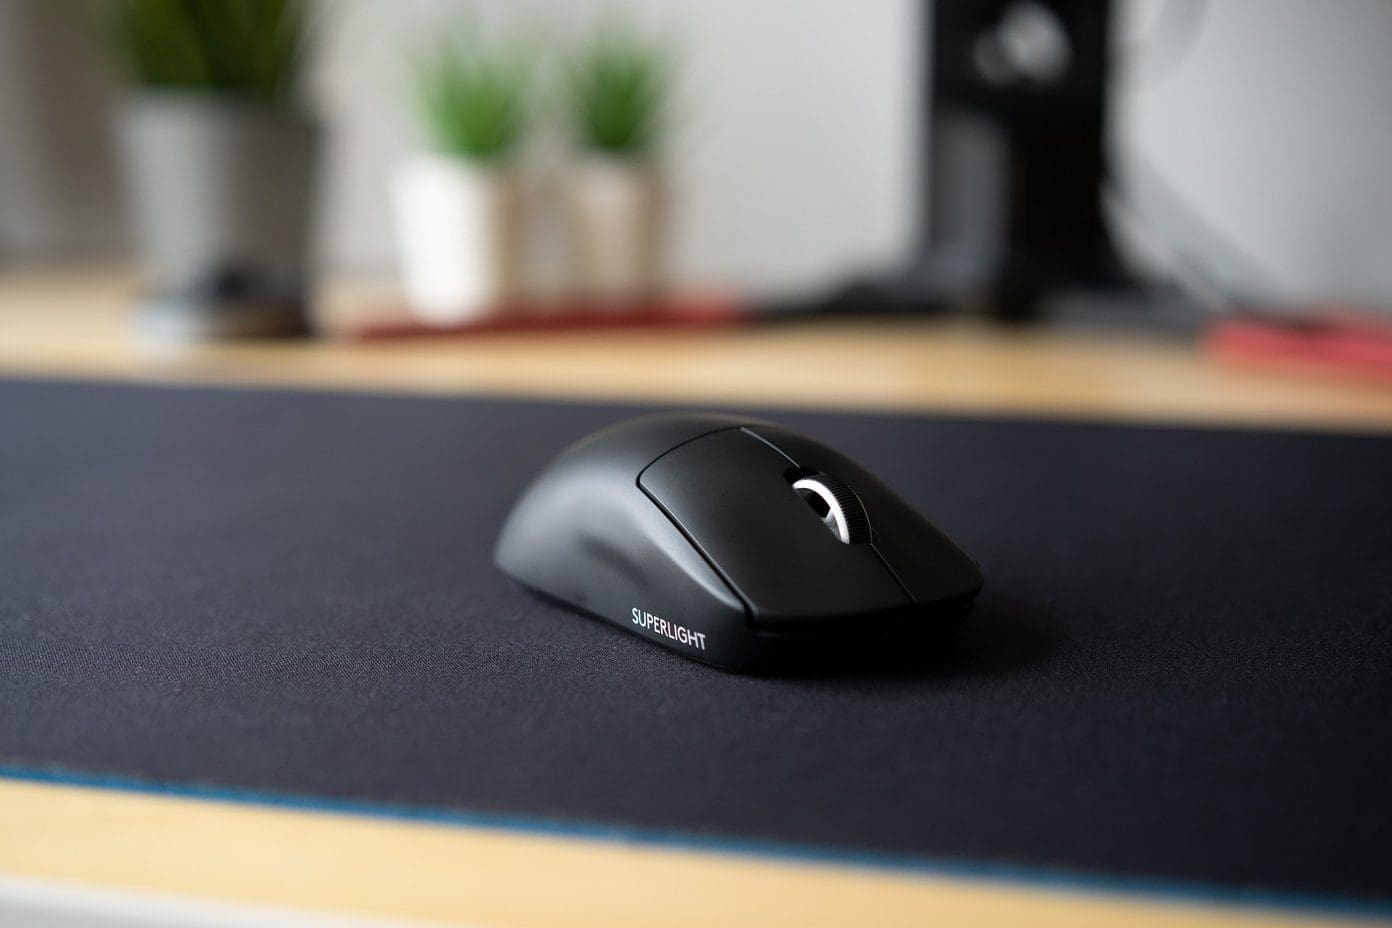
If you’ve been using the same mouse pad for years, the chances are that a portion of it has faded and lost the coarseness to hold the mouse in place. That could make your mouse slide a bit automatically and you’ll see the mouse pointer moving on its own. Also, if it is washable, you should wash your mousepad once in a while to ensure all the unwanted dust is off the mousepad to keep it clean.
2. Check Your Desk
Many folks don’t use a mousepad and prefer to use the desk instead. Some of these desks feature drawers and tend to bend over time and disturb the overall alignment of the spot. So check if your desk has an unexpected slant on the surface.
3. Restart PC
Restarting your Windows PC can help fix most of the issues, and bugs in the operating system. Restart your PC from the Start menu, and check if the cursor stops moving by itself.

4. Disconnect and Reconnect Mouse
If you are using an external mouse, and the cursor is moving on its own – try disconnecting, and reconnecting it again. This enables a fresh connection between your PC and the mouse and may help you get rid of the issue.
5. Manage Mouse Drivers
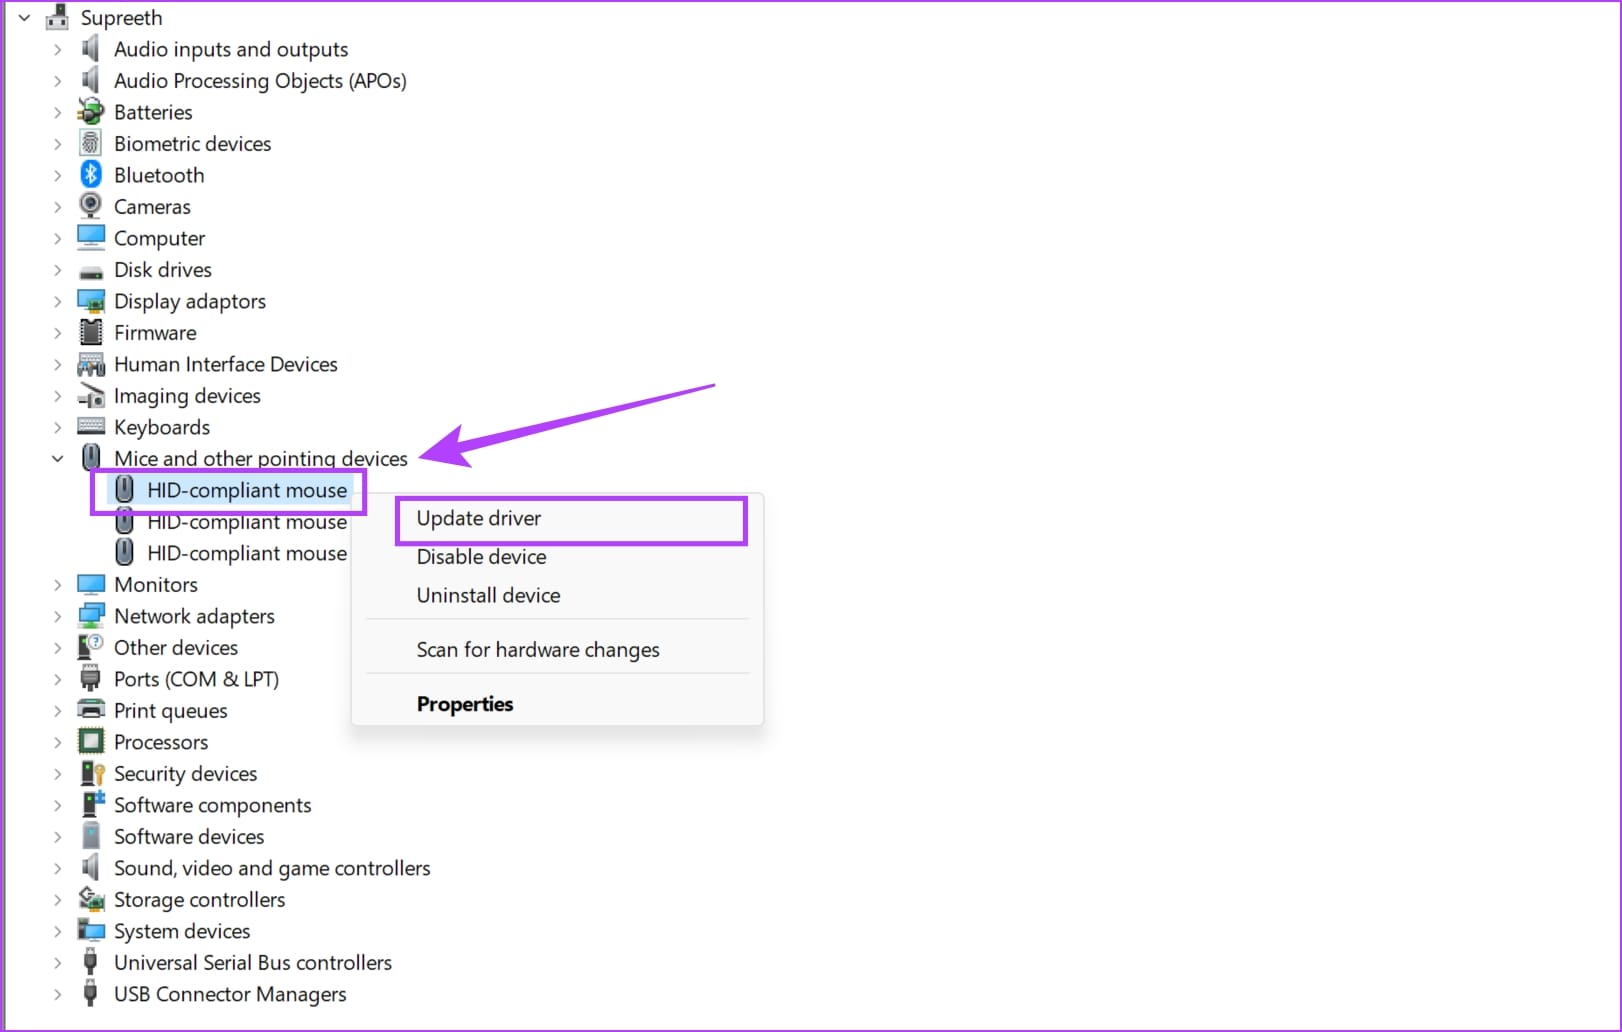
An outdated version of the mouse driver might be vulnerable to a few issues and bugs. This may cause the mouse to drift on its own in your Windows PC. Here’s how you can update the drivers.
Step 1: Open the Device Manager app.

Step 2: Select ‘Mice and other pointing devices’, and right-click on your mouse to update the driver.
6. Disable the Touchpad If You Are Using an External Mouse
At times the touchpad can accumulate dirt inside its surface and malfunction. If you prefer using a mouse with your laptop, then you should disable the touchpad. This can help you fix the issue, and prevent any ghost actions through your touchpad.
Step 1: Press Windows key+I to open Settings and search for the ‘Turn the touchpad on or off’ option. Click on the search result to open it.

Step 2: Click on the toggle button to turn it off. Some laptops also have a dedicated key on their keyboard to quickly turn on/off the touchpad.

7. Disable Other External Devices
Suppose you use game controllers, graphics tablets, joysticks, or some other input device connected to the system. The problem is that some of them can also control mice resulting in a conflict. Disable and unplug all such controllers and input devices from your computer and check again.

8. Disable Enhance Pointer Precision
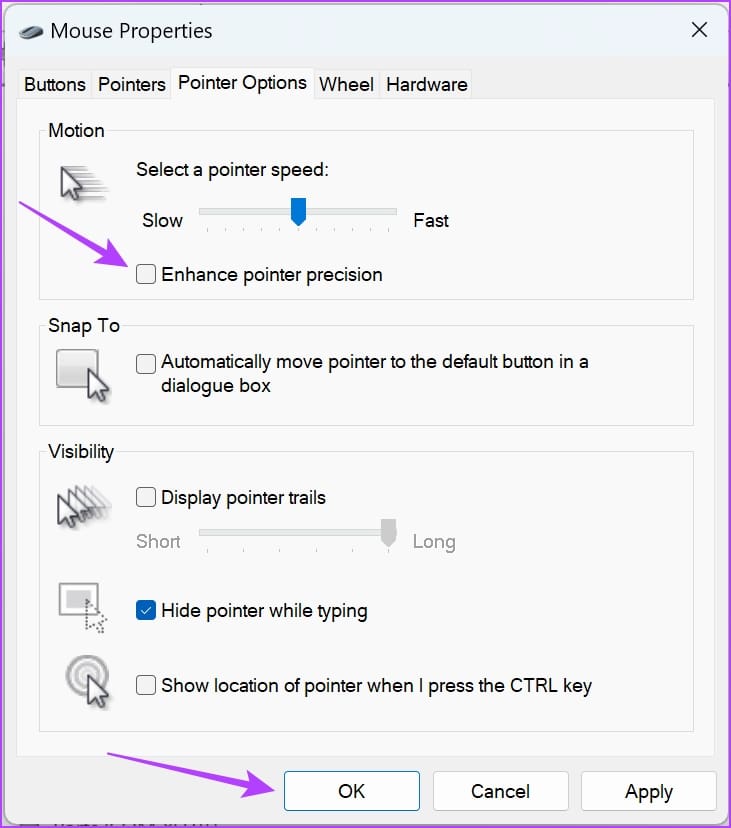
Disabling “Enhance Pointer Precision” stops your PC from adjusting mouse sensitivity, preventing erratic cursor movements caused by the pointer acceleration. Here’s how you can turn it off.
Step 1: Open the Settings app on your Windows PC. Tap on ‘Bluetooth and Devices’ and select Mouse.

Step 2: Select ‘Additional Mouse Settings’.

Step 3: Uncheck the box for ‘Enhance pointer precision’ and click on OK.
9. Boot Your PC in Safe Mode
Restarting your PC in safe mode turns off all the third-party applications, and runs your PC with just the essentials. If the mouse cursor stops moving on its own in safe mode, then it is likely that a third-party app is causing the problem. Therefore, you can uninstall a few apps and check if the issue is fixed.
We’ve written a detailed article on how to use the safe mode on your Windows PC, you can check that out for more information!
10. Run SFC Scan
You can run the System File Checker using Command Prompt to repair corrupted system files. This can potentially help you solve the issue of the erratic mouse cursor on Windows if any corrupted system file is the cause.
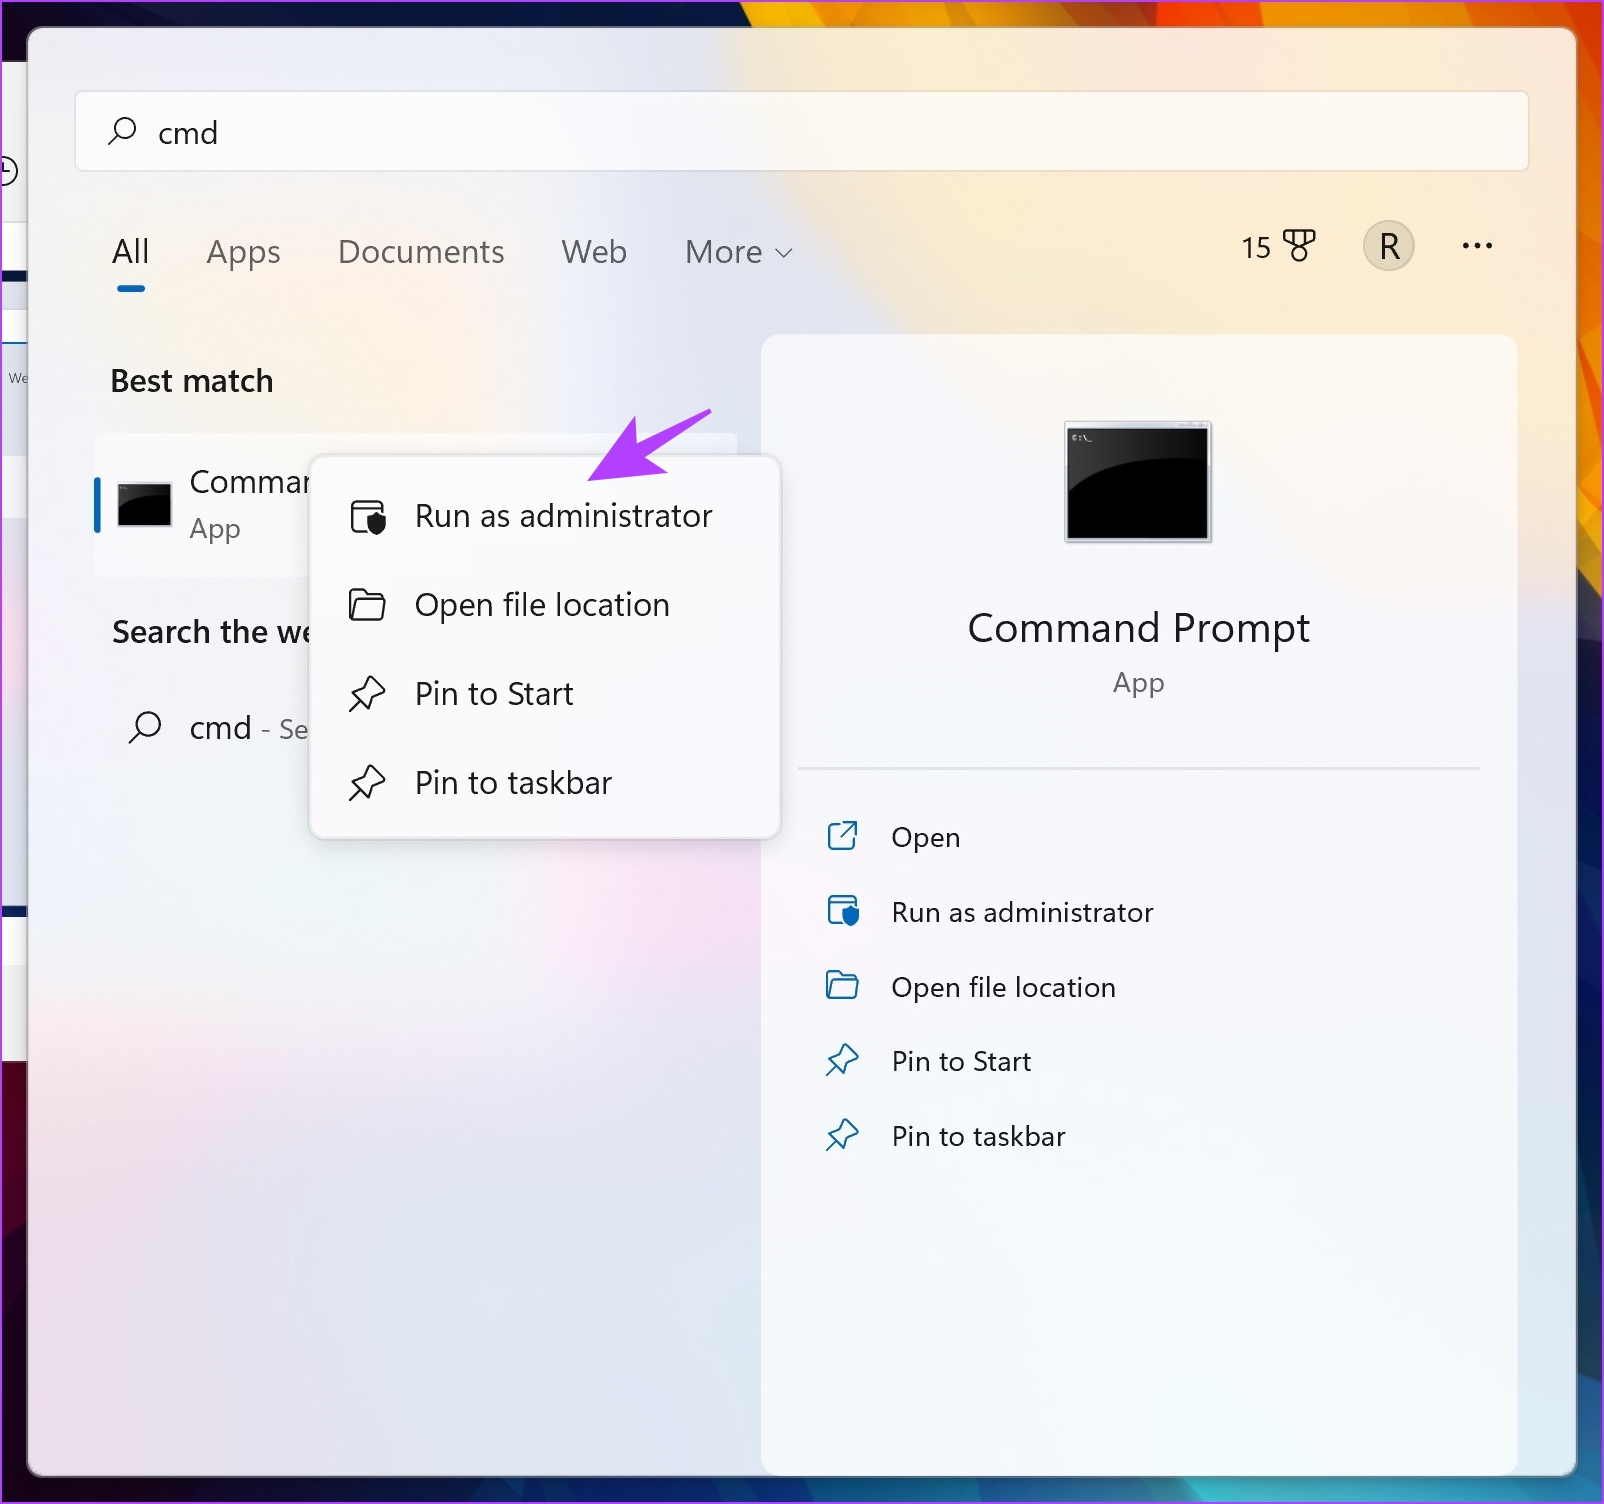
Step 1: Open ‘Command Prompt’ from the start menu. Right-click, and select ‘Run as administrator’.
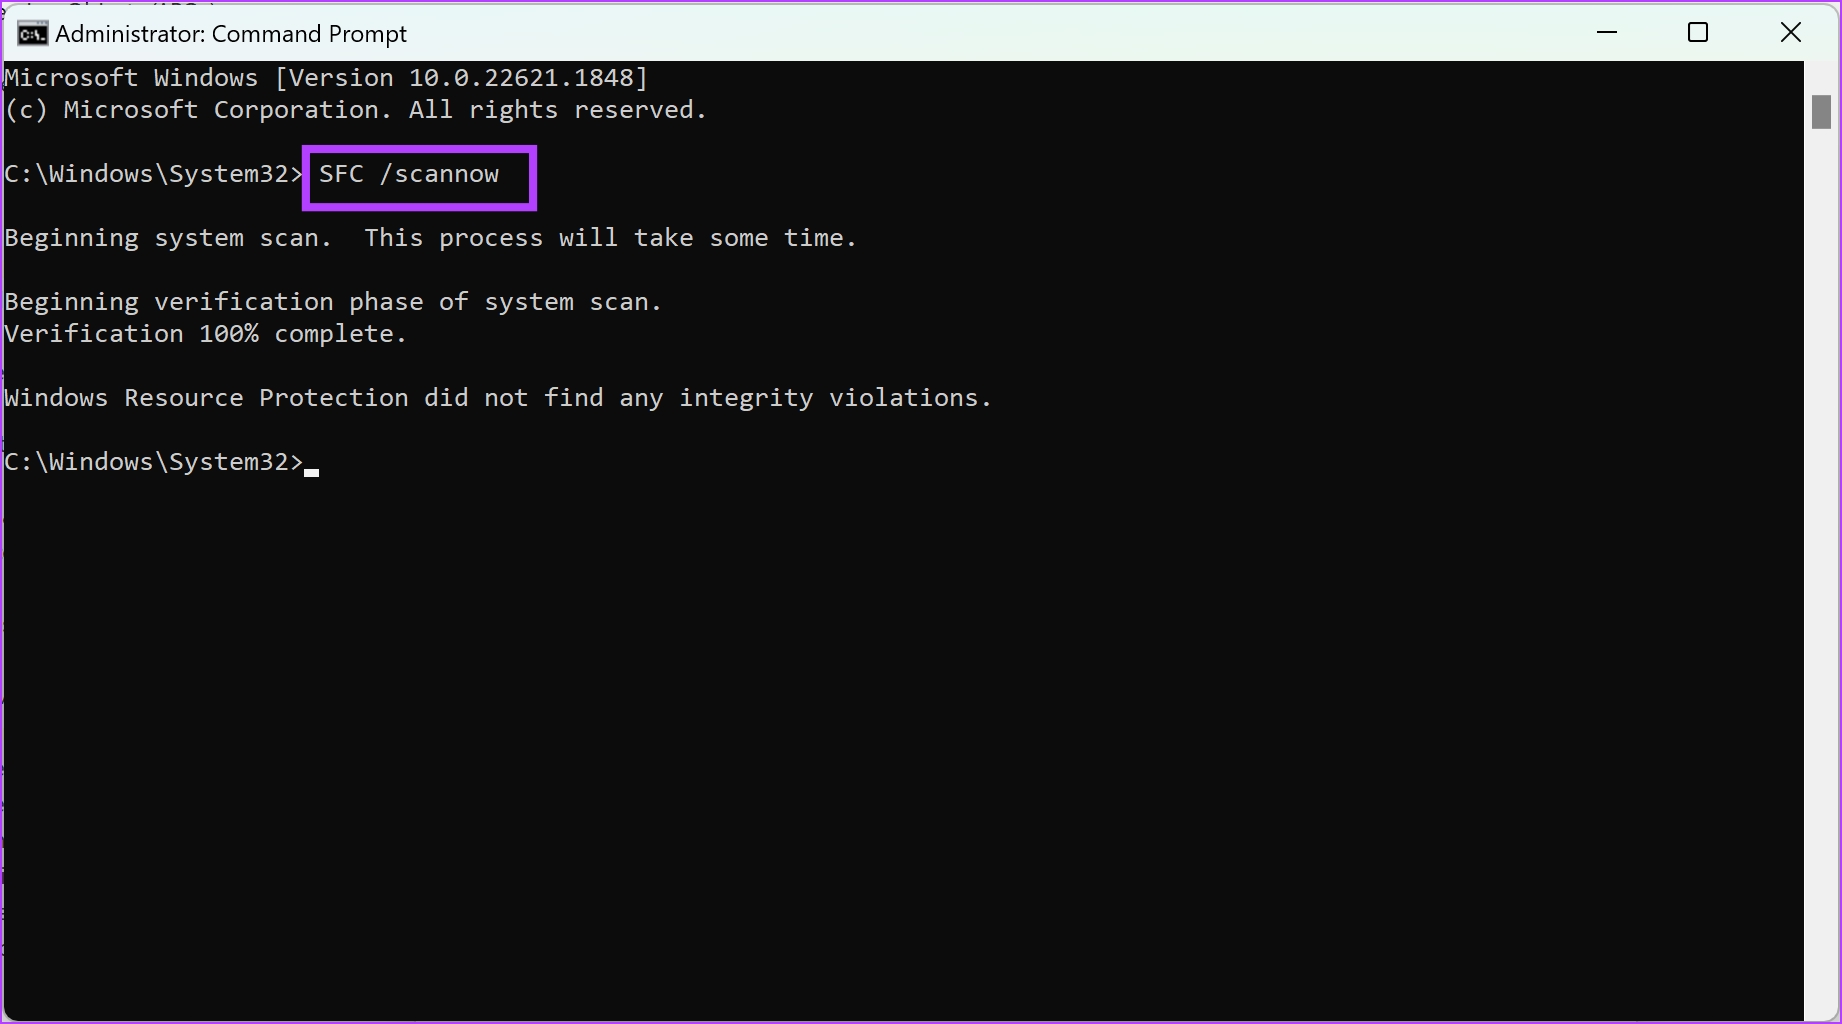
Step 2: Type the following command :
SFC /scannow
As the system scan begins, you can see its progress. Once the system scan is complete, you will see whether it is successful or not.
11. Check for Malware
Over the last few years, Windows Defender has done a great job in helping you protect your PC and has reduced the need for expensive anti-virus software. So, ensure to regularly scan and check if your PC has been infected by any malware using Windows Defender, although you will be automatically notified if there is any.
Having a malware-free PC is essential for all elements to work properly, and there are chances that it might cause your mouse to behave strangely as well. Here’s how you can scan for malware on Windows.
Step 1: Open the Settings app and select Privacy & Security.

Step 2: Click on Windows Security.

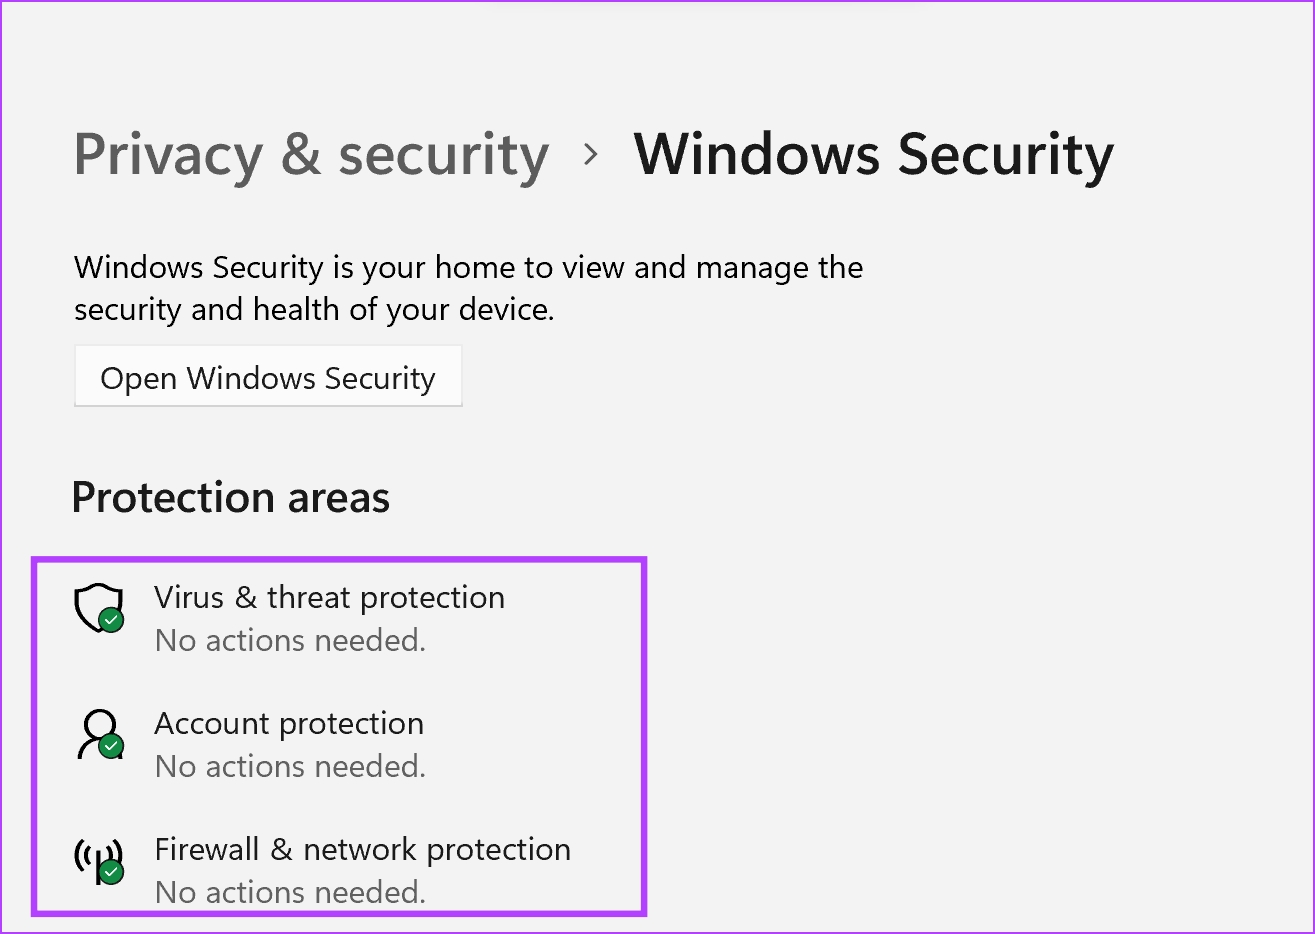
Step 3: You will now have an overview of the security status of your PC. In case of any concern, you will find options to take some action in this window.
Therefore, you need to ensure that there are no threats, and all of them show a status similar to the image below.
12. Run Hardware Troubleshooter
As the name suggests, the built-in troubleshooter in Windows will help you figure out the problem and suggest software fixes if you’ve messed up the settings by mistake.
Step 1: Search for Command Prompt in Windows Search (Windows key+S) and open it with admin rights (click on Run as administrator).

Step 2: Type the below command and hit Enter.
msdt.exe -id DeviceDiagnostic
Step 3: That will launch a pop-up window. Click on Next to continue and let it run.

13. Reset Windows Settings
As a last resort, you can proceed to reset your Windows PC. This gets rid of any corrupted system files, and fixes any misconfigurations within your system settings – both of which can help you fix the problem. However, this will remove all the installed applications – so make sure you proceed with relevant backups.
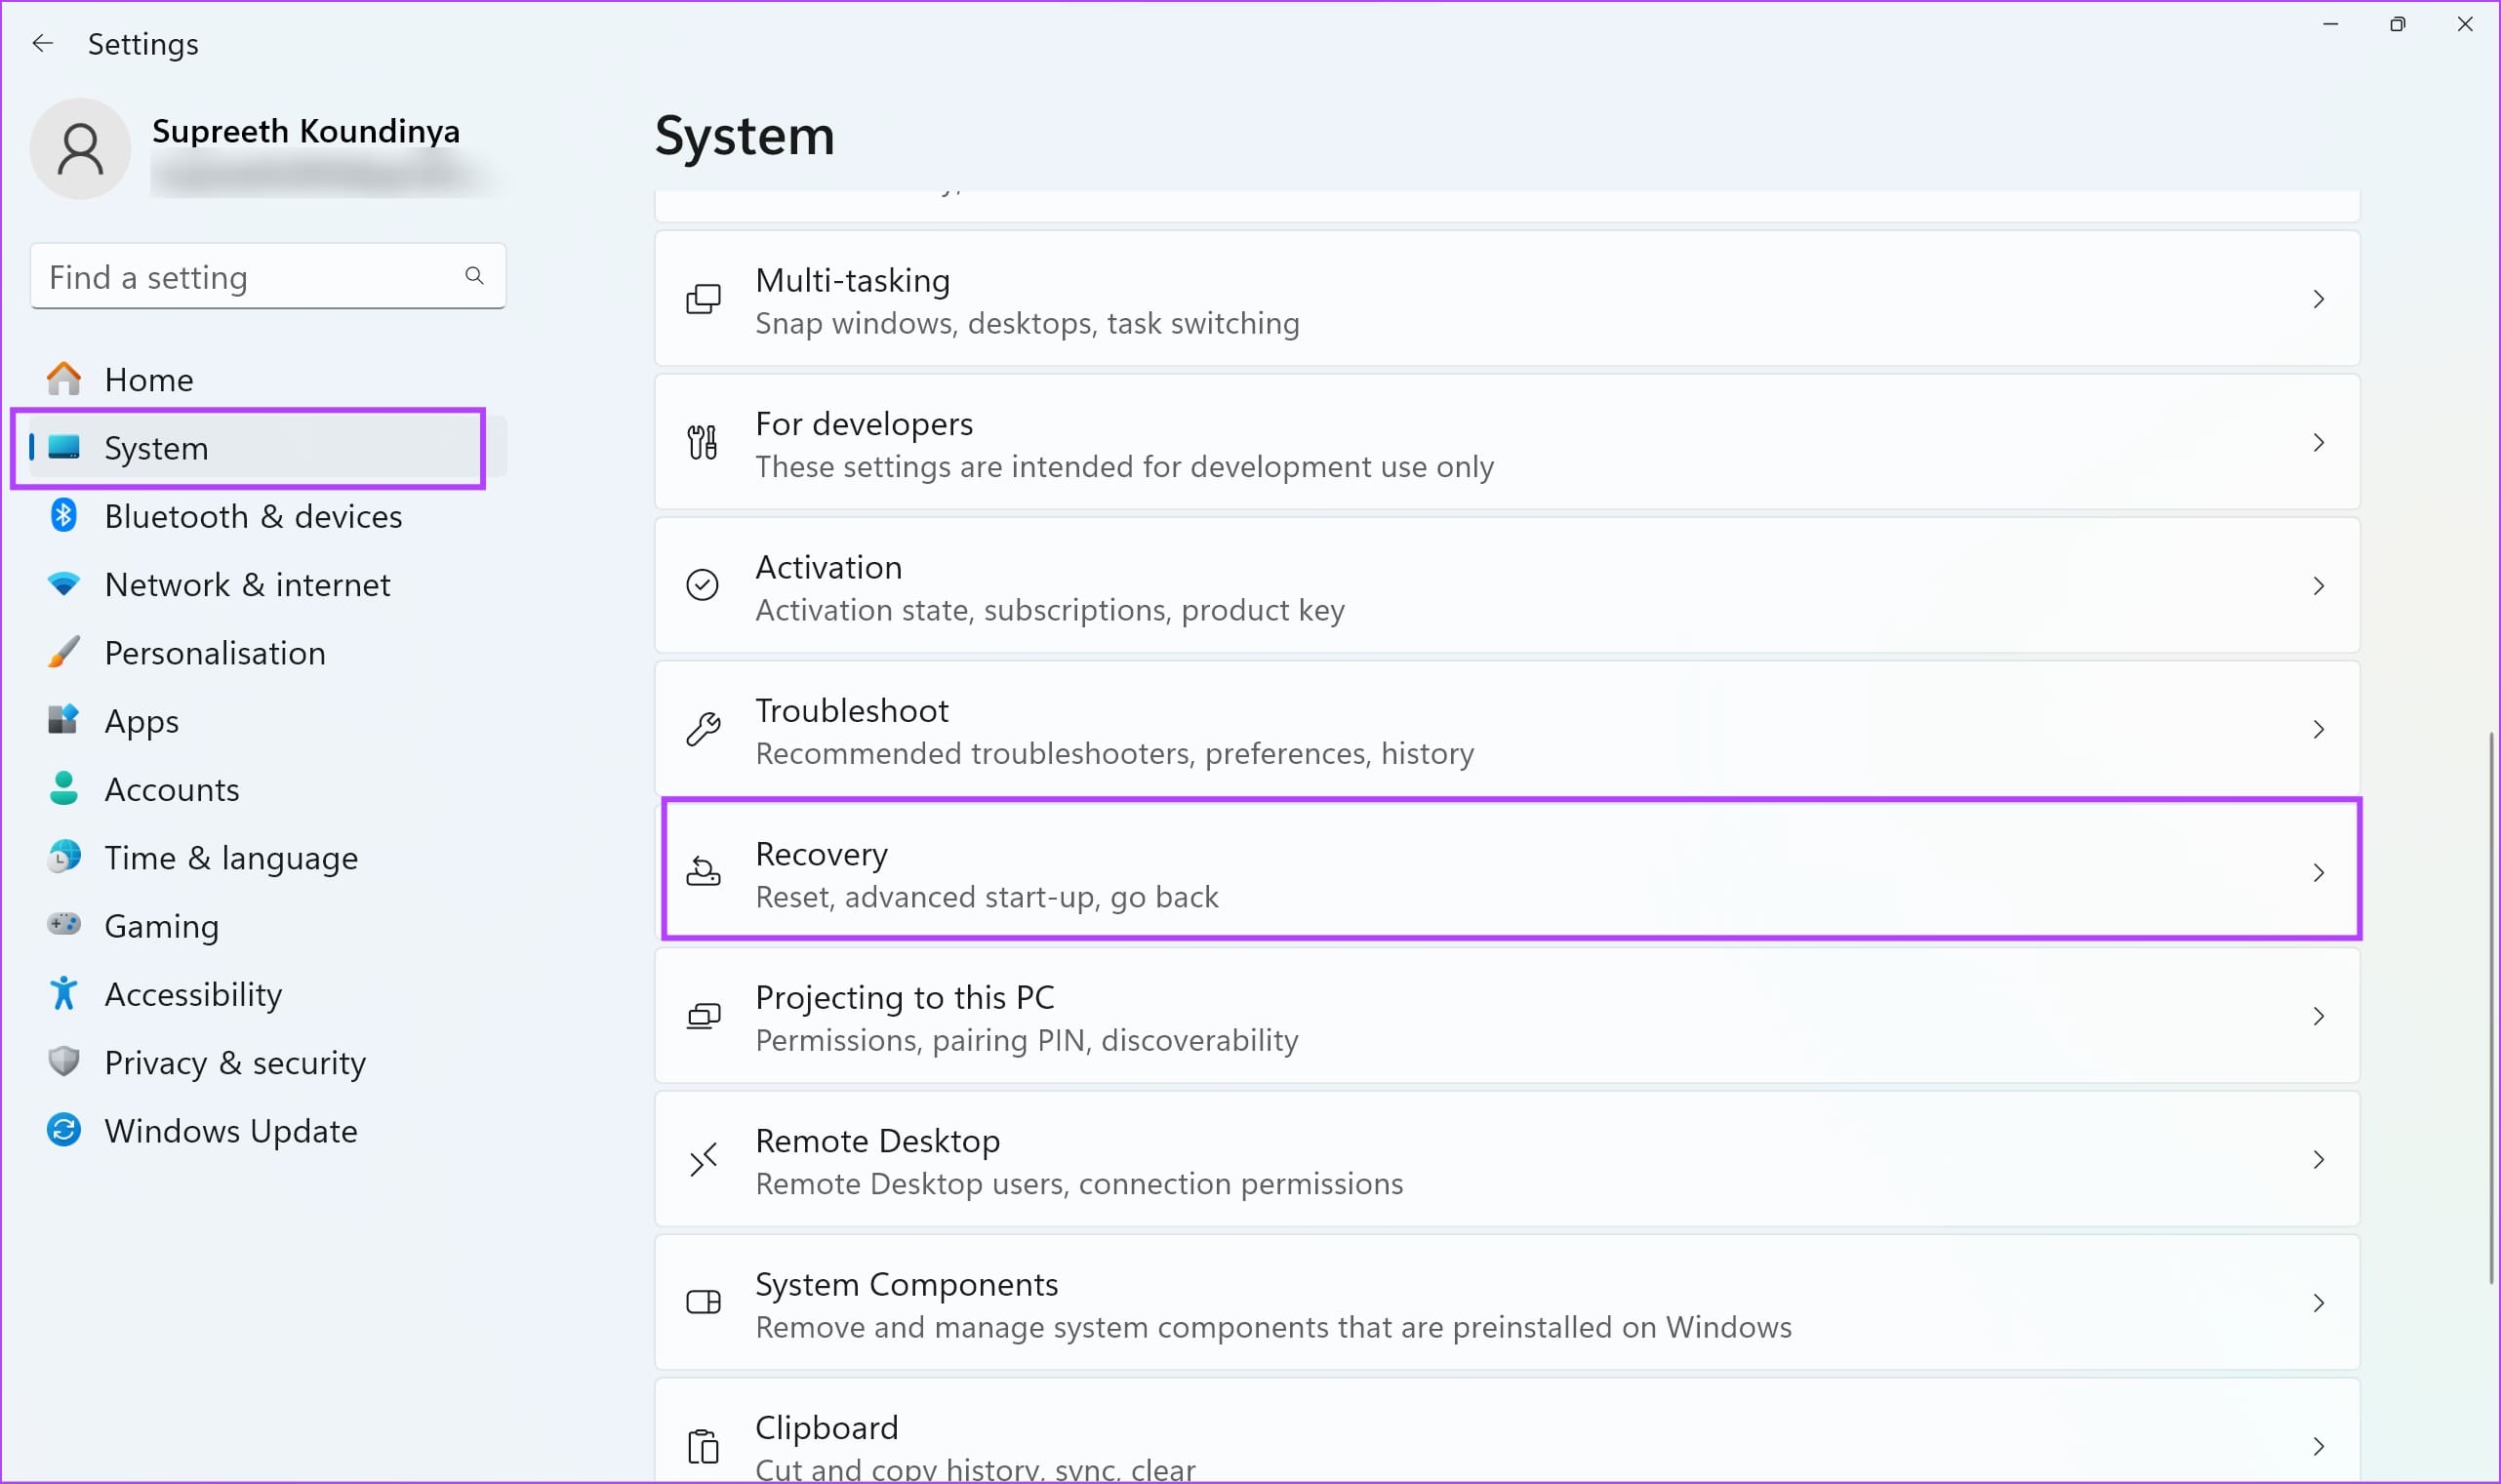
Step 1: Open the Settings app, and select System. Select Recovery.
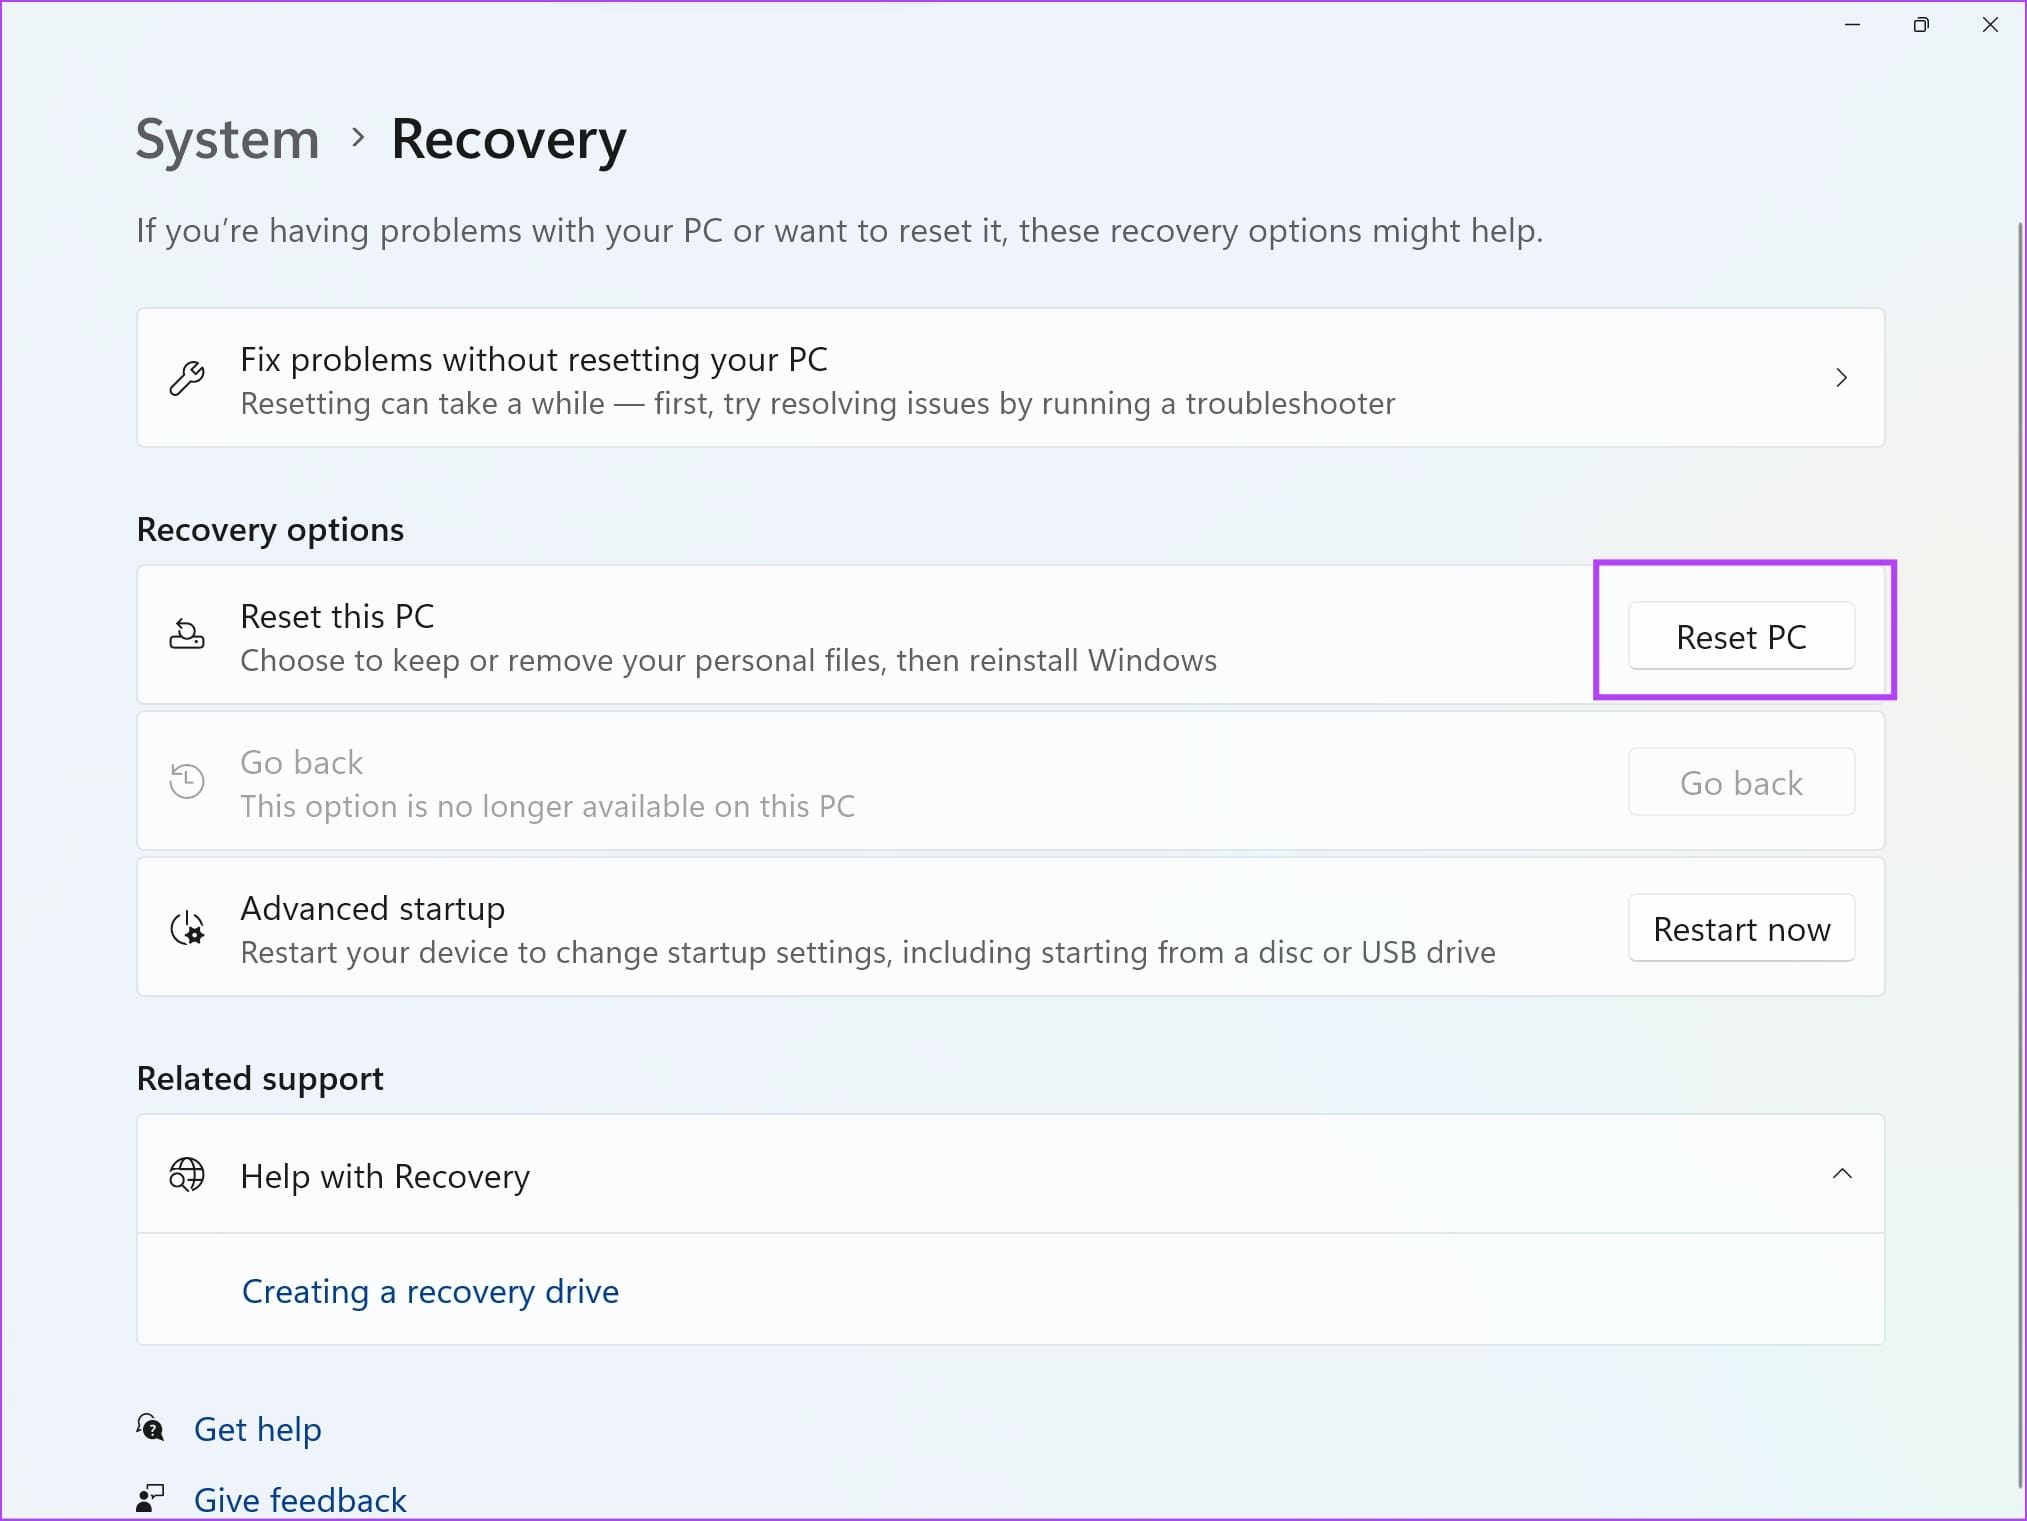
Step 2: Tap on ‘Reset This PC’.
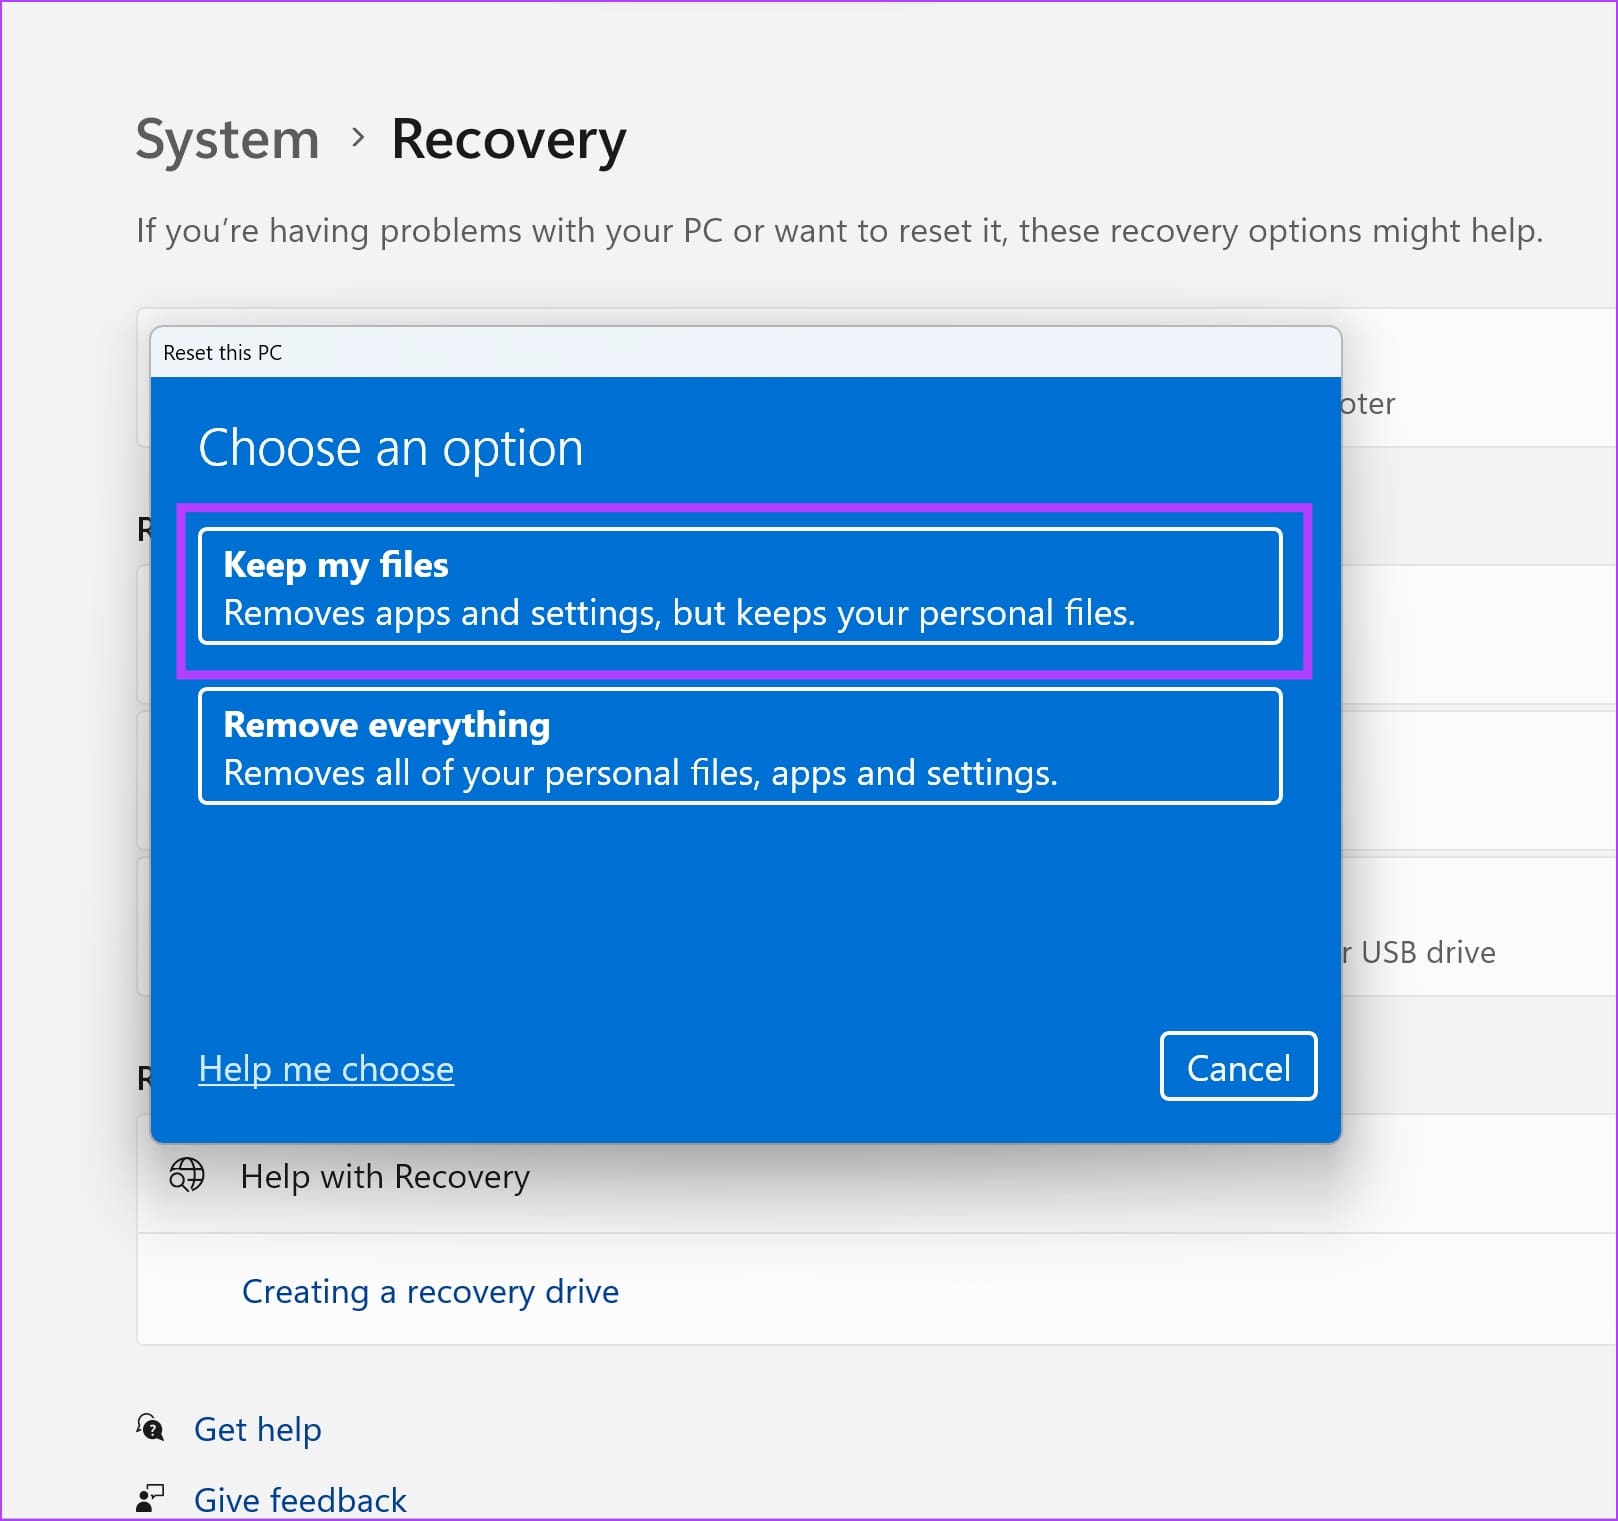
Step 3: Choose the option that resets your PC while it keeps your personal files. Proceed to reset your PC with the on-screen instructions.
That is everything you need to know on how to fix the problem of your mouse cursor moving on its own. If you have any further questions, you can take a look at the FAQ section below.
FAQs: PC/Laptop Cursor Moving Automatically
Yes, faulty USB ports can affect mouse performance and can cause some strange behavior. Try connecting the mouse to another port or another computer to check if the issue persists.
Yes, wireless devices like phones or routers emitting signals on similar frequencies might interfere with the mouse’s wireless connection. Moving these devices away or using the mouse in a different environment could help.
Fix Mouse Ghosting on Your PC
We hope this article helps you fix the mouse cursor that is moving on its own on your Windows PC. What other strange behavior have you observed on your Windows PC? Let us know in the comments section below!
Was this helpful?
Last updated on 10 January, 2024
The article above may contain affiliate links which help support Guiding Tech. The content remains unbiased and authentic and will never affect our editorial integrity.


