We are relying on mobile hotspot more than ever in the work from home situation. If there is any problem with your local Internet Service Provider (ISP), we immediately switch to the mobile hotspot for a temporary workaround. While it’s a smooth experience on the iPhone, you can’t say the same about Android phones. There can be a time when the Android hotspot will stop working for you.

Usually, it’s a standard affair to turn on an internet hotspot on an Android phone. There are multiple factors that cause the Android mobile hotspot not working as expected. Read on the troubleshooting methods to fix the issue.
1. Enable/Disable Airplane Mode
If there are some issues with the network connection on the phone, this simple trick might resolve that.
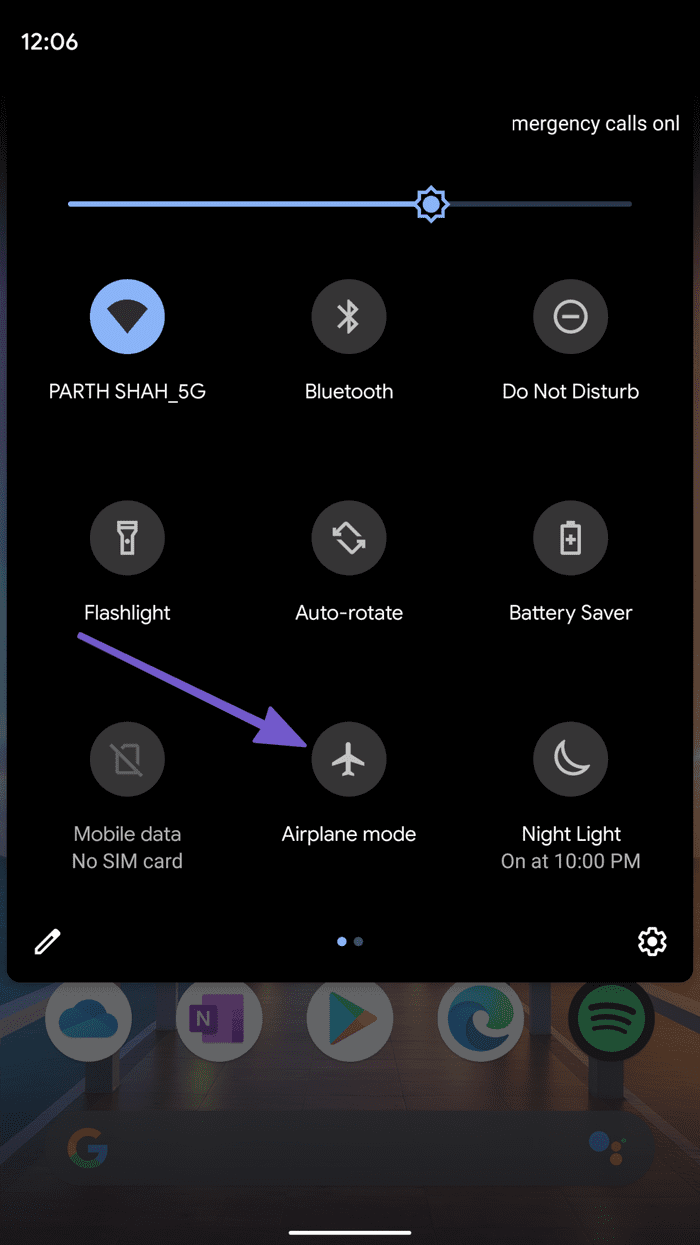
Pull down the notification center from the top. Enable the Airplane toggle. The OS will turn off all the network connections on the phone. Wait for a minute and turn back the Airplane mode on.
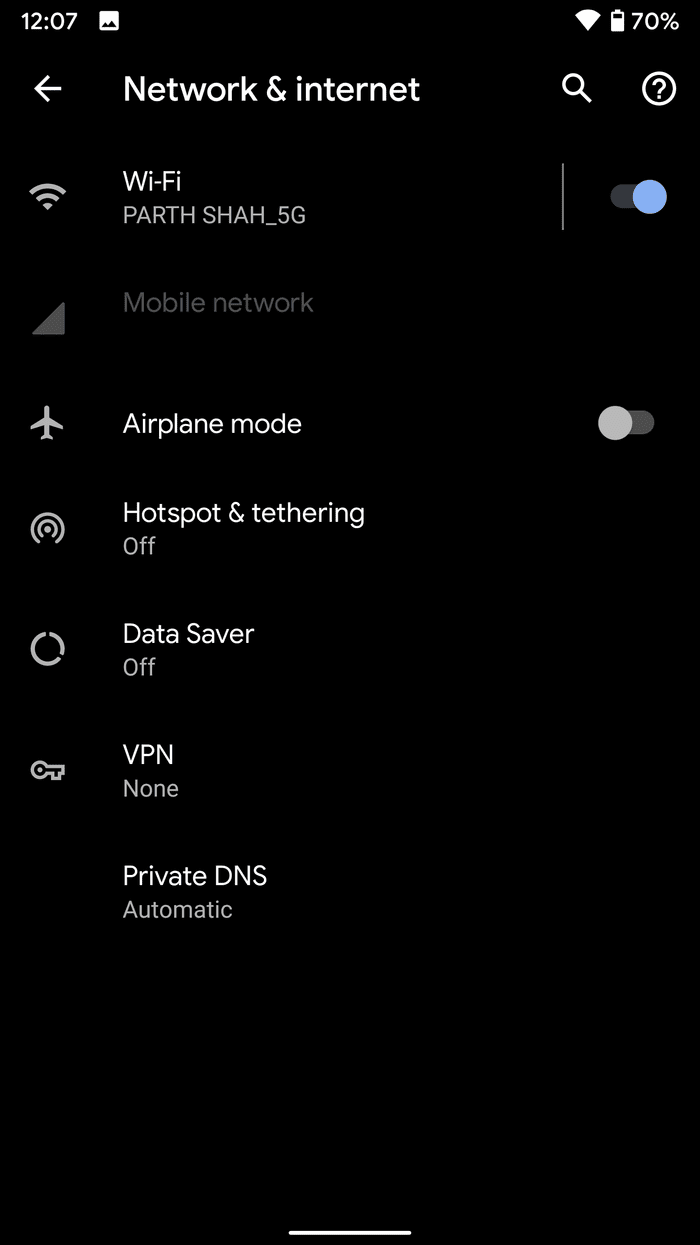
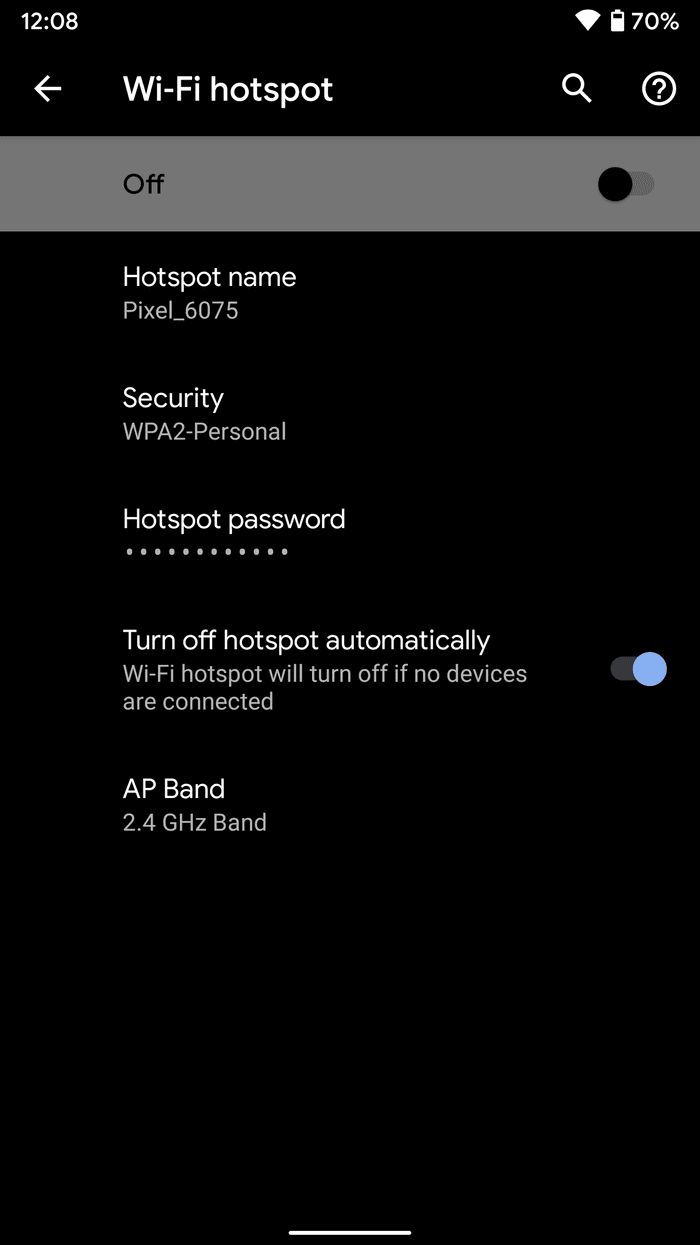
Now go to Settings, navigate to Network & internet > Hotspot & tethering > Wi-Fi hotspot, and enable the toggle from the following menu.
2. Enable Mobile Data
This is another basic step that you need to check off before moving forward with advanced methods.

Open the notification center from the top. Enable Mobile data toggle and make sure you have healthy network coverage bars at the top.
3. Turn off Battery Saver mode
Android’s default Battery Saver mode keeps the battery life in check, especially when the phone is running out of juice. It will close other open apps that you’re not actively using to limit the Android system’s energy usage in the background.
Battery Saver mode will also suspend all the apps’ background activity. The mode might interfere with the hotspot connectivity on the phone. It’s better to turn it from the Settings.
Step 1: Open the Settings app on your Android phone.
Step 2: Go to the Battery menu.
Step 3: Select Battery Saver.

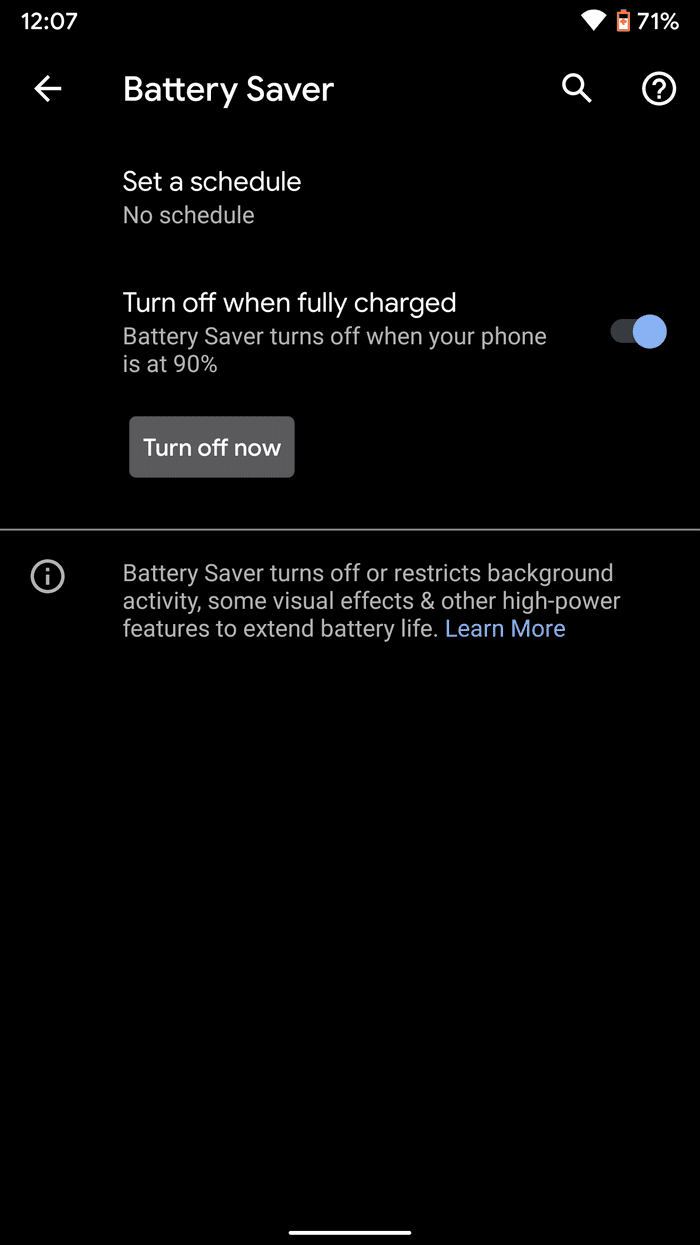
Step 4: Tap the Turn off now option.
How will you identify the Battery Saver mode in the first place? You will notice reduced animations, turned-off haptics, and an orange battery indicator in the menu bar.
4. Turn off Data Saver Mode
To help reduce data usage, Data Saver prevents some apps from sending or receiving data in the background. An app you are currently using can access data but may do so less frequently.
For a flawless hotspot experience on other devices, we recommend turning off Data Saver mode from the Android Settings menu. Follow the steps below.
Step 1: Open the Settings app on your Android phone.
Step 2: Navigate to the Network & internet menu.

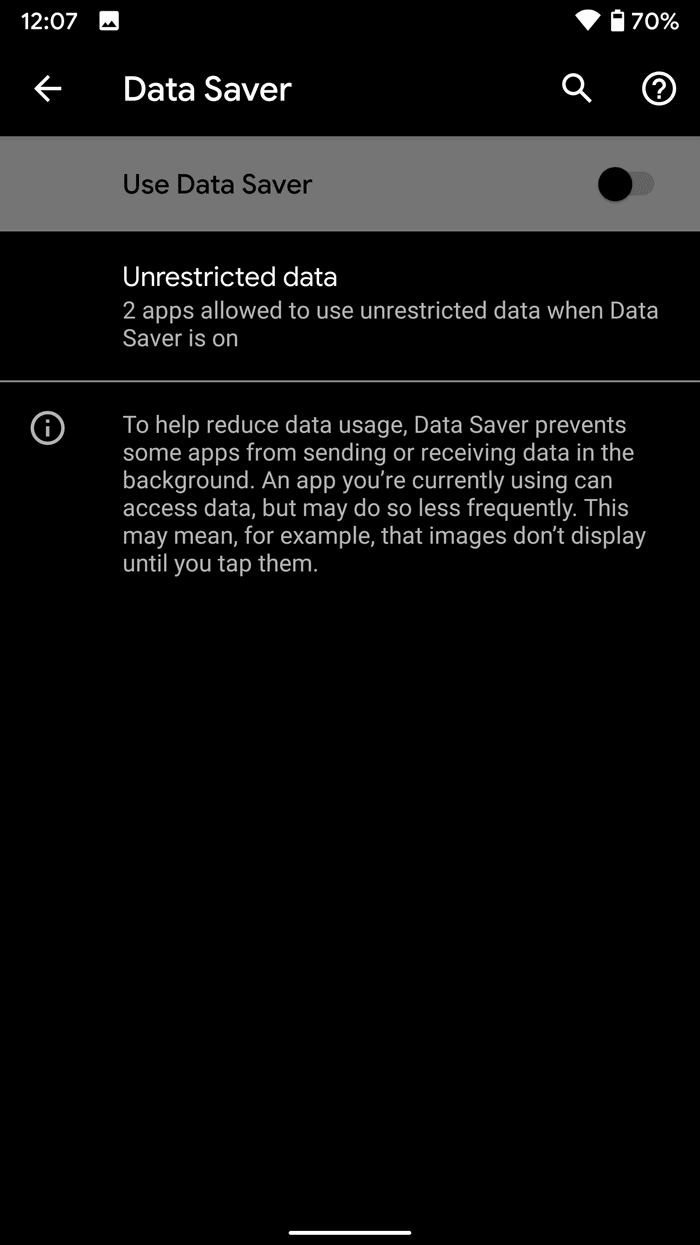
Step 3: Select Data Saver and turn off the toggle from the following menu.
5. Disable VPN
Using a Virtual Private Network (VPN) might mess up with mobile connectivity on the phone. We would advise disabling VPN before using the hotspot on the phone.
Step 1: Open the Settings app on the Android phone.
Step 2: Go to Network & internet > Advanced > VPN and remove irrelevant VPN profiles.

Now go ahead, enable the mobile hotspot and try to connect other devices to the main Android phone.
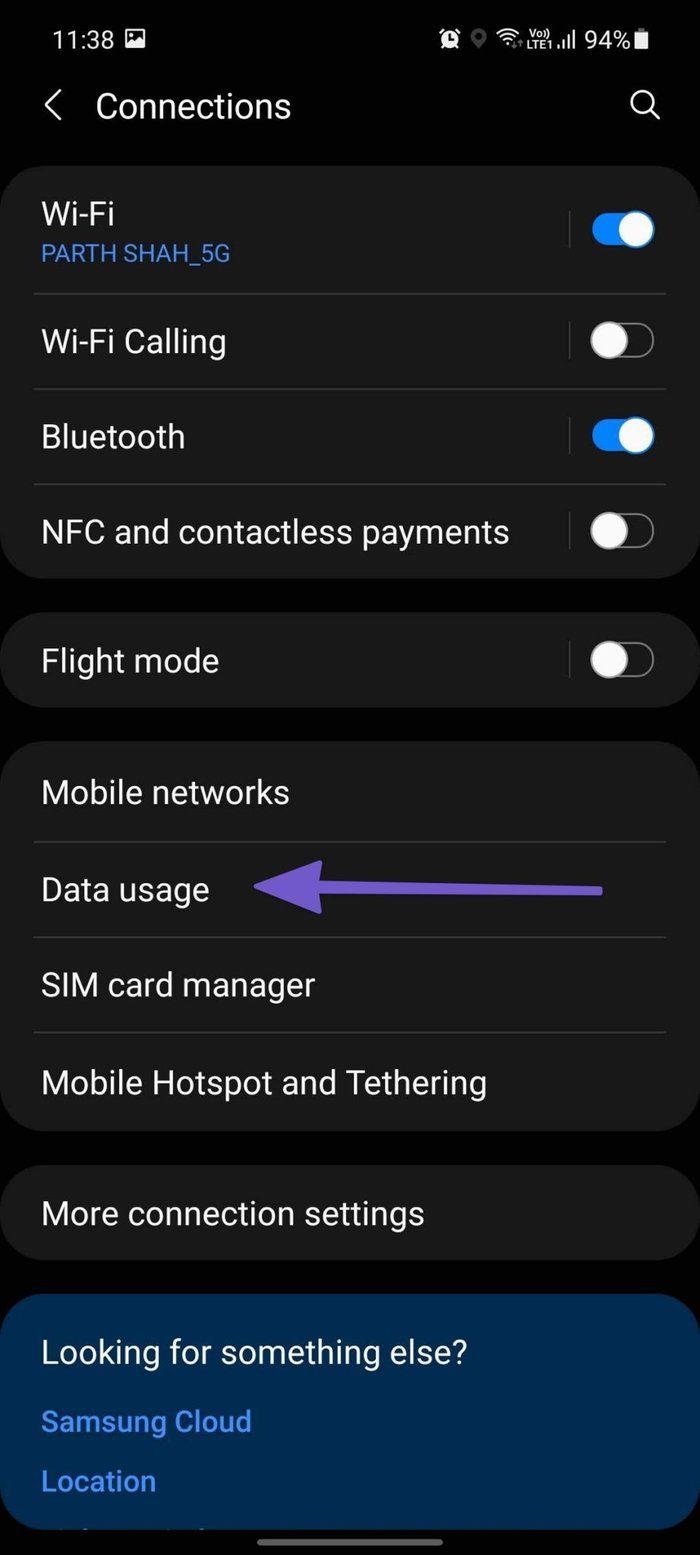
6. Set Higher Data Limit
Android OS allows you to set a data limit for a specific billing cycle. It is designed to keep data usage in check. If you have set the data limit on your Android device and exhausted the data, the OS will automatically turn off mobile data to save you from extra billing from the carrier.
You need to set the data limit higher from the Android Settings menu to enable the mobile data on the phone.
Step 1: Open the Settings app on your Android phone.
Step 2: Go to Connections > Data usage menu.
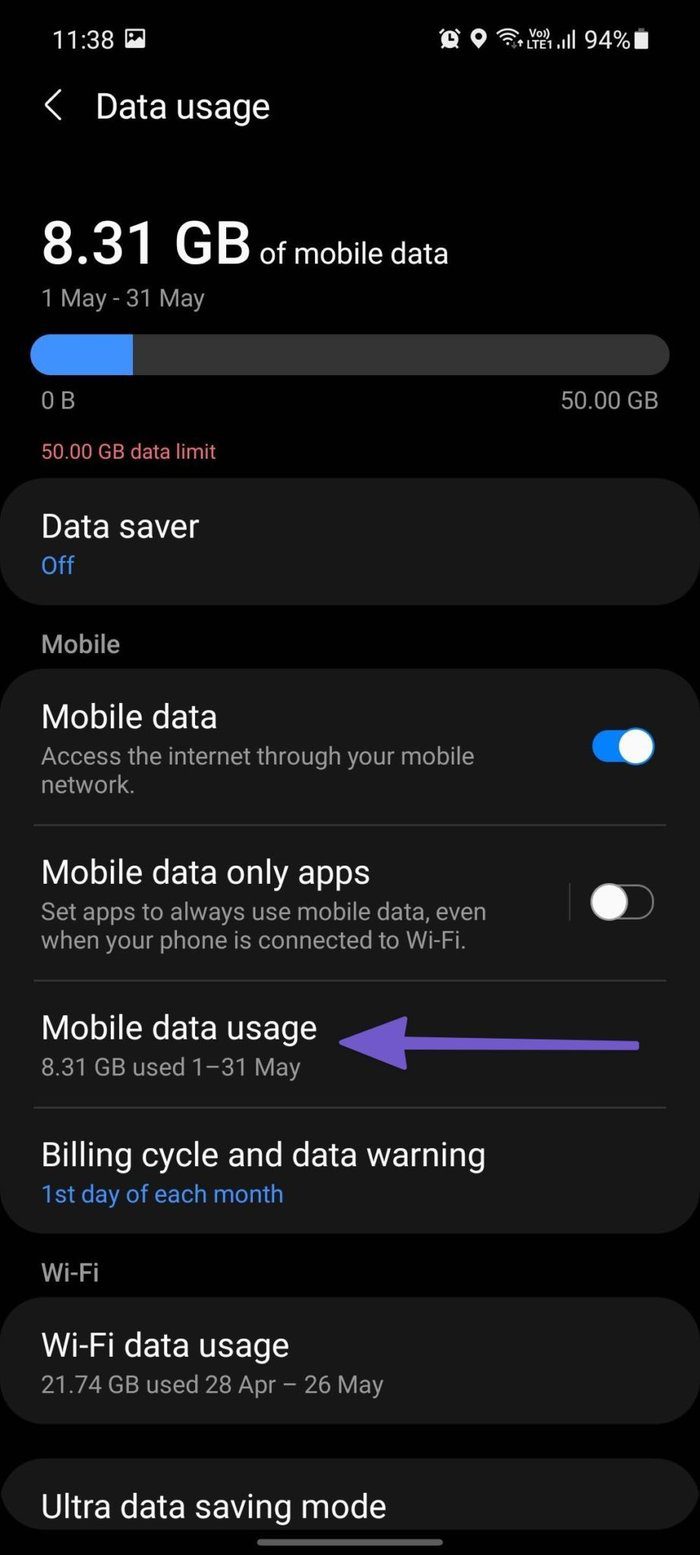
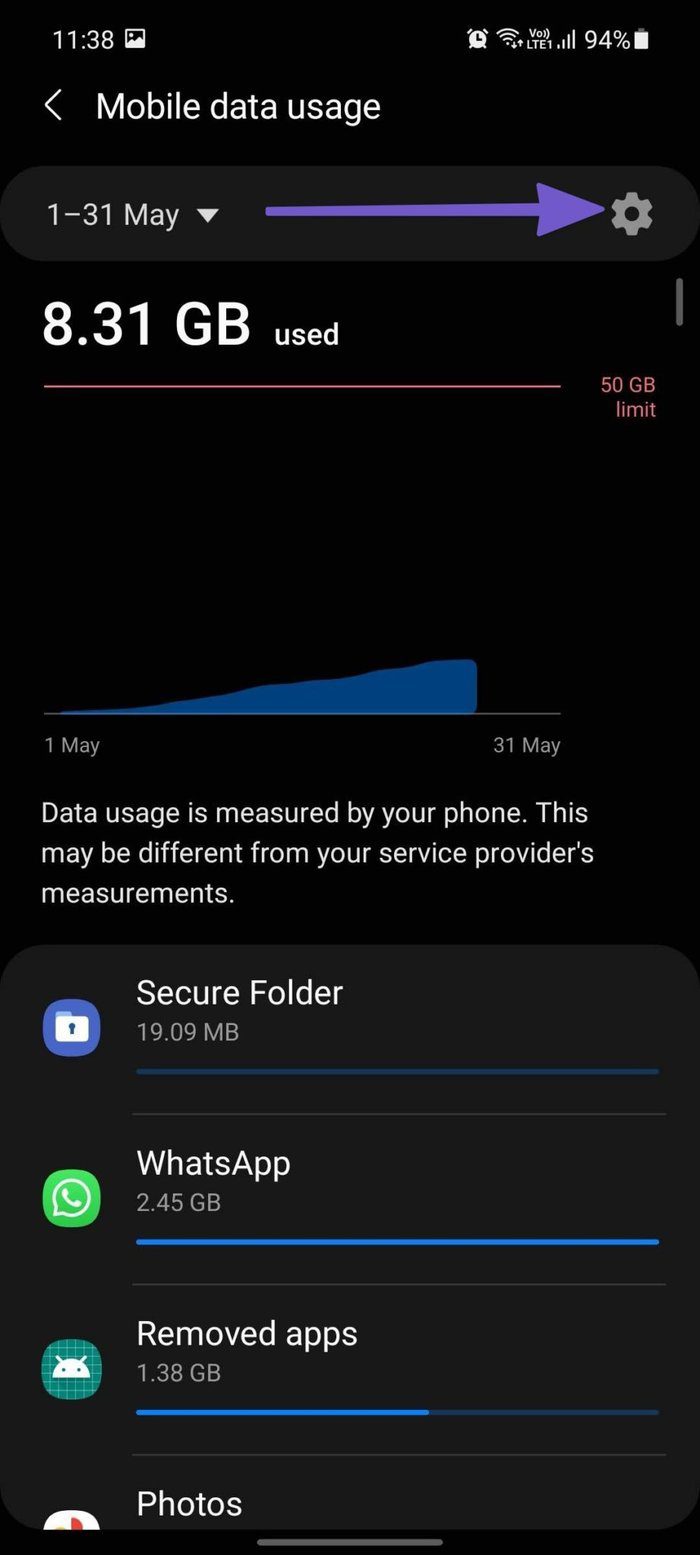
Step 3: Select Mobile data usage and tap on the little Settings icon beside the billing cycle.
Step 4: Tap on Data Limit and set the data usage at a higher number so that the OS won’t automatically turn it off.

7. Switch to a Different Wi-Fi Band
Most new phones support both the 2.4 GHz and 5.0 GHz Wi-Fi bands. That’s not the case with some old Android phones.
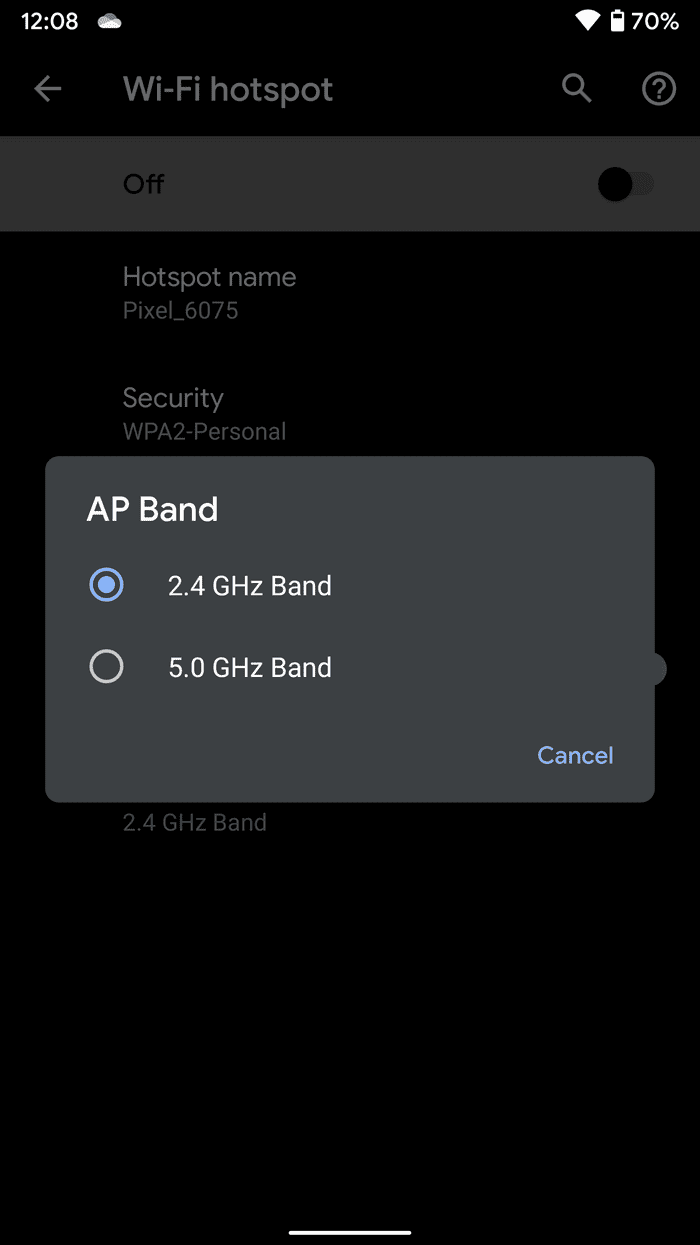
The receiving device might only support the 2.4 GHz band. In that case, if you have set the 5.0 GHz band on the main phone then the receiving device won’t be able to catch that. Also, you won’t see a successful device pair. Follow the steps below to change Wi-Fi Band on the Android phone.
Step 1: Open the Settings app on your Android phone.
Step 2: Navigate to Network & internet > Hotspot & tethering > Wi-Fi hotspot menu.

Step 3: Go Advanced > AP Band and select 2.4 GHz.
Now try connecting the other device to the Android mobile hotspot again.
Start Using Internet Again
Hotspot not working on your Android device might mess up your workflow. It can lead to unproductive hours as well. Go through the steps above and troubleshoot the hotspot not working on the Android phone. Which trick worked for you? Sound off in the comments section below.
Next up: Are you facing the System UI has stopped error on Android? Read the post below to learn about how to fix the issue.
Was this helpful?
Last updated on 13 July, 2021
Read Next
 Top 9 Ways to Fix Mobile Hotspot Not Working on Samsung Galaxy Phones
Mobile hotspot comes in handy when your office or home Wi-Fi is facing an outage.
Top 9 Ways to Fix Mobile Hotspot Not Working on Samsung Galaxy Phones
Mobile hotspot comes in handy when your office or home Wi-Fi is facing an outage.
 Top 8 Ways to Fix Mobile Hotspot Not Working on Windows 11
Mobile Hotspot is a handy utility that allows you to share your PC's internet connection with other wireless devices.
Top 8 Ways to Fix Mobile Hotspot Not Working on Windows 11
Mobile Hotspot is a handy utility that allows you to share your PC's internet connection with other wireless devices.
 10 Best Ways to Fix Windows 10 Laptop Not Connecting to Mobile Hotspot on Android
Most Android devices have a built-in Wi-Fi data-sharing feature.
10 Best Ways to Fix Windows 10 Laptop Not Connecting to Mobile Hotspot on Android
Most Android devices have a built-in Wi-Fi data-sharing feature.
 Top 7 Ways to Fix Android Hotspot Keeps Turning Off
Being able to share the internet connection from one device to another through a hotspot is one of the more useful features of your smartphone.
Top 7 Ways to Fix Android Hotspot Keeps Turning Off
Being able to share the internet connection from one device to another through a hotspot is one of the more useful features of your smartphone.
 Top 11 Ways to Fix iPhone Hotspot Not Working With Mac
As a part of Apple Continuity, iPhone users can instantly enable mobile hotpot on Mac.
Top 11 Ways to Fix iPhone Hotspot Not Working With Mac
As a part of Apple Continuity, iPhone users can instantly enable mobile hotpot on Mac.
 Top 6 Ways to Fix Mac Not Connecting to Hotspot
Using a mobile hotspot is a great way to connect to the internet when away from a Wi-Fi network.
Top 6 Ways to Fix Mac Not Connecting to Hotspot
Using a mobile hotspot is a great way to connect to the internet when away from a Wi-Fi network.
 Top 7 Ways to Fix iPhone Hotspot Not Showing Up on Android
When you're out and about, there are chances that there are no public Wi-Fi networks to connect to.
Top 7 Ways to Fix iPhone Hotspot Not Showing Up on Android
When you're out and about, there are chances that there are no public Wi-Fi networks to connect to.
The article above may contain affiliate links which help support Guiding Tech. The content remains unbiased and authentic and will never affect our editorial integrity.