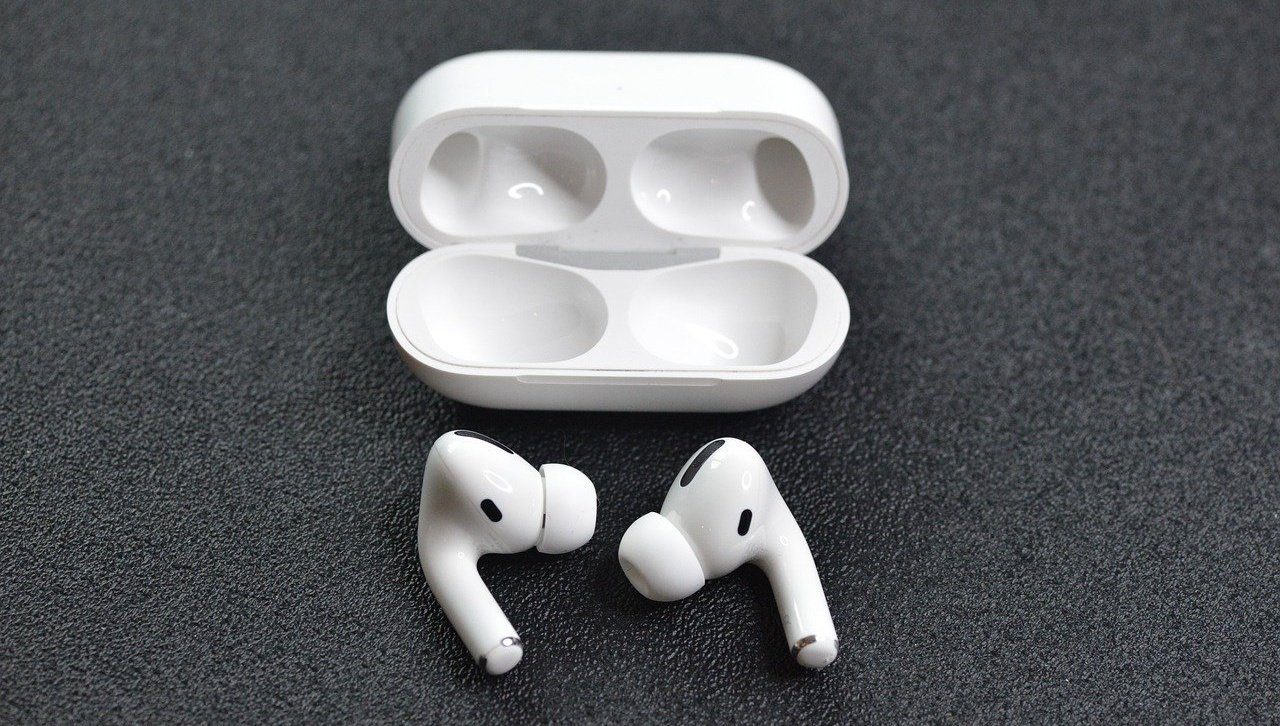
The AirPods Pro features Active Noise Cancellation, and that’s what makes them better over AirPods. Obviously, AirPods Pro looks like a better option if you use ANC often. While you want to study or enjoy music/videos during long flights only, we can understand how irksome it is when the Active Noise Cancellation stops working. To help you fix that, we have collated solutions in this guide.
Before you try restoring the Noise Cancellation feature, verify that your AirPods Pro is authentic/original. If you bought it from an authorized local Apple Store or Apple’s official online store, you have nothing to worry about; your AirPods Pro is most definitely authentic. If, on the other hand, you bought your from a third-party (non-Apple) store, be sure you were given an authentic unit.
This is necessary because from personal experiments and online reviews, Noise Cancellation doesn’t work with fake or counterfeit AirPods Pro’s. If you’re certain that you have a genuine unit, proceed to the section below to fix glitches hindering your AirPods Pro from switching to Noise Cancellation.
Note: This guide is focused on the AirPods Pro as it’s (currently) the only AirPods generation/model that supports Active Noise Cancellation.
1. Modify Active Noise Cancellation Configuration
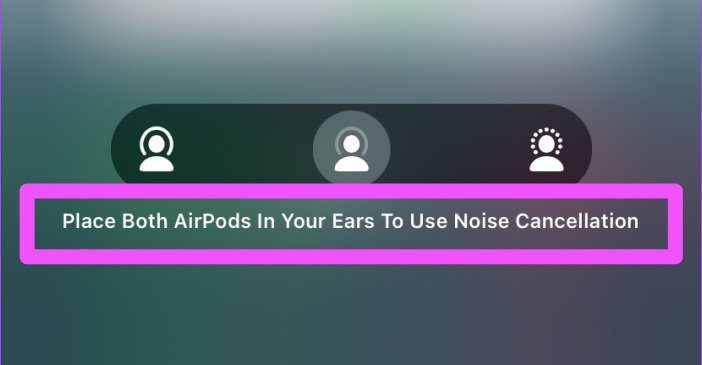
By default, Active Noise Cancellation is designed to work on the AirPods Pro when you place both AirPods in your ears. If you try to activate Noise Cancellation by pressing the AirPods Pro’s Force Sensor or from the Control Center, you’ll get an error message prompting you to have both AirPods in your ears to use the feature. That’s odd, right?
Interestingly, there’s a workaround that lets people use Noise Cancellation with just one AirPod. This is particularly useful for:
- People who have misplaced/lost one of their AirPods Pro units.
- Individuals with Hearing impairments or Single-Sided Deafness (hearing loss in one ear).
Follow the steps below to configure your AirPods to activate Noise Cancellation with just one (active) AirPod.
Note: Modifying the AirPods Pro Noise Cancellation to work with one AirPod can only be done on iOS devices (iPhone and iPad).
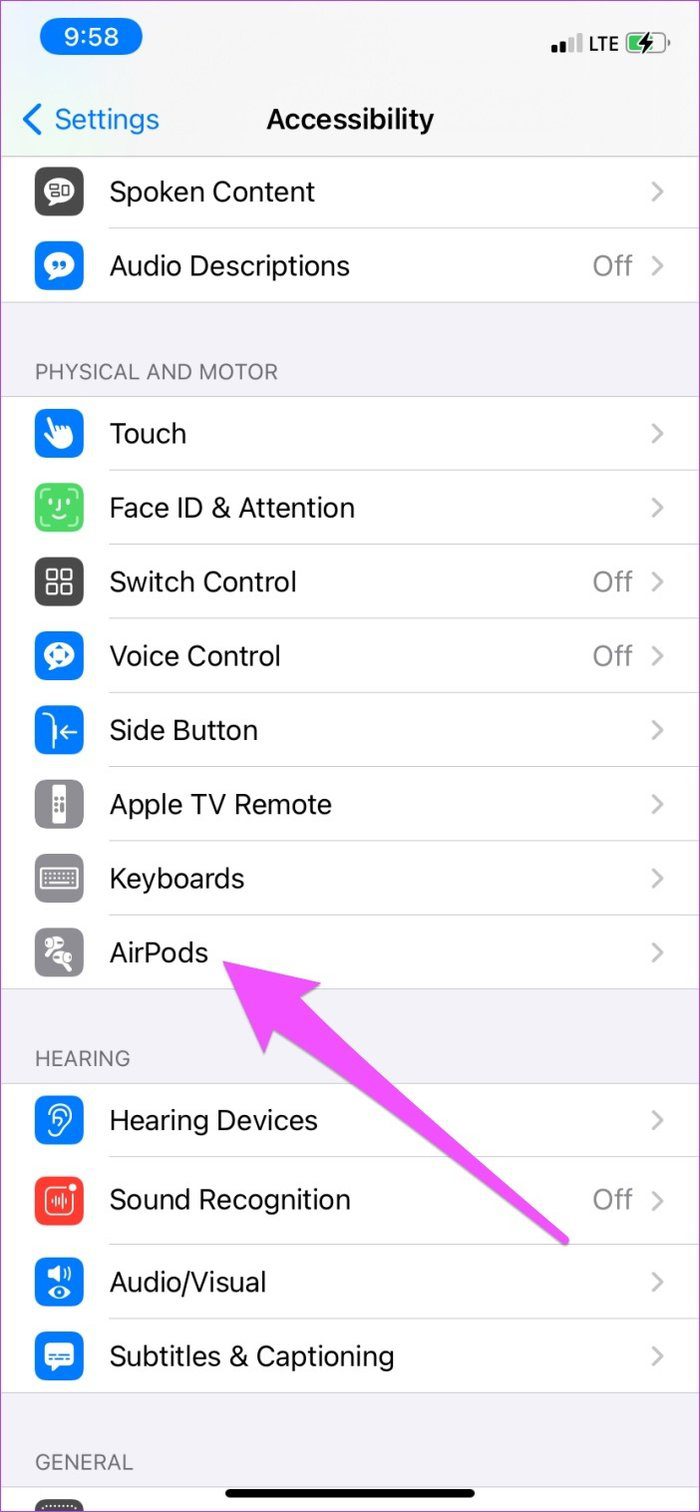
Step 1: Launch Settings on your iPhone or iPad and select Accessibility.

Step 2: In the ‘Physical and Motor’ section, select AirPods.
Step 3: Toggle on ‘Noise Cancellation with One AirPod.’
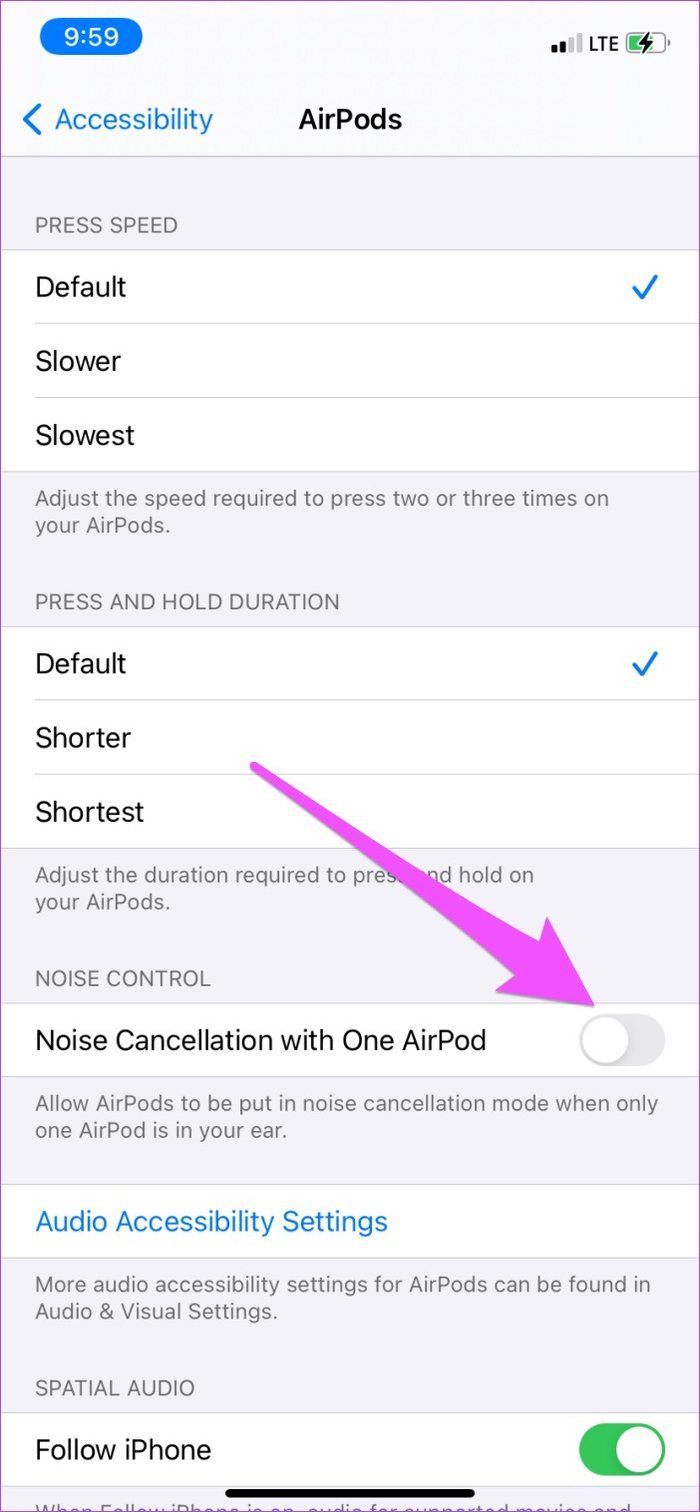
Now, when you tap and hold the Force Sensor on your AirPods Pro, you’ll be able to activate Noise Cancellation.
If Noise Cancellation isn’t working on either or both AirPods, even with the ‘Noise Cancellation with One AirPod’ option turned on, proceed to the solutions below.
2. Re-Enable Noise Cancellation
If you can still hear background noise despite having Noise Cancellation enabled, try turning off Noise Cancellation, wait for some seconds, and turn it back on. Tap and hold the Force Sensor on the stem of the either AirPod till you hear a chime. Tap and hold the Force Sensor again till you hear a chime.
Alternatively, follow the steps below.
Re-Enable Noise Cancellation on iPhone or iPad.
Step 1: Open the Control Center and long-press the AirPods volume icon.
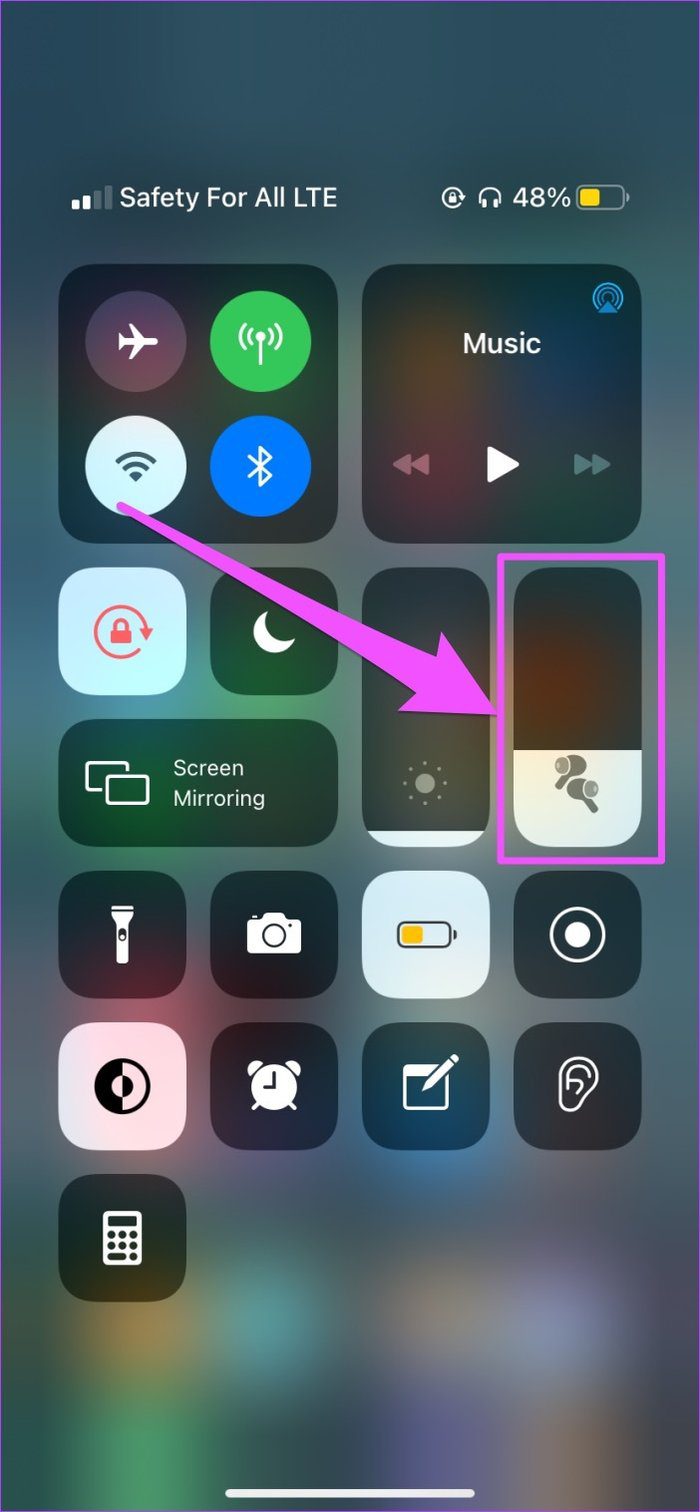
Step 2: Tap the Noise Control icon and select Off.
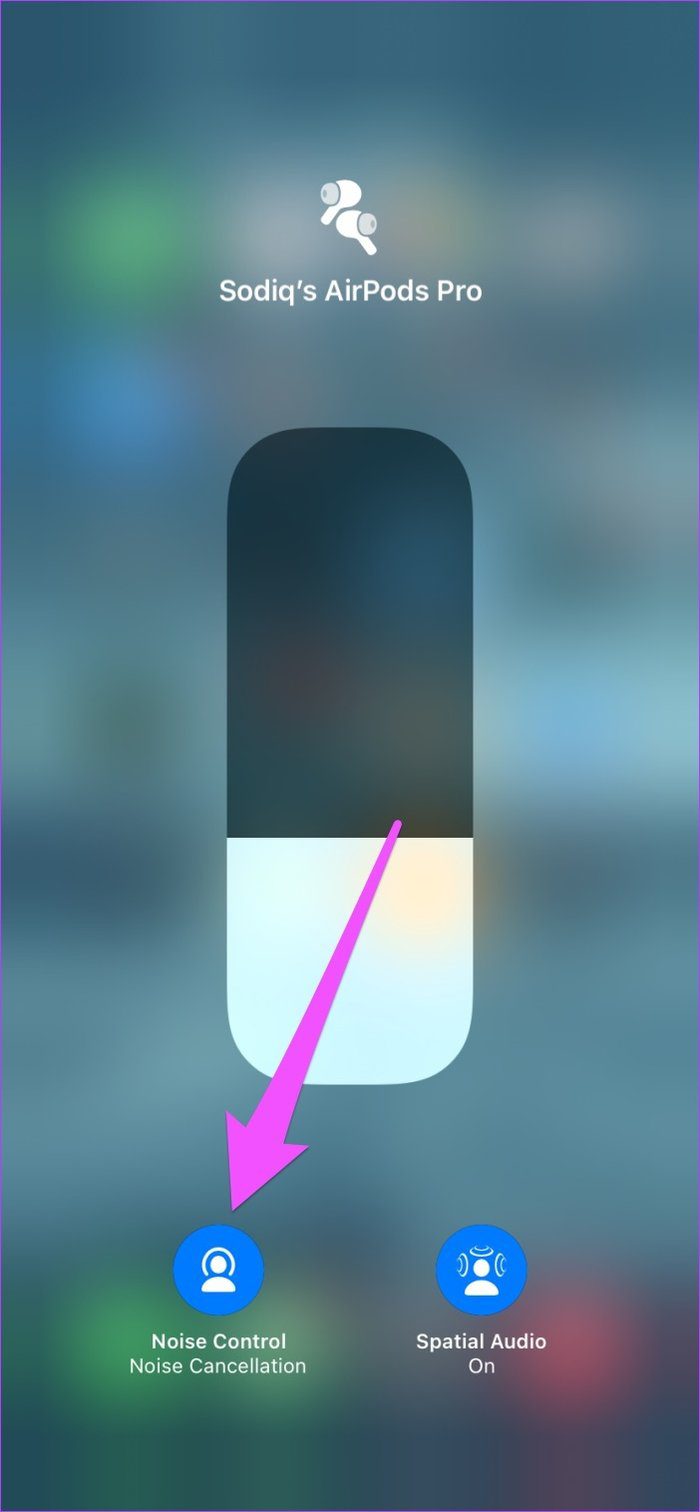
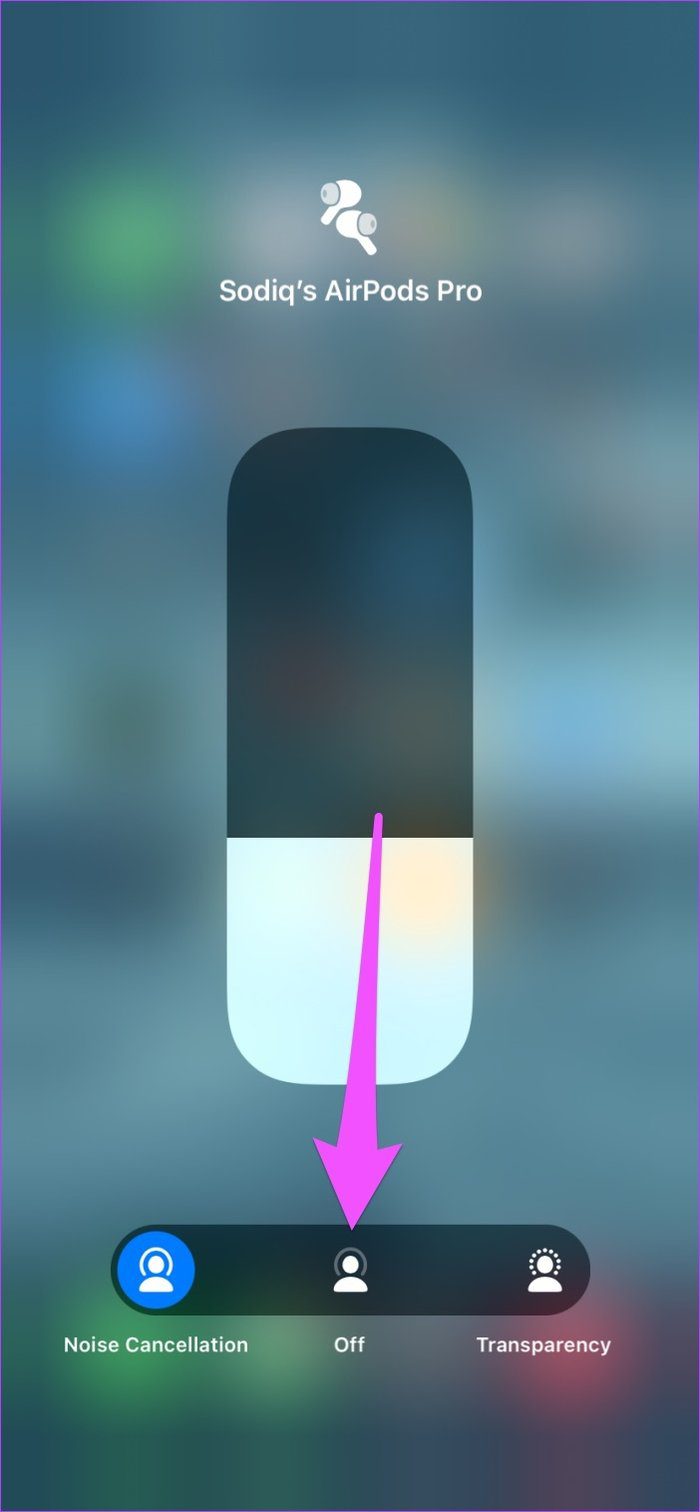
Step 3: Wait for some seconds and select Noise Cancellation.

Re-Enable Noise Cancellation on Mac
First off, connect the AirPods to your Mac. Secondly, make sure the volume icon is fixed to your Mac’s menu bar.
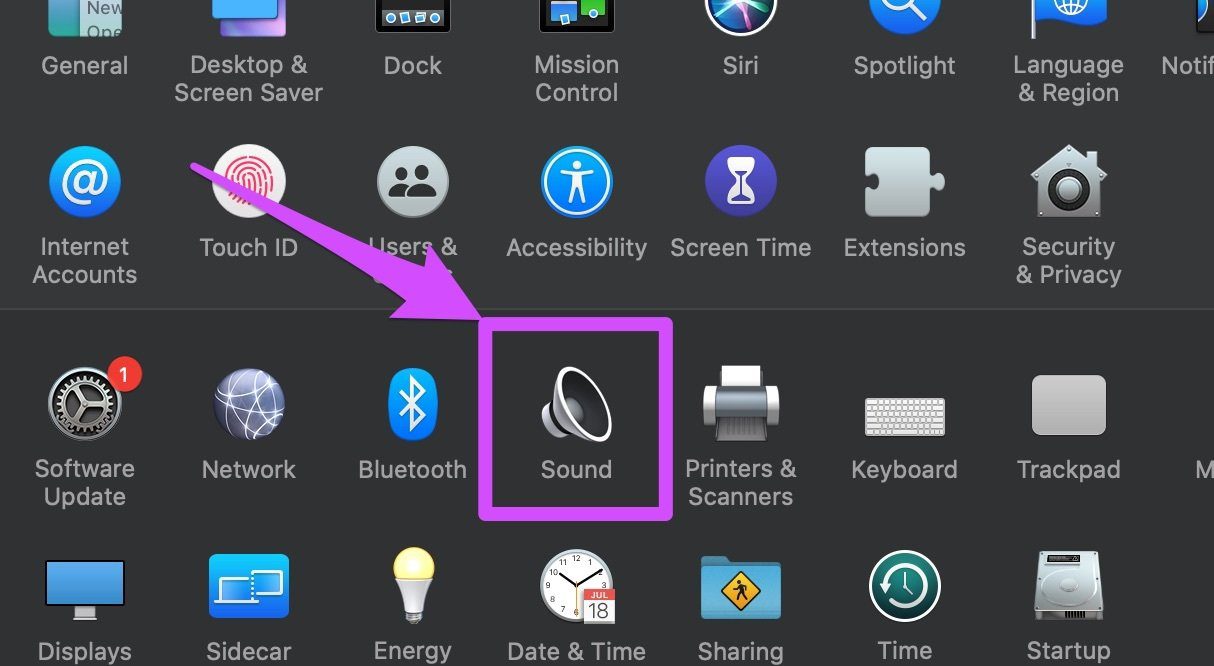
Step 1: Launch System Preferences and select Sound.
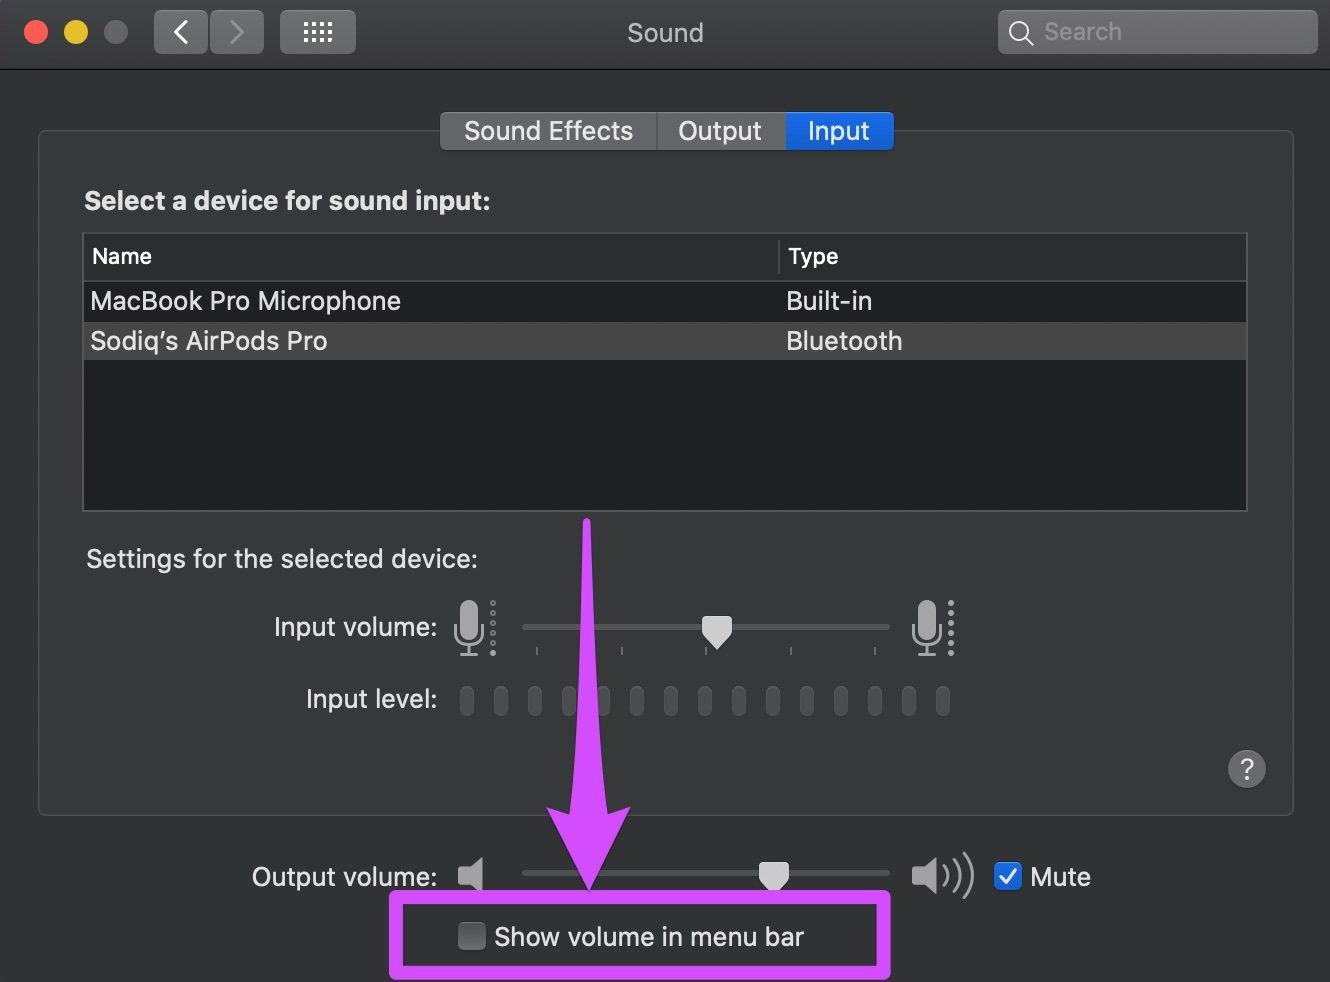
Step 2: Check the ‘Show volume in menu bar’ option.
Now, proceed to disable and re-enable Noise Cancellation.
Step 3: Tap the volume icon on the menu bar.
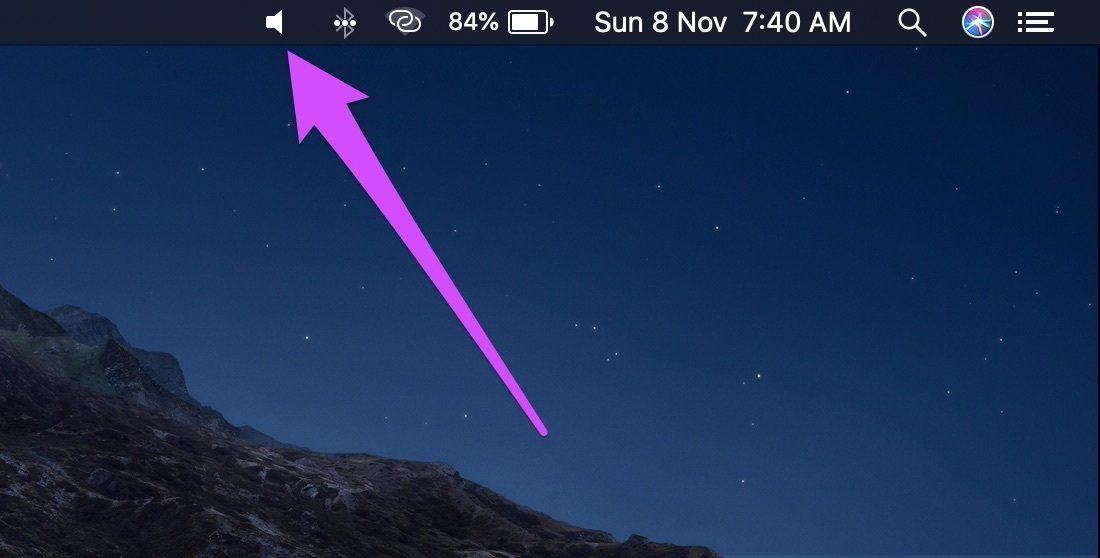
Step 4: Hover the cursor over your AirPods and select Off to disable Noise Cancellation.
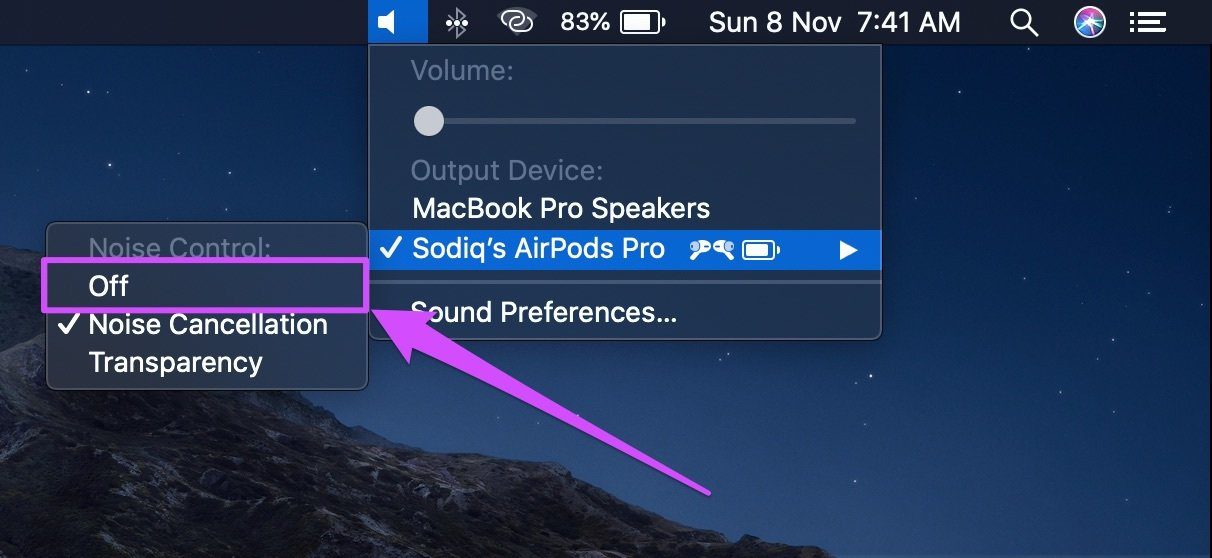
Step 5: Wait for a couple of seconds and re-activate Noise Cancellation.
3. Modify Force Sensor Settings
Are you able to switch to Noise Cancellation from your iPhone, iPad, Apple Watch, and other devices but not on the AirPods Pro itself? You should check the Force Sensor settings.
By default, you should be able to switch to Noise Cancellation by long-pressing the Force Sensor on both AirPods.
Modify AirPods Force Sensor Settings on iPhone & iPad
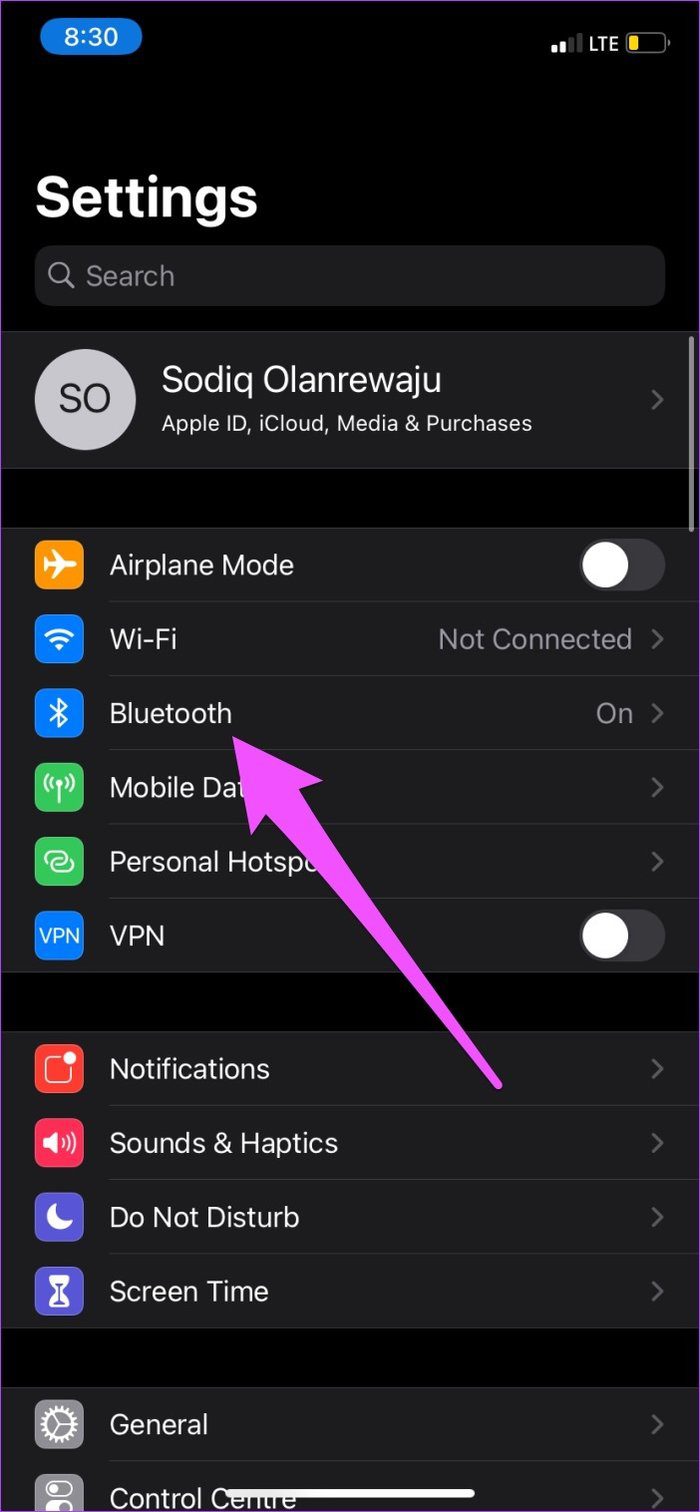
Step 1: Launch Settings and select Bluetooth.
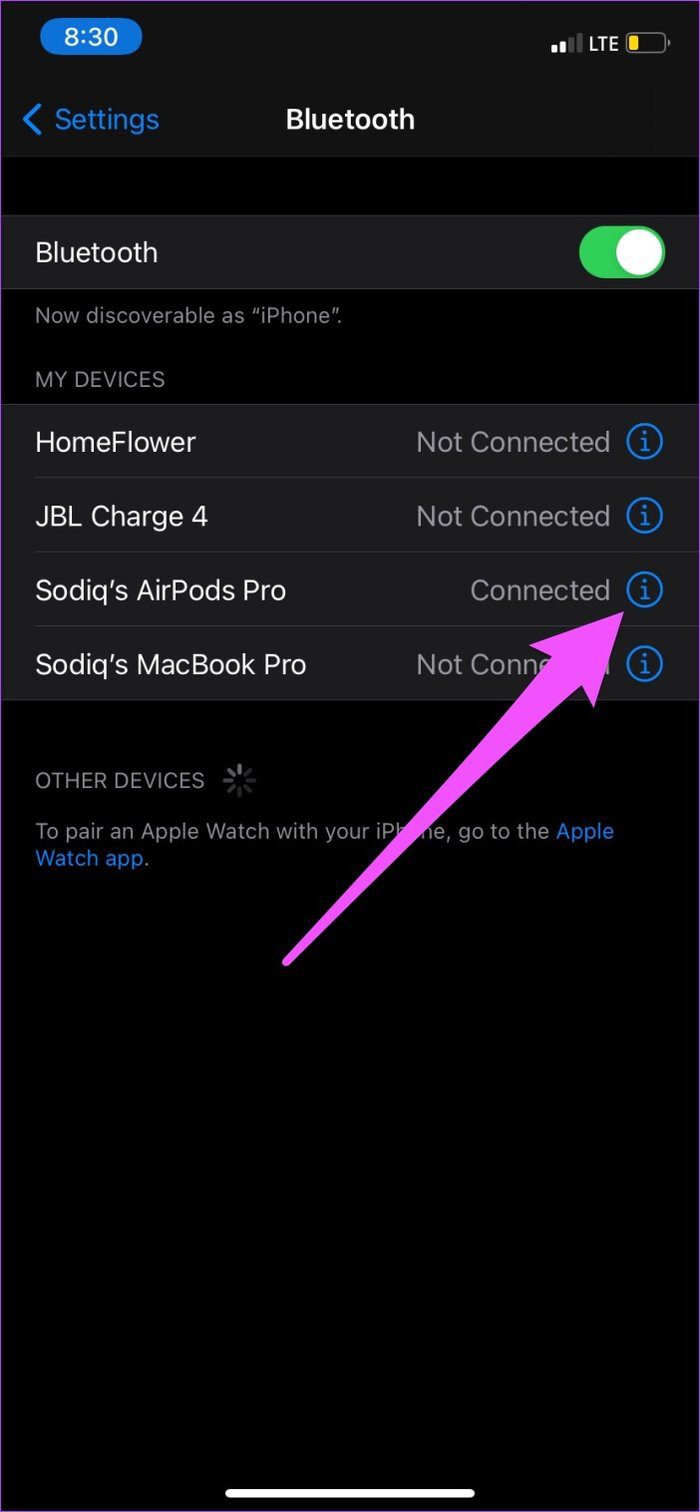
Step 2: Next, tap the info icon next to your AirPods name.
Step 3: In the ‘Press and Hold AirPods’ section, make sure Noise Control is the selected option.
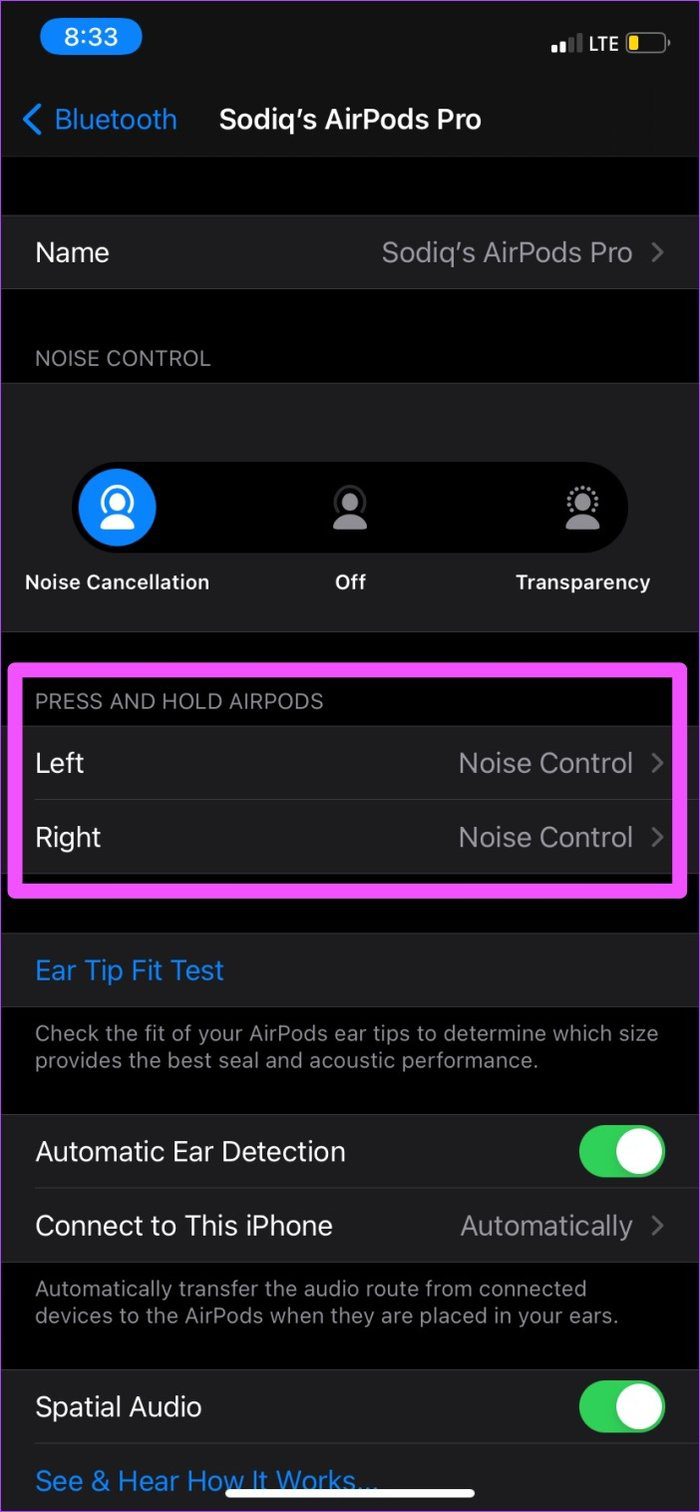
If something else is selected on either or both AirPods, tap on it to modify the Force Sensor settings.
Step 4: Tap whichever AirPod isn’t set to Noise Control and select Noise Control.
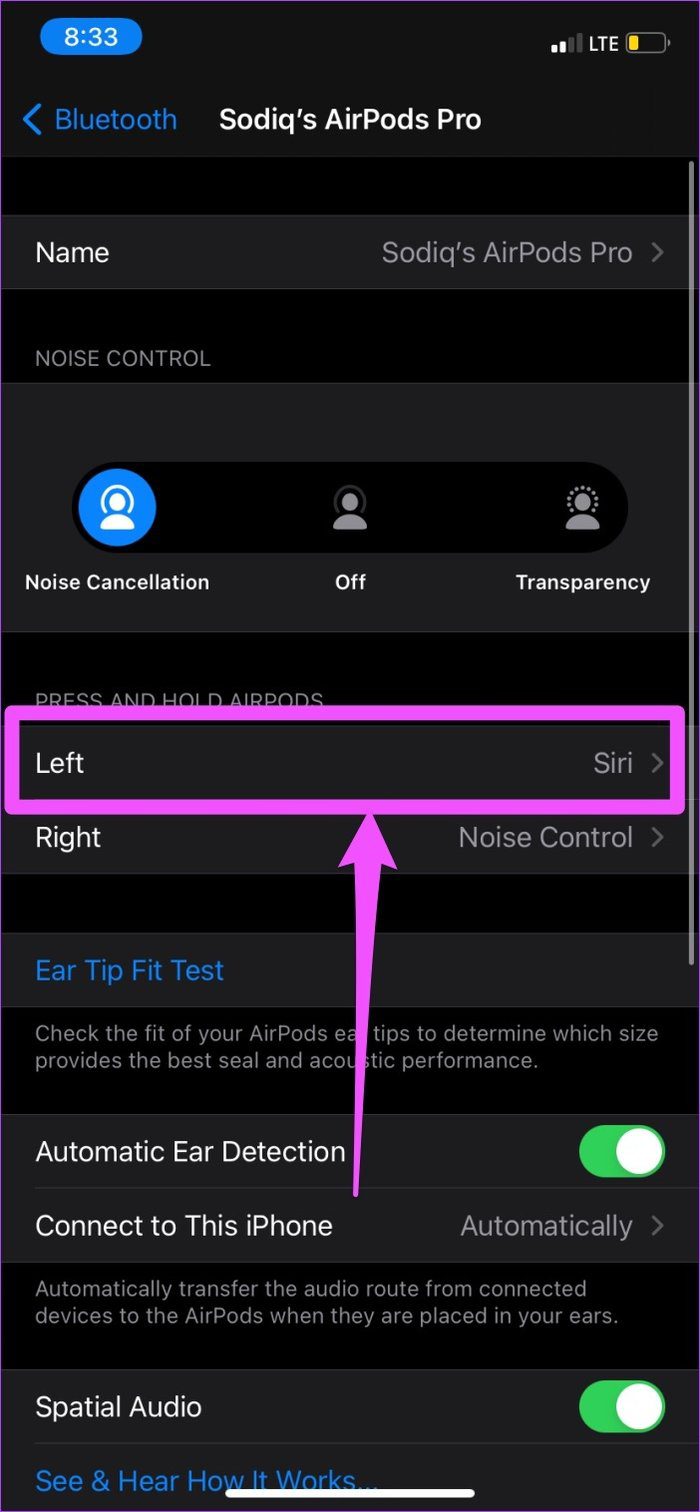

Step 5: Finally, make sure Noise Cancellation is also selected in the Noise Control options.

Modify AirPods Force Sensor Settings on Mac
Connect the AirPods to your Mac and follow the steps below.
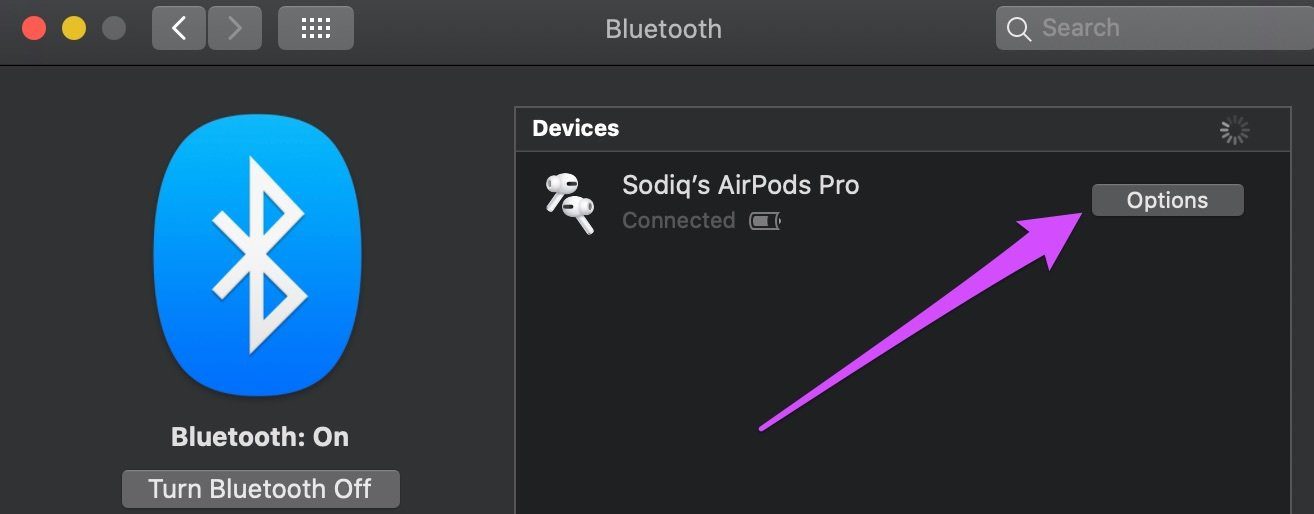
Step 1: Open System Preferences and select Bluetooth.

Step 2: Tap the Options button next to your AirPods.
Step 3: Make sure both ‘Press & Hold Left AirPod’ and ‘Press & Hold Right AirPod’ are set to Noise Control. Additionally, make sure Noise Cancellation is checked for the ‘Noise Control Toggles’ option.
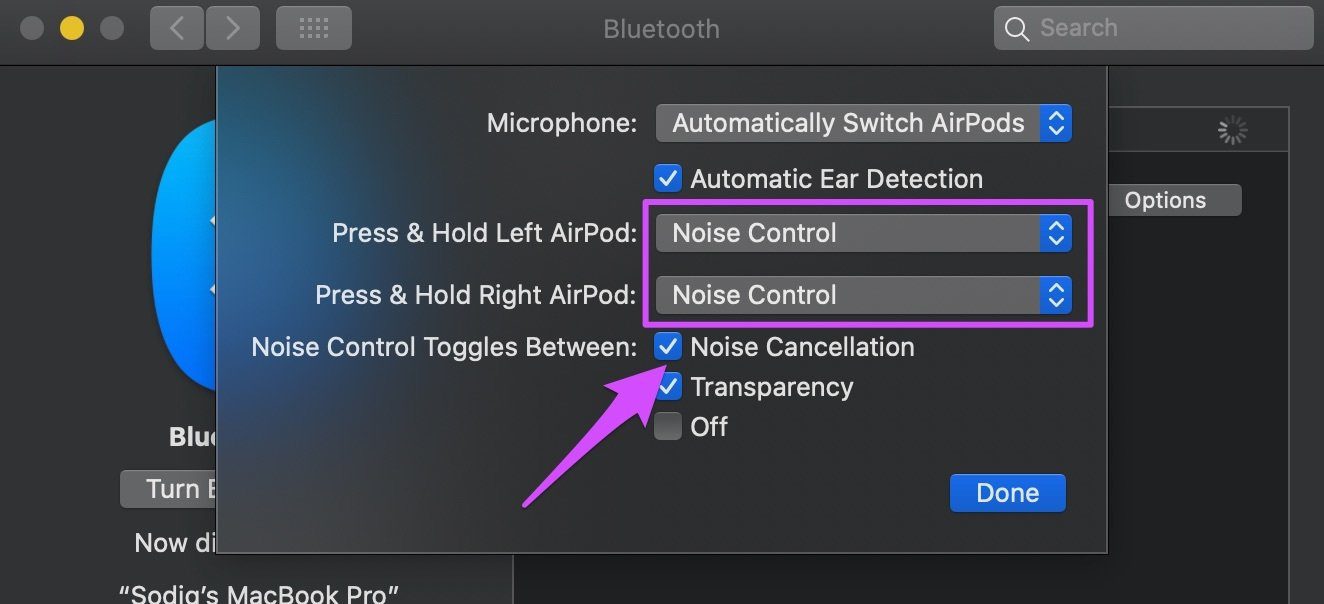
Step 4: Tap Done to save the changes.
4. Clean AirPods
No, don’t have to ‘wash’ your AirPods with water or any liquid. All you need is a clean, dry, and lint-free microfiber cloth. And you don’t even need to clean the entire AirPods; only the inward-facing microphones of the AirPods Pro require cleaning. Here’s why.
On the AirPods Pro, the outward-facing microphone works in conjunction with its inward-facing counterpart to counter both unwanted background and internal sound with anti-noise, respectively. Apple notes that Noise Cancellation might fail to work if dirt, debris, or earwax builds on the inward-facing microphone (see image below) of the AirPods Pro.

If there are particles or dirt on the microphone, wipe it off with a clean, dry, and lint-free cloth. And if there’s earbud wax stuck on it, dampen the cloth slightly with fresh water and clean off the wax. Ensure you use a dry cloth to clean the microphone afterward.
5. Update Device
This might seem unrelated, but your device’s operating system has some influence on the performance of the AirPods. To enjoy Active Noise Cancellation, Apple strongly recommends that the connected devices (iPhone, iPad, Mac, or iPod touch) run the latest version of their respective operating systems.
6. Apply to the AirPods Pro Service Program
According to Apple, some AirPods Pro units — particularly those manufactured before October 2020 — are faulty and likely to experience sound-related issues: crackling/static sounds, loss of bass, ineffective or non-functional Active Noise Cancellation, etc.

To that effect, Apple launched the ‘AirPods Pro Service Program,’ an initiative to service or replace affected AirPods Pro units without cost. So, if your AirPods Pro still won’t switch to Noise Cancellation despite trying all the troubleshooting solutions mentioned above, you should make either of these three(3) moves:
- Visit an Apple Retail Store near you.
- Locate and book an appointment with an authorized Apple Service Provider.
- Contact Apple Support.
If your AirPods Pro is diagnosed and found to be one of the affected units, the faulty AirPod (left, right, or both) will be repaired or replaced.
Note: The AirPods Pro charging case is not eligible for servicing or replacements under the service program.
No Noise Zone
We’re confident that at least one of these troubleshooting methods should restore Noise Cancellation to your AirPods Pro. If the problem persists, you most likely have a counterfeit or damaged device. Do let us know if you need any more help.
Next up: If the AirPods are connected to your devices (Android, iOS, Mac, or PC) but there’s no sound or audio output from the speakers, refer to the solutions in the guide linked below to get the issue fixed.
Was this helpful?
Last updated on 26 October, 2021
Read Next
 A Detailed Guide to Fixing Mac Booting With Black Screen Issues
Clicking the power button on your MacBook should light up the screen and keyboard, play a startup chime, display the Apple logo, and finally, boot into the authentication screen where
A Detailed Guide to Fixing Mac Booting With Black Screen Issues
Clicking the power button on your MacBook should light up the screen and keyboard, play a startup chime, display the Apple logo, and finally, boot into the authentication screen where
 How to Fix Noise Cancellation Not Working on Samsung Galaxy Buds
Active noise cancellation is one feature Samsung has included in all of their truly wireless earbuds range.
How to Fix Noise Cancellation Not Working on Samsung Galaxy Buds
Active noise cancellation is one feature Samsung has included in all of their truly wireless earbuds range.
 Why Are My AirPods Crackling, Rattling, or Producing Static Noise: 11 Ways to Fix This
If you use an iPhone or a Mac, and you're looking to buy a pair of wireless earbuds, your first option is generally the AirPods.
Why Are My AirPods Crackling, Rattling, or Producing Static Noise: 11 Ways to Fix This
If you use an iPhone or a Mac, and you're looking to buy a pair of wireless earbuds, your first option is generally the AirPods.
 How to Use the Compass App on iPhone: A Detailed Guide
A tool that was crucial in shaping the modern world was the humble mariner's compass.
How to Use the Compass App on iPhone: A Detailed Guide
A tool that was crucial in shaping the modern world was the humble mariner's compass.
 How to Use the Measure App on iPhone: A Detailed Guide
Things at home are never found when needed - this is something that all of us resonate with.
How to Use the Measure App on iPhone: A Detailed Guide
Things at home are never found when needed - this is something that all of us resonate with.
 13 Things to Know About Instagram Quiz Sticker: A Detailed Guide
Instagram has released a new sticker for its famed stories feature.
13 Things to Know About Instagram Quiz Sticker: A Detailed Guide
Instagram has released a new sticker for its famed stories feature.
 How To Use Nested Lists in Google Keep: A Detailed Guide
When we talk about lists, they are incomplete without the ability to add subitems.
How To Use Nested Lists in Google Keep: A Detailed Guide
When we talk about lists, they are incomplete without the ability to add subitems.
 How to Turn off Ads on Instagram: A Detailed Guide
Are you tired of annoying or irrelevant Instagram ads and want to eliminate them from your Instagram feed?
How to Turn off Ads on Instagram: A Detailed Guide
Are you tired of annoying or irrelevant Instagram ads and want to eliminate them from your Instagram feed?
The article above may contain affiliate links which help support Guiding Tech. The content remains unbiased and authentic and will never affect our editorial integrity.