Most Google Drive services like Google Docs, Slides, etc., offer built-in image editing capabilities. You don’t need a third-party photo editor for editing your photos separately. For instance, you can make an image in a circle in Google Slides itself. Curious to know how to crop an image with shape in Google Slides? Find the answer and solutions in this post.

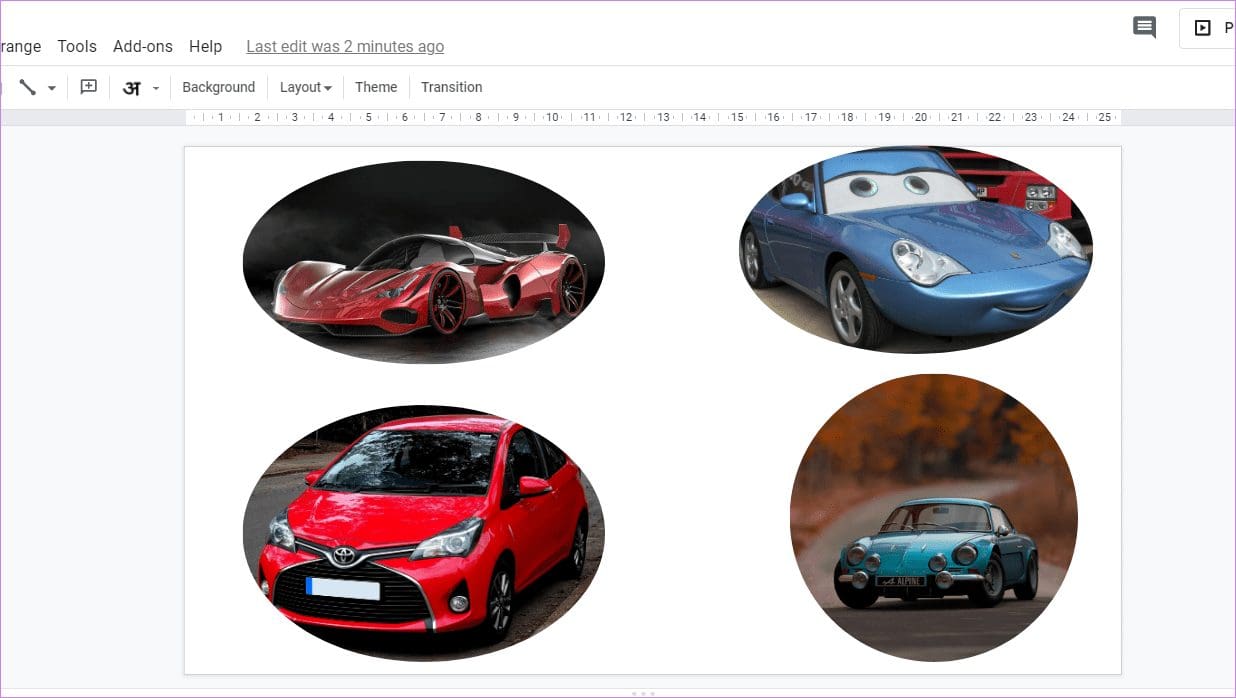
You can create beautiful graphics by masking images with shapes. The result depends on your creativity. You can even create collages in Google Slides by putting pictures in various shapes.
Doesn’t that sound exciting? Let’s check the steps to fit an image in shape on Google Slides on Android, iPhone, iPad, and desktop. We will start with PC first, followed by mobile apps.
How to Crop Image With Shape in Google Slides on Web
Step 1: Open slides.google.com in a browser and open a slide you want to edit.
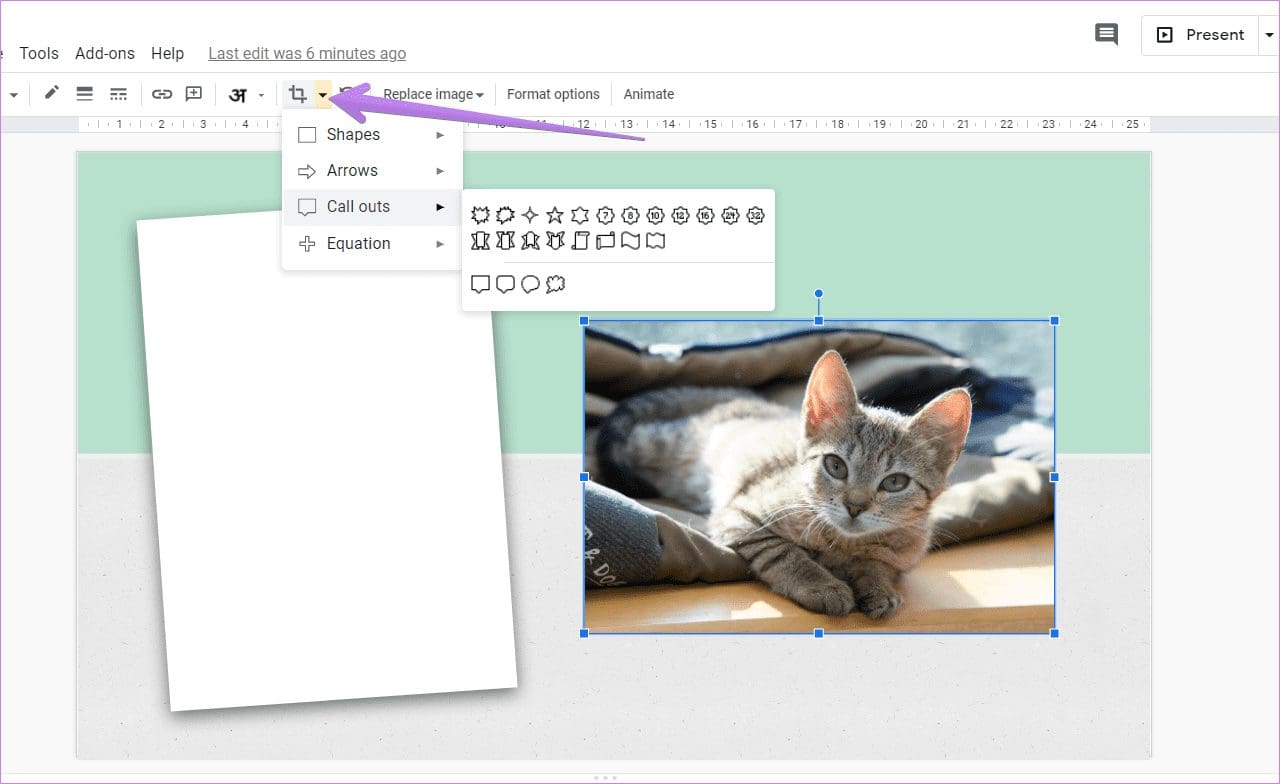
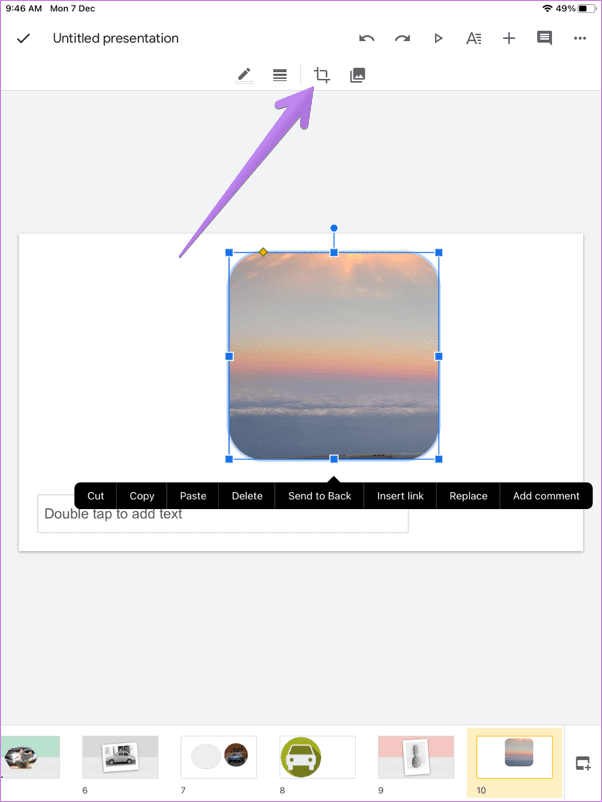
Step 2: Click on the image to select it. The selected image will get a blue border. In case you haven’t added an image yet, go to Insert > Image in the top menu bar and insert an image.

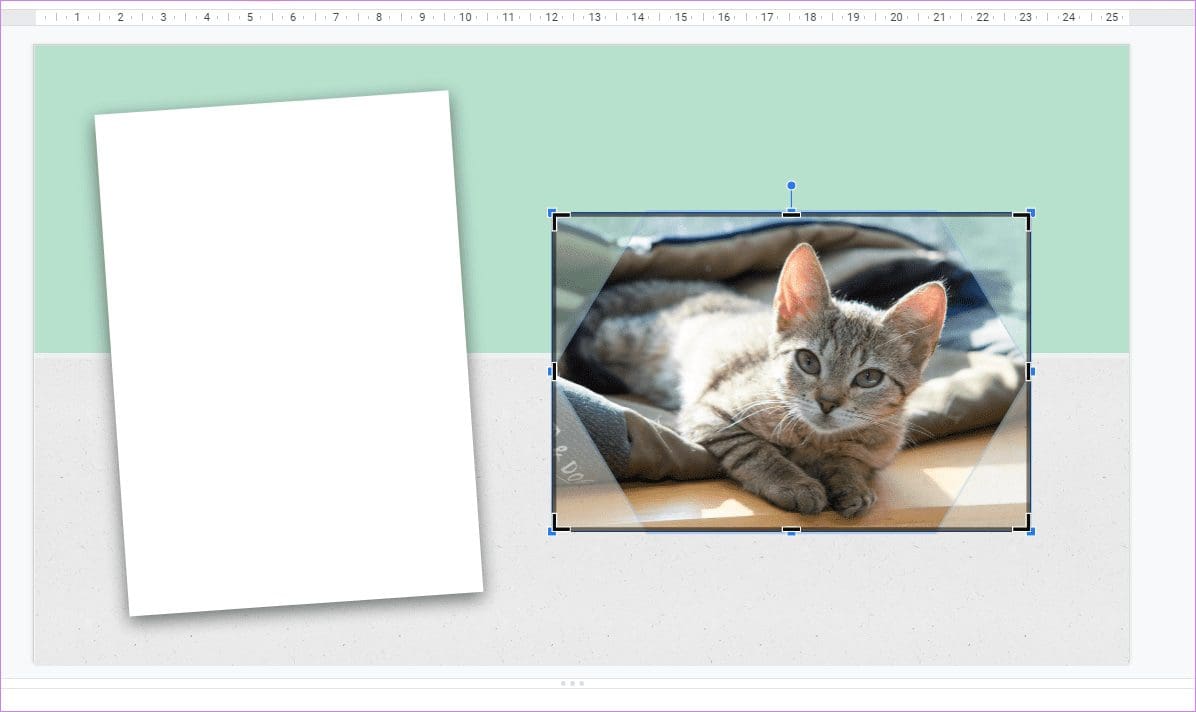
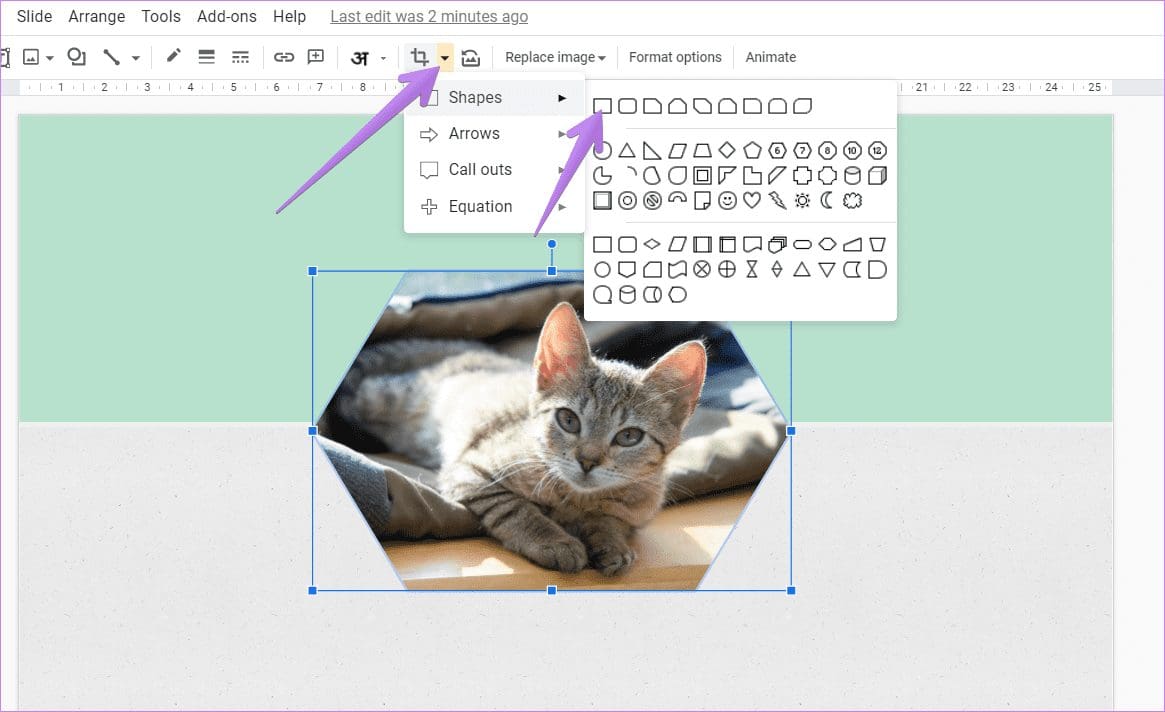
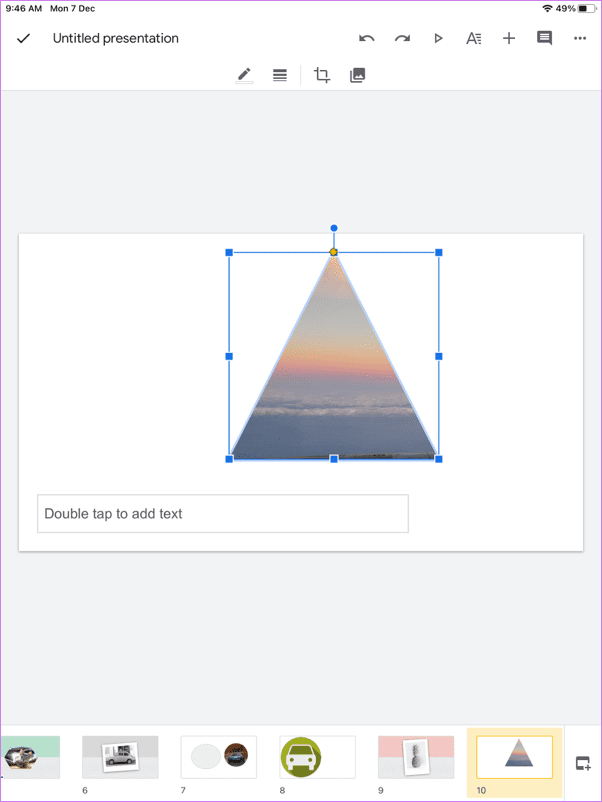
Step 3: When the image is selected, click on the small down arrow next to the Crop icon in the top bar. A menu with a variety of shapes will appear. Select the required shape to mask your image.
The shape will automatically crop your image.

To adjust the image inside the shape, double-click on the photo. A black border will appear around it. Drag the image to change its position inside the shape. You can adjust the size of the image within the shape by dragging the border.
Tip: In case you want to increase the size of the final shape containing your image, click once on the image first to select it. Then drag the image using the borders.
Similar to any regular image, you can further format the masked image in Google Slides. For that, right-click on the masked image and select Format options. Then choose the formatting option of your choice. You can recolor the image, adjust brightness and contrast, add reflection and shadow to your image cropped in a particular shape.

Further, you can add a border to your image to give it a different look. You can customize the border color, size, and style. To do so, click on the image once. Then select the appropriate border customization style from the menu bar.

Tip: Find out how to add animations in Google Slides.
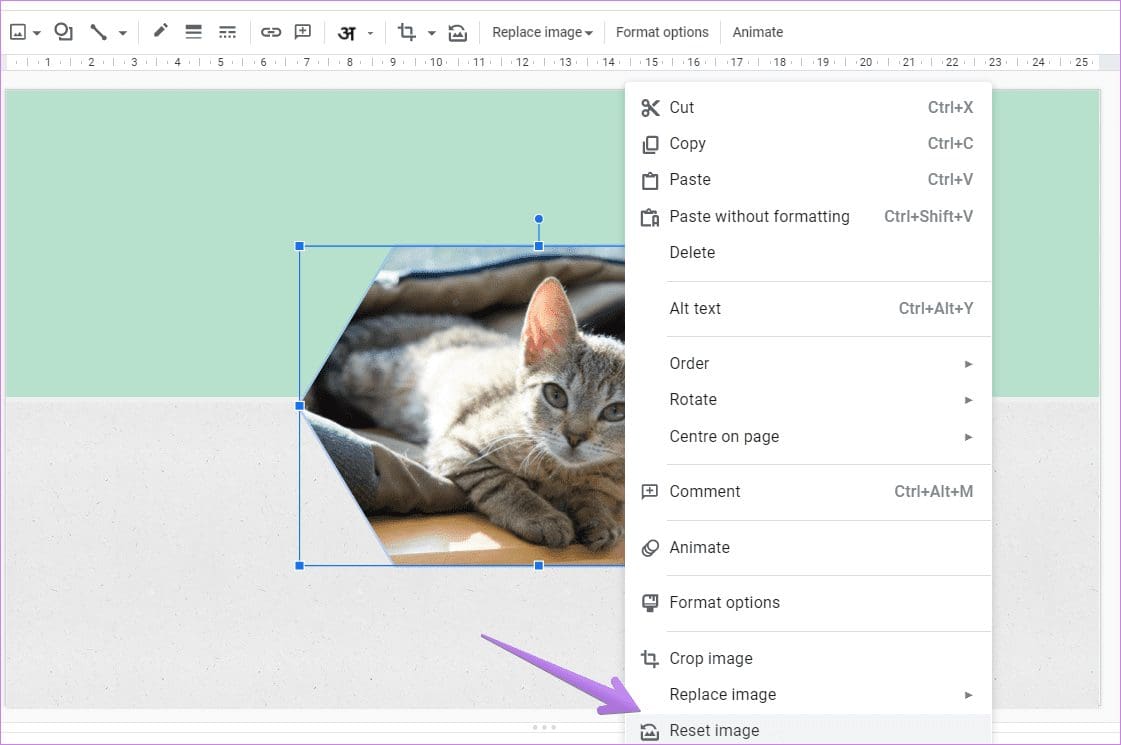
How to Reset Image Back to Original Photo
There are two ways to undo the shape mask. In the first method, click on the small arrow next to the Crop icon on the top bar when the image is selected. Select the rectangular shape.
Alternatively, right-click on the image and select Reset image. However, that will also remove other image customizations that you might have done for the image in Google Slides. You can also delete the masked image and re-add the original image.
How to Put a Picture in Shape on Google Slides on Android
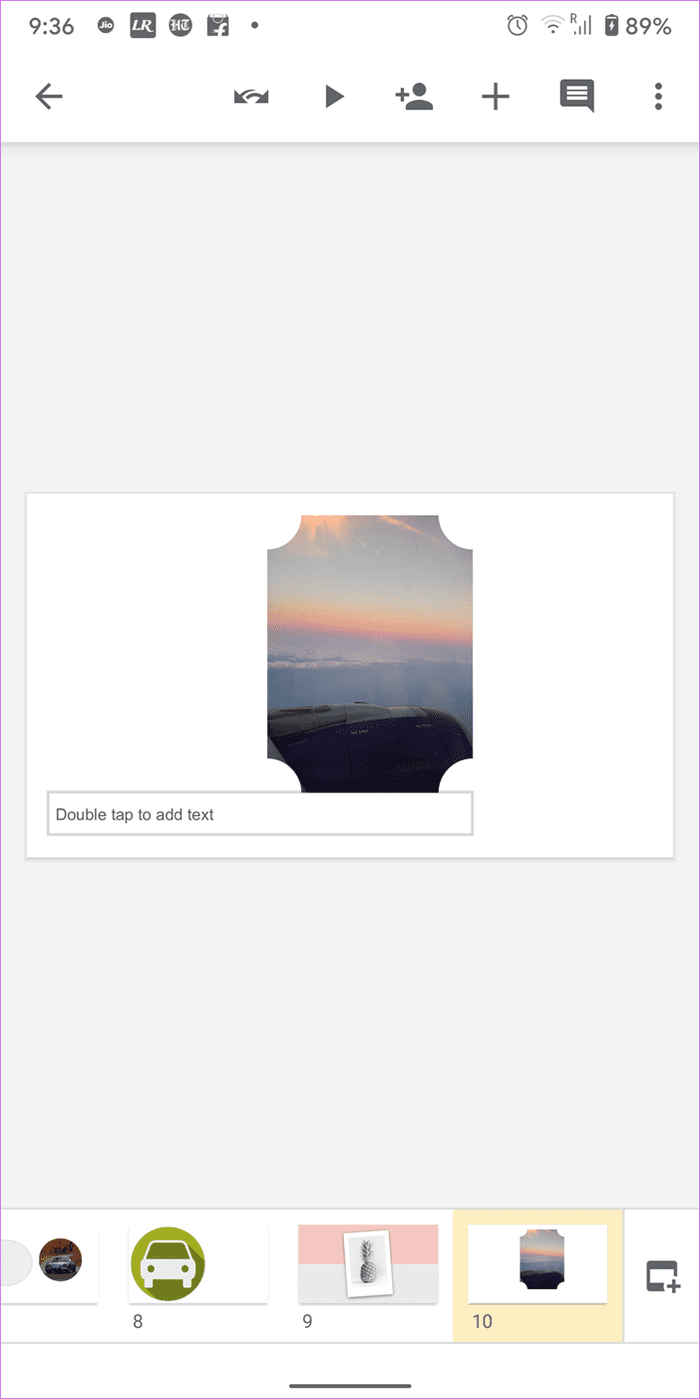
Step 1: Launch the Google Slides Android app and open the required presentation to edit it.
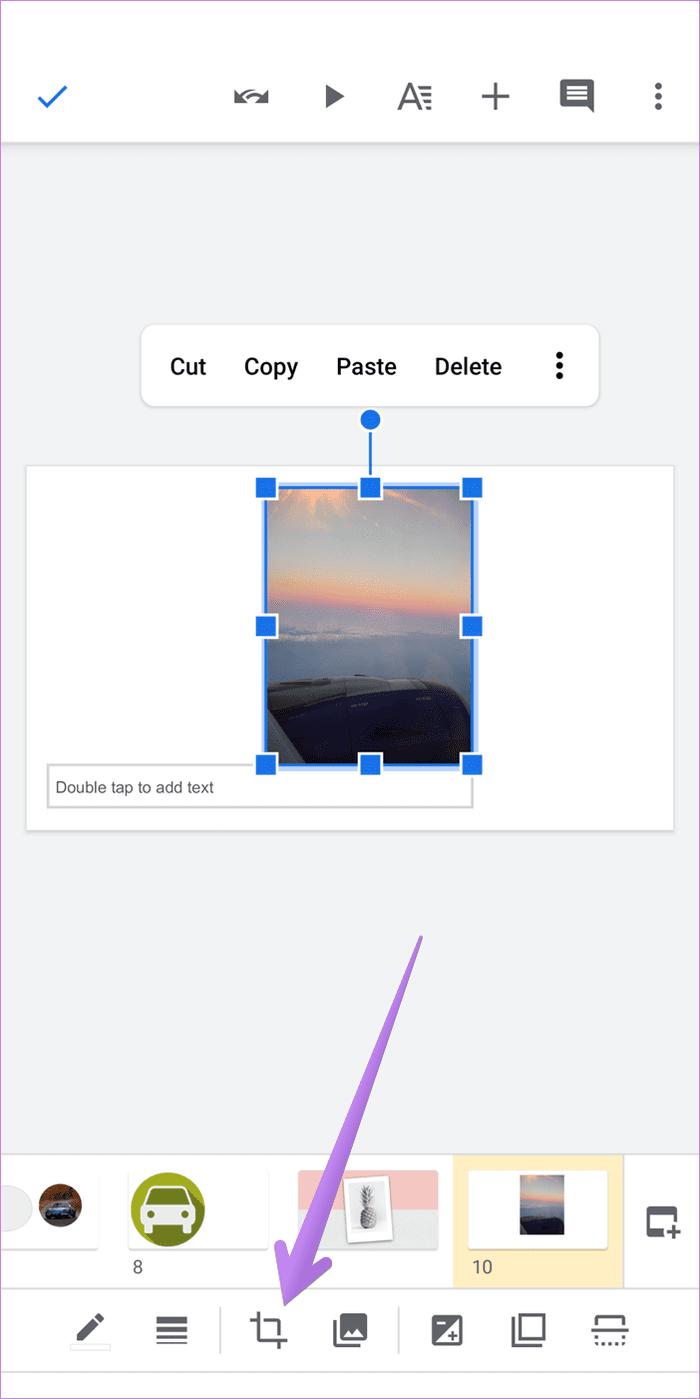
Step 2: Tap on the image in your slide to select it. Then tap on the Crop icon at the bottom.
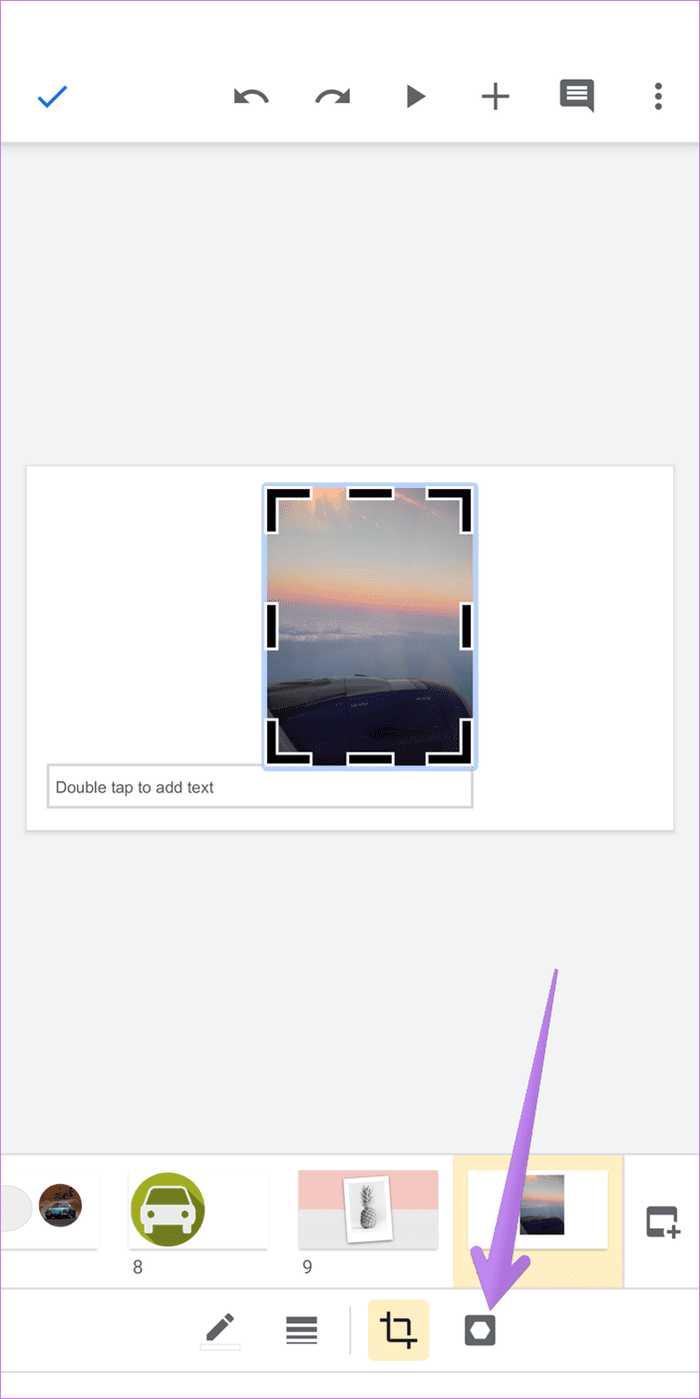
Step 3: Tap on the Mask icon available in the bottom bar. Select the required shape from the list.
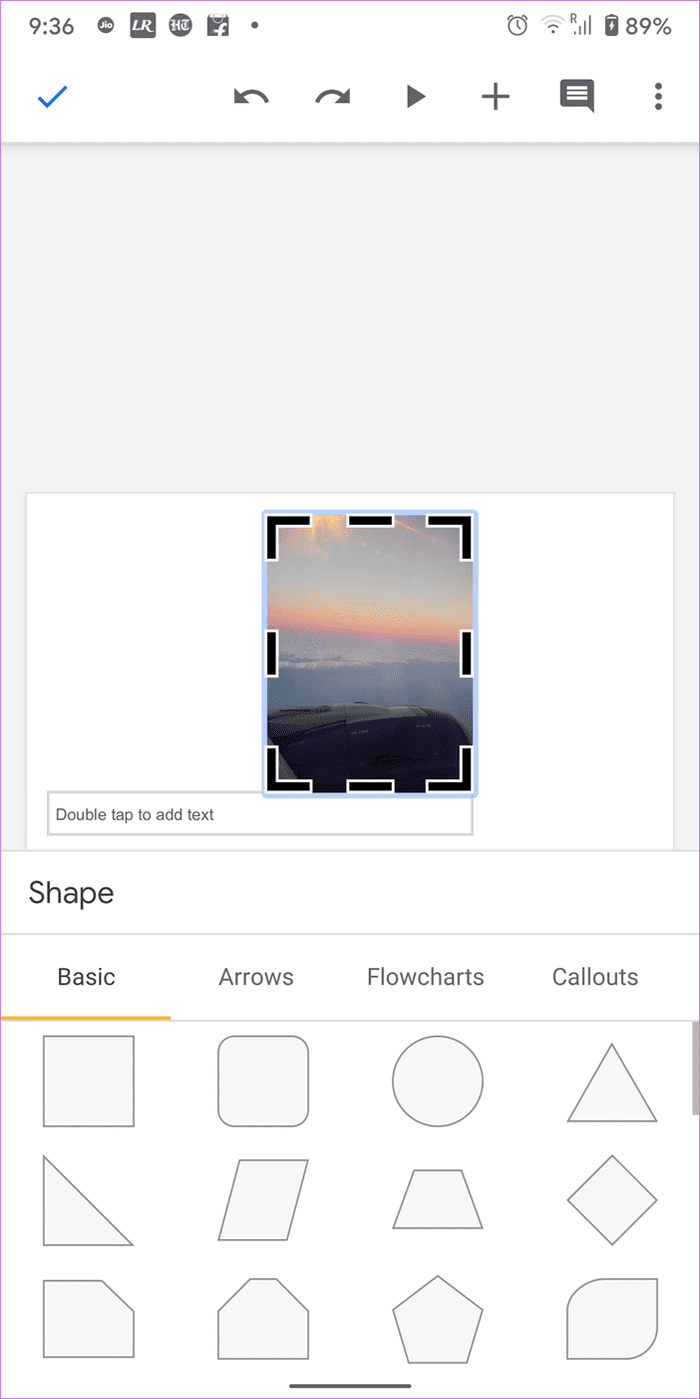
Step 4: Tap outside the image to apply the mask. Double-tap on the masked image to adjust the picture inside the shape.
Tip: Find out how to add hyperlinks in Google Slides on mobile and PC.
How to Mask Image With Shape in Google Slides on iPhone/iPad
Step 1: Open the Google Slides app on iOS/iPadOS.
Step 2: In the required slide, tap on the image. Tap on the Crop icon.
Step 3: The Mask icon will now appear next to the Crop icon. Tap on it. The list of shapes will open. Tap on the required shape.


Here’s how the final image will look like. You can adjust the masked image by double-tapping on the picture.
Tip: Find out how to present Google Slides in Google Meet.
Bonus: Create Collage in Google Slides
Using shape crop, you can create different styles of images. The same concept can be used to create a collage in Google Slides. Basically, repeat the same steps for all the images in your collage, and your collage should be ready.
Fun With Images
If you are a fan of Bitmojis, you can add them to Google Slides for creating more personalized slides. The Bitmojis can also be masked into shapes, as shown in the above steps. You can also use Canva to crop pictures into various shapes. The same pictures can then be inserted into Google Slides. We hope you were able to fit images in shapes using this tutorial.
Next up: If you don’t like the masking features offered by Google Slides, you should check five websites that let you crop your pictures into shapes. Check the next link for the same.
Was this helpful?
Last updated on 02 February, 2022
Read Next
 How to Give an Image a Perfect Round Shape Using Word, Paint
It’s frustrating that there is no option whatsoever to crop an image in round shapes on MS Paint.
How to Give an Image a Perfect Round Shape Using Word, Paint
It’s frustrating that there is no option whatsoever to crop an image in round shapes on MS Paint.
 How to Crop an Image in Circle Shape in Paint 3D
Cropping an image is one of the basic needs while editing a picture.
How to Crop an Image in Circle Shape in Paint 3D
Cropping an image is one of the basic needs while editing a picture.
 A Complete Guide to Adding Hyperlinks in Google Slides on Mobile and PC
Creating presentations using online tools like Google Slides helps to get work done at home quickly.
A Complete Guide to Adding Hyperlinks in Google Slides on Mobile and PC
Creating presentations using online tools like Google Slides helps to get work done at home quickly.
 Top 11 Google Slides Animation Tips and Tricks to Use It Like a Pro
Presentations offer you a space to get creative.
Top 11 Google Slides Animation Tips and Tricks to Use It Like a Pro
Presentations offer you a space to get creative.
 11 Best Google Slides Tips and Tricks to Use It Like a Pro
Google Slides makes it easy to create, manage, and collaborate on presentations anywhere.
11 Best Google Slides Tips and Tricks to Use It Like a Pro
Google Slides makes it easy to create, manage, and collaborate on presentations anywhere.
 4 Best Ways to Put a Border Around a Picture in Google Slides
A presentation with just text is boring, and adding images can make it attractive.
4 Best Ways to Put a Border Around a Picture in Google Slides
A presentation with just text is boring, and adding images can make it attractive.
 Top 15 Tips to Edit Images in Google Slides
What would a presentation be without any images?
Top 15 Tips to Edit Images in Google Slides
What would a presentation be without any images?
 2 Easy Ways to Insert Equations in Google Slides
Google Slides is quickly becoming the tool of choice for many.
2 Easy Ways to Insert Equations in Google Slides
Google Slides is quickly becoming the tool of choice for many.
The article above may contain affiliate links which help support Guiding Tech. The content remains unbiased and authentic and will never affect our editorial integrity.