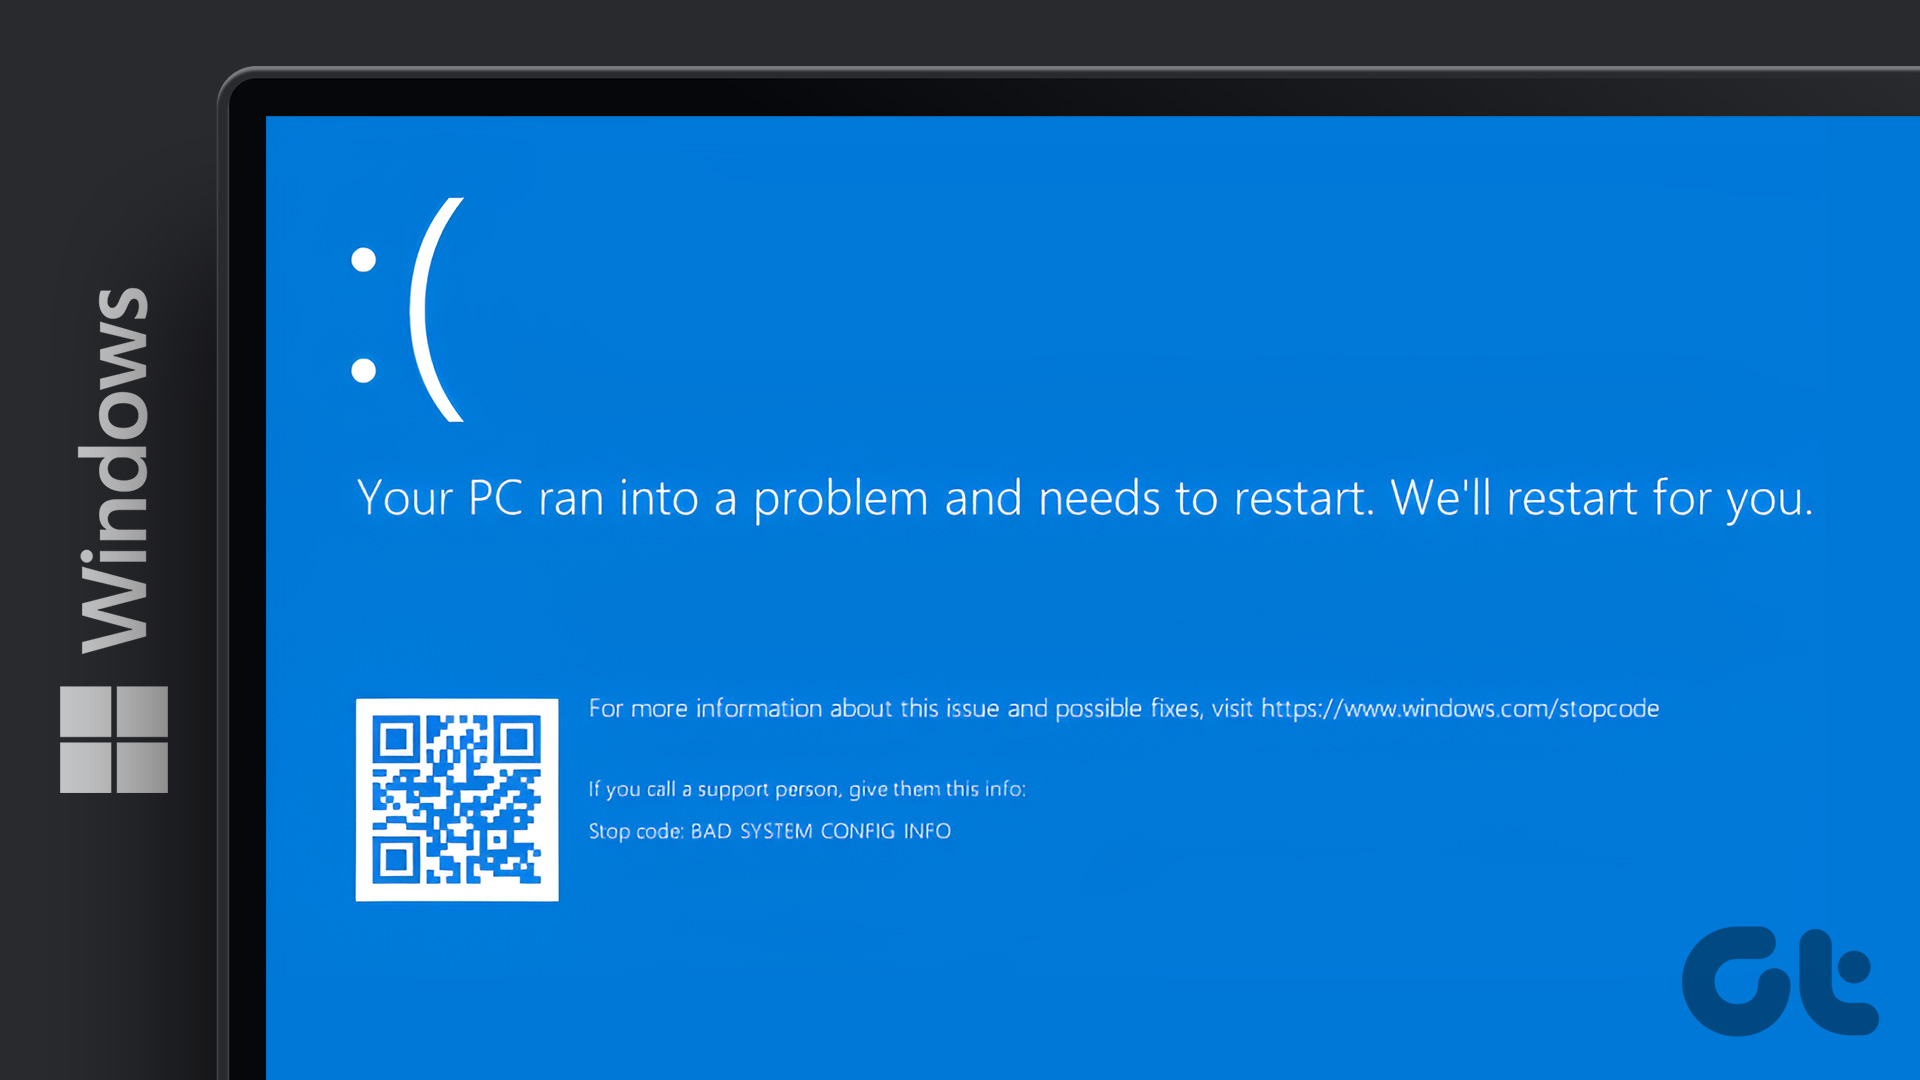
Blue Screen of Death (BSOD) is one of the most common and well-known errors in the Windows ecosystem. When it occurs, your computer displays a splash screen with details about the crash, which are also saved in a pre-defined location, before proceeding to restart your computer. In this article, we will discuss how to find BSOD log files in Windows.
There are many things that can cause BSOD, such as incompatible software, hardware that gets too hot, memory overflow, etc. Using the crash data on your computer, you can figure out what’s wrong and fix it for good. So, let’s begin by finding the BSOD dump file location on your computer.
1. How to Find BSOD Log Files in the Event Viewer Log
The Event Viewer Log is used to view the log files that store information about the start and stop of services in Windows. It lets you access the memory dumps and collect all the logs stored on your system, which can be used to search and read the BSOD log files. Here’s how.
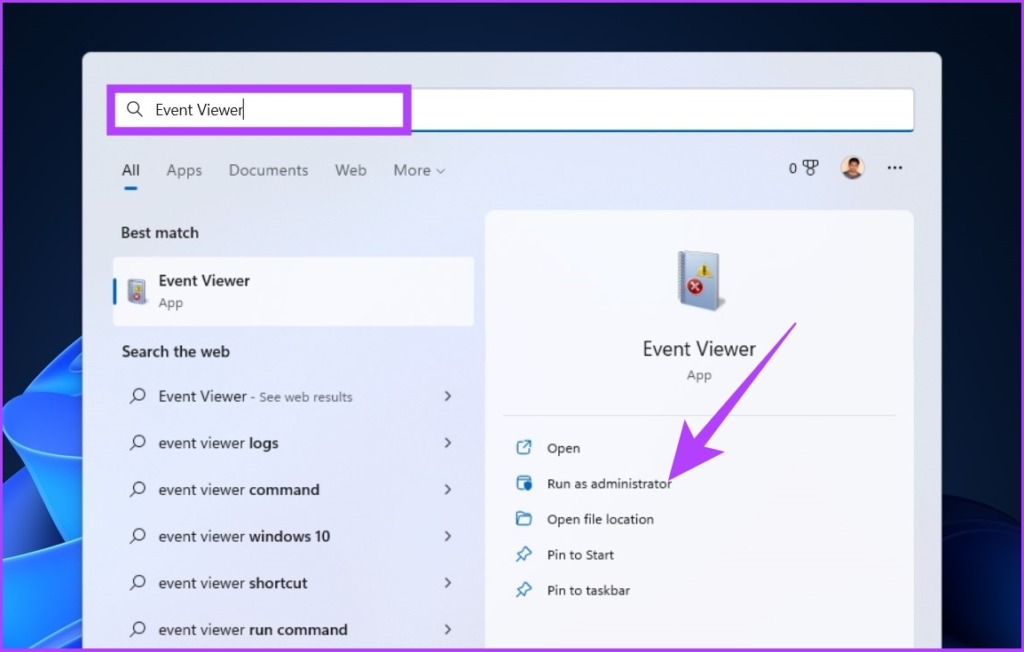
Step 1: Press the Windows key on your keyboard, type Event viewer, and click on ‘Run as administrator.’
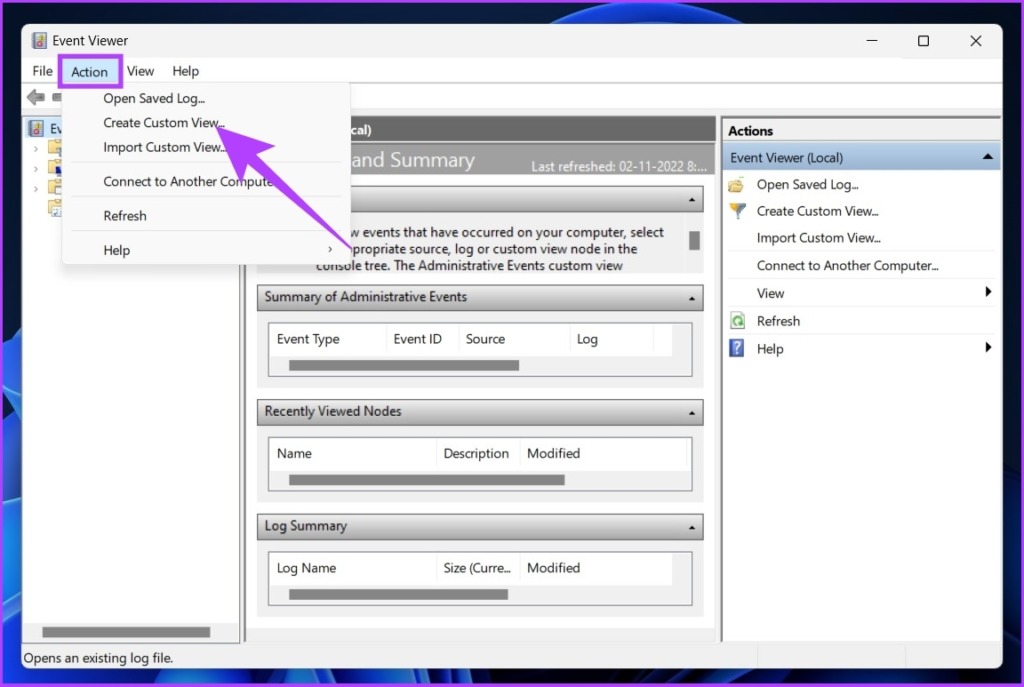
Step 2: Go to the Action tab and select ‘Create a custom view’ from the drop-down menu.
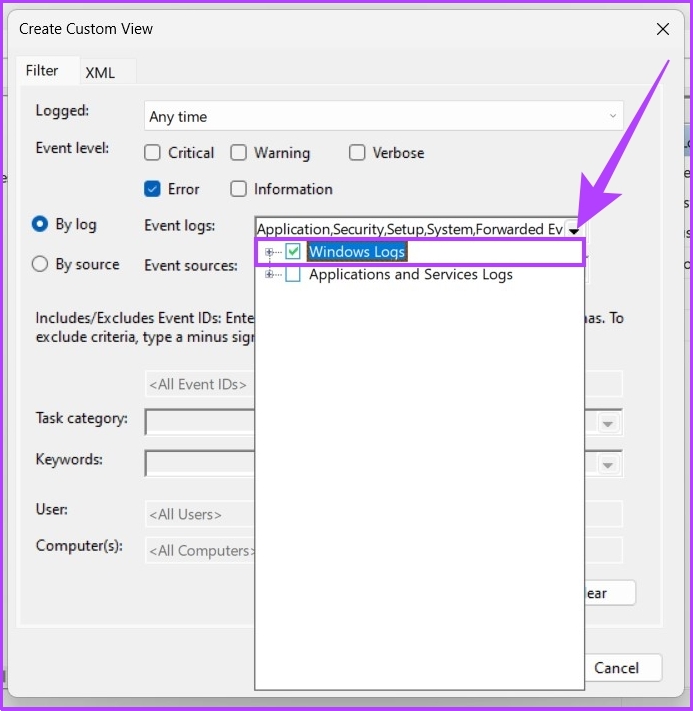
Step 3: In the new window, choose Any time as your time range in the ‘Logged’ field and select Error as the Event level.
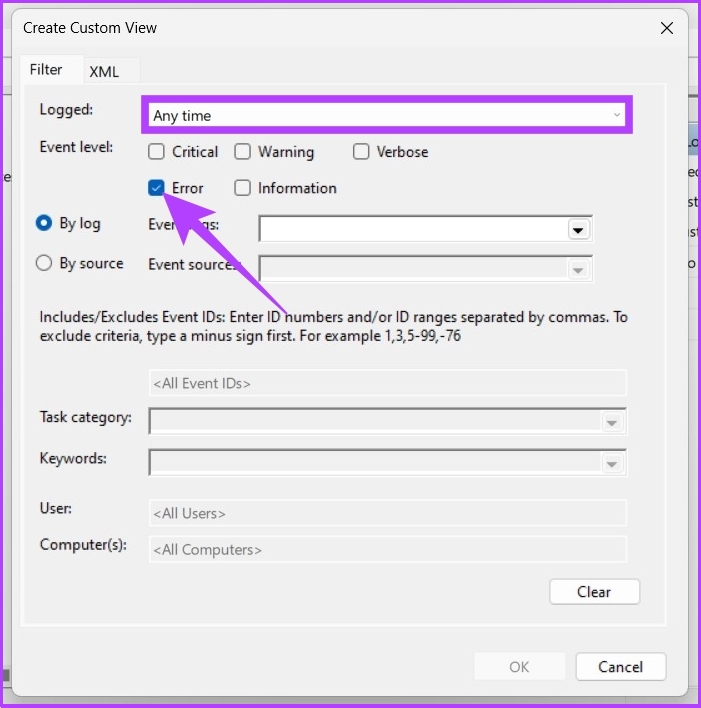
Step 4: In the Event Logs drop-down menu, select Windows Logs.
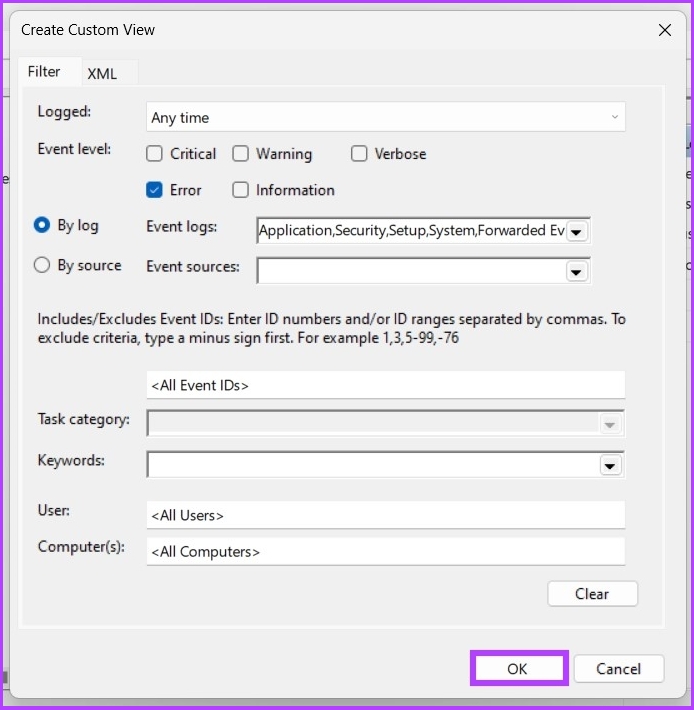
Step 5: Now, click on OK.
Step 6: In the ‘Save Filter to Custom View’ window, rename the view and click on OK.

With this, you will see all the error events in the Event Viewer. You can click on any event and go to Details to view the BSOD log to get more information.
2. View BSOD Log Files Using Reliability Monitor
It is a tool that lets users know their computer’s stability. It analyzes the app’s behavior and creates a chart about the system’s stability when running tasks. The Reliability Monitor rates stability from 1 to 10. The higher, the better. Here’s how to use it.
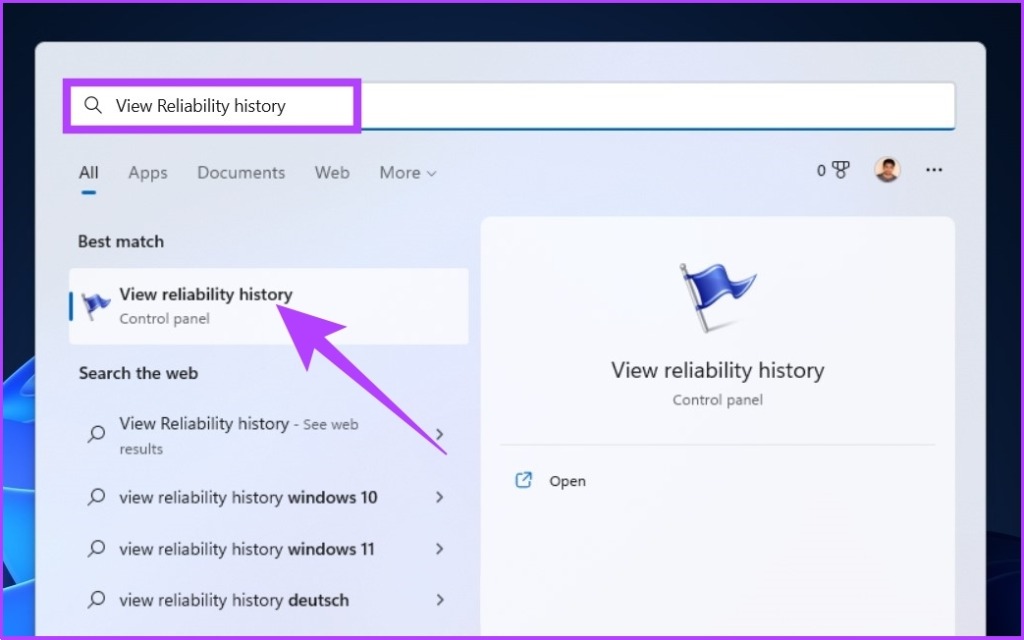
Step 1: Press the Windows key on your keyboard, type View reliability history, and press Enter.
In the Reliability Monitor window, you’ll see the reliability information displayed as a graph, with the instabilities and errors marked on the graph as points.
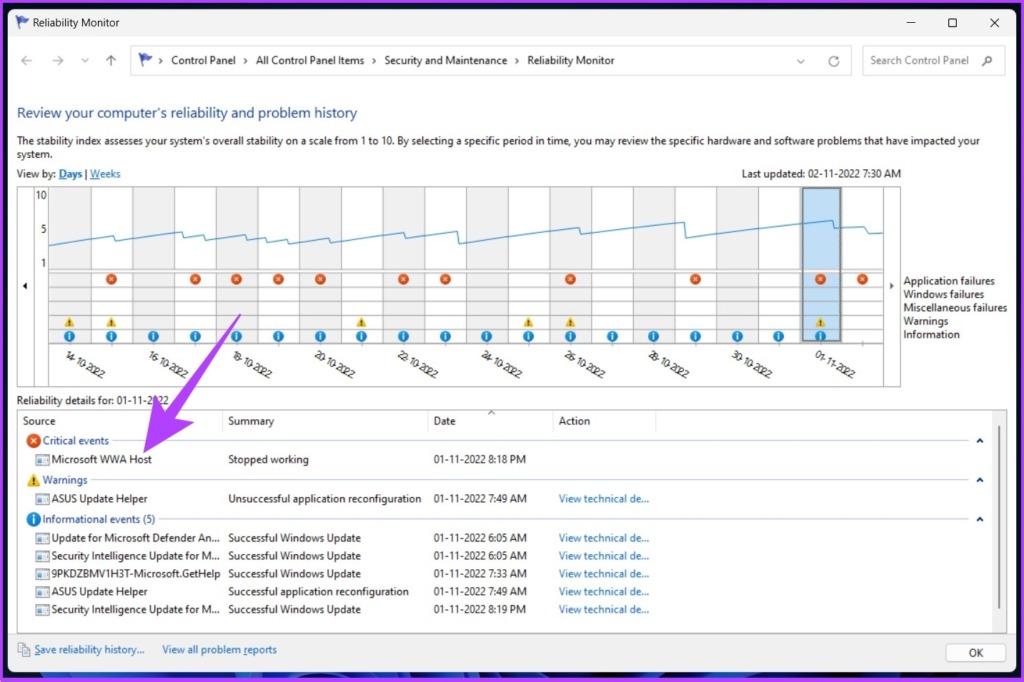
The red circle represents an error, while the ‘i’ (highlighted in yellow) represents a warning or notable event on your PC.
Step 2: You can click on the error or warning symbols to view detailed information and the exact time the error occurred.
Additionally, you can expand the details to find out more about the crash that caused the BSOD.
3. Check BSOD Log Files Using Registry Editor
It is one of the most common methods to find BSOD log files in Windows. The method involves some additional steps when compared to the above methods. Let us jump to the steps without further ado.
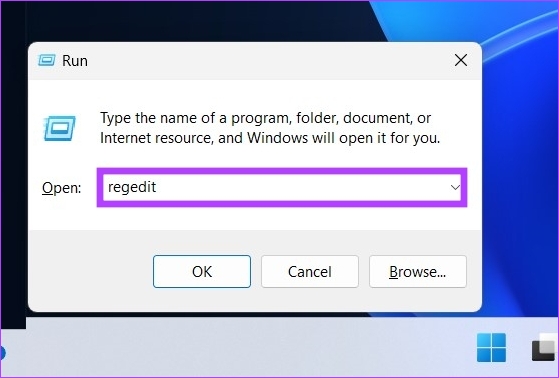
Step 1: Press ‘Windows key + R,’ type regedit, and click OK.
Select Yes in the prompt.
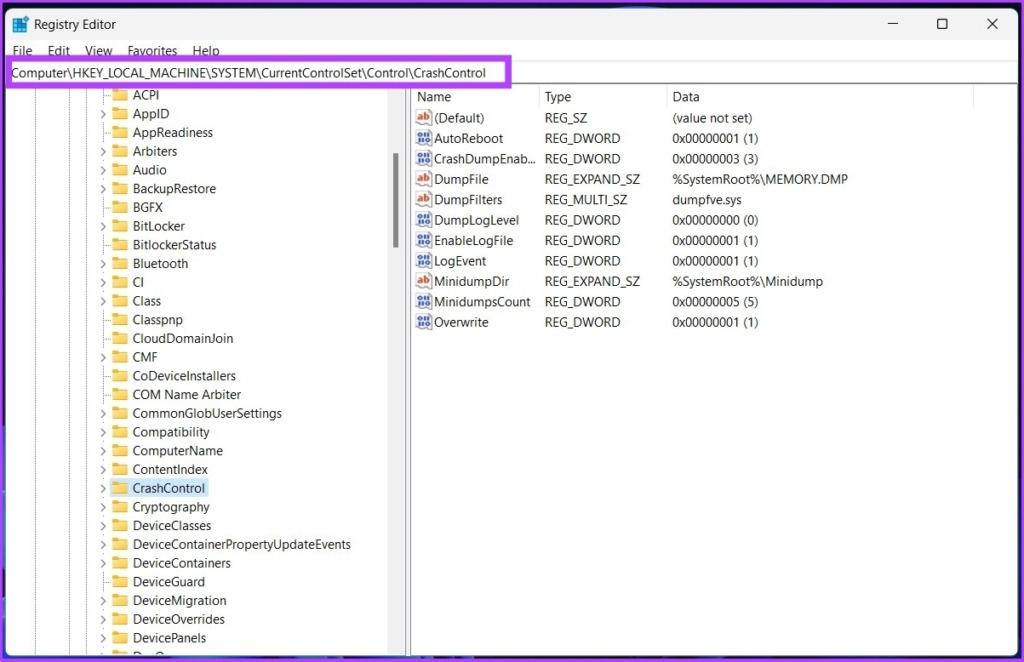
Step 2: Enter the following address in the address bar.
HKEY_LOCAL_MACHINE\System\CurrentControlSet\Control\CrashControl
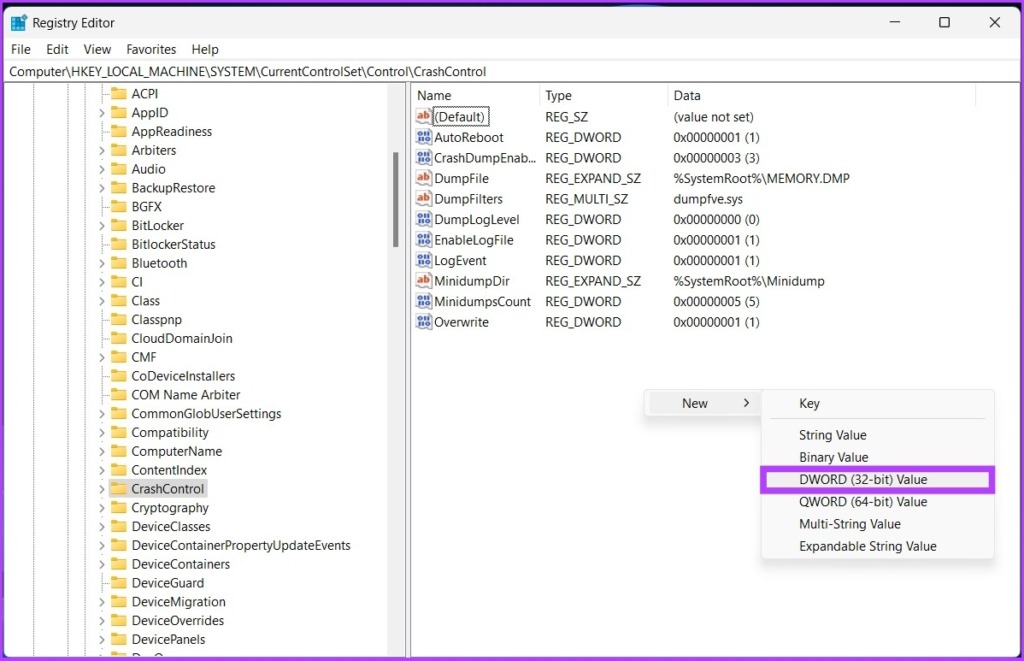
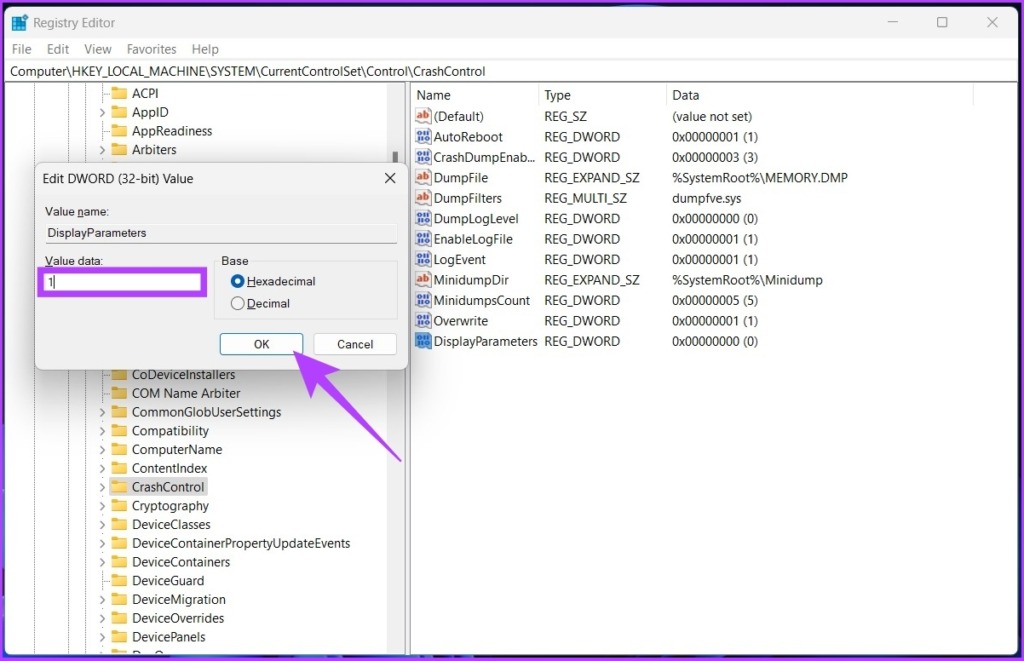
Step 3: Now, right-click on the right-side panel of the Registry Editor. Select New followed by ‘DWORD (32-bit) Value.’
Step 4: Enter the Value name as DisplayParameters and set the Value data to 1. Now, click on OK.
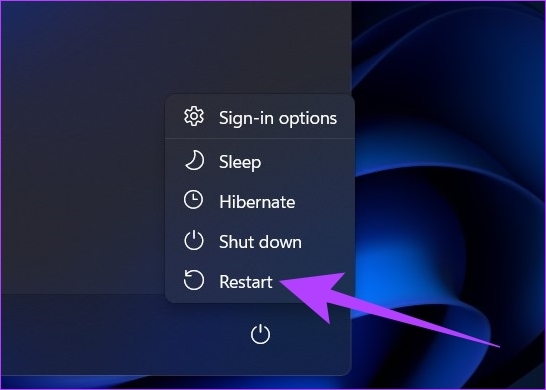
Step 5: Restart your PC to apply changes. Now, you should be able to view BSOD log files without issues.
4. Access BSOD Log Files Using a Third-Party BSOD Viewer
If the steps mentioned above seem too difficult to execute, you can use third-party event viewer applications that do exactly what the Windows Event Viewer does with fewer steps.
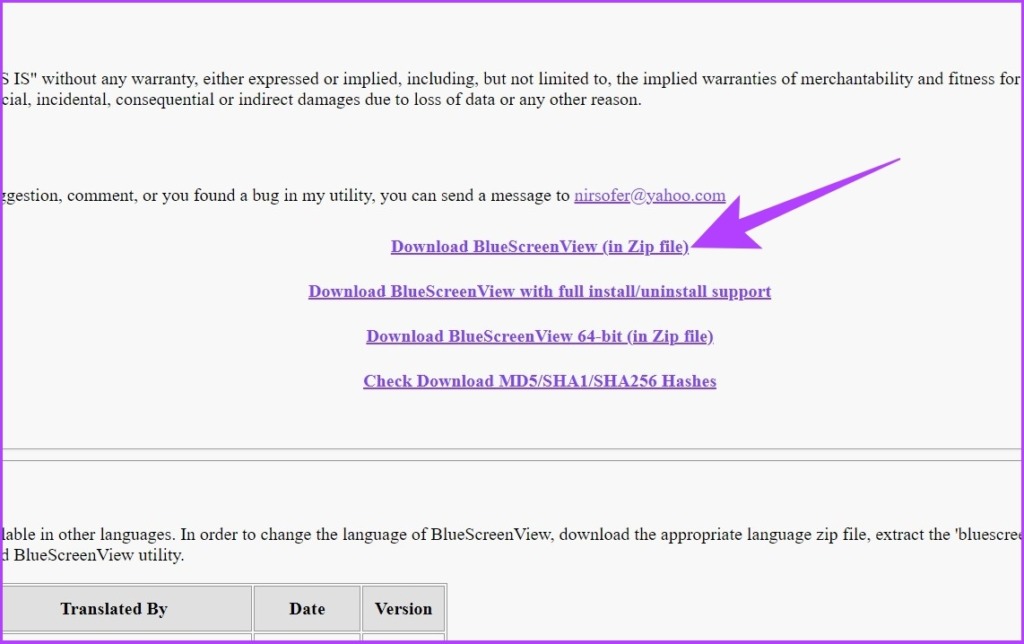
There are many applications out there, and we will be utilizing NirSoft’s BlueScreenView to detect the BSOD crash file. Follow along.
Step 1: Download BlueScreenView using the below link, install, and run it.
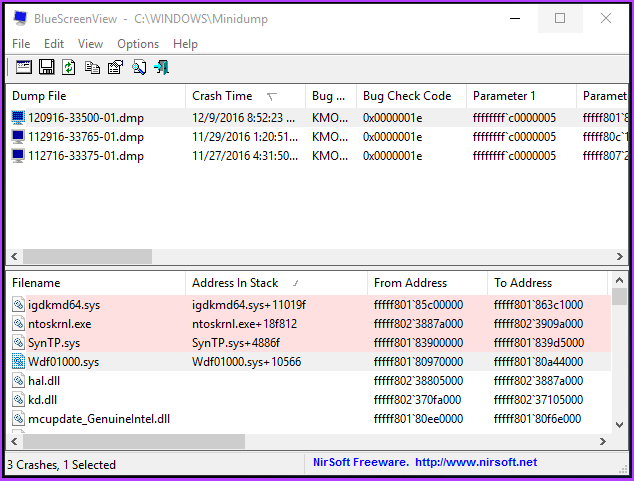
Step 2: Click on any dump files listed in the application.
This will let you view the details and understand the cause of the BSOD.
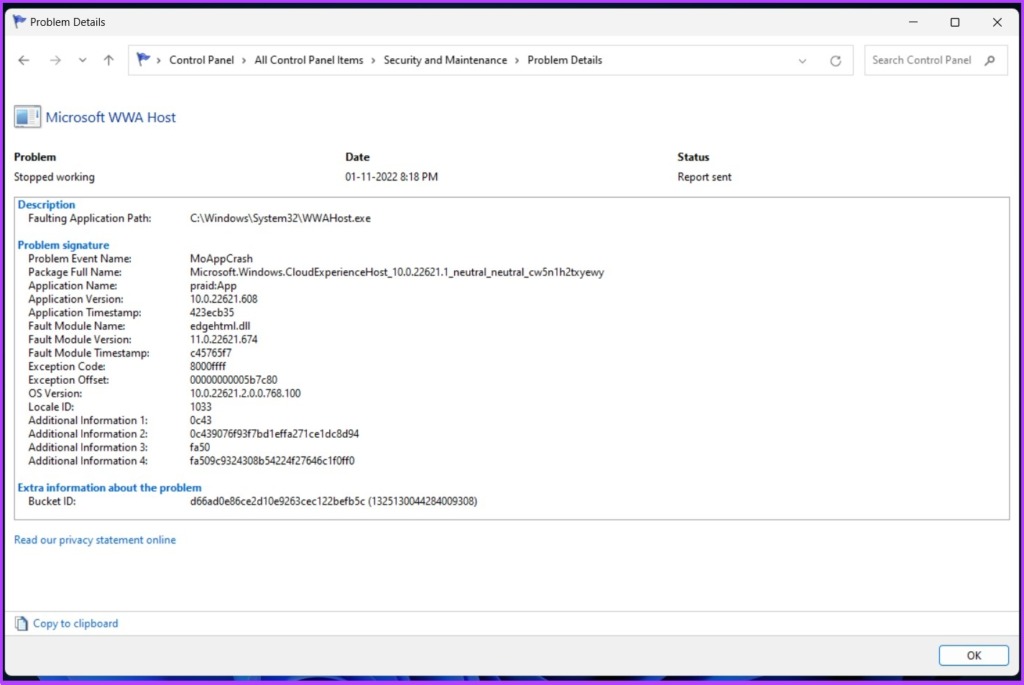
Note: The image is only for representation.
Generally, the BSOD info saved on your computer cannot be retrieved in a human-readable format, but an application like BlueScreenViewer lets you read and understand the cause of the crash too.
FAQs on BSOD Log Files
DMP is nothing but Memory Dump Files. These are snapshots of a program’s memory taken at the time of the crash.
Yes, you can do so using tools such as the Disk Cleanup utility. By deleting memory dumps, you will be able to free up more space on your hard drive.
There’s only one category of files that you should never modify, let alone delete, and that is Windows ESD installation files. However, you can delete temporary files on Windows to free up disk space.
Locating the Cause of the Crash
There are many reasons why a Windows PC crashes, but if it gives rise to a BSOD, the error code is displayed to you on the screen to help you understand the reason behind the issue. You can dig deep into BSOD dump files to find and fix the problem.
Was this helpful?
Last updated on 09 November, 2022
1 Comment
Leave a Reply
Read Next
 How to Manually Cause BSOD in Windows: 6 Step-By-Step Ways
BSOD (Blue Screen of Death) is an error screen in Windows that is displayed to signify a fatal system error that causes the Windows operating system to crash.
How to Manually Cause BSOD in Windows: 6 Step-By-Step Ways
BSOD (Blue Screen of Death) is an error screen in Windows that is displayed to signify a fatal system error that causes the Windows operating system to crash.
 Top 8 Fixes for ‘APC Index Mismatch’ BSOD Error in Windows 10 or 11
Blue screen of death (BSOD) errors can disrupt the normal functioning of a Windows computer.
Top 8 Fixes for ‘APC Index Mismatch’ BSOD Error in Windows 10 or 11
Blue screen of death (BSOD) errors can disrupt the normal functioning of a Windows computer.
 Top 9 Fixes for ‘WHEA_UNCORRECTABLE_ERROR’ BSOD in Windows 10 and 11
Windows Blue Screen of Death errors can abruptly restart your PC or get your machine stuck in a boot loop.
Top 9 Fixes for ‘WHEA_UNCORRECTABLE_ERROR’ BSOD in Windows 10 and 11
Windows Blue Screen of Death errors can abruptly restart your PC or get your machine stuck in a boot loop.
 Top 8 Fixes for ‘UNEXPECTED_KERNEL_MODE_TRAP’ BSOD in Windows
Windows encounters its fair share of BSOD errors.
Top 8 Fixes for ‘UNEXPECTED_KERNEL_MODE_TRAP’ BSOD in Windows
Windows encounters its fair share of BSOD errors.
 5 Ways to Fix Xbox App Won’t Let Me Log In on Windows 11
Fix 1: Make Sure Xbox Services Are Running The Xbox app for Windows relies on certain background services to work on your computer.
5 Ways to Fix Xbox App Won’t Let Me Log In on Windows 11
Fix 1: Make Sure Xbox Services Are Running The Xbox app for Windows relies on certain background services to work on your computer.
 Top 6 Ways to Fix Facebook Messenger Won’t Let Me Log In on Android and iPhone
The Messenger app is a key part of Facebook’s social media lineup.
Top 6 Ways to Fix Facebook Messenger Won’t Let Me Log In on Android and iPhone
The Messenger app is a key part of Facebook’s social media lineup.
 Top 9 Ways to Fix Unable to Log In to Spotify on Android and iPhone
The login experience in Spotify's mobile app isn’t always trouble-free.
Top 9 Ways to Fix Unable to Log In to Spotify on Android and iPhone
The login experience in Spotify's mobile app isn’t always trouble-free.
 10 Ways to Fix “Can’t Log Out of Facebook” Issue on Mobile and Desktop
Logging out of any social media app allows you to leave the app temporarily without any lasting implications.
10 Ways to Fix “Can’t Log Out of Facebook” Issue on Mobile and Desktop
Logging out of any social media app allows you to leave the app temporarily without any lasting implications.
The article above may contain affiliate links which help support Guiding Tech. The content remains unbiased and authentic and will never affect our editorial integrity.

Hi,
I tried your registry tweak by adding a dword key and given the value.
On Reboot, you have informed that there will be log file showing.
Nothing shows me on reboot like memory diagnosis.
Could you say, where i have to look for the log files created with this registry tweak