Many folks consider Google Docs as a tool to create and edit documents. However, it’s more than that. You can add images and perform basic image editing tasks in Google Docs too. You can even create photo collages in it. We shall share two ways to create a collage in Google Docs in this post.
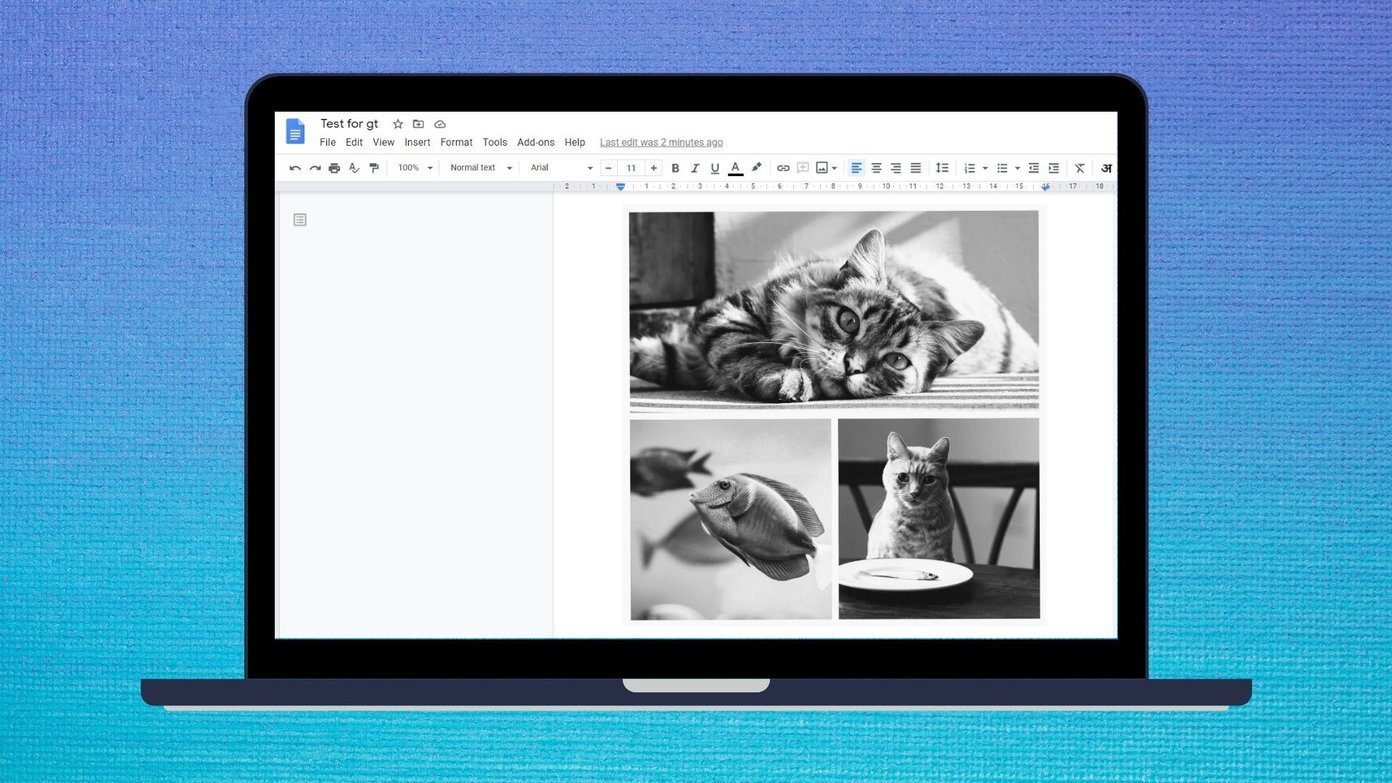
The beauty of adding a collage in Google Docs is that, firstly, it saves space, and secondly, collages are easy to move as compared to individual images. You need to move or edit one single image, i.e., a collage instead of multiple images.
Let’s check two methods to create a collage in Google Docs.
Method 1: Create Collage in Google Docs Using Google Drawings
Google Docs doesn’t offer a direct way to create a collage. You need to take the help of Google Drawings to create a collage for Google Docs. Don’t worry. You don’t even have to leave the Google Docs page. Google Drawings can be easily accessed from within any Google Docs document.
Note: This method works on the desktop only.
Let’s check the steps in detail.
Step 1: Open the Google Docs document for which you want to create a collage
Step 2: Click on the Insert option present in the top menu bar. Select Drawing from it, followed by New.
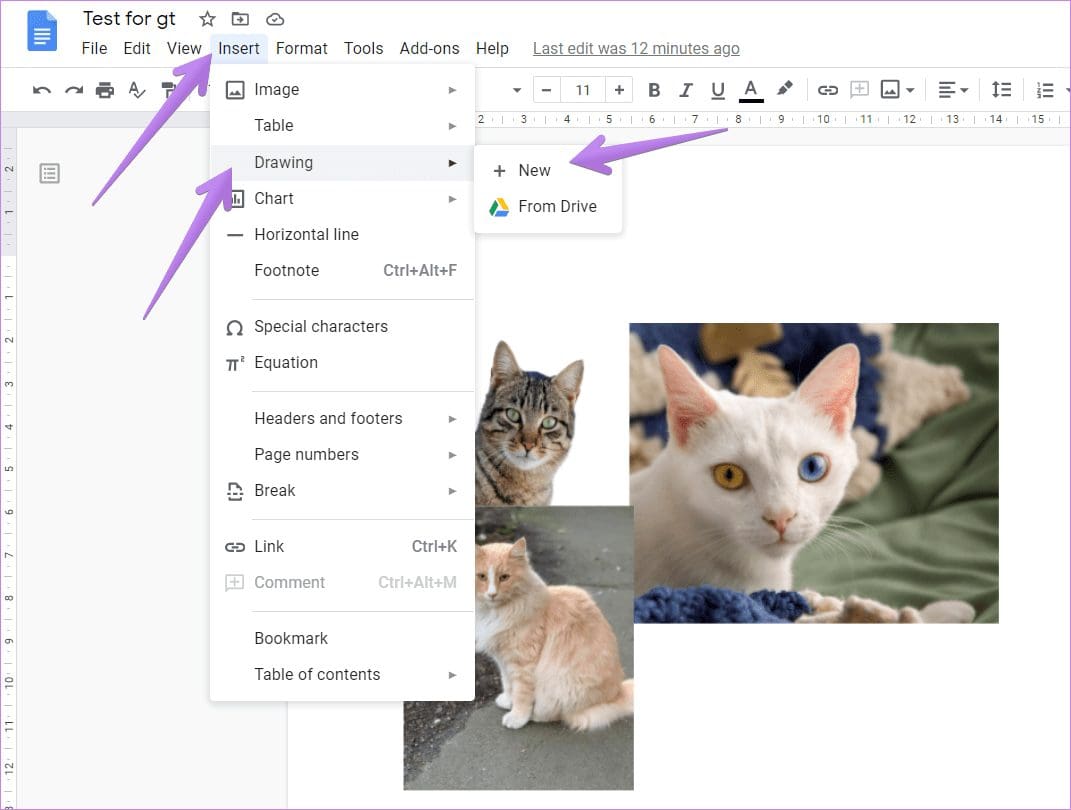
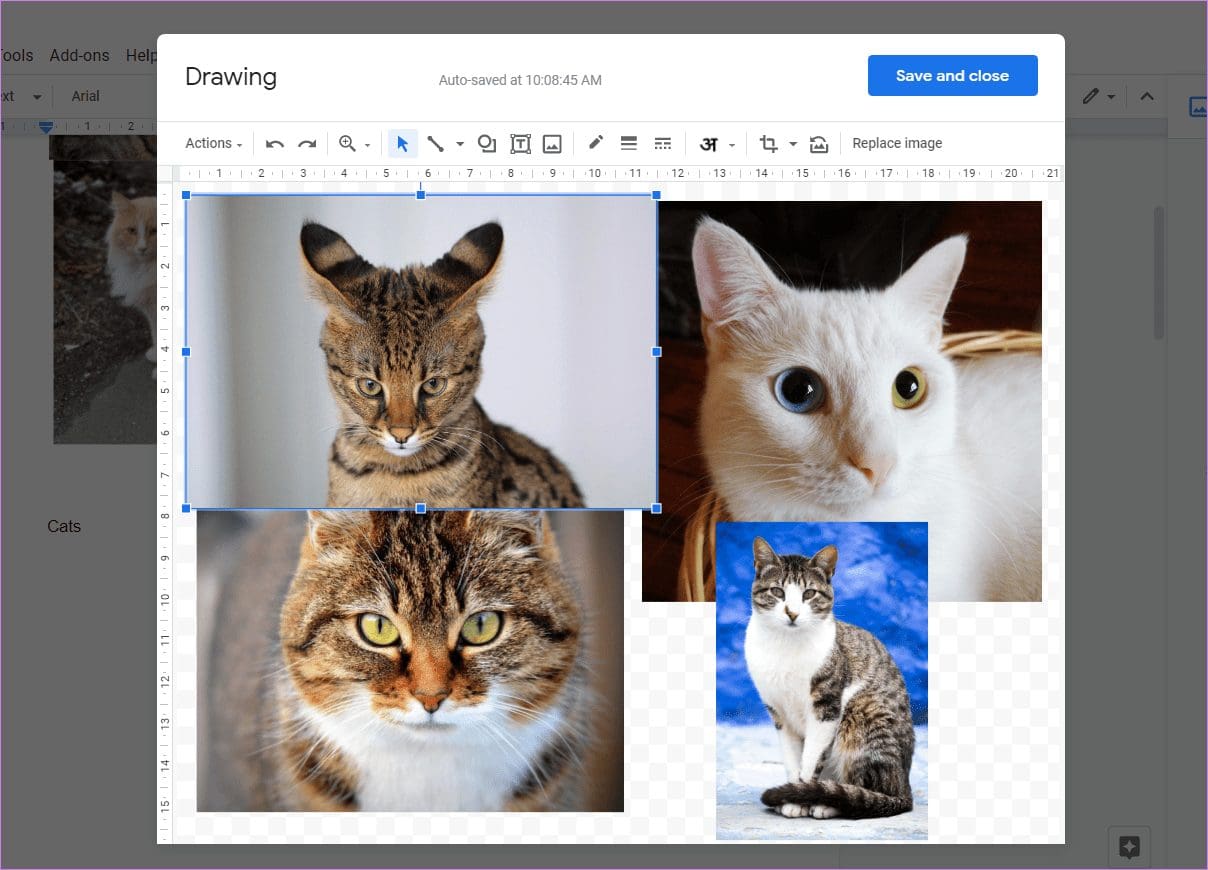
Step 3: The Drawing window will open. Click on the Image icon to add your first image for the collage.

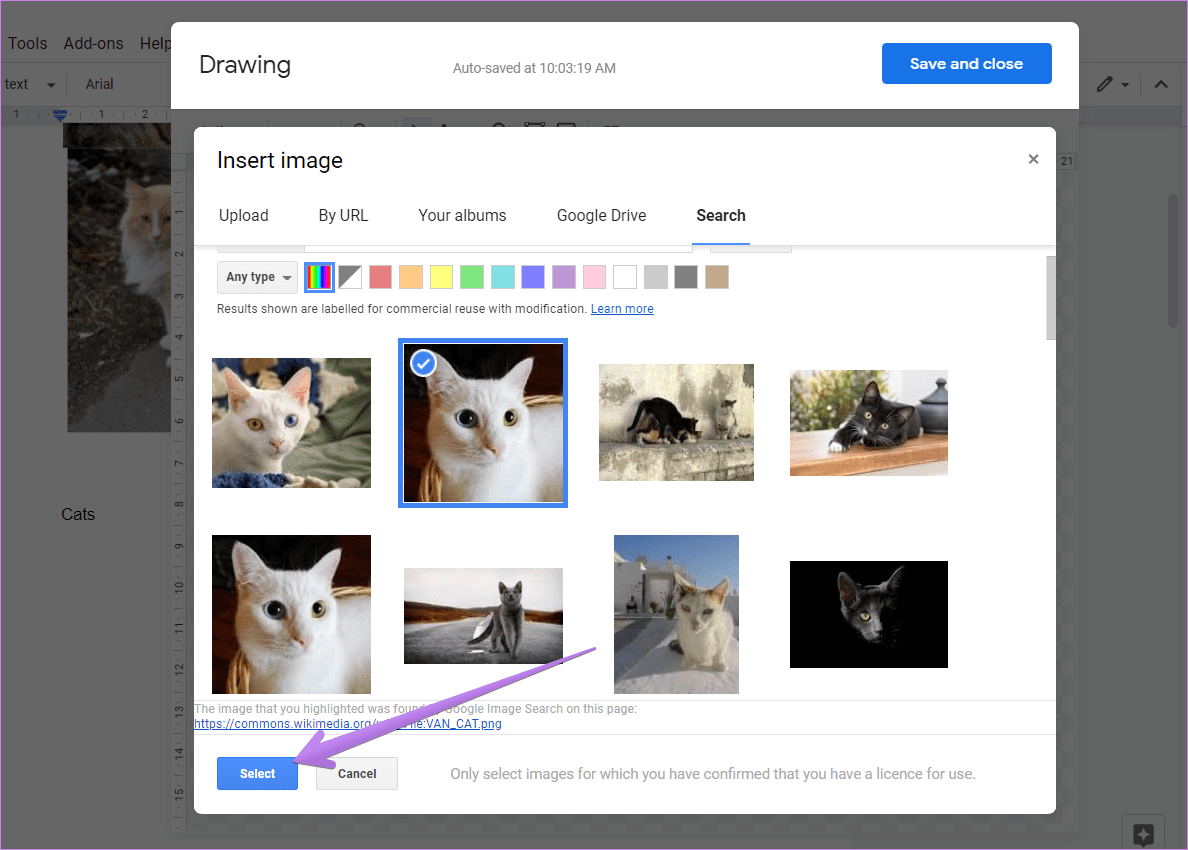
Step 4: Select the source from which you want to insert your image. You can upload from your computer, using a URL, Google albums, and Google Drive. You can even search directly on the web using the Search option. Click on the image to select it. Then, click on the Select button at the bottom.
Step 5: The image will be added to the Drawing template. Repeat steps 3 and 4 to add as many images as you like. Don’t worry if the images appear over one another.
Step 6: Once you have added all the images, you need to arrange and edit them. Here are some editing tips to make a beautiful collage in Google Docs.
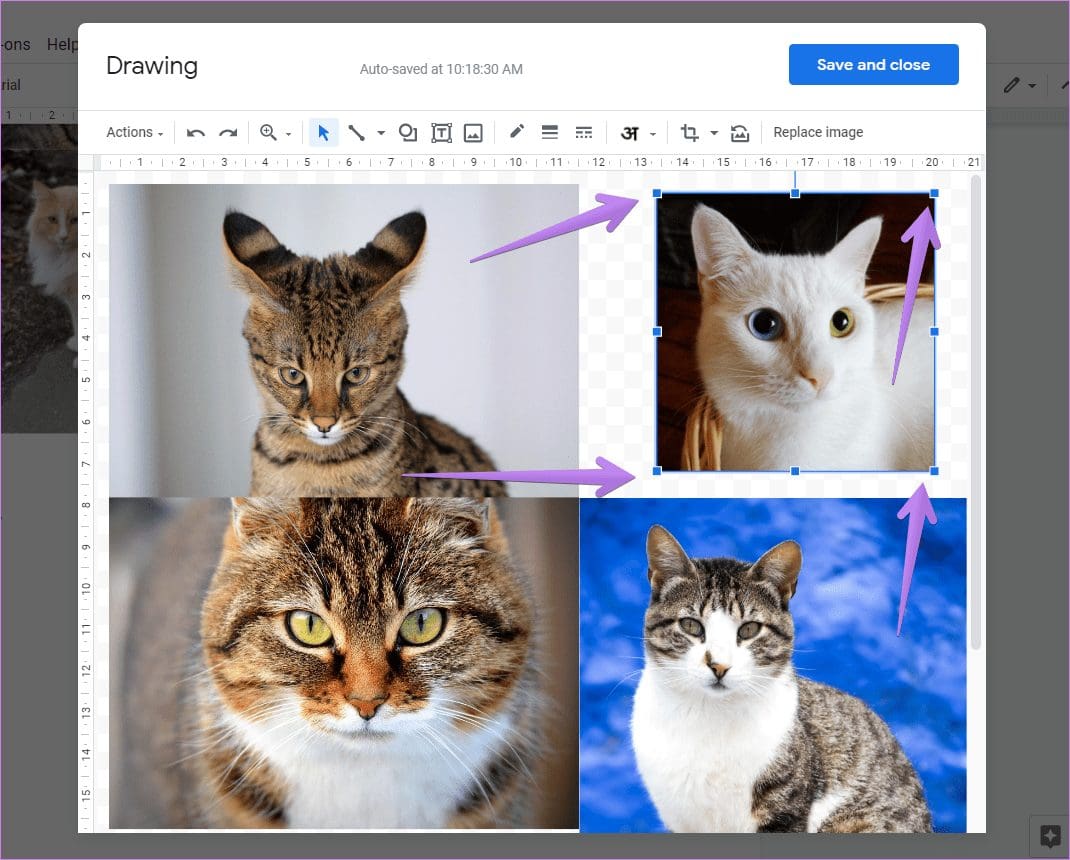
Move Image
When you add images, they might appear over one another. Just select the image that you want to move and drag it to a new location.
Resize Images
To resize an image, select the image first. A blue border along with tiny boxes will appear on the image. Using any of the four boxes available on the four edges, change the size of the image. You can use the boxes available in the center of the box as well but with that, the width height ratio of your image will not be maintained.
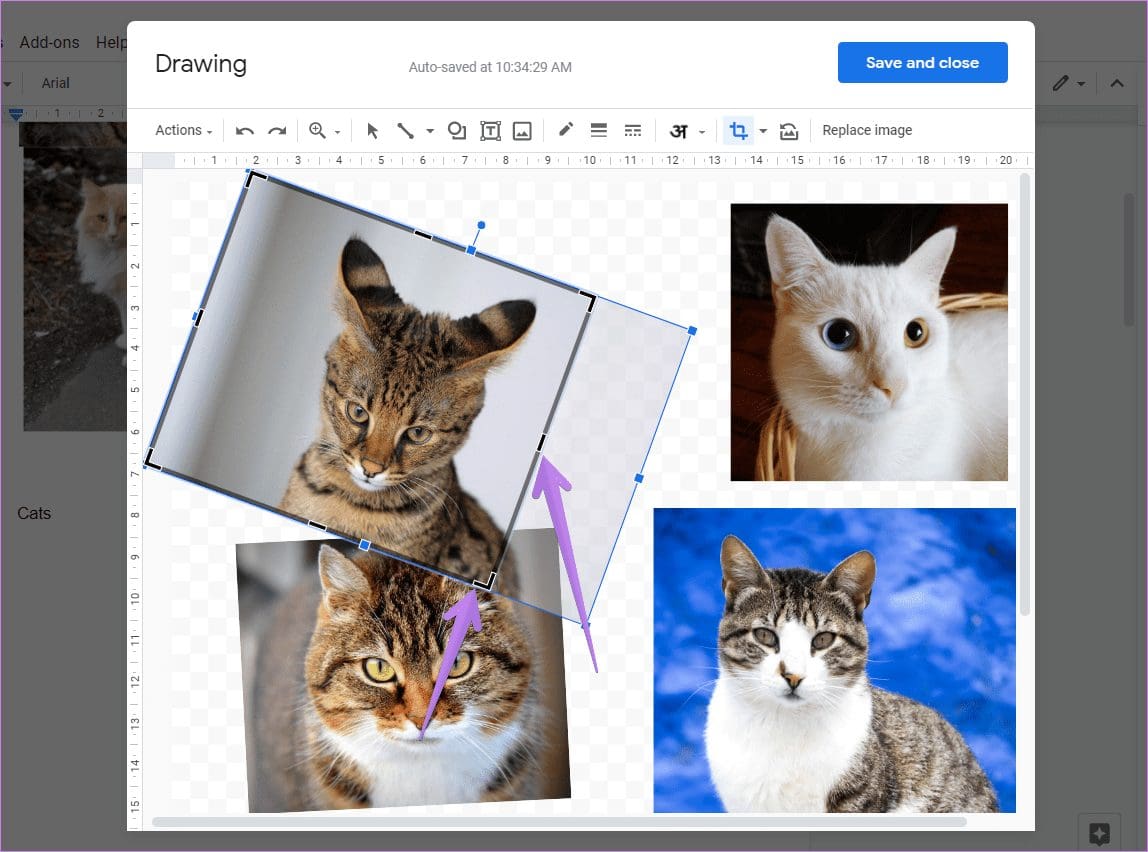
Rotate Image
Select your image and hover your mouse over the circular section of the blue box. When the cursor changes to a plus (+) sign, using your mouse rotate the image in whatever direction you want it.
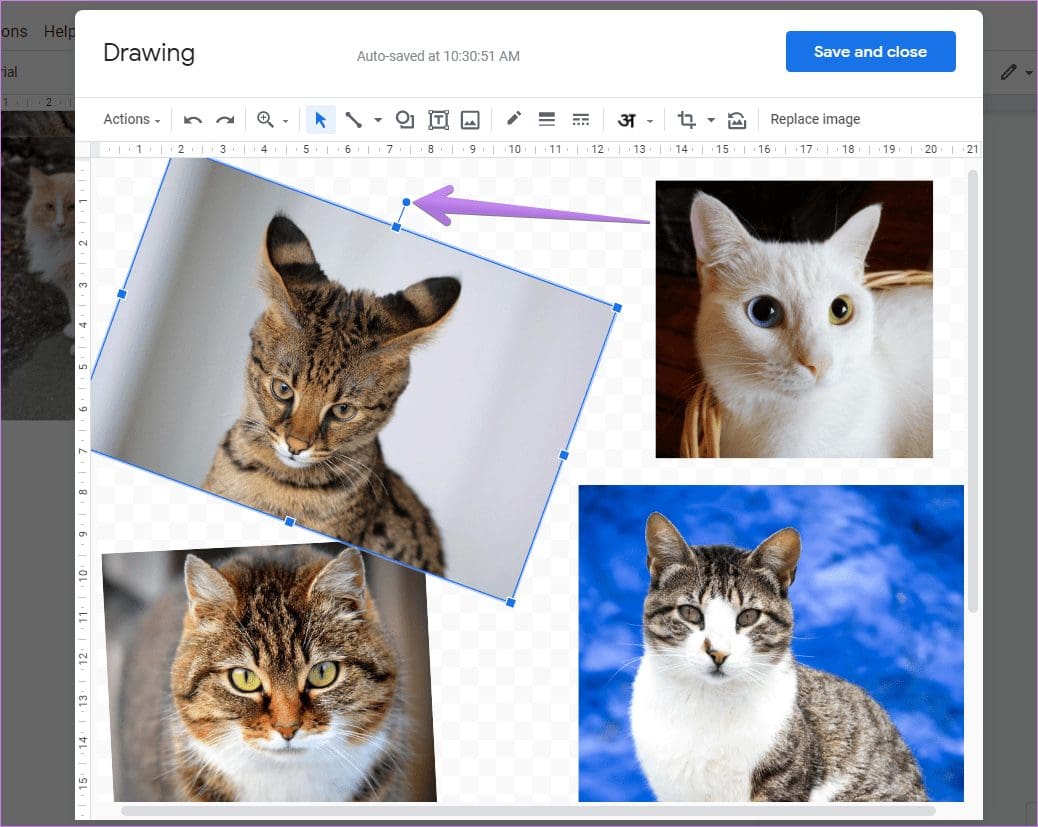
Tip: You can also right-click on the image and select the Rotate option from the menu.
Reorder Images
Sometimes, you may want to bring an image forward to another image or move it backward. For such situations, right-click on the image and select Order. Choose your desired image order from the menu.
Tip: Check out how to put an image or text on top of another image in Google Docs.
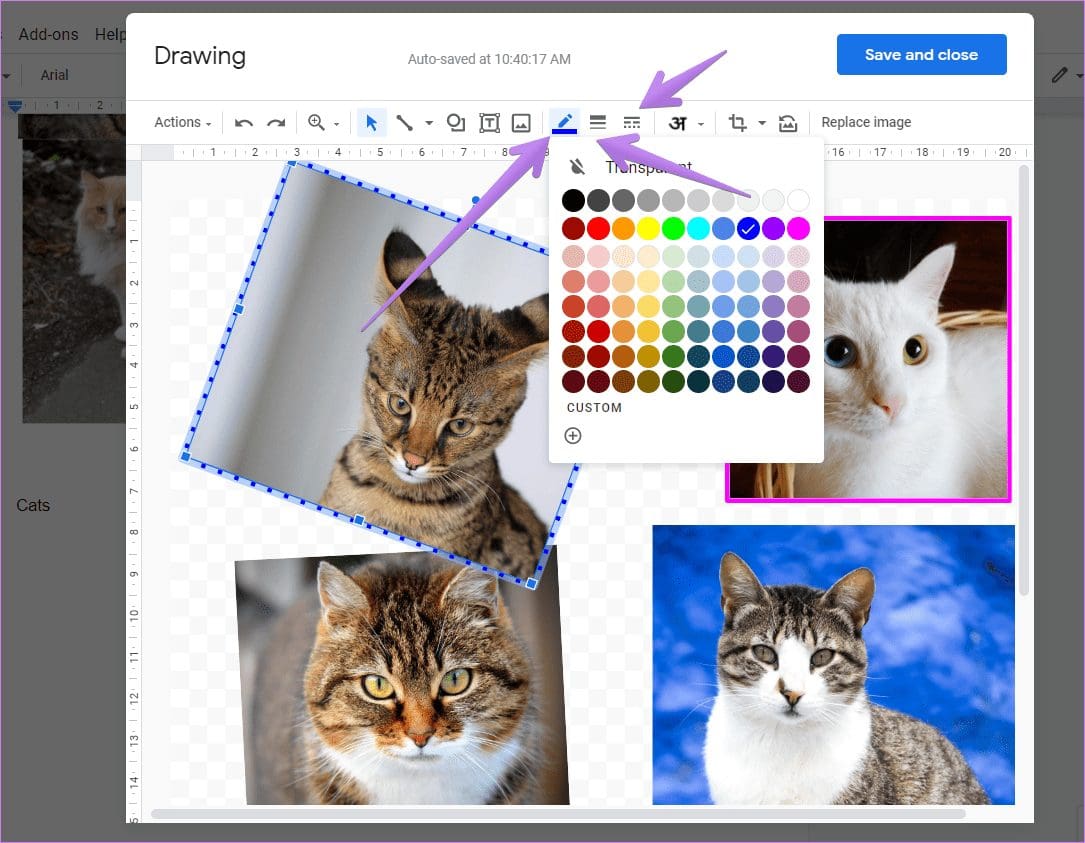
Apply Border Color, Size, and Style
If you want, you can apply individual border colors to your collage images. For that, select the image and click on the Border color icon in the menu bar. Select the color of your choice. To change the border size and style, click on the icons next to the Border icon and choose the width and style of your border.
Tip: Find out how to adjust the transparency of an image in Google Drawings.
Crop Image
If your image has an extra area, you can remove it. So, right-click on the image and select Crop from the menu. A black box will appear around the image with a few slightly darker dashes present on edge and in border’s center. Using those, drag the image inwards and hit the Enter button to crop it as per need.
Tip: You can enable Crop from the top menu bar as well.
Crop Image in a Shape
Besides regular cropping of an image, you can crop it into a shape as well. For that, select the image. Then click on the tiny arrow icon next to the Crop icon present in the top bar. Select the desired shape for your image.
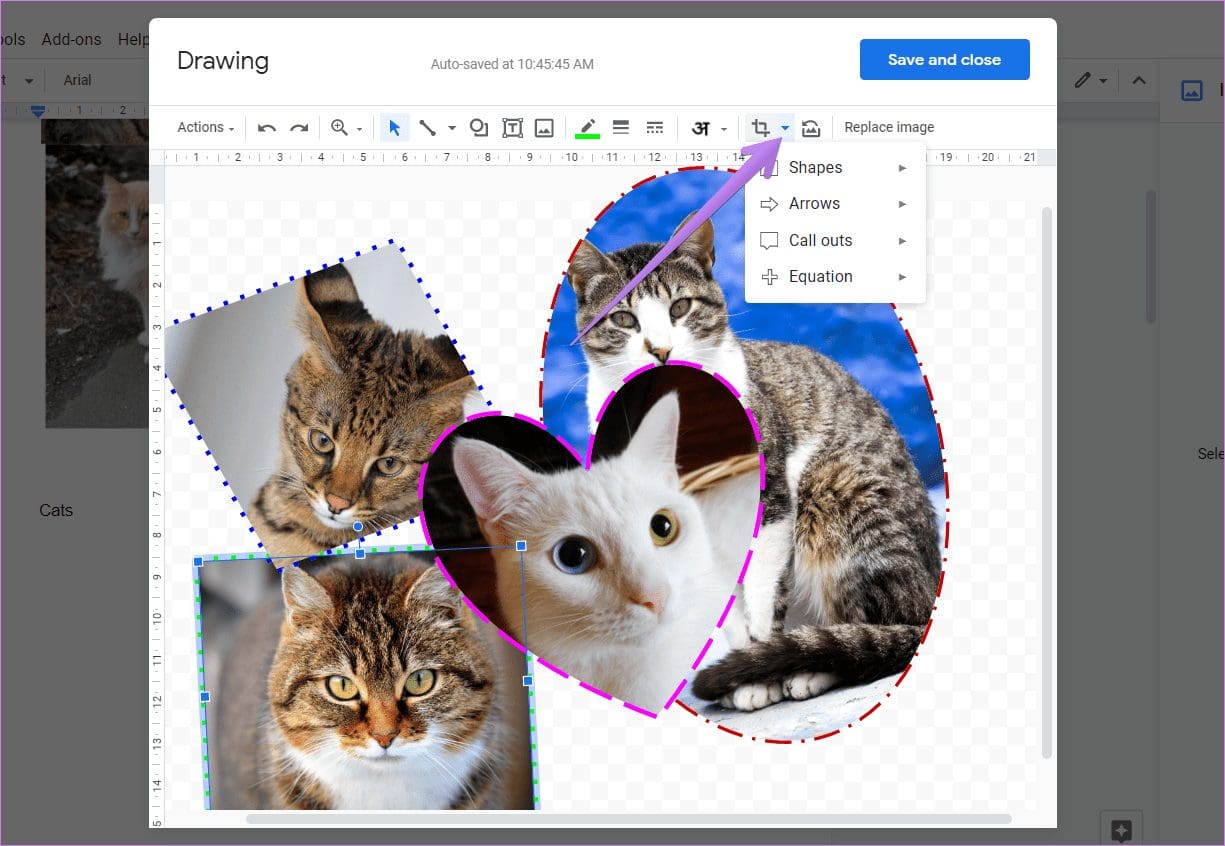
To rearrange the picture in the shape, double-click on it, and drag the image.
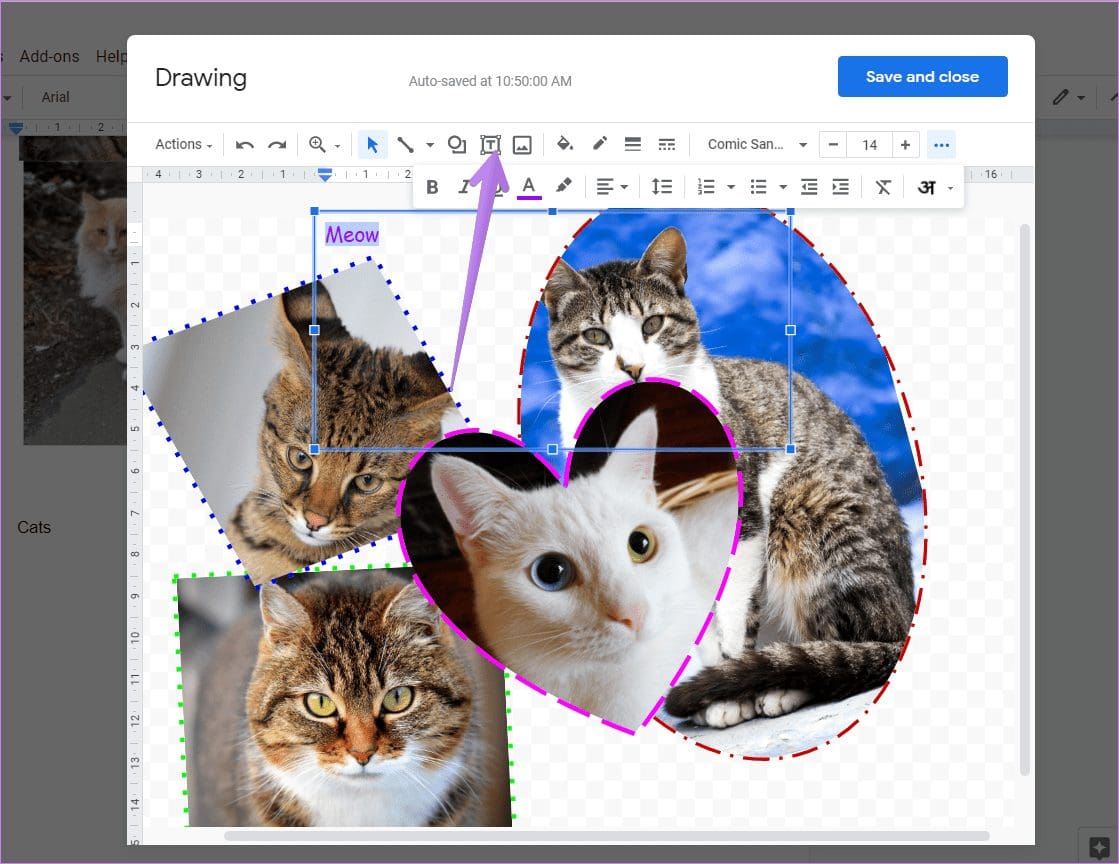
Add Text
You can also add text to your collage. For that, click on the Text icon in the top bar to activate the text mode. Then draw a typing box using your mouse and start typing inside it. Select the text to change its font style, color, etc.
Tip: Refer to our guide on how to change the background of your collage in Google Docs.
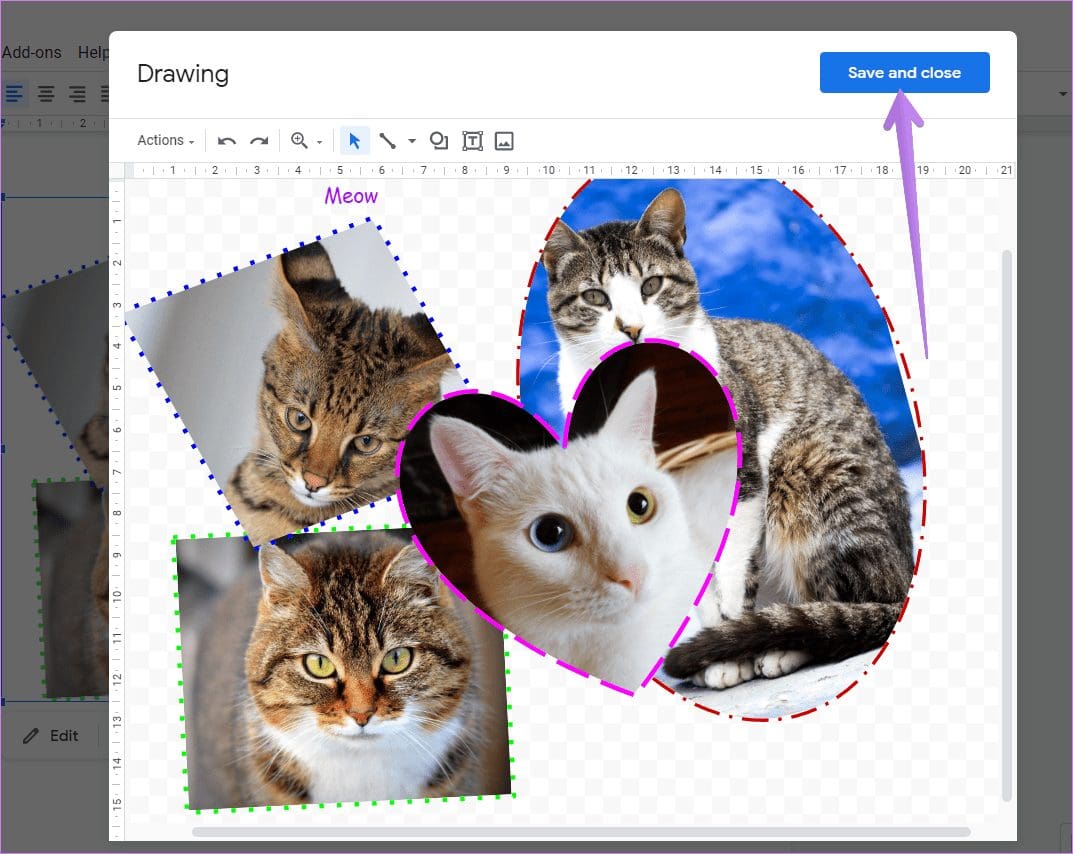
Step 7: Once your collage is ready, click on the Save and Close button at the top to insert it into your Google Docs document. You can edit your collage anytime after inserting it into the document.
Click on the Actions option and select Download > PNG/JPG if you want to download your collage and use it outside of Google Docs.
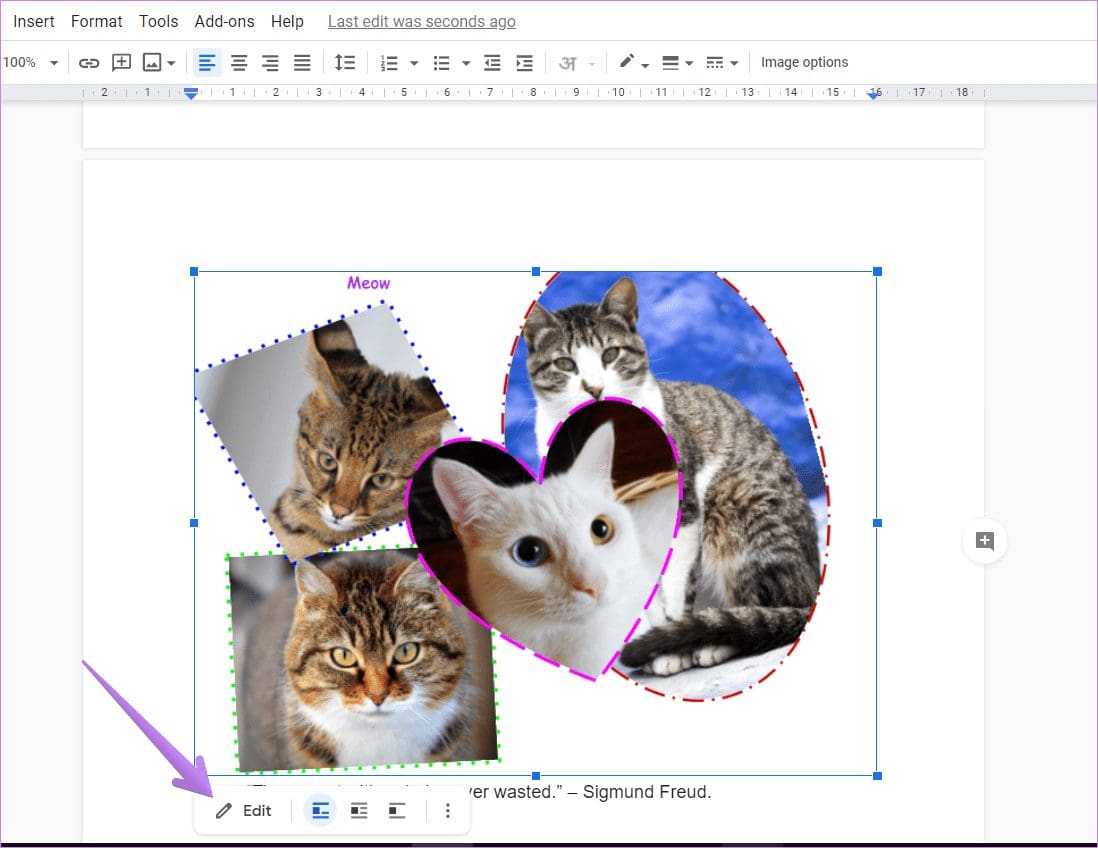
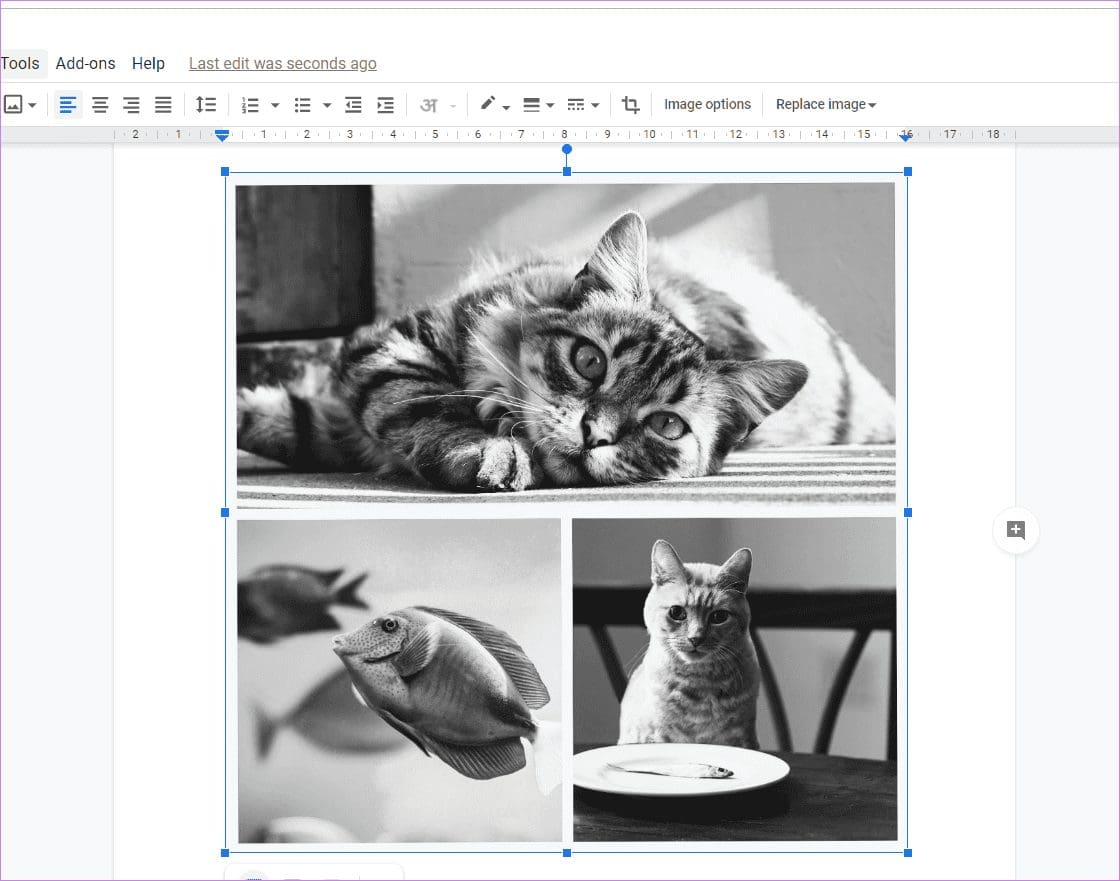
Step 8: When inserted in Google Docs, the collage will behave as a single image. You can perform further editing tasks on it just as you would do for any regular image. You can add a border, resize, move, crop, etc. In case you want to edit your collage, click on the collage and hit the Edit button. You will be taken to the Drawing screen, where you can edit it, as shown above.
That’s how you can create a collage in Google Docs.
Method 2: Using Google Photos
If you don’t like the above method or your photos are available in Google Photos, you can create a collage in Google Photos and then insert it in Google Docs. We have covered the steps for creating a photo collage in Google Photos on mobile and PC in a separate post. Do check that.
You can use this method on mobile and PC both. On PC, once you have created a collage using Google Photos, click on the Insert option in the top bar in Google Docs document and select Image followed by Photos.

Your images present in Google Photos will show up. Click on the collage that you want to add to Google Docs.

The collage will be added to your document.
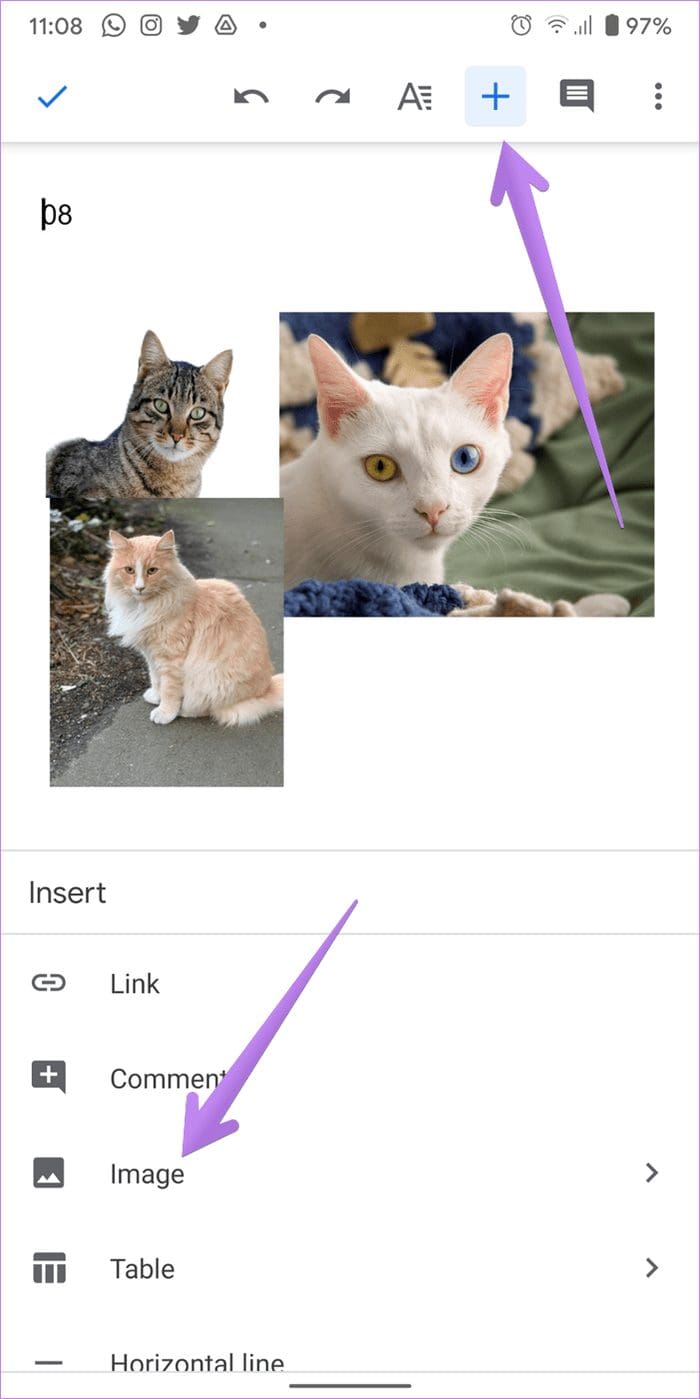
On mobile, download the collage created in Google Photos on your device first using Save to device button. Then launch the Google Docs app and open your document where you want to add the collage. Tap on the add (+) icon and select Image. Navigate to the collage that you downloaded from Google Photos on your phone.
Use Google Docs Creatively
Google Docs offers various other interesting features to customize your documents. For instance, you can even add a watermark to your collage or any other image. Similarly, you can even sign your Google Docs documents without any third-party tool.
Next up: Did you know that you can download any image from Google Docs on your mobile or computer? Check out how to do so from the next link.
Was this helpful?
Last updated on 02 February, 2022
Read Next
 4 Best Ways to Create a Fraction in Google Docs
Google Docs accommodates text and numbers in different forms such as fractions.
4 Best Ways to Create a Fraction in Google Docs
Google Docs accommodates text and numbers in different forms such as fractions.
 Top 5 Ways to Make a Collage on iPhone
Instead of jamming your social media feed with several photos from a recent trip, you can create a beautiful collage on your iPhone and share it with friends and family.
Top 5 Ways to Make a Collage on iPhone
Instead of jamming your social media feed with several photos from a recent trip, you can create a beautiful collage on your iPhone and share it with friends and family.
 How to Make a Collage on Snapchat on iPhone and Android
Snapchat is a great app to capture and share the present moment with your friends.
How to Make a Collage on Snapchat on iPhone and Android
Snapchat is a great app to capture and share the present moment with your friends.
 4 Ways to Create Desktop Shortcuts for Google Docs or Sheets
Make sure to keep the Google Docs or Sheets website open in the browser or if you want to add shortcuts of any particular file.
4 Ways to Create Desktop Shortcuts for Google Docs or Sheets
Make sure to keep the Google Docs or Sheets website open in the browser or if you want to add shortcuts of any particular file.
 How to Create a Different Header and Footer for Each Page in Google Docs
In a typical Google Docs document, the header and footer automatically appear on all the pages.
How to Create a Different Header and Footer for Each Page in Google Docs
In a typical Google Docs document, the header and footer automatically appear on all the pages.
 How to Create a Fillable Form in Google Docs
Method 1: The Native Way Using Tables and Other Form Elements One of the best methods to create a form in Google Docs is to use Tables.
How to Create a Fillable Form in Google Docs
Method 1: The Native Way Using Tables and Other Form Elements One of the best methods to create a form in Google Docs is to use Tables.
 How to Create and Customize Bullet Points in Google Docs
Google Docs is a great app for ensuring optimum productivity.
How to Create and Customize Bullet Points in Google Docs
Google Docs is a great app for ensuring optimum productivity.
 How to Create and Edit Text Columns in Google Docs
By default, when you type on the Google Docs canvas, text runs horizontally from the left side of the page to the right side until it reaches the page margin.
How to Create and Edit Text Columns in Google Docs
By default, when you type on the Google Docs canvas, text runs horizontally from the left side of the page to the right side until it reaches the page margin.
The article above may contain affiliate links which help support Guiding Tech. The content remains unbiased and authentic and will never affect our editorial integrity.