Google Chrome is widely appreciated, but it isn’t immune to data corruption. Unexpected browser crashes, problematic user profiles, and buggy browser releases can all contribute to this fact. That is why it’s a great idea to take a backup of your browser’s data, such as bookmarks and passwords. In this article, we will guide you on how to export Chrome bookmarks and passwords.
There are several ways to go about backing up your Chrome bookmarks and passwords. Feasible methods include signing in to a Google account, exporting data to an HTML or CSV file, creating copies of relevant data files, or backing up using third-party tools. Let’s take an in-depth look at all the possible methods below.
Before we learn how to export bookmarks and passwords from Chrome, it is important to understand how to use the Chrome Sync feature to backup bookmarks and passwords; continue reading.
1. Use Chrome Sync to Take a Backup of Bookmarks and Passwords
The best way to go about taking a backup of your bookmarks and passwords is to use Chrome’s integrated Sync functionality. Provided that you have a Google account, you can easily sign in and set up Chrome Sync to back up your data to the Google servers.
With Chrome Sync, not only do you have a complete backup of your bookmarks and passwords, but you also get to sync the data between devices. Furthermore, Chrome Sync will continuously back up your data, which means that you always have an up-to-date backup of your bookmarks and passwords.
Step 1: Click the profile icon on the upper-right corner of the Chrome window, and then select Turn On Sync.

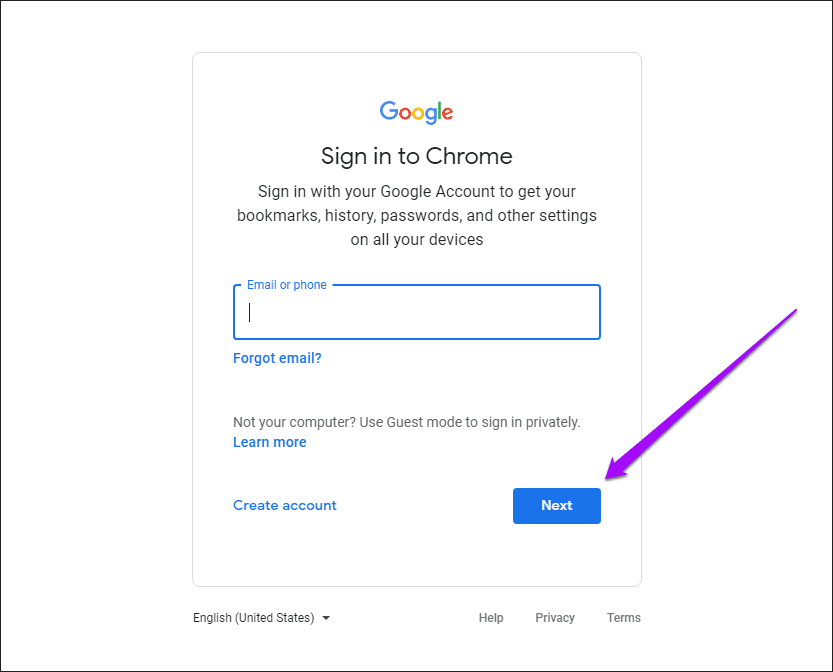
Step 2: Insert your Google Account credentials to sign in to the web browser.
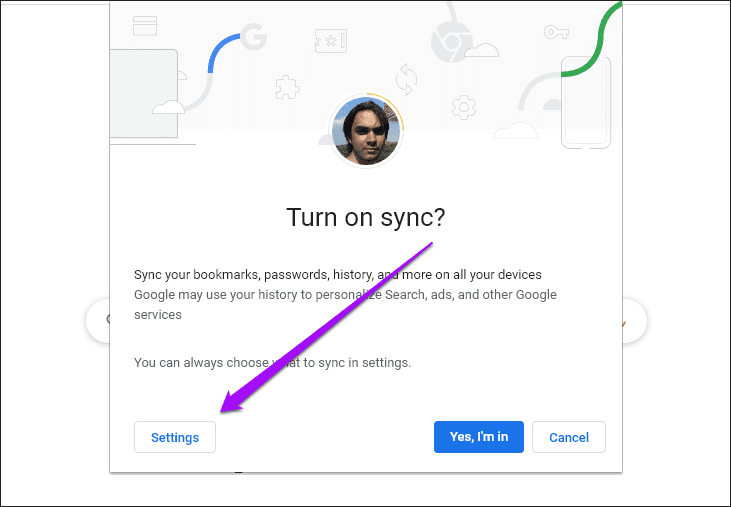
Step 3: Click the Settings option when prompted to turn on Chrome Sync.
Step 4: Select the forms of data that you want to back up and sync between devices—specifically bookmarks and passwords in this case.

Step 5: Click the arrow-shaped Back icon, and then click Confirm to turn on Chrome Sync.
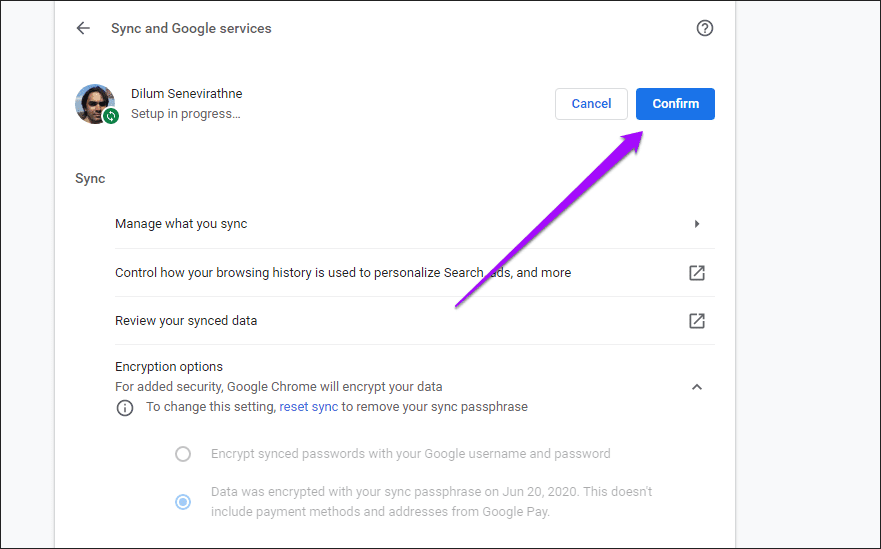
That should prompt Chrome to start backing up your bookmarks, passwords, and any other forms of specified data. Chrome Sync will also update your data accordingly whenever you make any additions or modifications. To access your data on another device, simply sign in to Chrome with your Google account.
Note: If you were already signed in with a Google Account, open the Chrome menu, and then click Settings > Sync and Google Services > Manage What You Sync to review the Chrome Sync settings.
You can also use Chrome Sync on the Android and iOS versions of Google Chrome to back up your bookmarks and passwords. Check out our complete Chrome Sync guide for more details.
2. Export Bookmarks and Passwords to an HTML or CSV File
Google Chrome lets you easily export your bookmarks and passwords to the HTML and CSV formats, respectively. This method is perfect if you don’t like using a Google Account. It also serves as a perfect means to create offline backups of bookmarks and passwords at any particular moment, even if you have Chrome Sync enabled.
Exports Bookmarks to an HTML File
Step 1: Open the Chrome menu, point to Bookmarks, and then click Bookmark Manager.

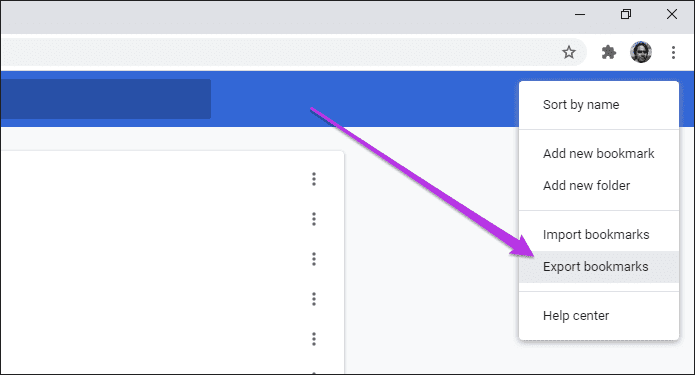
Step 2: Click the three-dot icon to the upper-right corner of the Chrome window.

Step 3: Select the option labeled Export Bookmarks.
Step 4: Specify a location within local storage to export the bookmarks to, and then click Save.
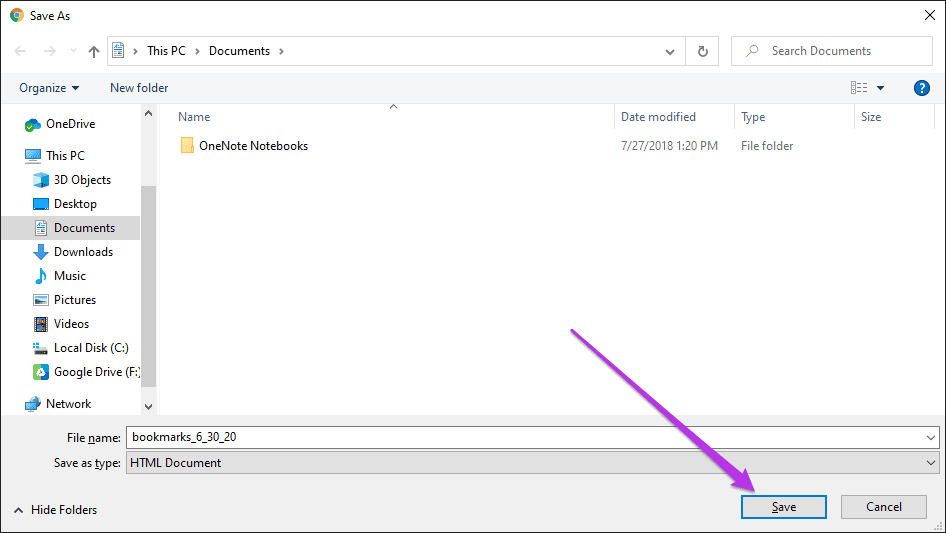
You can use the exported HTML file to import bookmarks back to Chrome or other supported browsers on any desktop device.
Note: The Android and iOS versions of Chrome do not offer the option to export bookmarks as an HTML file. However, you can use Chrome Sync to sync your bookmarks from your mobile to a desktop, and then export them to an HTML file using the steps above.
Exporting Passwords to a CSV File
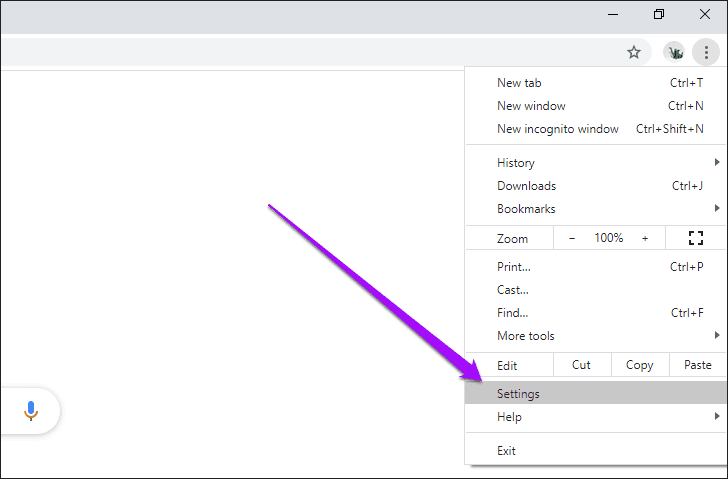
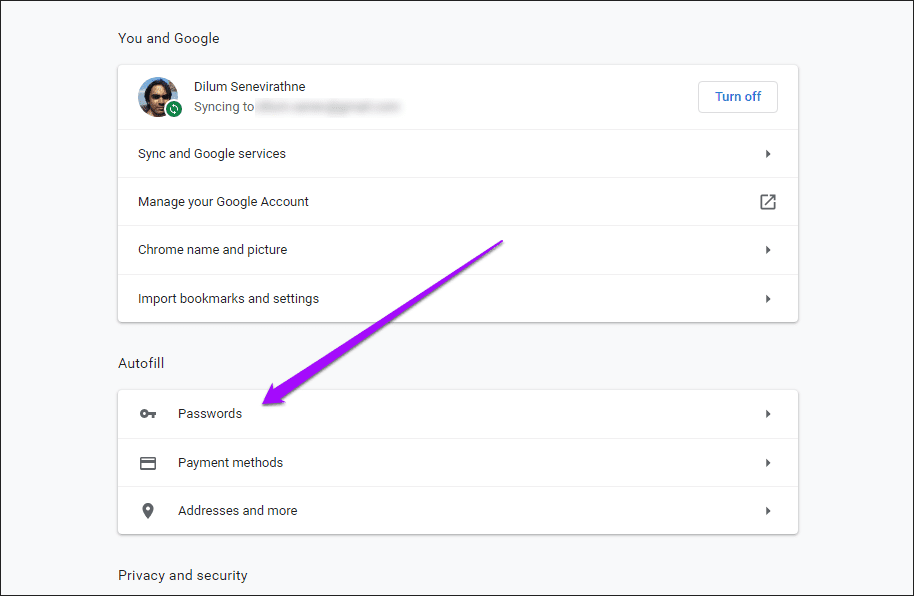
Step 1: Open the Chrome menu, and then click Settings.
Step 2: Click Passwords.
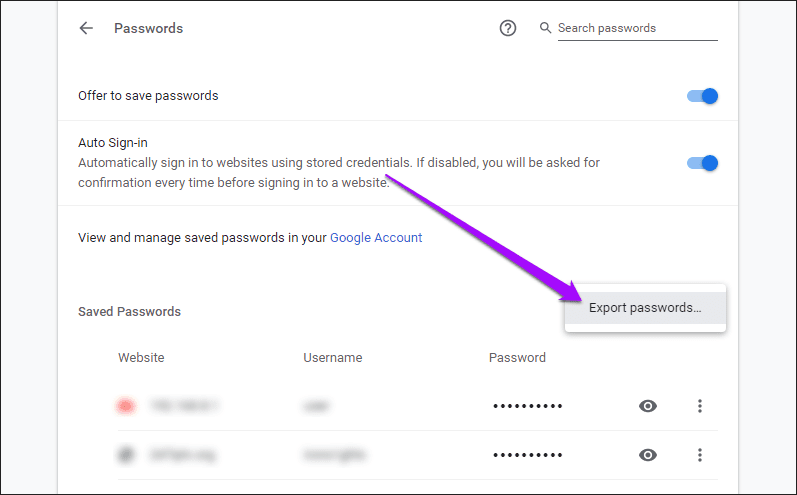
Step 3: Click the three-dot icon next to Saved Passwords.

Step 4: Click Export Passwords.
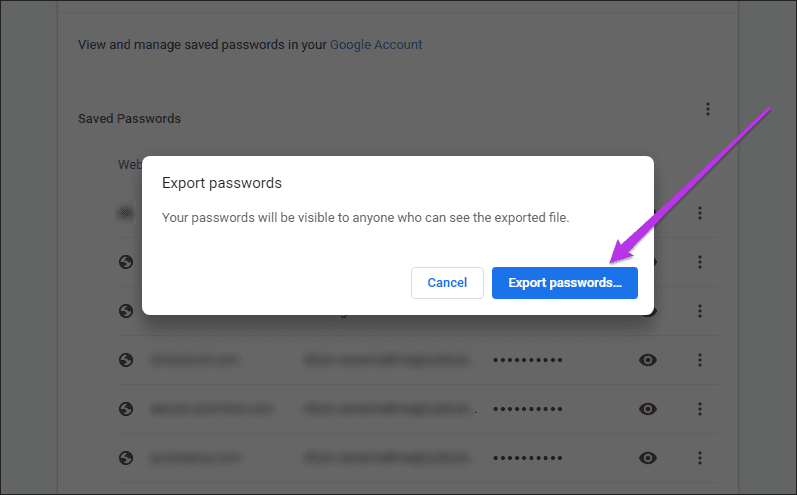
Step 5: Click Export Passwords to confirm.
Step 6: Specify a destination, and then click Save.

You can import the data within the CSV file to Chrome or other supported browsers on any desktop device. It’s also possible to read the contents within a CSV file using a spreadsheet program.
Exporting passwords to the CSV format is largely the same on Android and iOS. You can refer to our guide on exporting Chrome passwords to CSV.
3. Copy Chrome Bookmarks and Passwords Storage Files
You can copy the files that store your bookmarks and passwords in the Windows and macOS versions of Chrome. But there’s a catch—you can only use the bookmarks file, but not the passwords file, if you want to restore your data to different devices or operating system profiles. This happens due to the encrypted nature of the file that holds your passwords—it can only be used with the same device/operating system profile that it was originally created in.
Step 1: Go to the folder that stores your Chrome data:
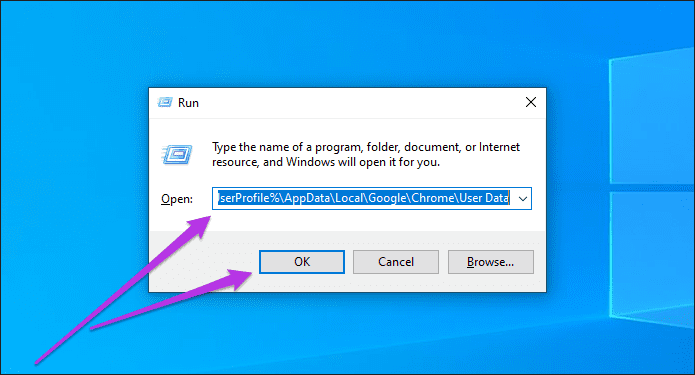
Windows — press Windows+R to open Run, copy and paste the folder path below, and then click OK.
%UserProfile%\AppData\Local\Google\Chrome\User Data
macOS — press Cmd+Space to open Spotlight Search, copy and paste the folder path below, and then click OK.
~/Library/Application Support/Google/Chrome/
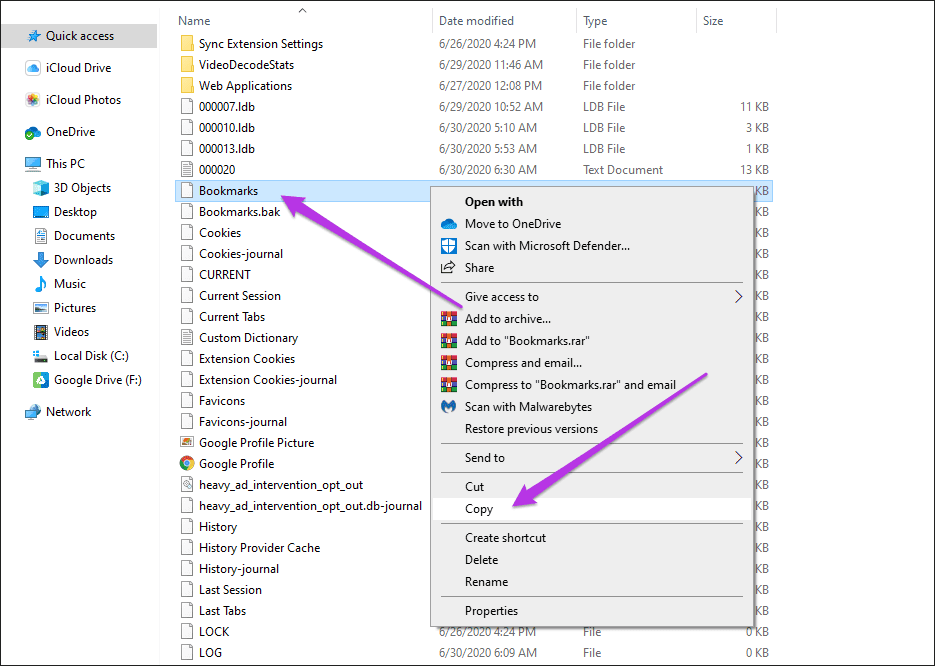
Step 2: Double-click the folder labeled Default to access the contents of your Chrome profile.

Note: If you have multiple profiles in Chrome, the related profile folders will appear as Profile 1, Profile 2, Profile 3, and so on.
Step 3: Copy the file labeled Bookmarks to create a backup of your bookmarks.
Step 4: Copy the files labeled Login Data and Login Data-journal to back up your passwords.
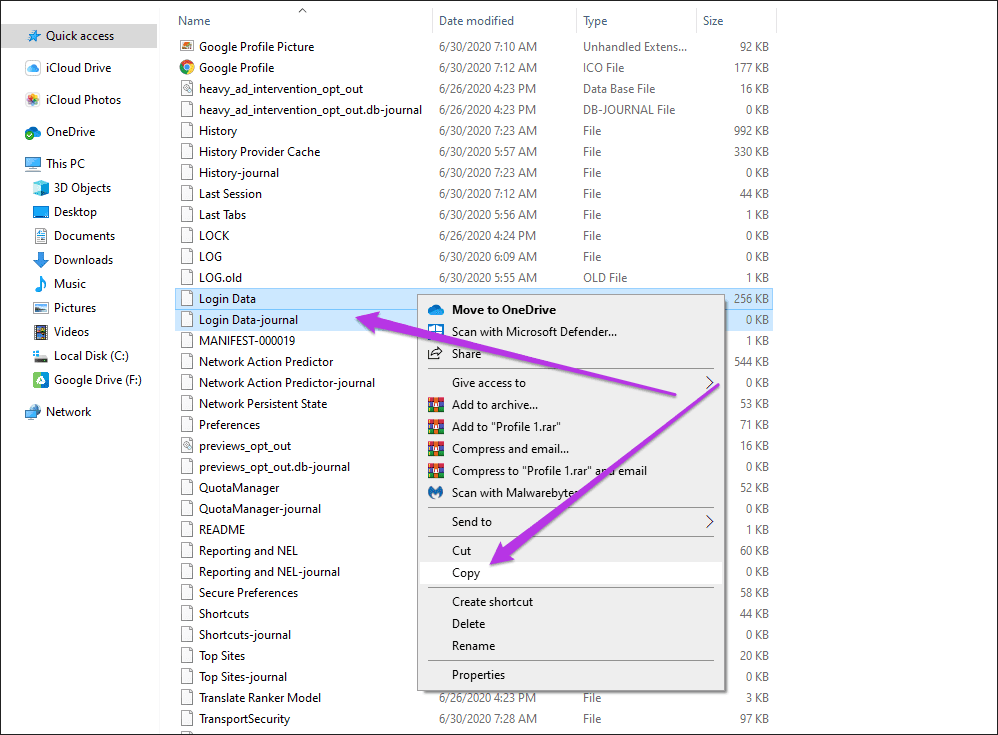
Once again, remember that you can’t use the Login Data and Login Data-journal files to restore your passwords on a different device or operating system profile. If you don’t just want to save Chrome bookmarks but also want to export passwords, keep reading.
4. Export Chrome Bookmarks and Passwords Using Third-Party Tools
While Chrome itself offers a built-in feature to export bookmarks, exporting passwords directly is restricted for security reasons. Third-party tools, like ChromePass, chrome-export-passwords, EaseUS Todo Backup, etc., provide a workaround for this limitation. Follow the below steps.
Note: For demonstration, we will go with the EaseUp Todo Backup tool. If you want, you can use any of the mentioned tools.
Step 1: Go to EaseUS’s official website from your preferred browser. Click the Free Download button to download the tool.
Step 2: Once downloaded, double-click on the installer file to install the tool.
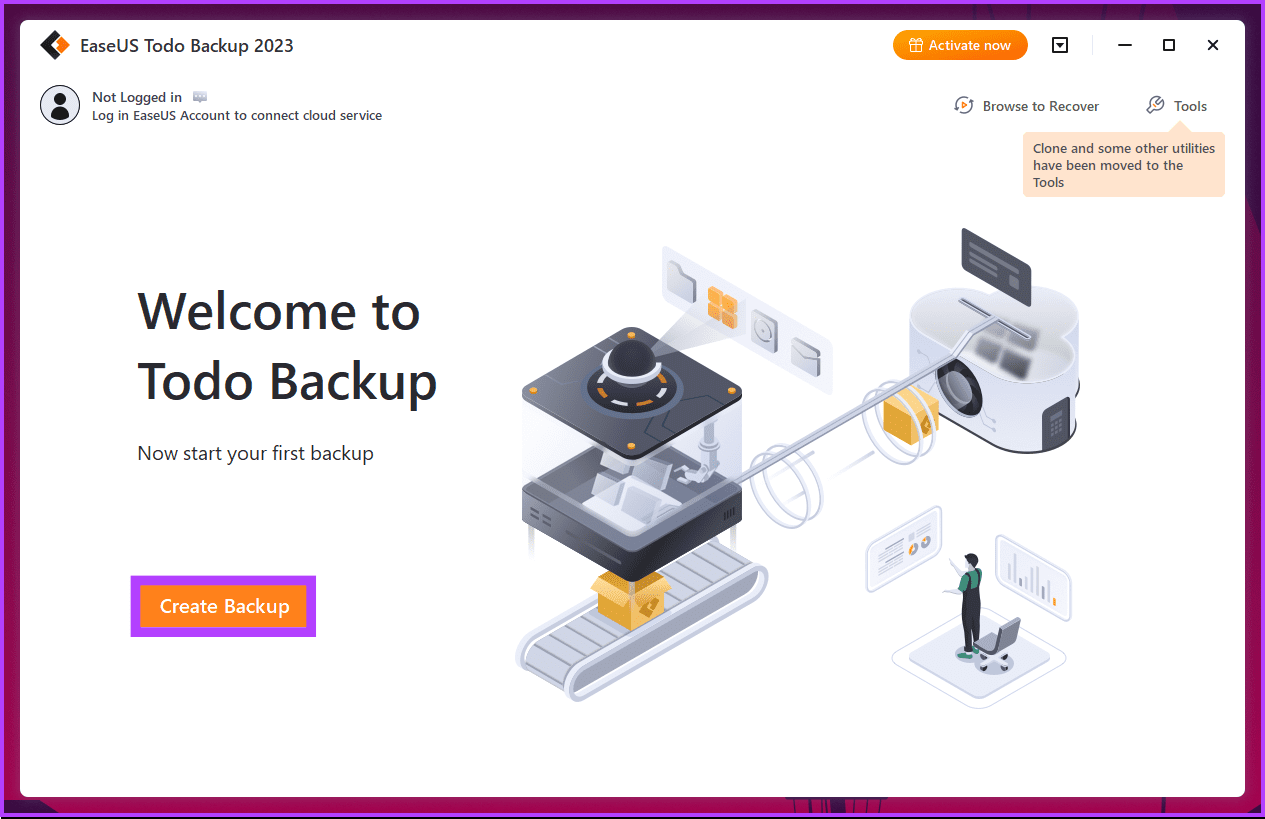
Step 3: Once installed, launch the tool. Now, click the Create Backup button.
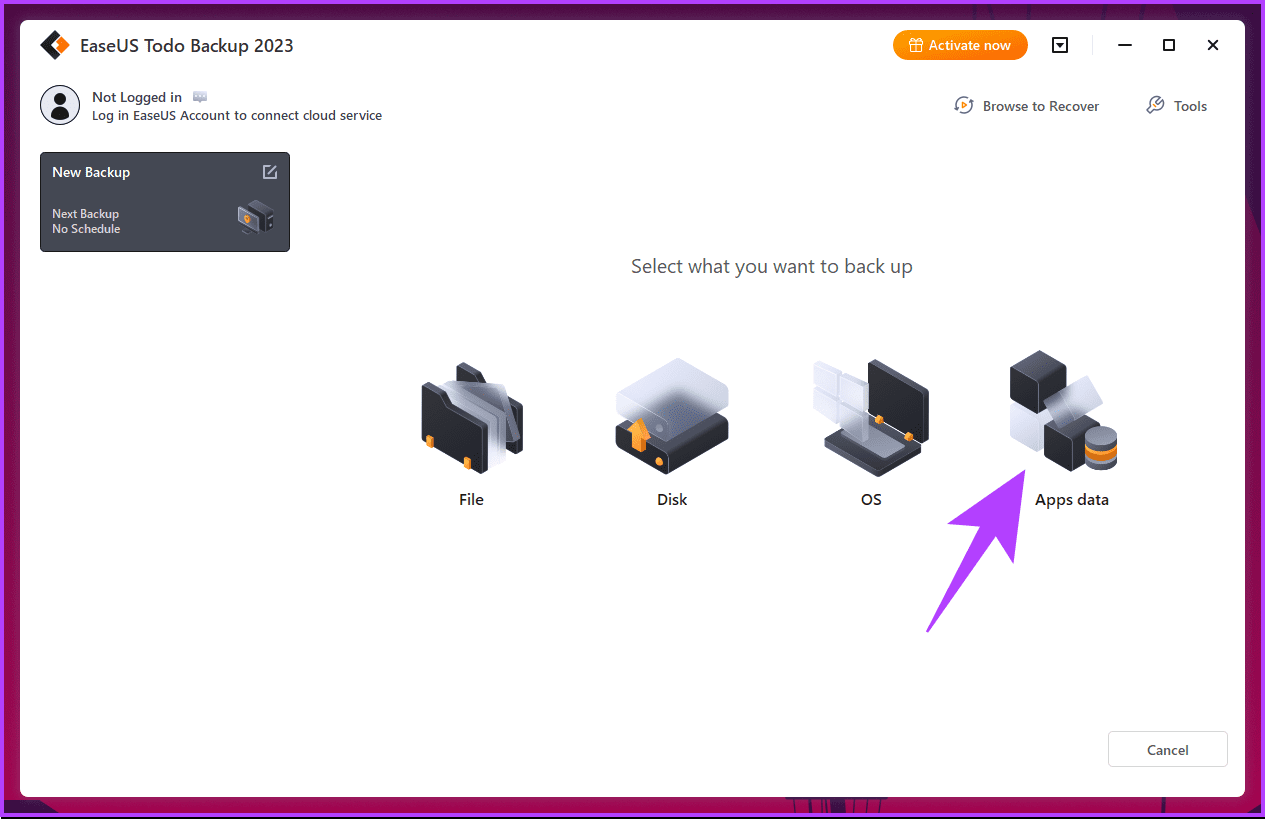
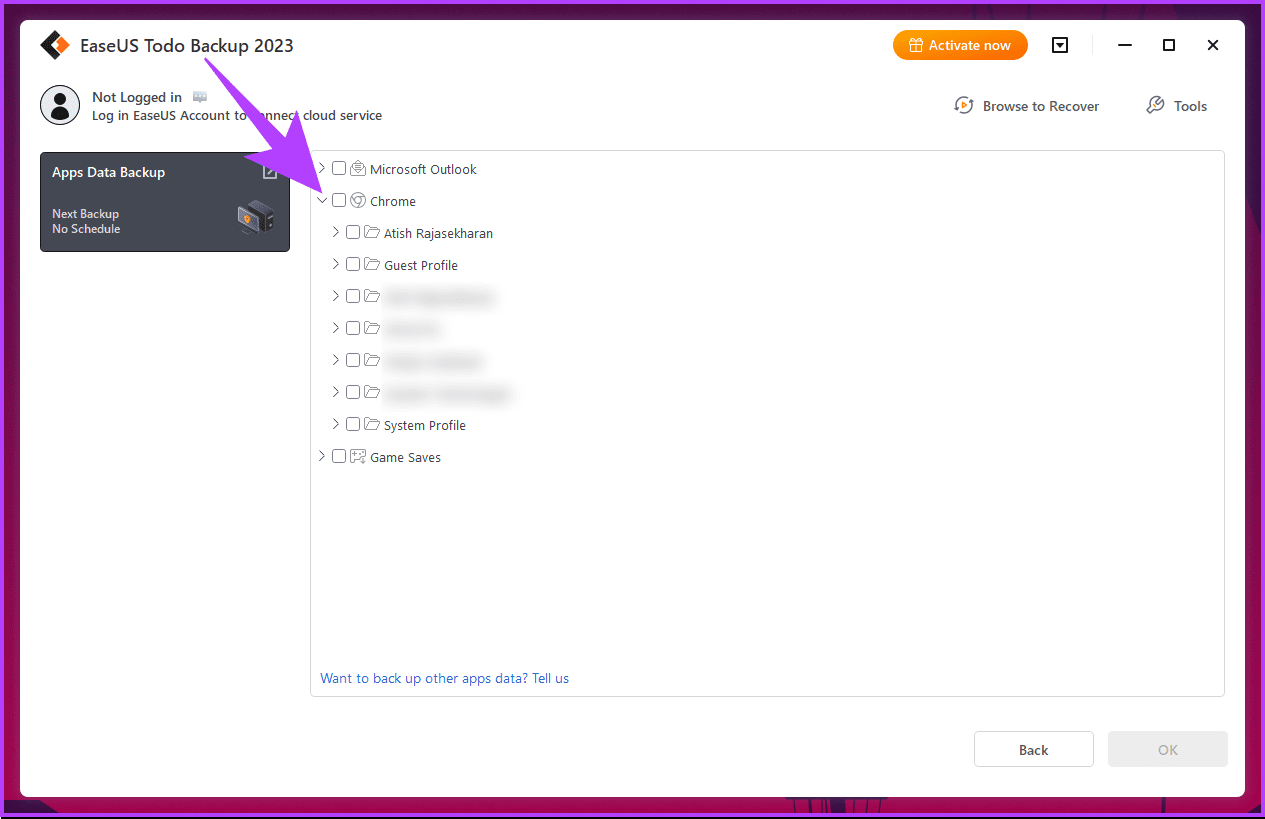
Step 4: From the list of backups, click on Apps data.
Step 5: Expand the Chrome menu.
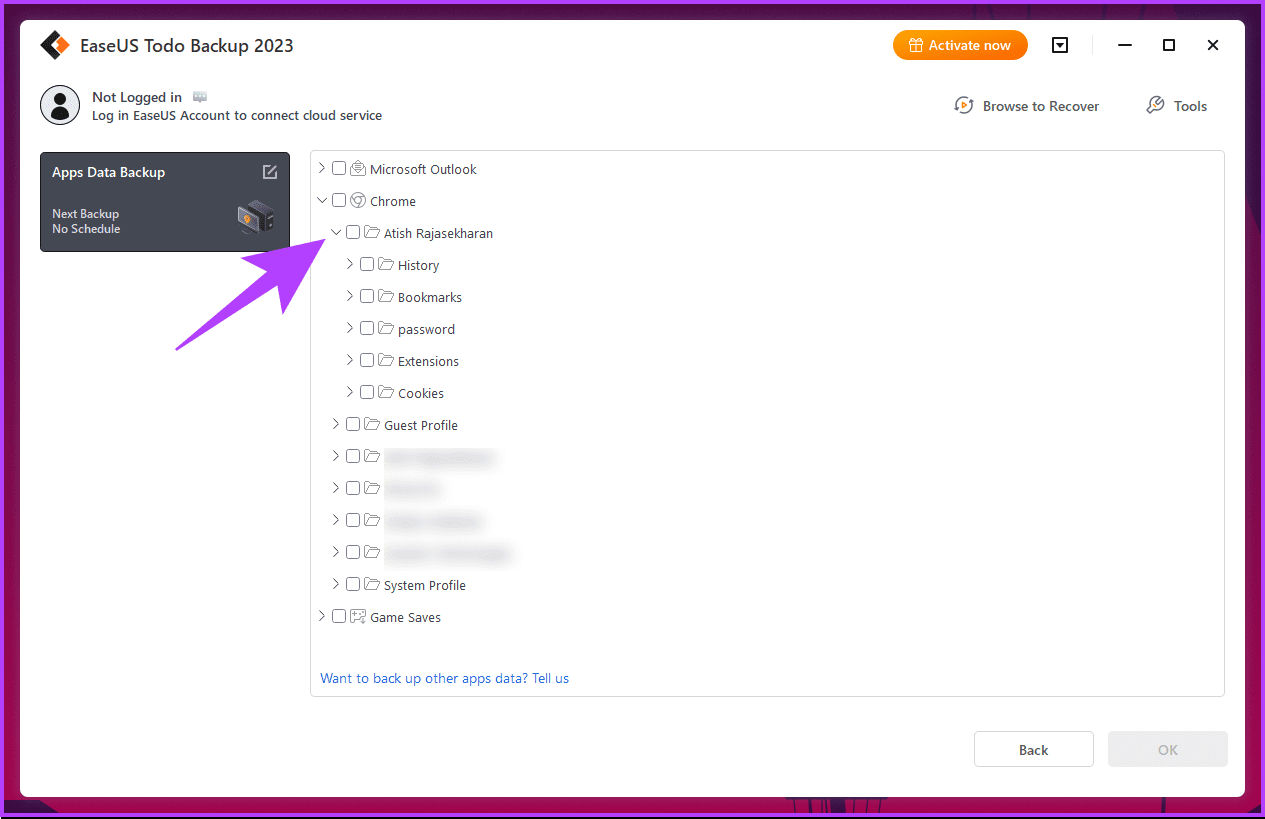
Step 6: Choose the Chrome profile to expand.
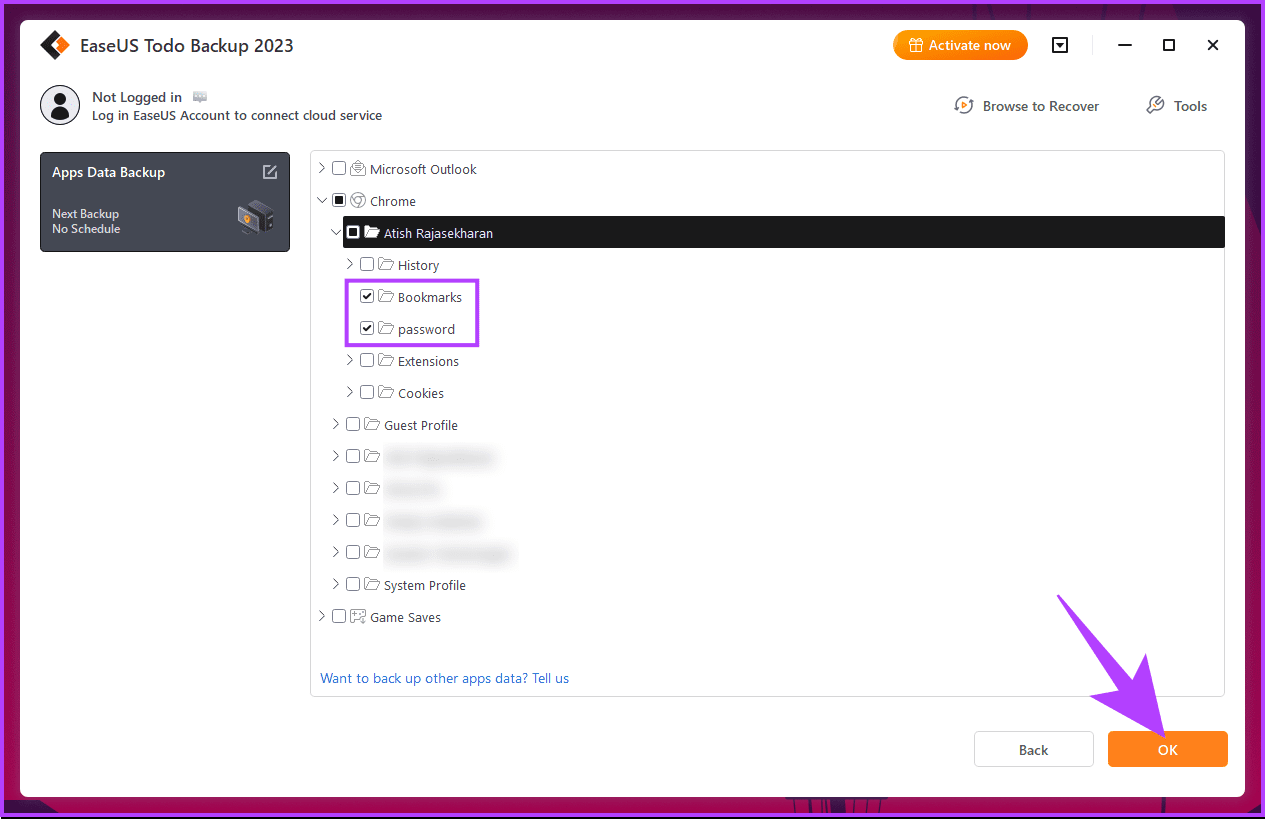
Step 7: From the expanded menu, check the box next to Bookmarks and password. Then, click OK.
Step 8: Finally, click the Backup Now button to export bookmarks and passwords.
Note: If you want, you can also change the destination folder.
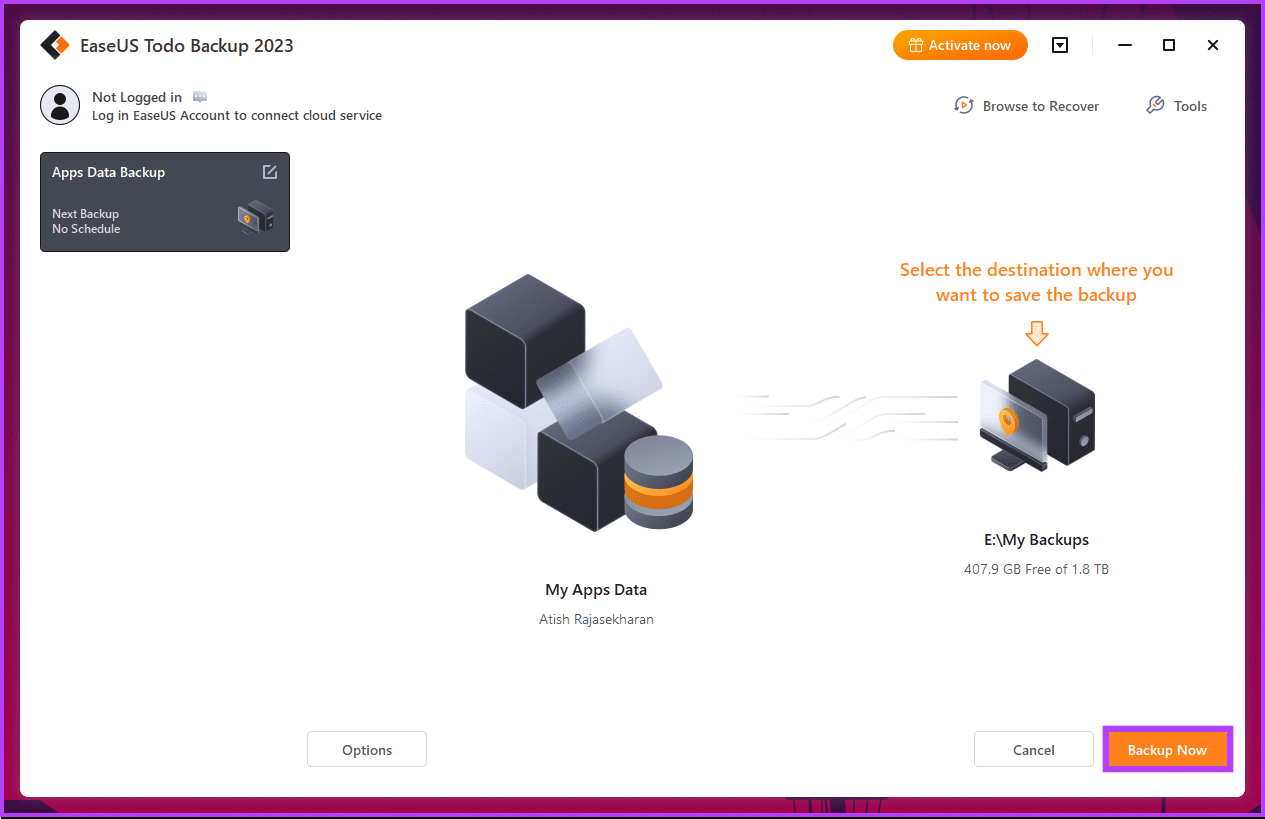
That’s it. All the bookmarks and passwords from the Chrome profile get saved to the destination folder. If you have any queries, check out the FAQ section below.
FAQs on Backing Up Chrome Bookmarks and Passwords
Chrome doesn’t have a direct feature to back up bookmarks to Google Drive. However, you can either save the exported HTML file to Google Drive manually or use a third-party tool to do the backup for you.
If you’re signed in with a Google account and have sync enabled, passwords are automatically backed up and can be accessed on other devices.
Yes, passwords are encrypted during export and import processes to maintain security.
Exporting and importing bookmarks and passwords have no impact on your browsing history.
Backed Up and Safe
Now that you know how to export Chrome bookmarks and passwords, you know that using Chrome Sync is the best and fastest way—not only is it convenient in practice, but it also backs up your data continuously. If you want to have a snapshot of your data, however, either exporting the data to HTML and CSV files or copying the Chrome files that store the bookmarks and passwords should work as viable alternatives.
Was this helpful?
Last updated on 28 December, 2023
Read Next
 How to Export Chrome Passwords to CSV
Are you tired of losing or forgetting your passwords?
How to Export Chrome Passwords to CSV
Are you tired of losing or forgetting your passwords?
 How to Import or Export Firefox Bookmarks
Browsers are a part and parcel of our lives.
How to Import or Export Firefox Bookmarks
Browsers are a part and parcel of our lives.
 Top 10 Ways to Fix Chrome Passwords Not Syncing Issue
Chrome's built-in password manager may lack the advanced functionalities of dedicated services such as 1Password, LastPass, or Dashlane, but it sure is convenient to use.
Top 10 Ways to Fix Chrome Passwords Not Syncing Issue
Chrome's built-in password manager may lack the advanced functionalities of dedicated services such as 1Password, LastPass, or Dashlane, but it sure is convenient to use.
 3 Best Ways to Fix Chrome Bookmarks Not Deleting Issue
Usually, deleting unwanted bookmarks and folders in Google Chrome is a relatively simple and convenient affair.
3 Best Ways to Fix Chrome Bookmarks Not Deleting Issue
Usually, deleting unwanted bookmarks and folders in Google Chrome is a relatively simple and convenient affair.
 How to Fix Chrome Sync Bookmarks Not Working Issue
Thanks to the sync feature of Chrome, all your information like history, passwords, bookmarks, and other details are available across devices.
How to Fix Chrome Sync Bookmarks Not Working Issue
Thanks to the sync feature of Chrome, all your information like history, passwords, bookmarks, and other details are available across devices.
 How to Import Chrome Bookmarks to Samsung Internet Browser
Samsung Internet Browser is one of the finest alternatives to Chrome on Android, answering many of the persistent usability issues in Google’s flagship browser.
How to Import Chrome Bookmarks to Samsung Internet Browser
Samsung Internet Browser is one of the finest alternatives to Chrome on Android, answering many of the persistent usability issues in Google’s flagship browser.
 How to Recover Deleted Passwords in Google Chrome
Recover Deleted Passwords in Google Chrome Step 1: Launch Google Chrome on the computer you have previously logged into your Google account.
How to Recover Deleted Passwords in Google Chrome
Recover Deleted Passwords in Google Chrome Step 1: Launch Google Chrome on the computer you have previously logged into your Google account.
 How to Remove Saved Passwords From Google Chrome
Google Chrome is undoubtedly the most popular browser.
How to Remove Saved Passwords From Google Chrome
Google Chrome is undoubtedly the most popular browser.
The article above may contain affiliate links which help support Guiding Tech. The content remains unbiased and authentic and will never affect our editorial integrity.