People are snapping billions of photos every day using the smartphone cameras, and many prefer to store them at different cloud services. And why not? It’s secure, accessible, affordable, and the sharing functionality is as smooth as ever.

Google Photos is a free service, while Microsoft and Dropbox offer 1TB of cloud storage only for a few bucks. All offer automatic camera upload options with support for device folders. But that’s where things get complicated. There’s no way to organize photos automatically in Google Drive or OneDrive. Even though both companies boast of AI to tag the images, it is often a hit or a miss affair.
You won’t find the Twitter images landing in dedicated Twitter photo folder in OneDrive folder automatically. Similarly, you can’t move documents from a device folder to a given cloud folder. And this where Autosync for OneDrive comes to the rescue.
As the name suggests, Autosync lets you auto-sync a device folder to a cloud folder and vice versa. I will walk you through the steps on how to create folder pairs, its functions, and setting options. Let’s get started.
Note:Setup Folder Pair

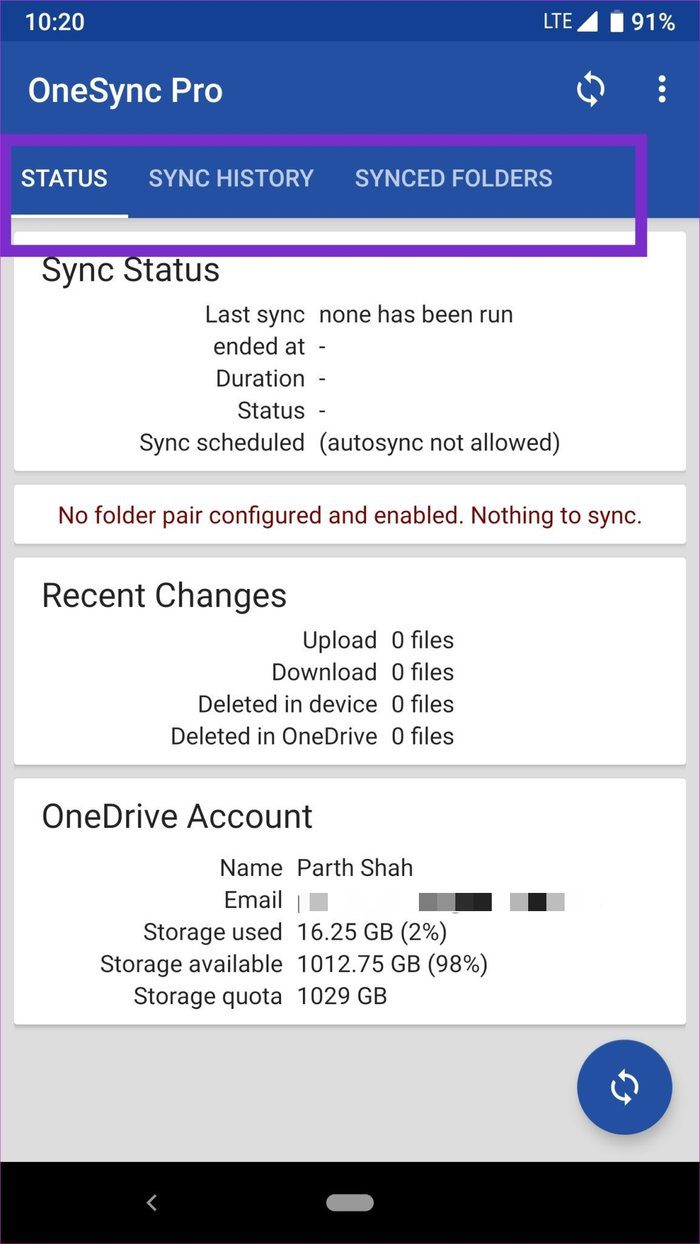
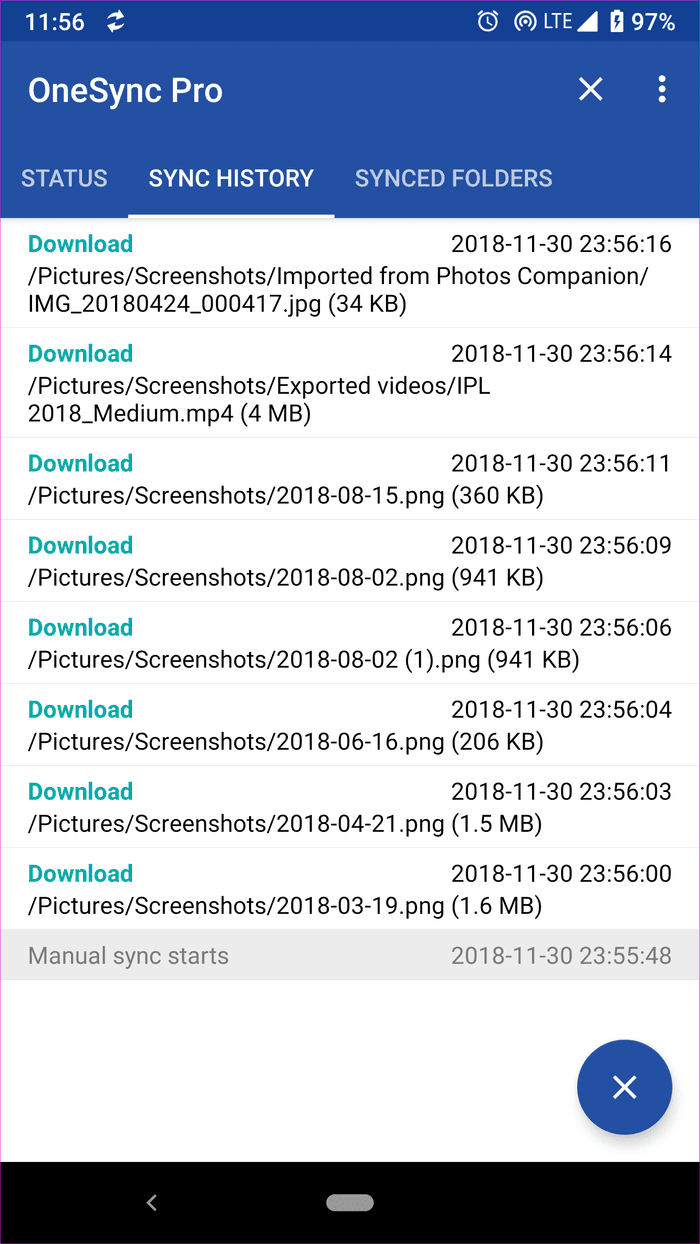
When you launch the app, it will ask you to connect your OneDrive account to Autosync. Set it up to view the three-tabbed UI highlighting Status, Sync History, and Synced Folders.
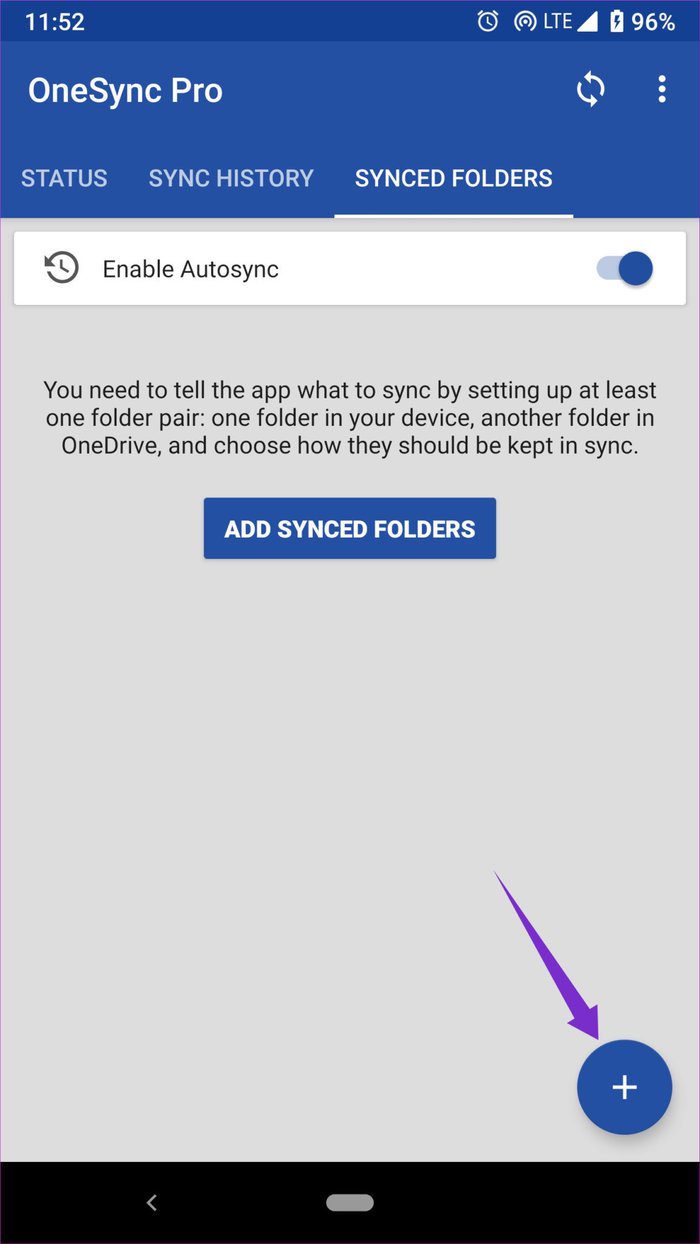
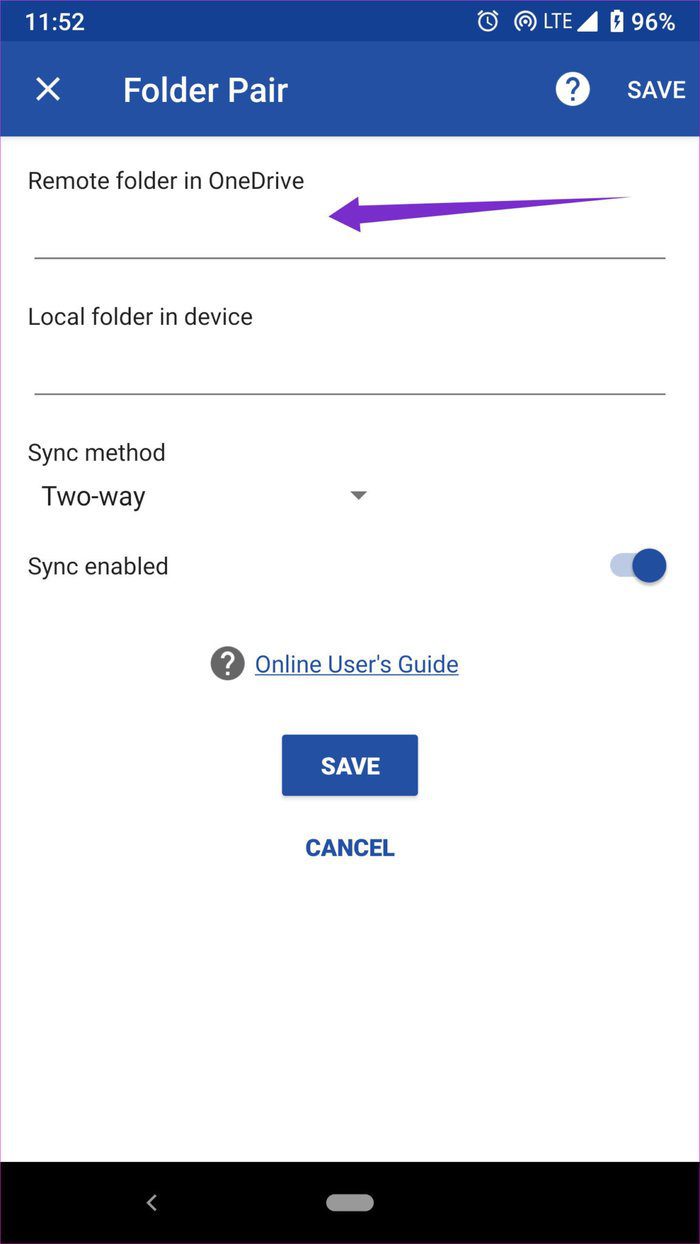
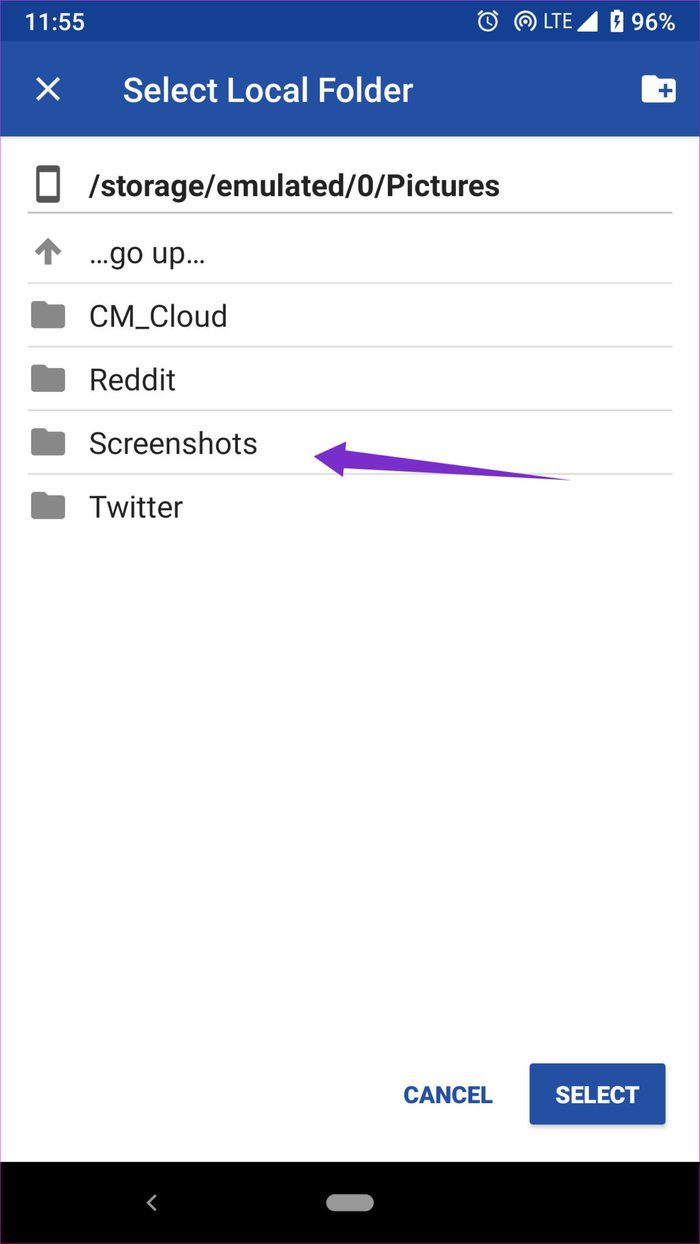
To make a folder pair, head to Synced Folders and hit the ‘+’ icon. The folder pair menu will ask you to choose the remote folder from OneDrive and a local folder from device to keep them in sync. In the example below, I have created a pair for ‘Screenshot’ folders in the app. Select the screenshot folder from the device storage and add a similar folder on OneDrive where all the screenshots should automatically get uploaded from now on.

Before finalizing the folder, the menu will ask you to choose the way you want them to be synced.
You can choose from the following options:
- Two-way to keep both folders in sync
- Upload only for adding device folders to the cloud
- Upload then delete to erase the images from PC once they are uploaded
- Upload mirror to make an exact copy of a device folder to the cloud
- Download only to fetch the newly added images from cloud to a device
- Download then delete will download images from cloud to device and will delete it from the cloud folder
- Download mirror will make an exact copy of cloud folder to a device

My advice would be to go with Upload only option as it will get the job done while keeping an offline copy on the phone. Hit the Save button, and you are good to go.
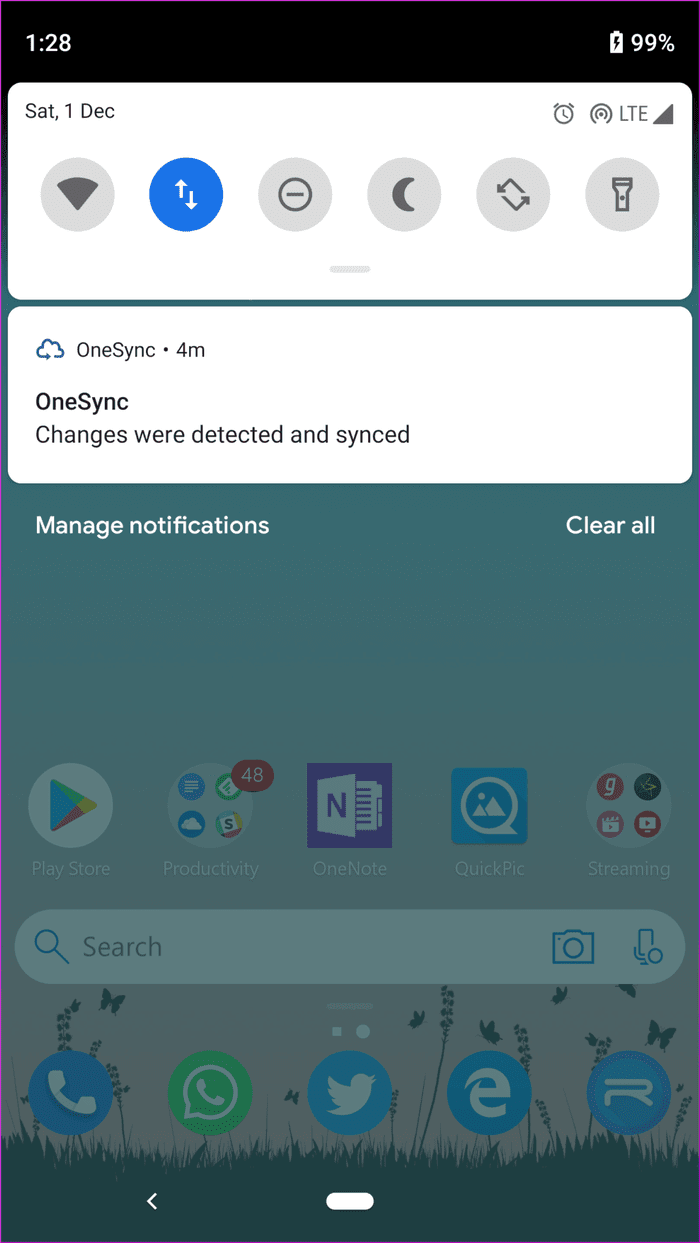
From now on, whenever I take a screenshot, it automatically gets uploaded to OneDrive > Picture > Screenshot folder. Neat, isn’t it?
The status tab will show the ongoing processes done by the app, the recent changes to both sides, and basic info about your OneDrive account. You can also track all the past syncing process by visiting the sync history menu. When the Autosync detects any change, the file gets synced to the chosen folder on the cloud and the whole process ends with a notification.
Choose When to Start and Delay Sync
In the Autosync for OneDrive app, head over to Settings > Autosync and you will notice several options to choose from on how to start the sync process. Select the charger as a power source if you only want to upload images when the device is charging. And if you opt for battery and charger option, you can choose at which battery level if should sync.
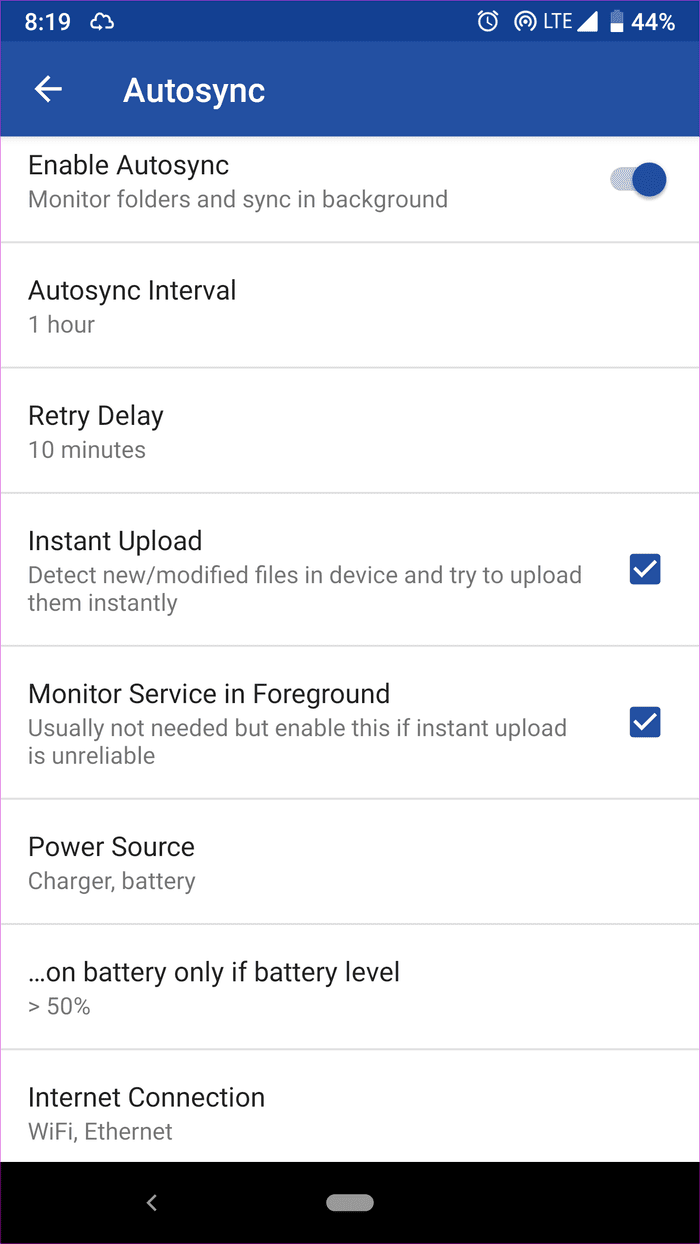
If the Autosync service has been unreliable for you, turn on the Monitor service in foreground option. It will keep the service active and display a persistent notification icon. The last option lets you choose to sync the folders on either Wi-Fi, Ethernet, or a mobile connection.
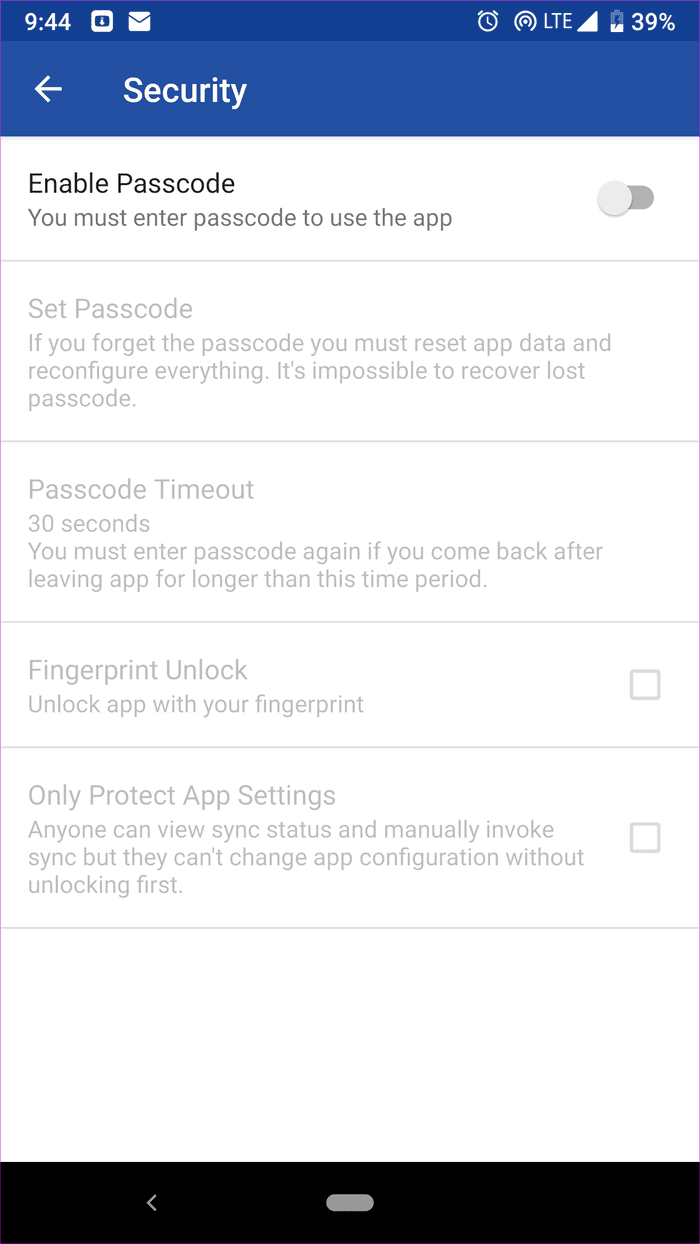
About security, Autosync lets you turn on the passcode or fingerprint authentication for safe access. Go to Settings > Security and enable Passcode option. You can also select Passcode timeout and set a passcode to access only the settings menu.
Backup and Restore
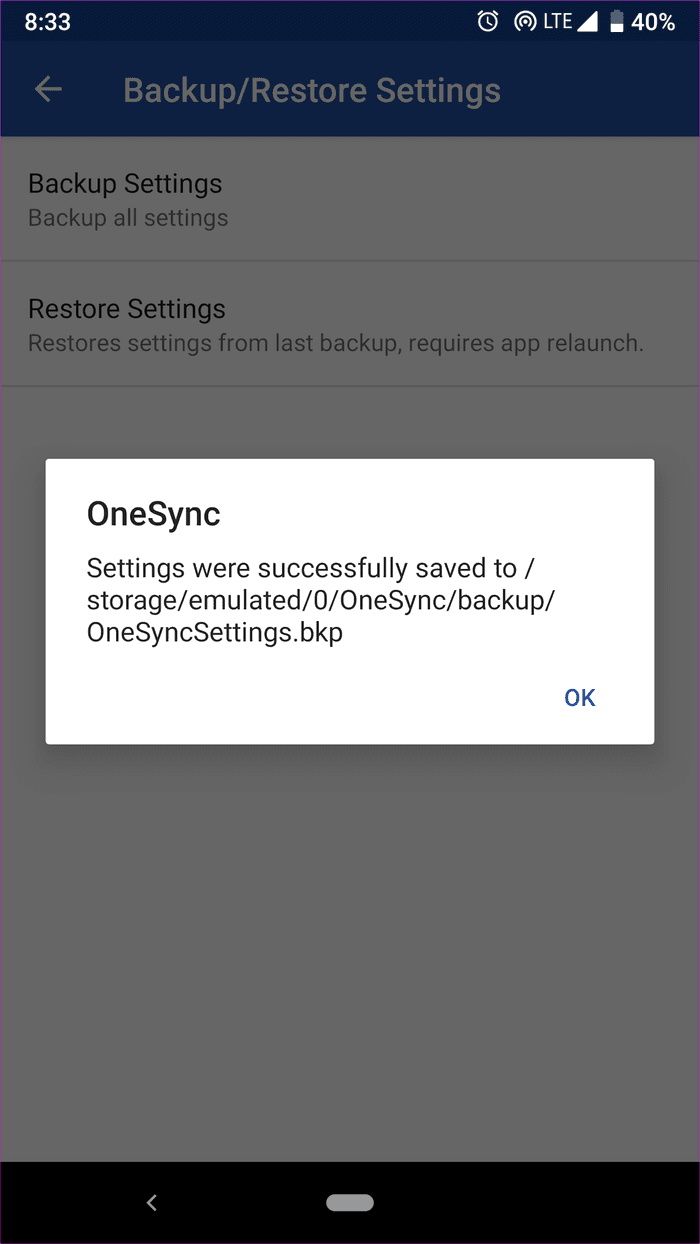
When changing phones, you won’t want to setup folder pairs once again on the new device. To tackle the issue, back up the app settings from Settings > Backup and it will generate the backup file on the device folder. Restore that file on the new device to auto-add folder pairs.
Pricing Model
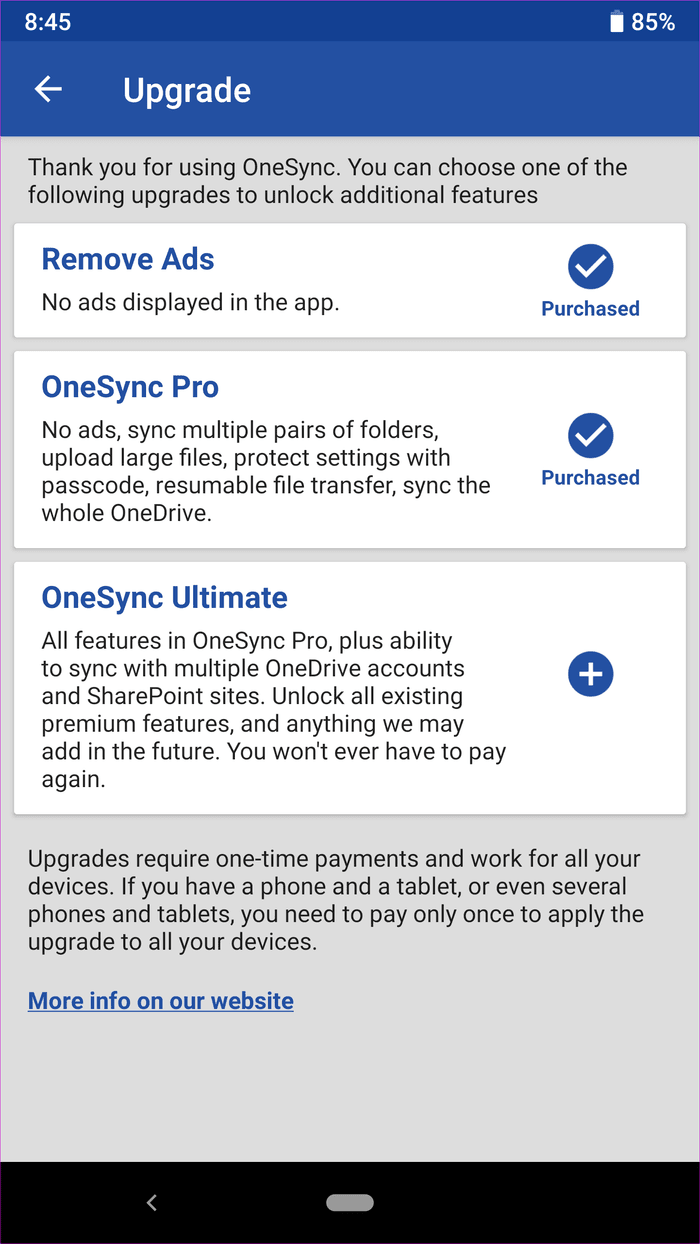
The free version of the app comes with ads and limits you to pair only one folder. The added functionalities lie in the Pro version which unlocks multiple app pairs, upload support for files larger than 10MB, no ads, multiple accounts, and a passcode option. Tap on the three-dot menu at the upper right corner of the screen, select upgrade pro option, and from there you can purchase the premium version.
That Syncing Feeling
As the app description mentions, this type of functionality should be built-in on every cloud app. And for some reason, none of the popular options provide that. For someone like me who uploads every picture to OneDrive, Autosync makes a perfect fit for my needs. If you are someone who wants to auto-organize cloud folders as neatly as the device folders, then it’s a must-have app for you too.
Was this helpful?
Last updated on 03 February, 2022
Read Next
 Top 6 Fixes for OneDrive Creating Duplicate Files and Folders on Windows
When you rely on Microsoft OneDrive to manage and share your important files, duplicate files can cause unnecessary confusion and waste time while you double-check the correct one.
Top 6 Fixes for OneDrive Creating Duplicate Files and Folders on Windows
When you rely on Microsoft OneDrive to manage and share your important files, duplicate files can cause unnecessary confusion and waste time while you double-check the correct one.
 Top 8 Fixes for OneDrive Sync Issues on Mac
Microsoft OneDrive is one of the best cloud storage solutions for everyone.
Top 8 Fixes for OneDrive Sync Issues on Mac
Microsoft OneDrive is one of the best cloud storage solutions for everyone.
 15 Ways to Fix OneDrive Sync Is Pending or Stuck Error in Windows 10
One of the most common issues with any cloud storage service is broken sync.
15 Ways to Fix OneDrive Sync Is Pending or Stuck Error in Windows 10
One of the most common issues with any cloud storage service is broken sync.
 How to Auto Sync Files and Photos to Google Drive on Android
Today, smartphones are more than just devices for tending to calls and messages.
How to Auto Sync Files and Photos to Google Drive on Android
Today, smartphones are more than just devices for tending to calls and messages.
 5 Free Android Launchers with Folders in App Drawer to Organize Apps
When we talk about Android launchers, we mostly focus on the features offered for the home screen, such as icon size, shape, gestures, and folders.
5 Free Android Launchers with Folders in App Drawer to Organize Apps
When we talk about Android launchers, we mostly focus on the features offered for the home screen, such as icon size, shape, gestures, and folders.
 How to Sync Game Progress Across Different Android Devices
You got a brand new phone and you installed all your apps and games.
How to Sync Game Progress Across Different Android Devices
You got a brand new phone and you installed all your apps and games.
 How to Sync and Dismiss Notifications Across Multiple Android Devices
While there are many ways to get Android notifications on a Windows 10 PC, very few apps let you sync notifications across Android devices.
How to Sync and Dismiss Notifications Across Multiple Android Devices
While there are many ways to get Android notifications on a Windows 10 PC, very few apps let you sync notifications across Android devices.
 Top 12 Fixes for Sync Is Currently Experiencing Problems on Android with Google Account
Majority of folks connect their Google account with Android phones.
Top 12 Fixes for Sync Is Currently Experiencing Problems on Android with Google Account
Majority of folks connect their Google account with Android phones.
The article above may contain affiliate links which help support Guiding Tech. The content remains unbiased and authentic and will never affect our editorial integrity.