Method 1: Increase Mic Volume in Settings
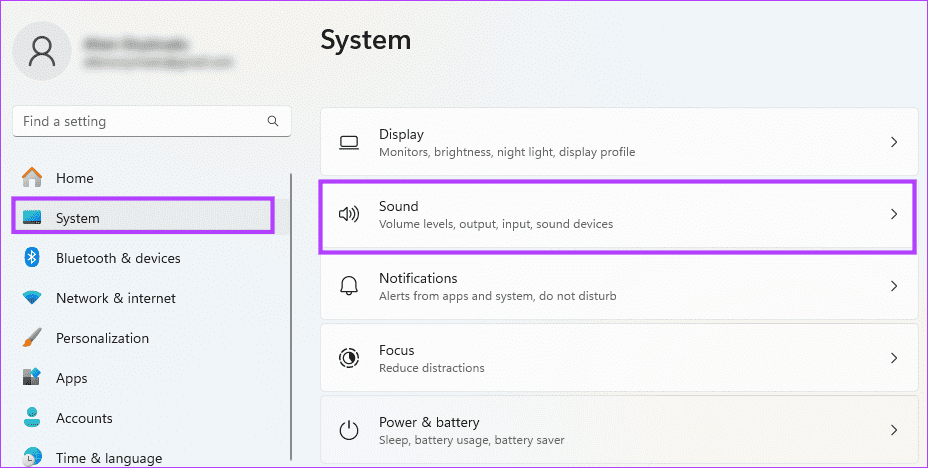
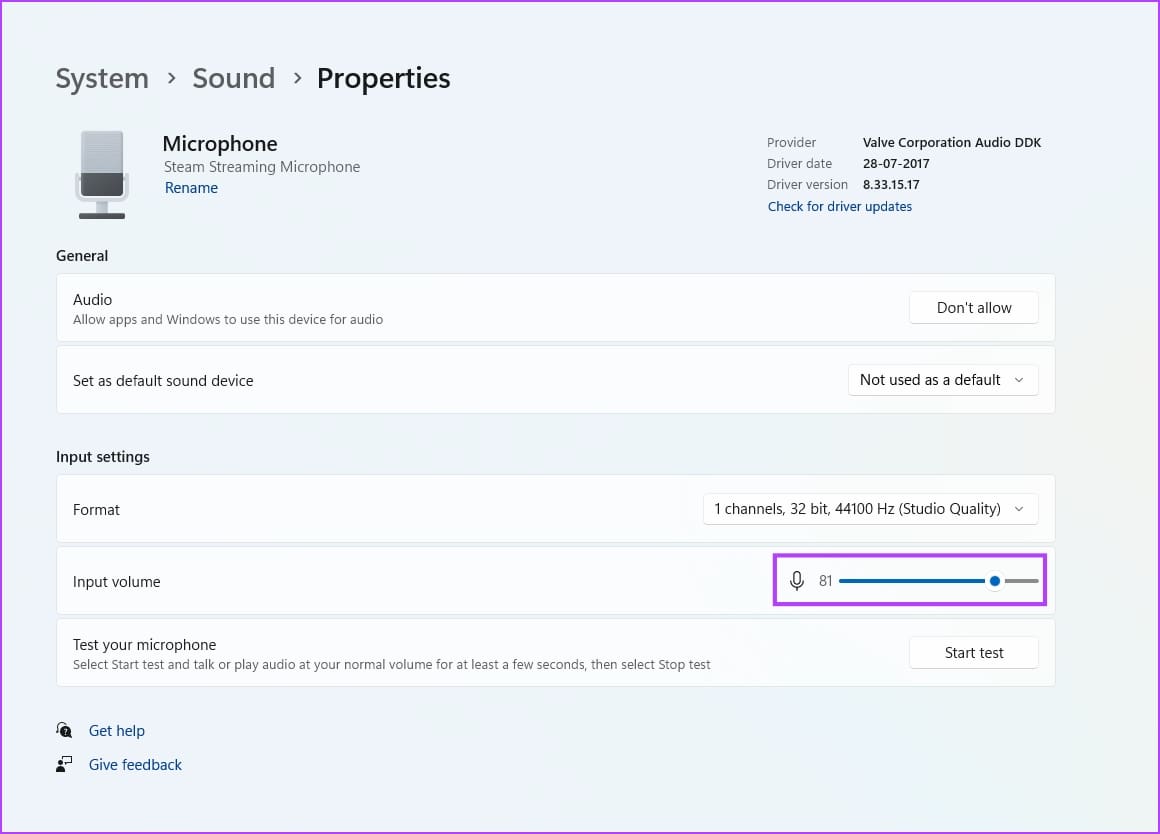
Step 1: Open the Settings app. Select System > Sound.
Step 2: Scroll down to the input section. Select the Microphone you want to increase volume for.
Note: The active microphone will be highlighted.
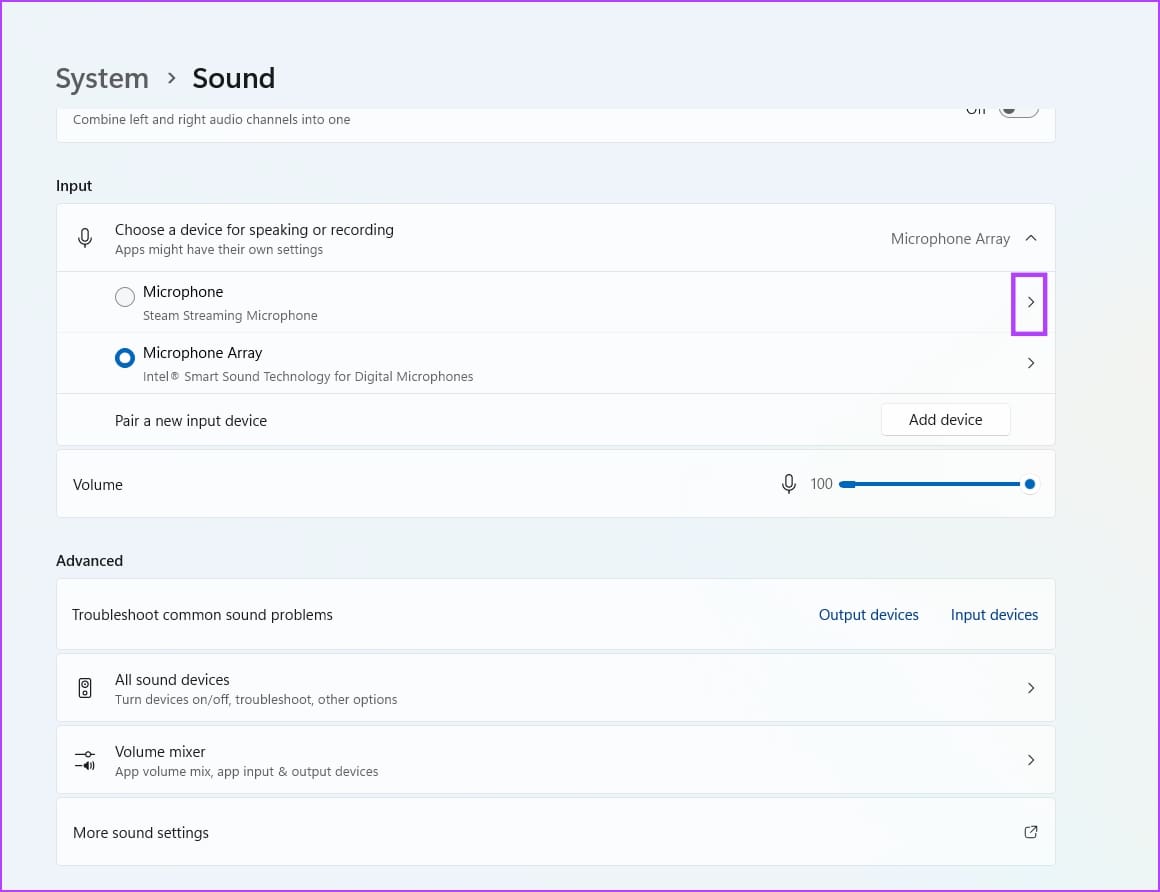
Step 3: Use the slider to increase the input volume.
Also Read: How to fix microphone not working on Windows
Method 2: Increase Mic Volume Using Control Panel
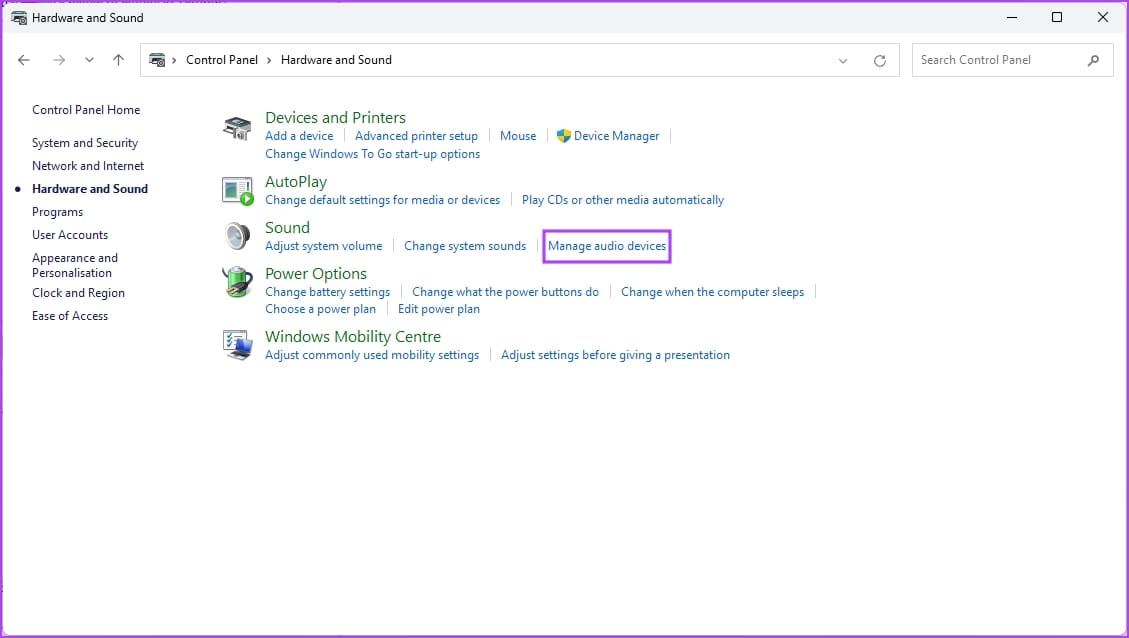
Step 1: Open Control Panel > select Hardware and Sound > Manage audio devices.
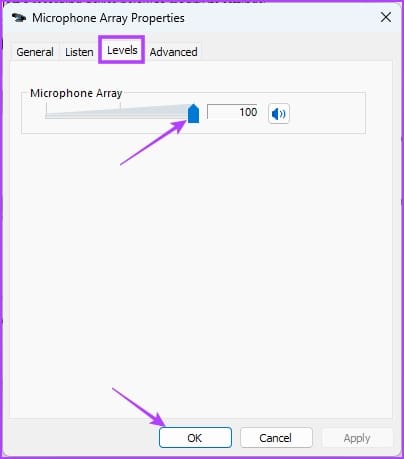
Step 2: Click on Recording > select the mic > click on Properties.
Step 4: Click on the Levels tab > increase the volume of the mic > tap on OK.

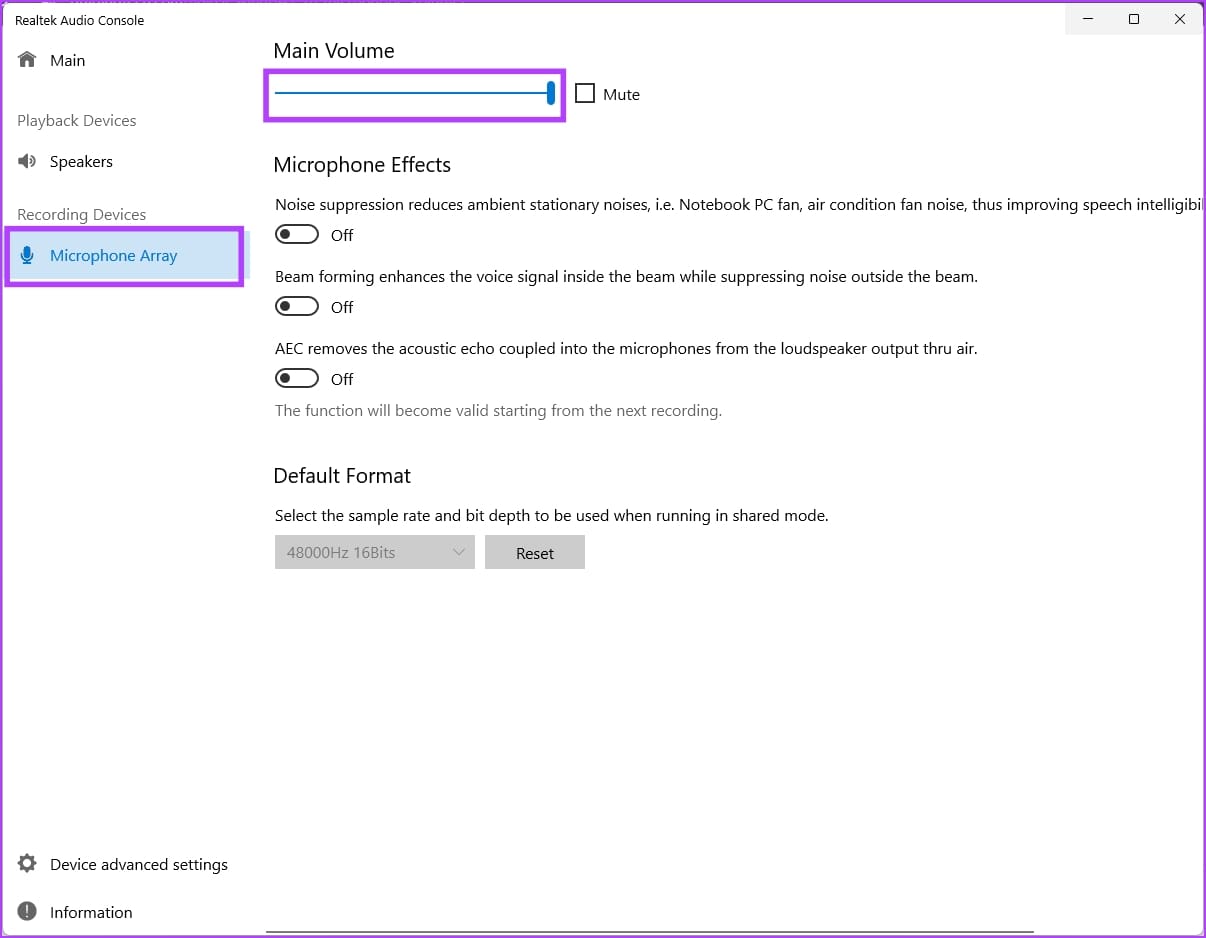
Method 3: Adjust Mic Volume Using Audio Driver Manager
Some audio drivers come with a dedicated app that allows you to control audio devices on their computers. For example, the Realtek HD Audio Driver comes pre-installed with a dedicated HD Audio Manager.
You will find the necessary controls to increase the volume of the microphone on the console.
Also Read: How to fix Windows not detecting microphone in headset
Was this helpful?
Last updated on 24 April, 2024
Read Next
 How to Adjust Volume on Apple Watch
Your Apple Watch has a tiny speaker to alert you of all the incoming app notifications.
How to Adjust Volume on Apple Watch
Your Apple Watch has a tiny speaker to alert you of all the incoming app notifications.
 3 Best Ways to Adjust Brightness on External Monitor in Windows 10
One can easily adjust the screen brightness of their Windows 10 laptop or computer using the slider in the Action Center or with buttons on the keyboard.
3 Best Ways to Adjust Brightness on External Monitor in Windows 10
One can easily adjust the screen brightness of their Windows 10 laptop or computer using the slider in the Action Center or with buttons on the keyboard.
 6 Best Ways to Adjust the Display Brightness on Windows 11
Whether you're working late into the night or working outdoors, having the perfect brightness level on your Windows machine can make all the difference.
6 Best Ways to Adjust the Display Brightness on Windows 11
Whether you're working late into the night or working outdoors, having the perfect brightness level on your Windows machine can make all the difference.
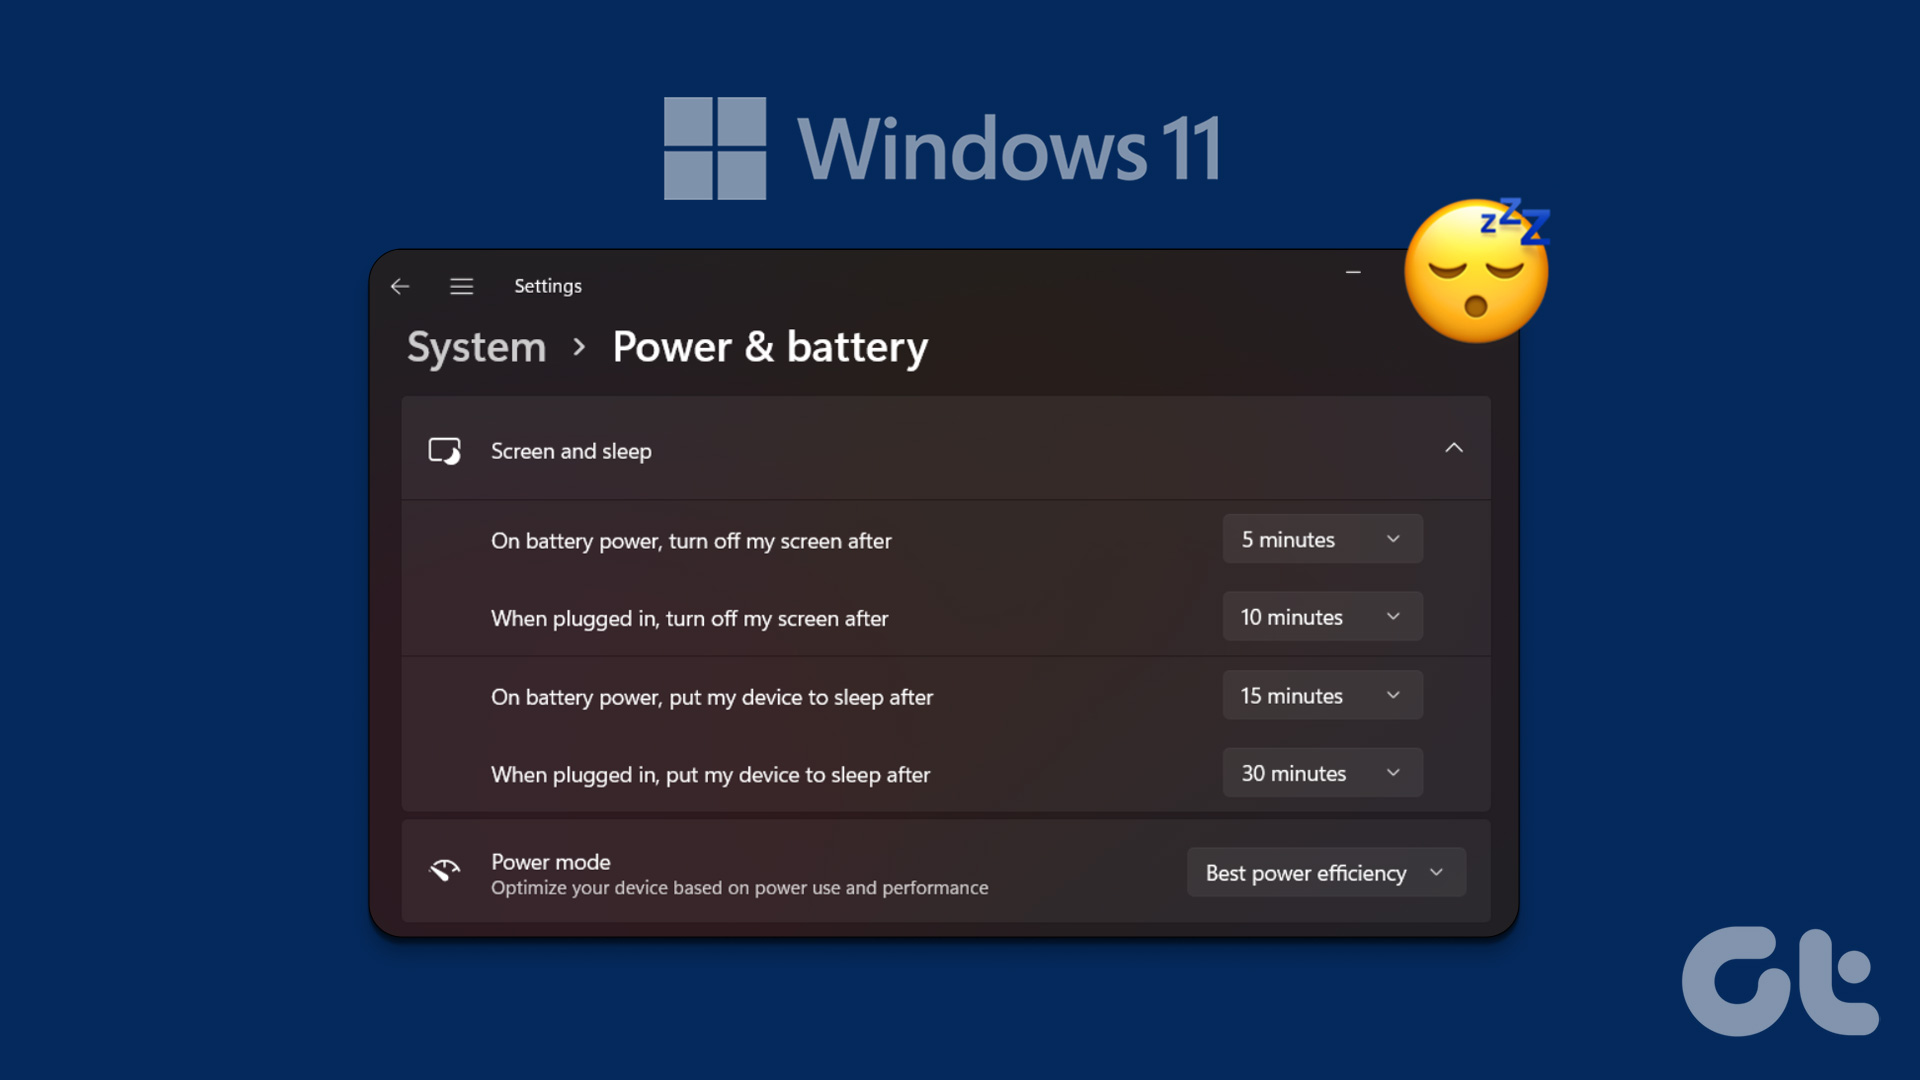 3 Ways to Adjust Windows 11 Screen Timeout Settings
Method 1: Change Screen Timeout Using Settings You can easily change the Windows 11 screen timeout duration using the Settings app.
3 Ways to Adjust Windows 11 Screen Timeout Settings
Method 1: Change Screen Timeout Using Settings You can easily change the Windows 11 screen timeout duration using the Settings app.
 How to Adjust Audio Balance in Windows 10
Have you ever paid careful attention to the sound on a Windows 10 computer and found something was off?
How to Adjust Audio Balance in Windows 10
Have you ever paid careful attention to the sound on a Windows 10 computer and found something was off?
 Top 9 Ways to Fix Microphone Not Working Issue on Windows 11
orking on wiindowsA PC microphone remains to be a crucial peripheral for many purposes.
Top 9 Ways to Fix Microphone Not Working Issue on Windows 11
orking on wiindowsA PC microphone remains to be a crucial peripheral for many purposes.
 6 Ways to Fix Windows Not Detecting Microphone in Headset
Basic Fixes Check cable and Bluetooth connection: Check the microphone and its wire for significant damage on either side.
6 Ways to Fix Windows Not Detecting Microphone in Headset
Basic Fixes Check cable and Bluetooth connection: Check the microphone and its wire for significant damage on either side.
 Top 5 Ways to Fix Microphone Not Working in Xbox Game Bar on Windows 11
The Xbox Game Bar is a useful Windows tool with various features to enhance your gaming experience.
Top 5 Ways to Fix Microphone Not Working in Xbox Game Bar on Windows 11
The Xbox Game Bar is a useful Windows tool with various features to enhance your gaming experience.
The article above may contain affiliate links which help support Guiding Tech. The content remains unbiased and authentic and will never affect our editorial integrity.