Over the last couple of iterations, the humble phone camera has evolved significantly. Features like bokeh, AI scene recognition, watermark, and beauty mode are now part of pretty much every phone out there. In fact, many phones even allow you to edit and add elements like timestamps to a photo once it is taken. If you plan on printing a picture you took, here’s how to add the date and timestamp to photos on Android phones to indicate when it was taken.

Timestamps were a common feature in many analog cameras. But the switch to DSLRs and eventually to smartphone cameras meant that this little feature got lost in the process. If you’re on a trip, you may want to the add date and time watermark on photos so you know when you took them. Timestamps are also helpful to quickly search for a photo taken during a particular time period. If you want to take advantage of this, there are a few ways to timestamp photos on Android.
How to Take Photos With Date and Time on Android
If you’re wondering how to set the date and time in your mobile camera app to add timestamps to future photos, there are two ways to go about it. You can use the stock camera app on a lot of phones since several custom UIs have the timestamp option built-in. If your phone doesn’t have it, you can always use a third-party camera app.
Method 1: Using the Stock Camera App
If your Android phone is running a custom UI like MIUI, Color OS, or OneUI, the built-in camera app gives you the option to add a watermark consisting of the date and time. Here’s how to click photos with date and time using that feature.
Step 1: Open the Camera app on your smartphone. Navigate to the Settings menu using the Gear icon and then head to the Watermark option.

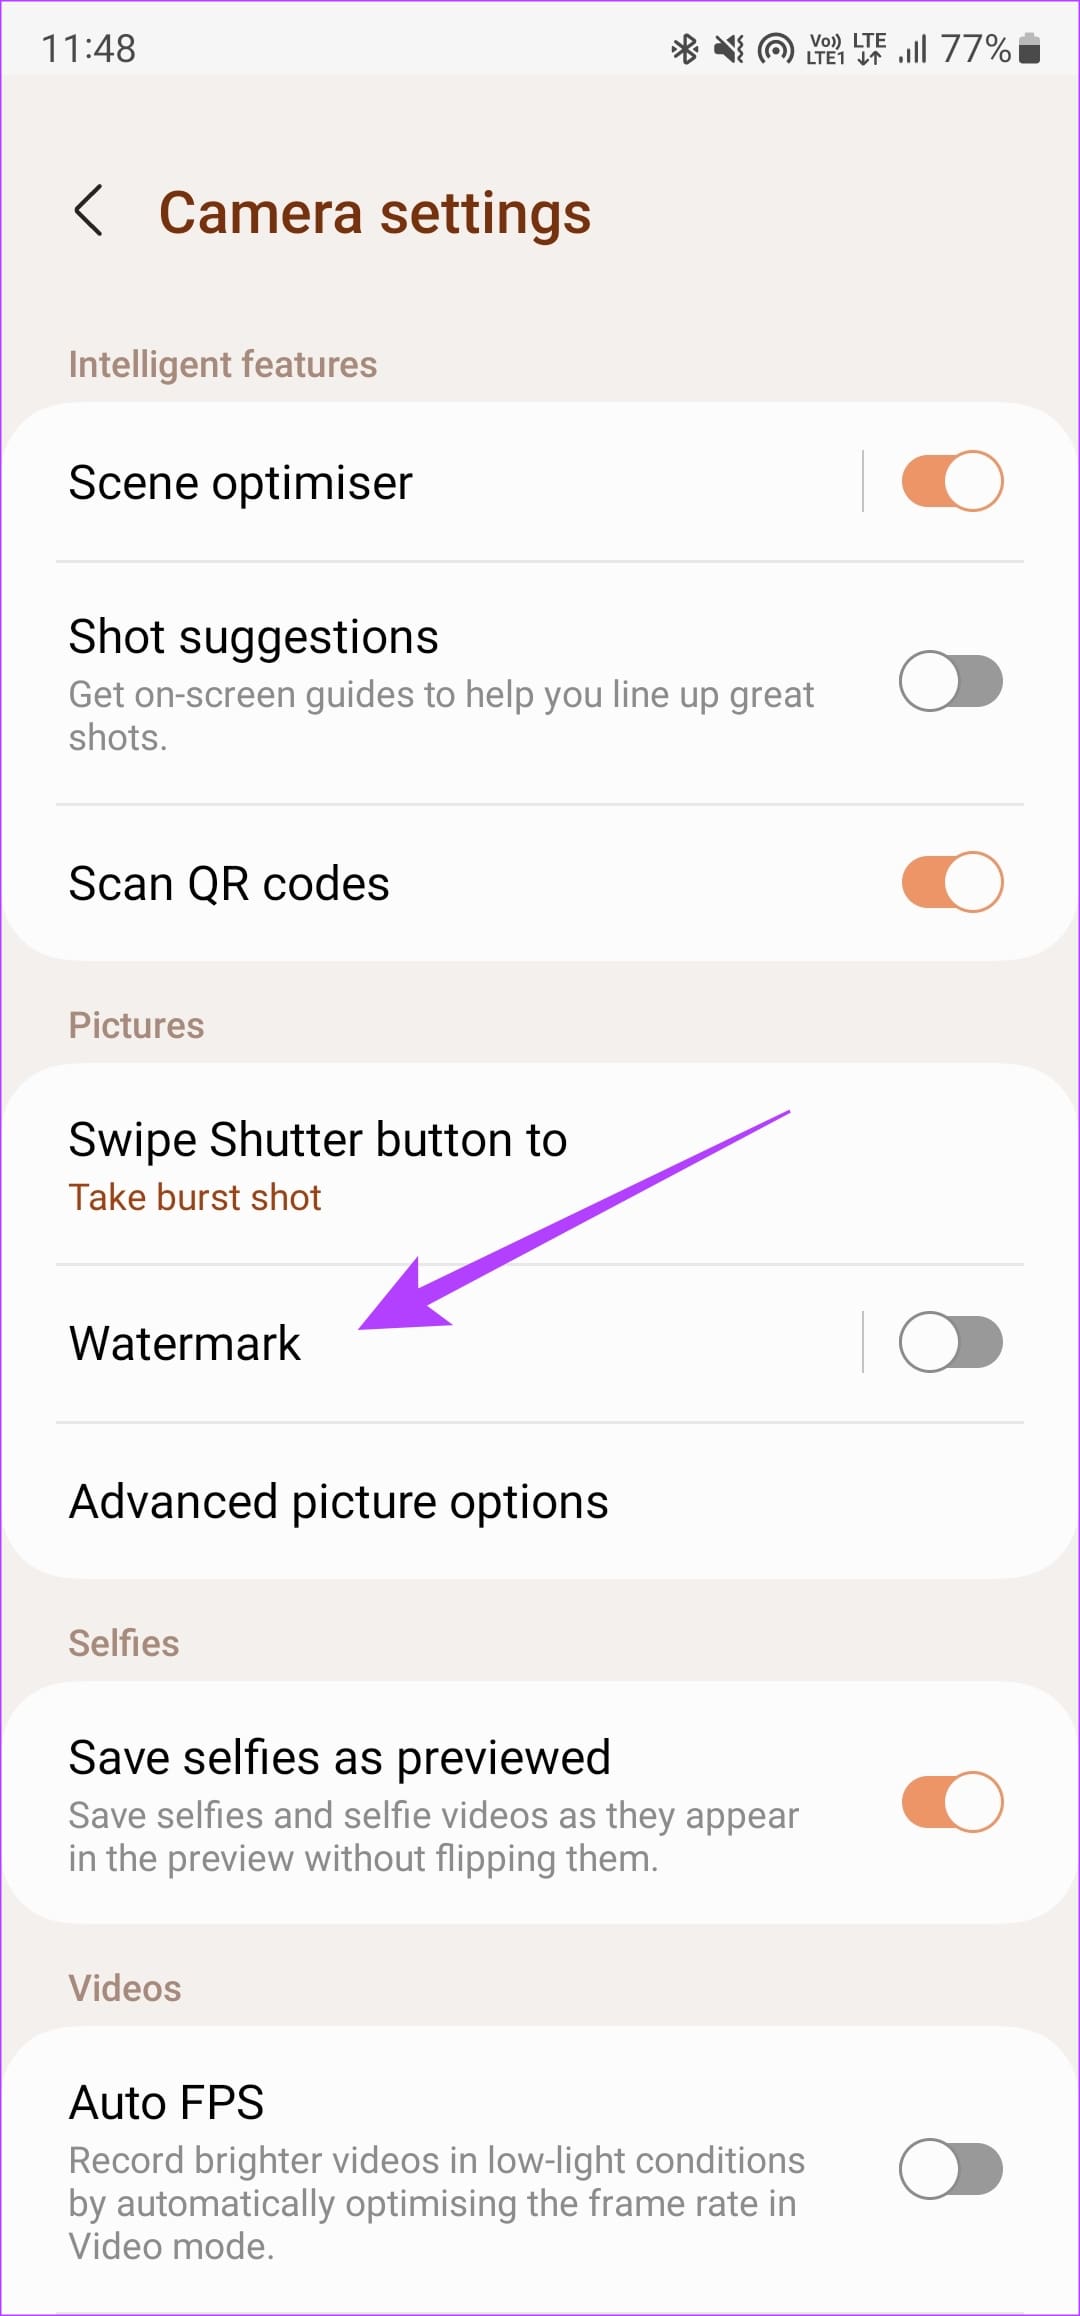
Step 2: Enable the toggle to turn on the feature. Then, select the ‘Date and time’ option. You will now see a preview of the timestamp.
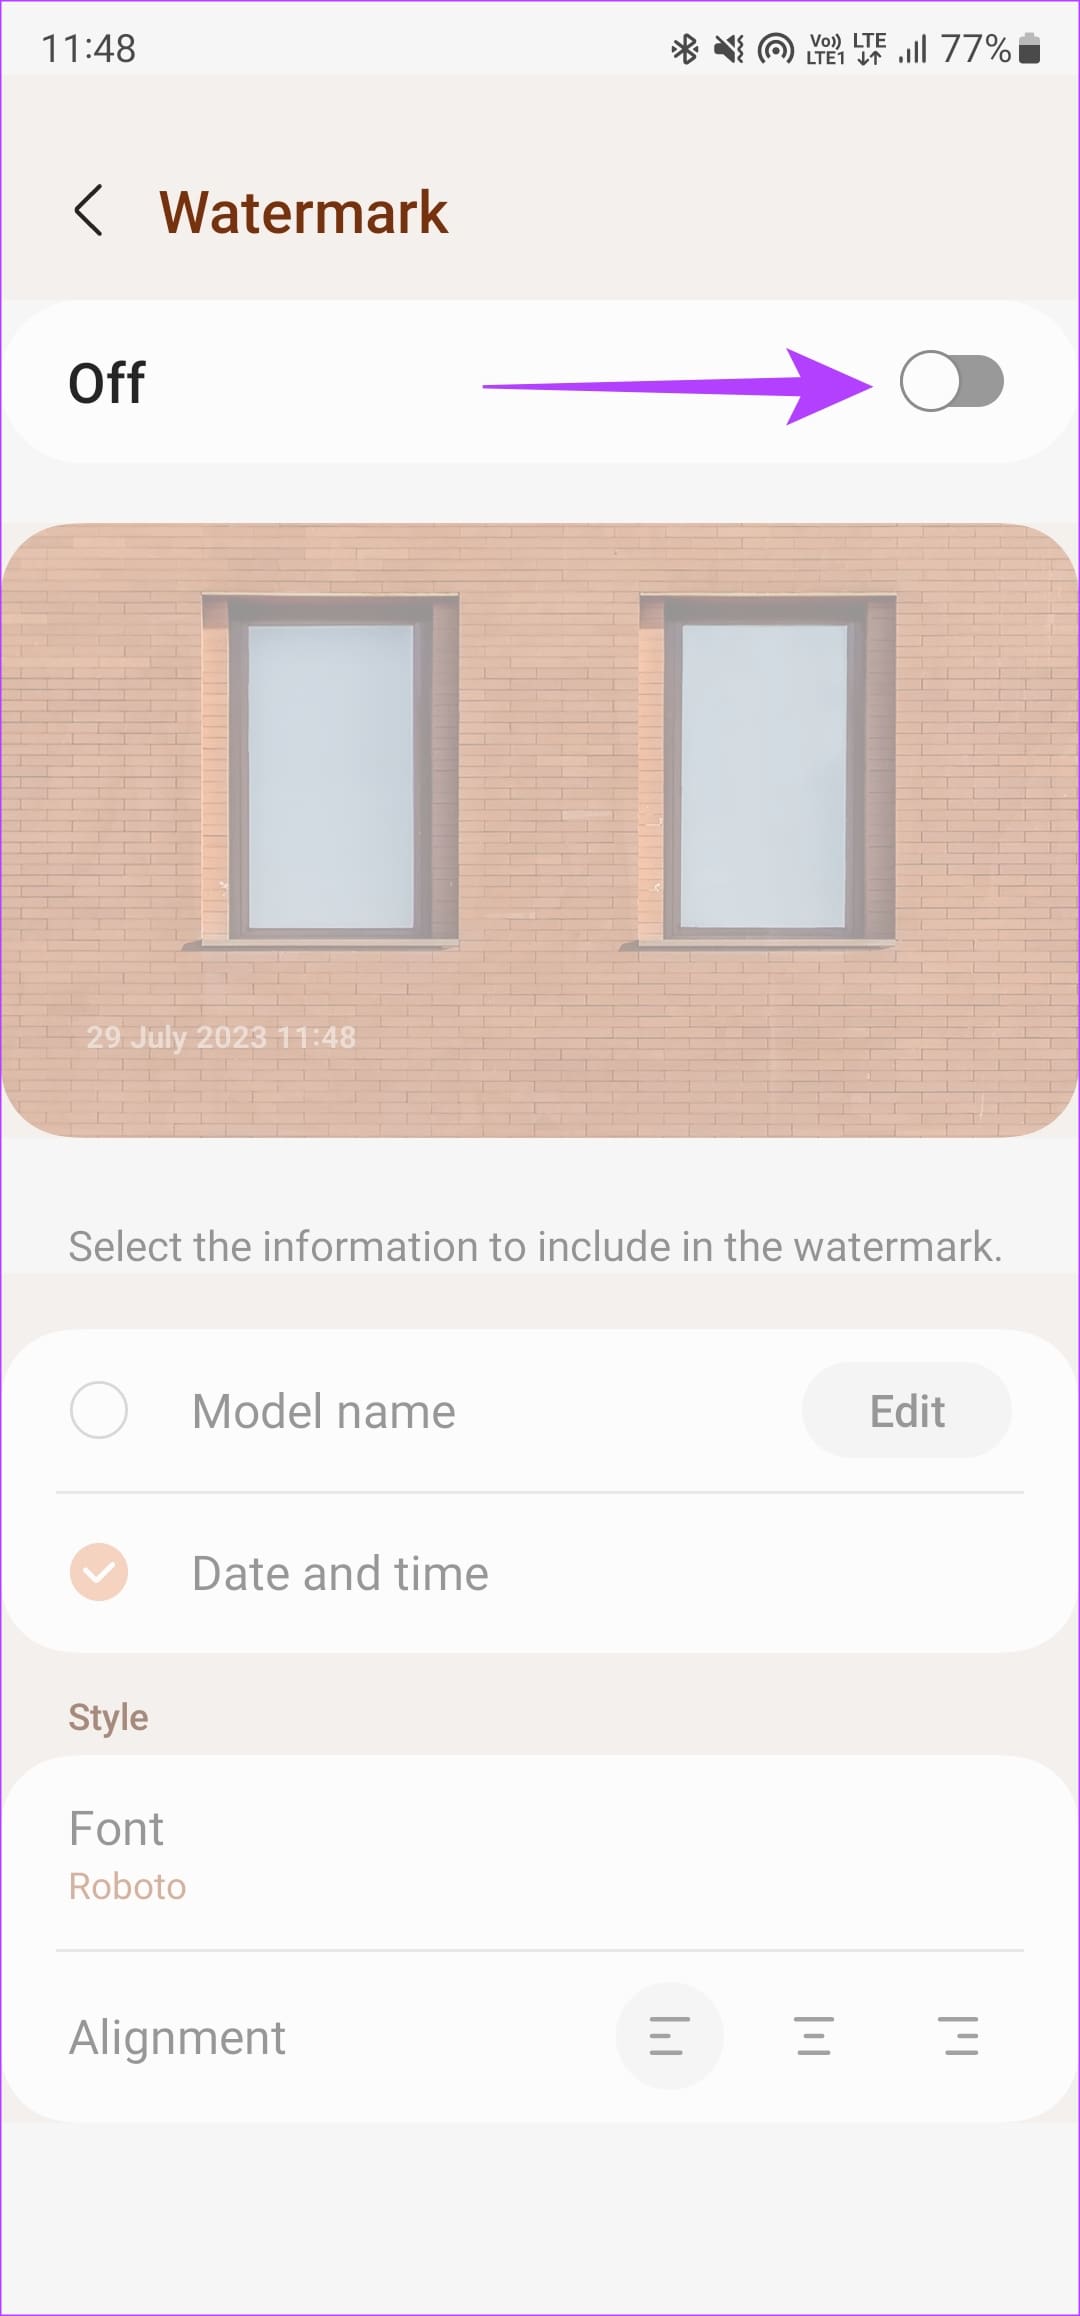

Once enabled, you can change the font or position of the timestamp as per your preference using the provided settings.
Method 2: Using a Third-Party Camera App
Some Android phones run a stock version of Android without any customization. This includes phones from Google, Moto, Nothing, and some other brands. Such phones may not have the option to add a timestamp by default. To tackle this, you can use a third-party camera app.
We’ve used Open Camera to demonstrate the procedure since it’s free and open-source. But, you can use any camera app of your choice.
Open Camera is a manual camera app that combines many features such as Color Effects and customizable JPEG quality. This is along with manual controls like Exposure, ISO, and White balance.
Here’s how to enable the timestamp feature on Open Camera when clicking pictures.
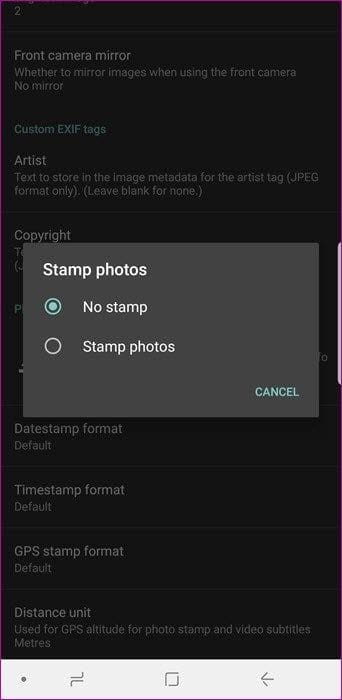
Step 1: Open the app. Go to the Settings section by tapping on the cog-shaped icon.

Step 2: Tap on Camera settings. Scroll down until you see the Stamp Photos option. Select Stamp Photos.

You can now choose to add the date and time to your photos. So next time you want to click a picture, don’t forget to use Open Camera instead of the stock camera app on your phone.
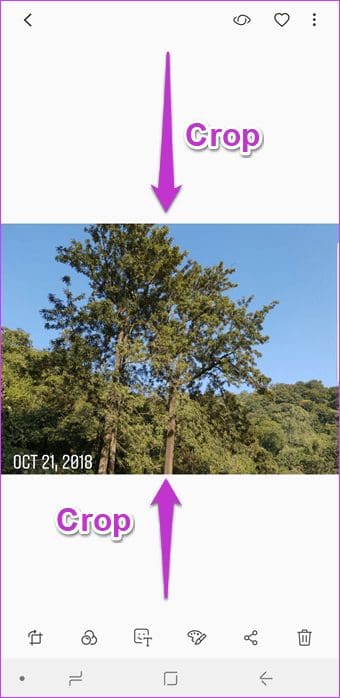
How to Add Timestamp to Photos Already Taken On Android
The above methods will allow you to add timestamps to photos taken in the future. But, what if you want to add timestamps to photos that have already been taken? There are a few methods for that too.
Method 1: Using a Third-Party Watermark App
There are several apps on the Play Store that allow you to add a watermark to your images. You can use an app like Timestamp Camera to manually add a timestamp to your photos. Here’s how it works.
Step 1: Download the Timestamp Camera app from the Play Store using the link below.
Step 2: Select a photo of your choice along with the style of timestamp you want to add to it.
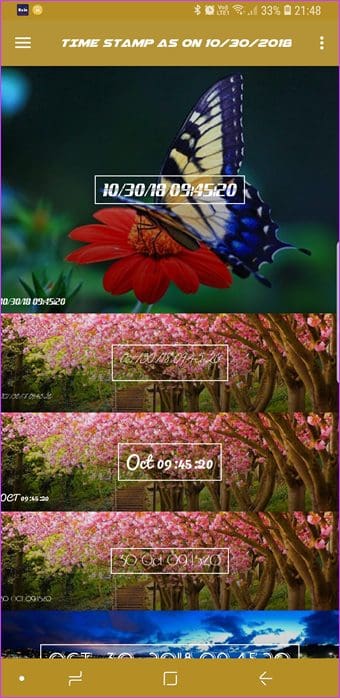
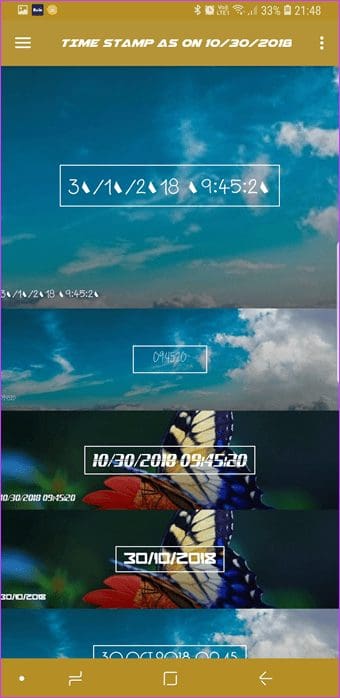
The app also has an automatic watermarking feature that will add a timestamp to every new photo you click. For this, you’d need to add the Camera folder path manually. If you don’t do so, the app will add watermarks to any new photos, even if it’s a silly WhatsApp forward.
For changing the path, follow this — swipe left, select Settings, and tap on Camera Folder Path (third option from the top). Open the Camera and tap on a random picture to set the path. Having done that, go back choose a timestamp style, and select a position.


Next time whenever you click a picture, the app will add the timestamp in a couple of seconds. Also, you can customize the date time stamp in many ways.
Method 2: Using Instagram
Yep, you read that right. Instagram lets you add date and time stamps to your photos without breaking a sweat. The best thing is that you needn’t download any additional apps nor do you need to part with your money.
The (somewhat) hidden feature of Instagram Stories is that if you add photos that are older than 24 hours, the app will add a timestamp of its own. The cherry on top is that Instagram lets you add different-sized photos to stories meaning that you can add time information to both landscapes and portraits.
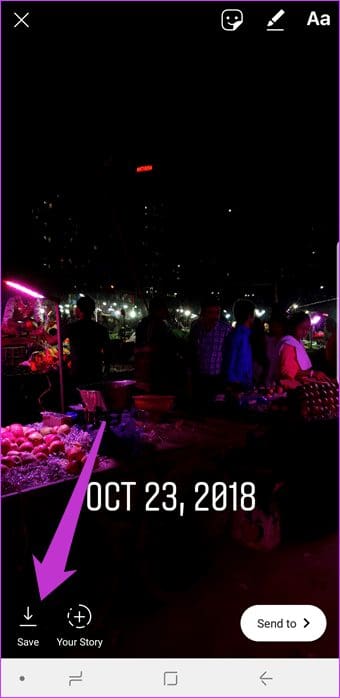
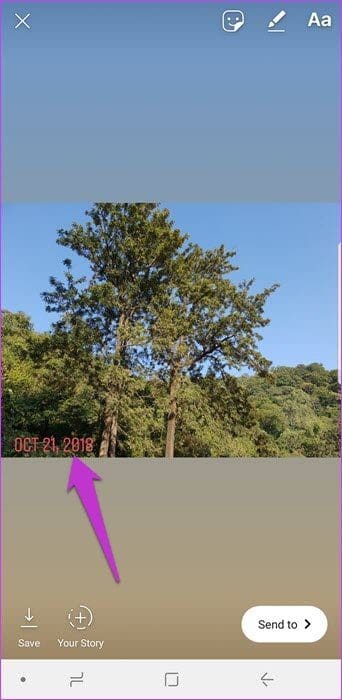
Just add a photo to Instagram Stories and the app will apply the timestamp automatically. All you need to do is place it in a position of your choice. Tap on it to change colors. Once done, hit Save to store the photo in your phone’s gallery.
In the case of landscape photos, you’d need to go the extra step of chopping off the extras through your phone’s built-in editing suite. Of course, this method has its share of flaws. For one, it generally crops the photos to the specified aspect ratio. Secondly, the manual addition can be an exasperating affair.
Method 3: Using an Online Tool
If you don’t want to download an additional app on your phone, you can use an online tool like Ofoct. Simply upload a photo of your choice and the site will do the rest for you.
Step 1: Head to the Ofoct website using the link below
Step 2: Click on ‘Upload From Computer’ to select an image. You can also add a link to an image if you wish.

Step 3: Select the photo and then click on Open.

You’ll now see that the timestamp has automatically been added to the photo you selected.
Stamp Them All
Those were a few ways to tell you how to add the date and timestamp to your photos on Android phones. This feature is especially helpful when you want to remember a special event or if you have a habit of sharing old pictures and don’t want to confuse your followers.
Was this helpful?
Last updated on 29 July, 2023
Read Next
 How to Change Date Created, Date Modified, and Other Attributes on Windows
If you want to keep your information private, arrange your files neatly, or fix issues like files not showing up in searches or not opening correctly, you can tweak specific
How to Change Date Created, Date Modified, and Other Attributes on Windows
If you want to keep your information private, arrange your files neatly, or fix issues like files not showing up in searches or not opening correctly, you can tweak specific
 How to Add Date, Time, and Weather to Home Screen
Smartphones have replaced many traditional things like clocks, calendars, music systems, etc.
How to Add Date, Time, and Weather to Home Screen
Smartphones have replaced many traditional things like clocks, calendars, music systems, etc.
 2 Ways to Change Your Age (and Birth Date) on Discord
Having issues with Discord due to incorrectly entering your age and now trying to modify it?
2 Ways to Change Your Age (and Birth Date) on Discord
Having issues with Discord due to incorrectly entering your age and now trying to modify it?
 6 Ways to Fix the Wrong Date and Time on Mac
Have you ever glanced at your Mac's clock only to find it displaying the wrong time?
6 Ways to Fix the Wrong Date and Time on Mac
Have you ever glanced at your Mac's clock only to find it displaying the wrong time?
 4 Easy Ways to Get Google Search Results by Date
Google offers several handy tools to help refine your results.
4 Easy Ways to Get Google Search Results by Date
Google offers several handy tools to help refine your results.
 How To Fix Your Phone Date Is Inaccurate Error In WhatsApp
When WhatsApp is your go-to platform for communicating with friends and family, you'd want it to function properly.
How To Fix Your Phone Date Is Inaccurate Error In WhatsApp
When WhatsApp is your go-to platform for communicating with friends and family, you'd want it to function properly.
 10 Best Ways to Fix Google Photos Not Showing All Photos on Phone
With seamless sharing, cross-platform availability, and a plethora of smart editing features, Google Photos is easily one of the best gallery apps.
10 Best Ways to Fix Google Photos Not Showing All Photos on Phone
With seamless sharing, cross-platform availability, and a plethora of smart editing features, Google Photos is easily one of the best gallery apps.
 8 Best Fixes for WhatApp Photos Not Backing Up to Google Photos on Android
You can download and send multiple photos to your contacts on WhatsApp.
8 Best Fixes for WhatApp Photos Not Backing Up to Google Photos on Android
You can download and send multiple photos to your contacts on WhatsApp.
The article above may contain affiliate links which help support Guiding Tech. The content remains unbiased and authentic and will never affect our editorial integrity.