From wishing on birthdays to keeping up with meeting commitments, things can get hectic if the other person is on a different continent. Keeping tab of different time zones and the time difference can be challenging. Thankfully, you can add multiple clocks to your Windows 10 computer. Oh! You didn’t know?

That’s why I used to dabble with Google constantly for figuring out the time difference(s), but things are a lot easier now. On a Windows computer, you can add multiple clocks for different time zones and regions. That also comes in handy if you run a business with clients or employees spread across different countries.
So how do you add multiple clocks to your Windows? We’ve provided two different hassle-free methods in the paragraphs below.
Adding Multiple Clocks to the Start Menu
I’m based somewhere in West Africa, and my computer’s clock is configured to the West African timezone by default.
In this tutorial, I’ll be adding a new clock for an entirely different timezone/region (Baltimore – a city in Maryland, USA) to my PC’s start menu.
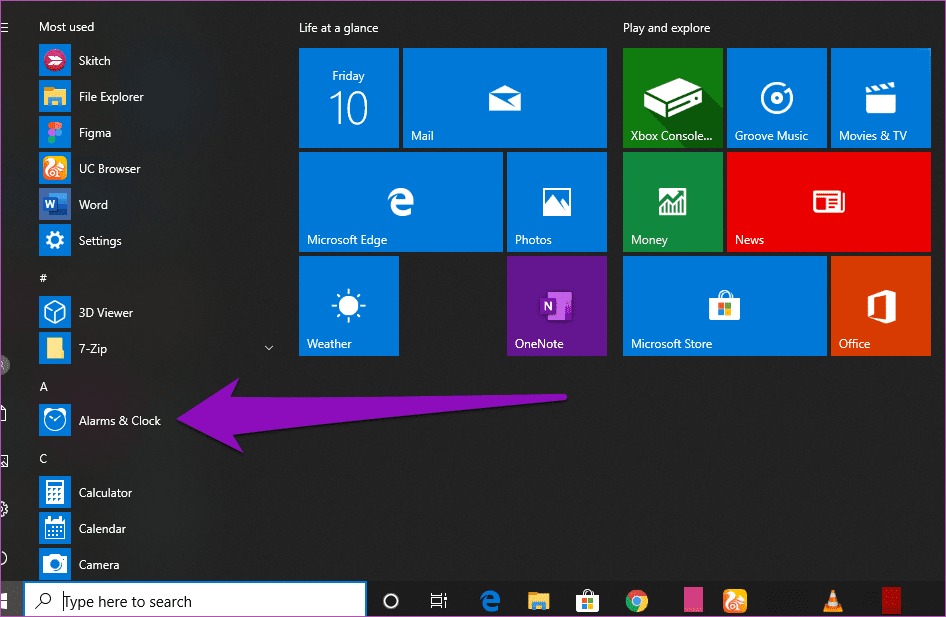
Step 1: Tap the Windows key and select ‘Alarms & Clock’ from the app list.
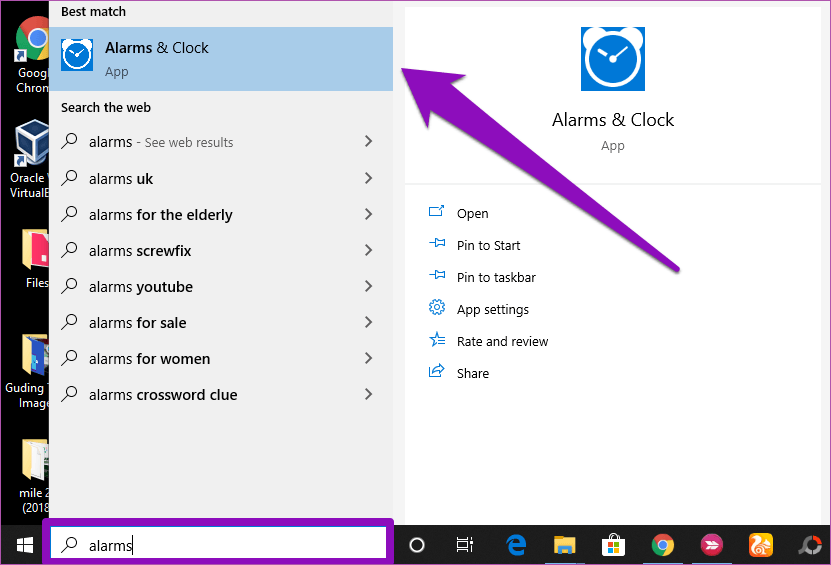
Alternatively, you can type Alarms into the search box and click on the corresponding result — Alarms & Clock.
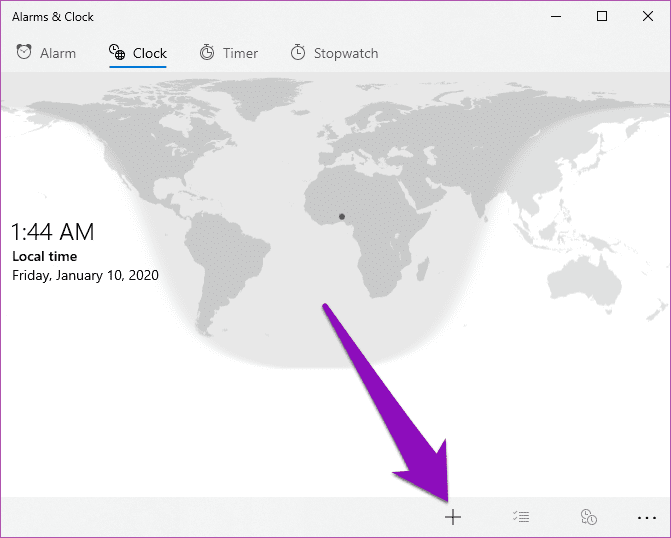
Step 2: On the ‘Alarms & Clock’ homepage, navigate to the Clock section.

That will display your local time, date, as well as a map with a geo-pin that shows your current location.
Step 3: To add a new clock for a different region or timezone, tap the plus (+) icon at the bottom-right corner of the display.
That will bring up a new search bar just at the top of the map.
Step 4: Enter a location into the search box. It could be the name of a country, a state, or a city.
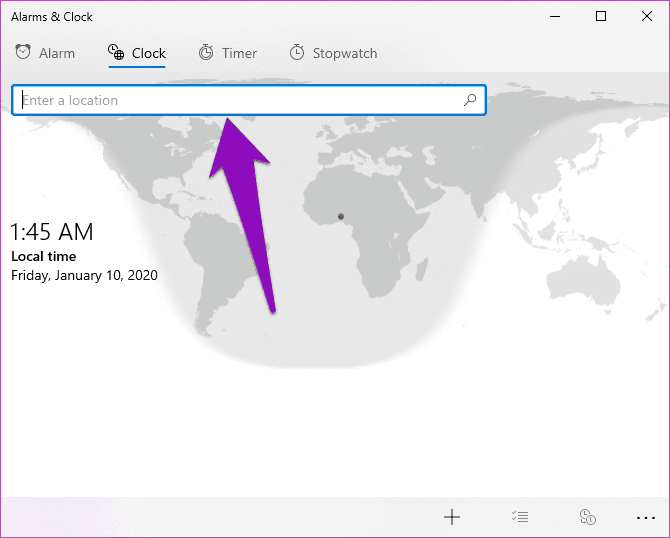
As you type in the box, Windows system will show some suggestions.
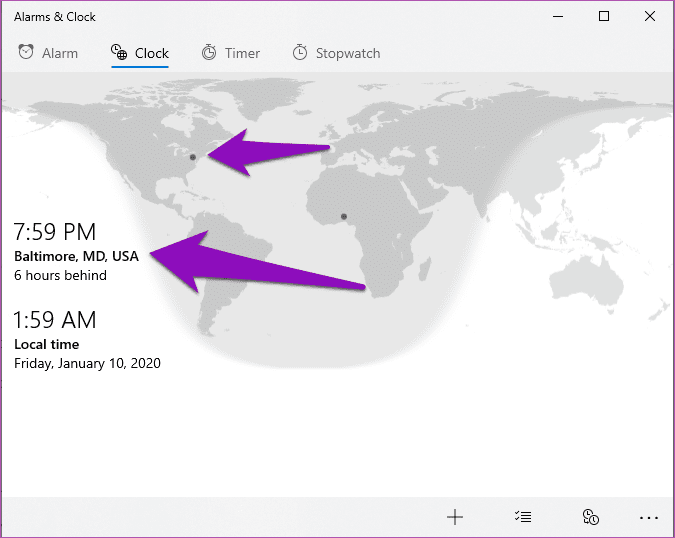
Step 5: Tap a region of choice from the drop-down suggestions, and its corresponding clock would be added to the dashboard.

Windows will display the time difference between your default timezone and the newly-added timezone. A new pin showing the location of the new clock would also be added to the map.
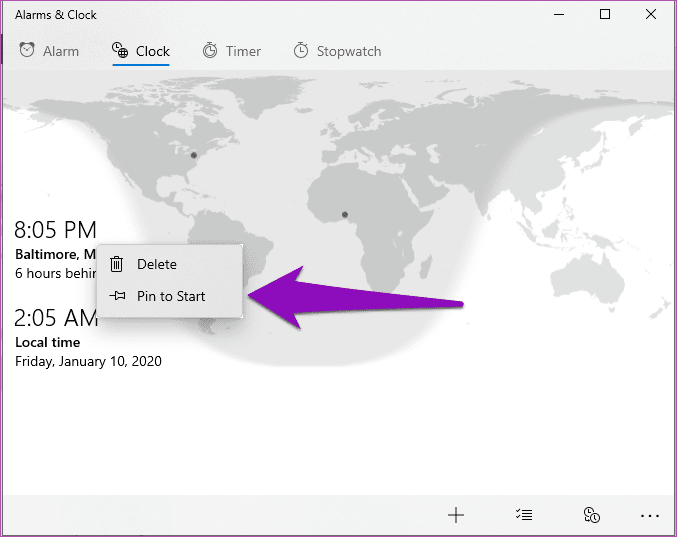
Step 6: To add the new clock to the Start Menu of your computer, simply right-click the clock and select ‘Pin to Start’ option.
Step 7: A window prompting you to confirm if you truly want to add the new clock to your PC’s Start Menu will pop up. Tap Yes to proceed.

And that’s it. When you tap the Windows icon on the screen or your keyboard, you should see a tile displaying the newly-added clock.

If you added a clock in an entirely different timezone, we recommend that you also pin your primary (read: local) clock to the Start Menu. This eliminates the possibility of mistaking the newly-added clock for your local clock.
Step 8: To add your primary clock to the Start Menu, go back to the Clock dashboard, right-click the Local time clock, and select ‘Pin to Start’ option.

Step 9: Tap Yes to confirm the action.

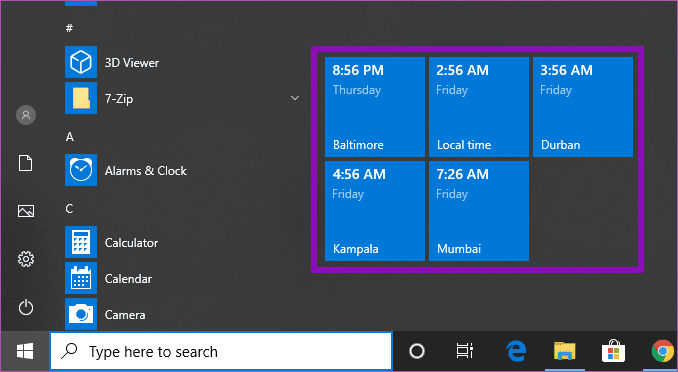
Now you should see multiple clocks in your PC’s Start Menu. All the clocks should carry a proper label with their respective location and time. To add more clocks, simply repeat Steps 1 to 7.
Adding Multiple Clocks to the Taskbar
If you’d rather have multiple clocks for different timezone on your PC’s taskbar, follow the steps below get it done.
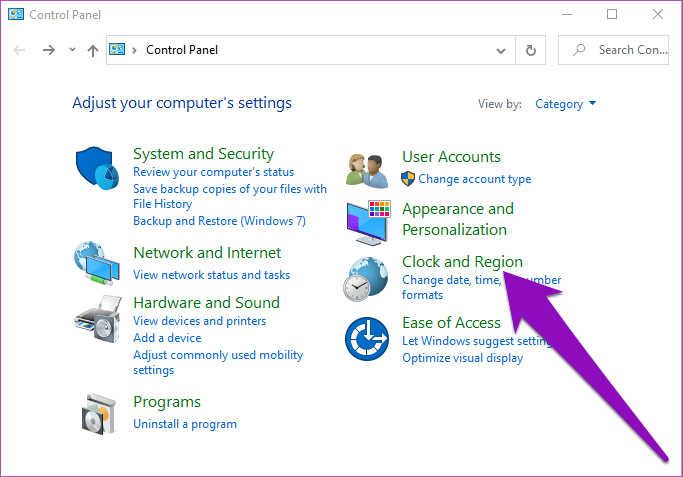
Step 1: Type Control Panel into the Windows search bar and tap the corresponding result.

Step 2: Tap ‘Clock and Region’ option.
Step 3: Right under the ‘Date and Time’ section, tap the ‘Add clocks for different time zones’.

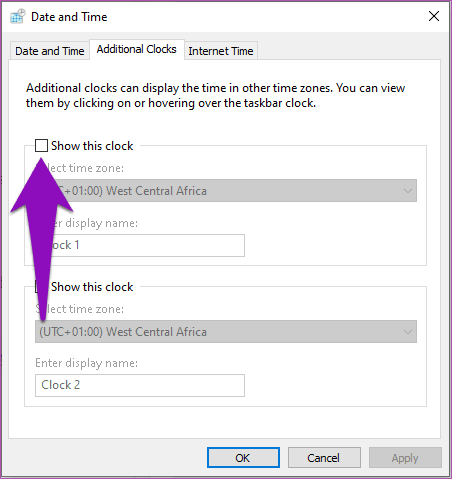
That opens a new window where you can set up multiple clocks for different time zones on your PC.
Note:
Step 4: To add the first clock, check the ‘Show this clock’ box.
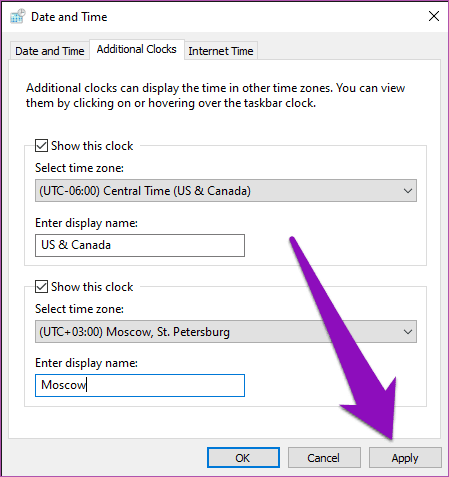
Step 5: Tap the ‘Select time zone’ drop-down button and select your preferred timezone from the available options.

Step 6: Give the clock a name or use the default display name (Clock 1).

We recommend that you rename the clock; preferably to match the name of the region or timezone so it can be easily distinguished from your primary timezone.
Step 7: To add another clock, check the second ‘Show this clock’ box, select a timezone, and change the clock’s display name — or use the default name like Clock 2.

Step 8: Tap the Apply button.
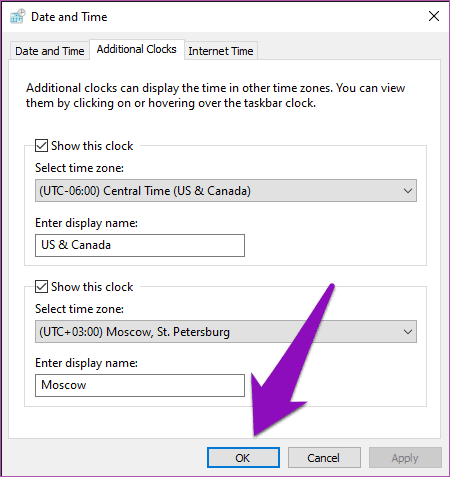
Step 9: Click OK to save the new clocks.
When you hover your mouse over the Date & Time section of the taskbar, the time and date of the local and new time zones would be displayed on the tool tip.

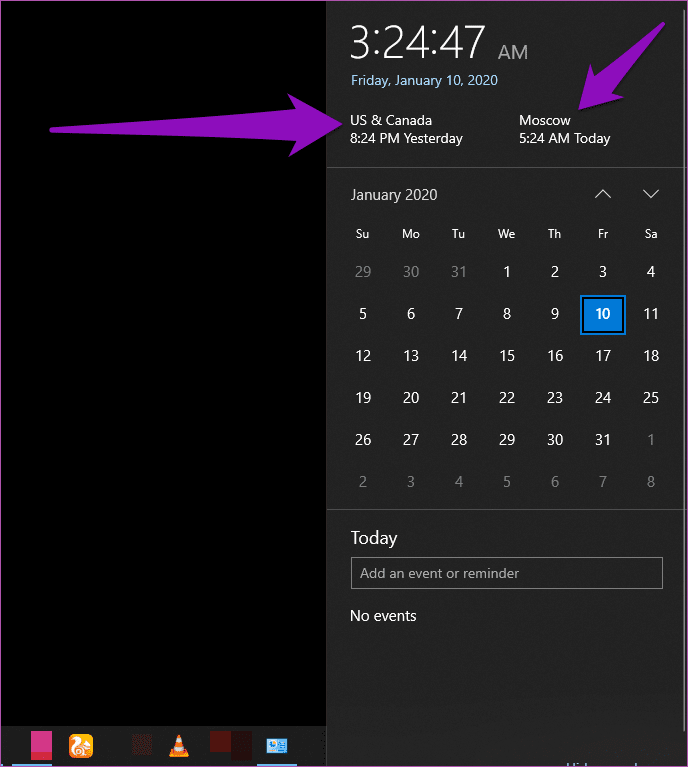
And when you click on the taskbar clock, the newly-added clocks would be displayed directly above the calendar.
Multiple Clocks to the Rescue
If you have trouble keeping up with the time differences of multiple regions, you should use either of the methods above to add their respective clocks to your Windows computer. That would help you effectively manage your daily tasks and events, particularly with people living in different time zones.
Next up: Did the clock disappear from the taskbar in your Windows PC? The article linked below will guide you on how to bring back the date and time to your PC’s taskbar.
Was this helpful?
Last updated on 19 April, 2023
Read Next
 How to Add and Manage Multiple OneDrive Accounts in Windows 10
Both smartphones and computers are smart enough to run multiple accounts of the same app or service.
How to Add and Manage Multiple OneDrive Accounts in Windows 10
Both smartphones and computers are smart enough to run multiple accounts of the same app or service.
 4 Best Apps to Add Multiple Videos in One Screen on Instagram
Did you stumble upon a story or post on Instagram playing multiple videos on the same screen?
4 Best Apps to Add Multiple Videos in One Screen on Instagram
Did you stumble upon a story or post on Instagram playing multiple videos on the same screen?
 How to Add Multiple Photos to Facebook and Messenger Story
Our lives are full of stories, and we publish some of them online too.
How to Add Multiple Photos to Facebook and Messenger Story
Our lives are full of stories, and we publish some of them online too.
 How to Add Multiple Labels on Google Maps
While Google Maps keeps evolving, it lets you add a marker for your home and work location.
How to Add Multiple Labels on Google Maps
While Google Maps keeps evolving, it lets you add a marker for your home and work location.
 How to Add Multiple Users to Google Nest Hub Device
Google Nest Hub lets you control all your smart home accessories, listen to your favorite music, and browse the web.
How to Add Multiple Users to Google Nest Hub Device
Google Nest Hub lets you control all your smart home accessories, listen to your favorite music, and browse the web.
 How to Add Multiple Admins to WhatsApp Channels
WhatsApp Channels allow you to follow your interests and create a community of people with a shared passion.
How to Add Multiple Admins to WhatsApp Channels
WhatsApp Channels allow you to follow your interests and create a community of people with a shared passion.
 Top 4 Ways to Select Multiple Files on Windows 10 File Explorer
There are several reasons why you may need to select multiple files on your Windows 10 File Explorer.
Top 4 Ways to Select Multiple Files on Windows 10 File Explorer
There are several reasons why you may need to select multiple files on your Windows 10 File Explorer.
 7 Best Ways to Fix Keyboard Typing Multiple Letters in Windows 10
Whether you are a student, professional, developer, or creator, a flawless typing experience is a must-have for anyone to get things done.
7 Best Ways to Fix Keyboard Typing Multiple Letters in Windows 10
Whether you are a student, professional, developer, or creator, a flawless typing experience is a must-have for anyone to get things done.
The article above may contain affiliate links which help support Guiding Tech. The content remains unbiased and authentic and will never affect our editorial integrity.