Google Docs offers a decent selection of tools to help you clean up your documents and make them look top-notch. You can delete blank pages, insert text boxes, and more. But do you know that you can also add horizontal and vertical lines in Google Docs to help compartmentalize and add breaks between data? Read on to know how.
The main difference between using horizontal and vertical lines in Google Docs is the type of data. While horizontal lines can be added at the top or bottom of the text, vertical lines will only be added in the middle or at the sides.
So, if you’re looking to, say compare something, vertical lines might be more useful. And if you’re simply looking to add a break, you can go for horizontal lines instead.
Note: Before starting, ensure you’re signed in to your Google account.
How to Insert Horizontal Lines in Google Docs
Breaking big chunks of text is made easier by inserting horizontal lines in Google Docs. This way, you can add lines to segregate the text and break it into small, easy-to-read parts. Follow the below steps to insert horizontal lines in Google Docs using these 4 easy ways.
1. Using Insert Menu
Step 1: Open Google Docs and click on the relevant document.
Step 2: Go to the menu options and click on Insert.
Step 3: Here, click on Horizontal line.
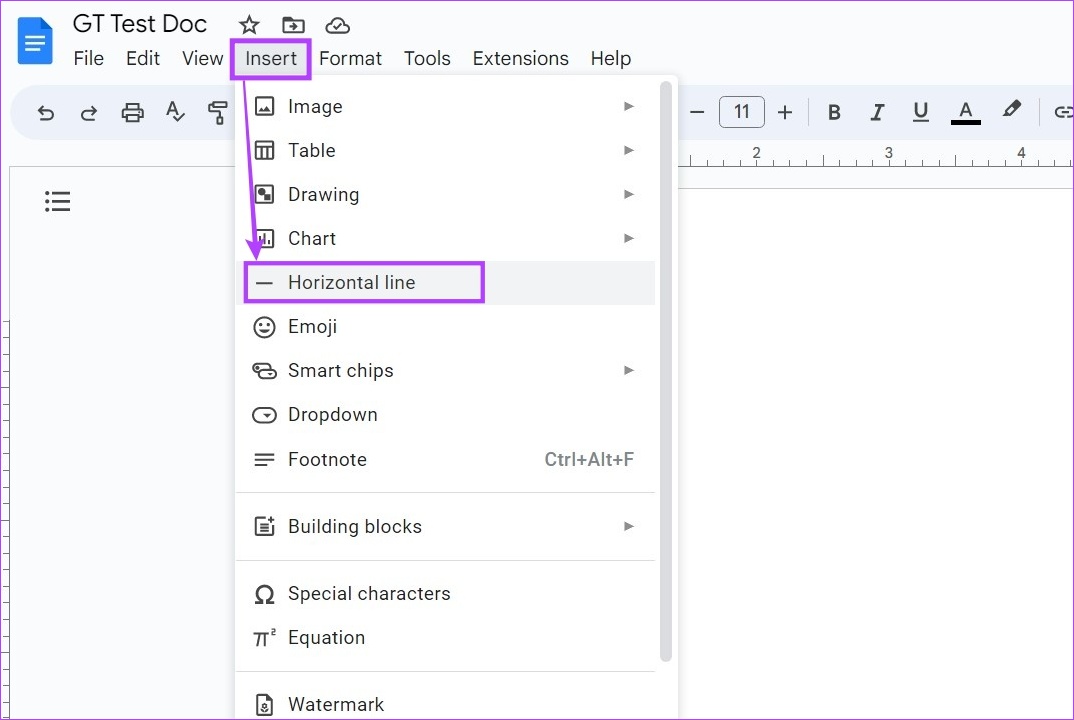
This will instantly insert a horizontal line in your document. However, with this option, you can only insert basic horizontal lines in Google Docs. For more customization options, check out the other methods listed below.
2. Using the Paragraph Styles Menu
Step 1: Open Google Docs.
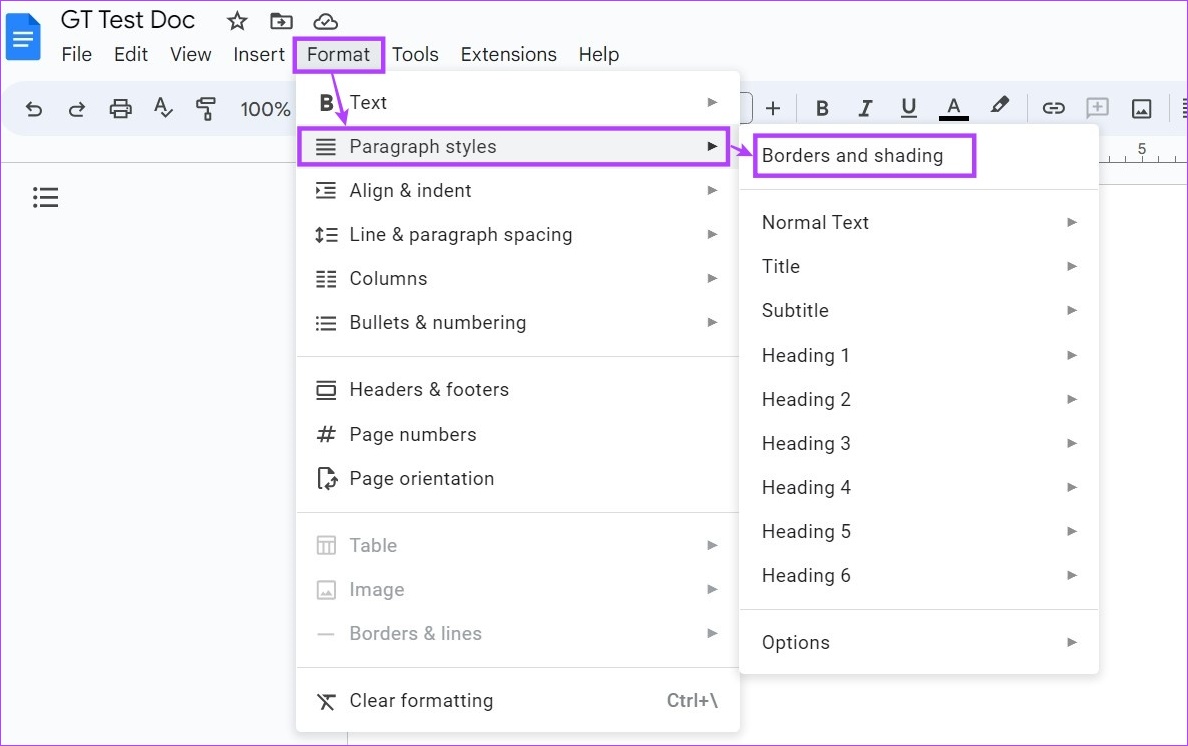
Step 2: Click on the document you wish to add the lines to and click on Format.
Step 3: Here, go to Paragraph styles and click on ‘Borders and shading’. This will open a separate window.
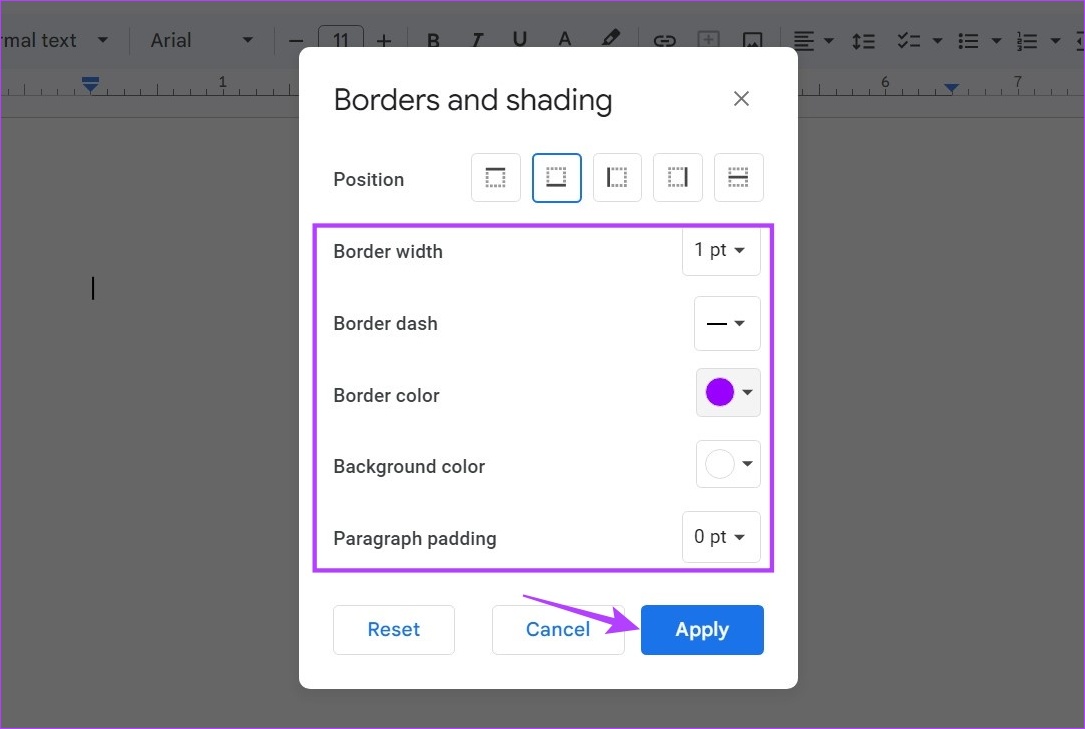
Step 4: From the Position menu, select the Bottom border option.
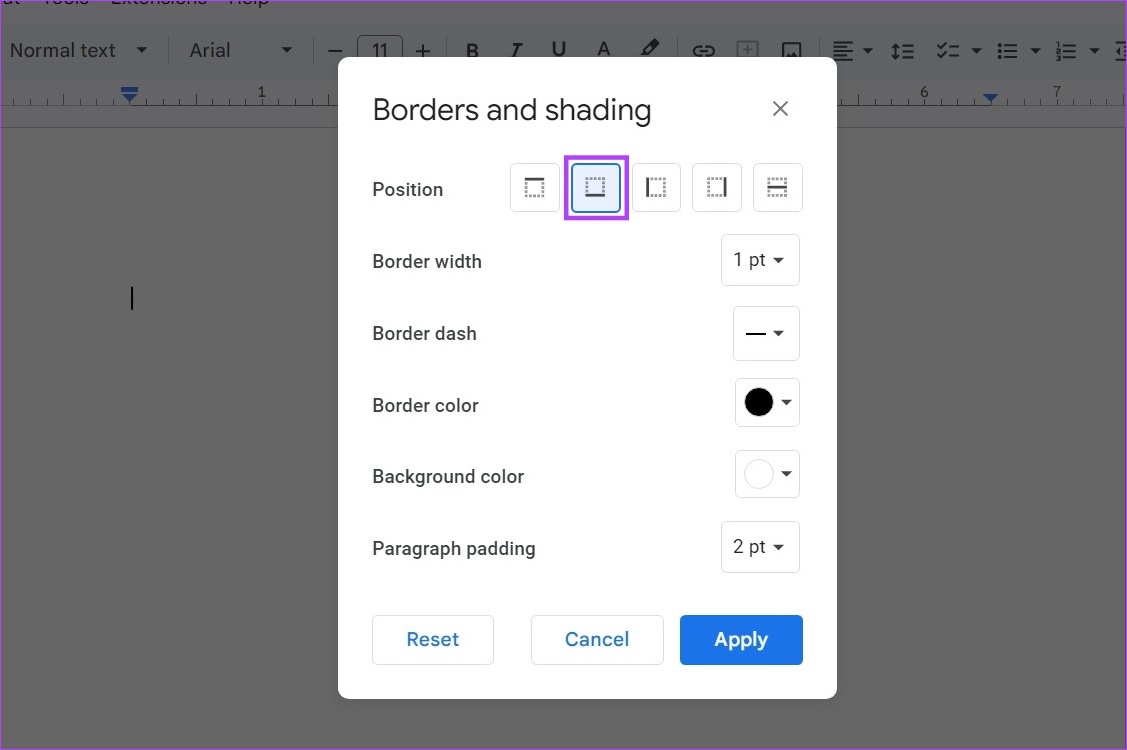
Step 5: Then, use the other menu options to customize the horizontal line’s color, dash, border width, and style. Also, ensure Paragraph padding has been set to 0 pt.
Step 6: Once all the changes have been made, click on Apply.
Tip: If you wish to do away with all the customizations, click on Reset, select the Bottom border option, and click on Apply.
This will immediately add the horizontal line to Google Docs.
3. Using Keyboard Shortcuts
An easy, quick but time-consuming trick to insert horizontal lines in Google Docs is by using keyboard shortcuts. Pressing the Shift key along with the – or hyphen key will insert an underscore or _ symbol in the document. However, pressing the keyboard shortcut in quick succession will lead Google Docs to create a horizontal line instead.

When using this method, you will need to be careful to make sure to align the line according to the page requirements. You can use this method if you don’t want your horizontal line to run all the way across your document’s page or just want it in a limited area.
4. Using the Drawing Tool
Step 1: Open Google Docs and go to the relevant document.
Step 2: Here, click on Insert.
Step 3: Then, go to Drawing and click on New. This will open the Drawing window.

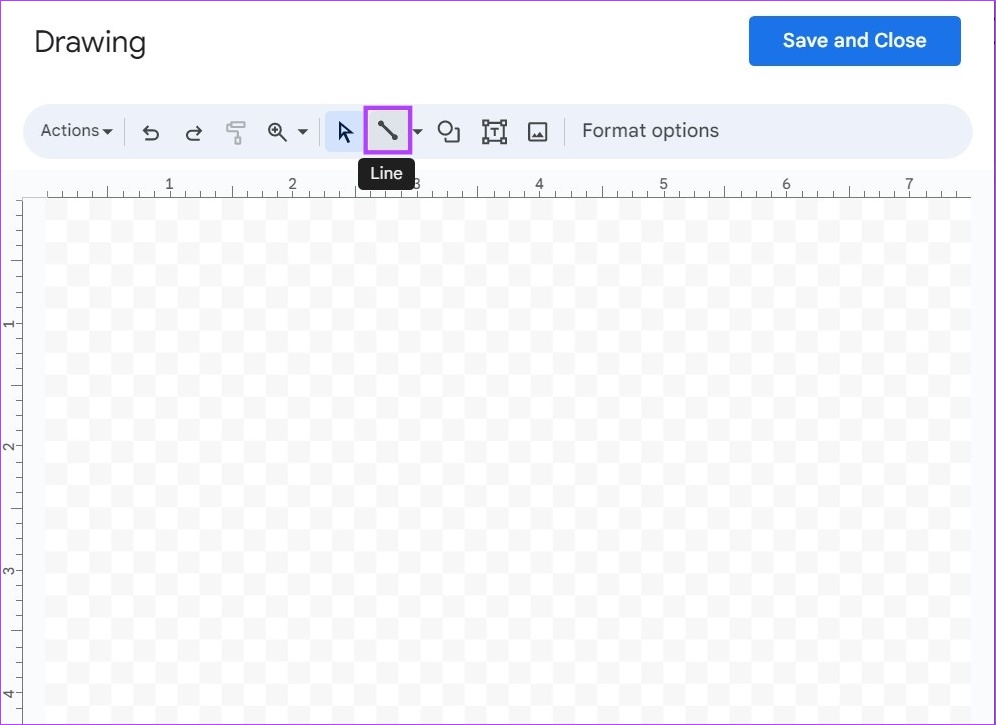
Step 4: Here, click on Line.
Step 5: Then, draw a horizontal line. Click on ‘Save and Close’ once you’re done.
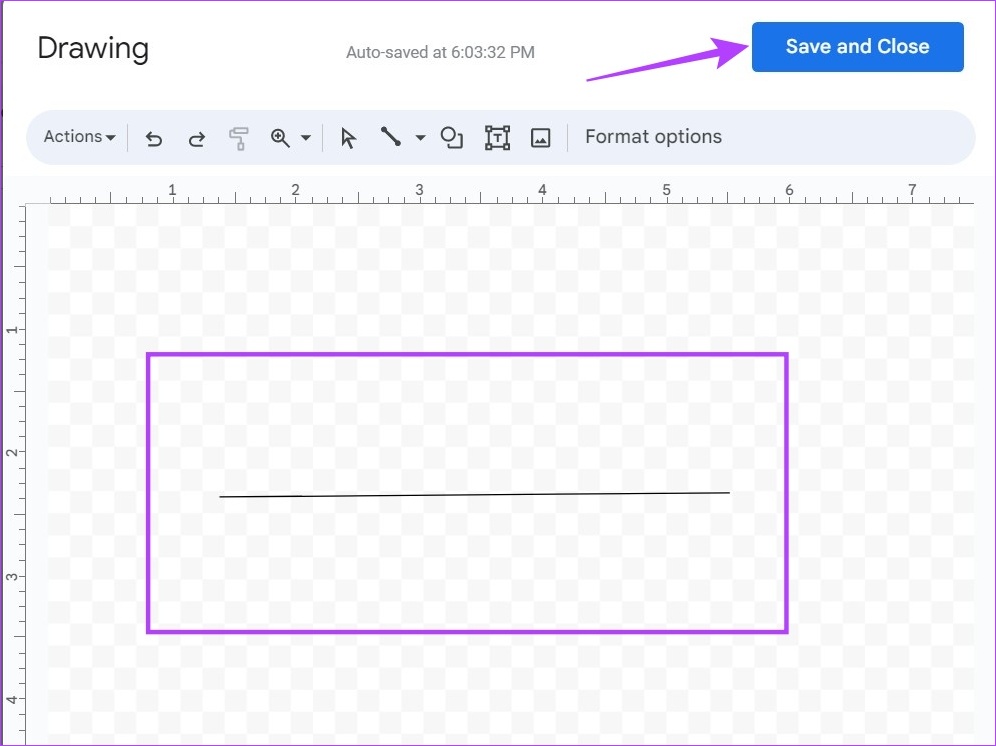
This will close the Drawing window and add the line in Google Docs.
How to Insert Vertical Lines in Google Docs
Inserting vertical lines in Google Docs can help in dividing the text into columns. This can be useful if you’re adding text that is either corresponding or in comparison to each other. To do this, you can use the Column menu along with the ever-versatile Drawing tool.
Here’s how to add lines in Google Docs using them both.
1. Using the Column Menu
Step 1: Open Google Docs and click on the relevant document.
Step 2: Here, click on Format.
Step 3: Then, go to Columns and click on More options. This will open the Column options window.

Step 4: Now, select the number of lines you want along with the relevant spacing measurement. Additionally, make sure the ‘Line between columns’ option is checked.
Step 5: Then, click on Apply.

This will insert vertical lines in Google Docs.
2. Using the Drawing Tool
Step 1: Open Google Docs.
Step 2: Here, go to the relevant document and click on Insert.
Step 3: Then, go to Drawing and click on New.
Step 4: In the Drawing window, click on Line.
Step 5: Use your cursor to draw the vertical lines and once done, click on ‘Save and Close’.
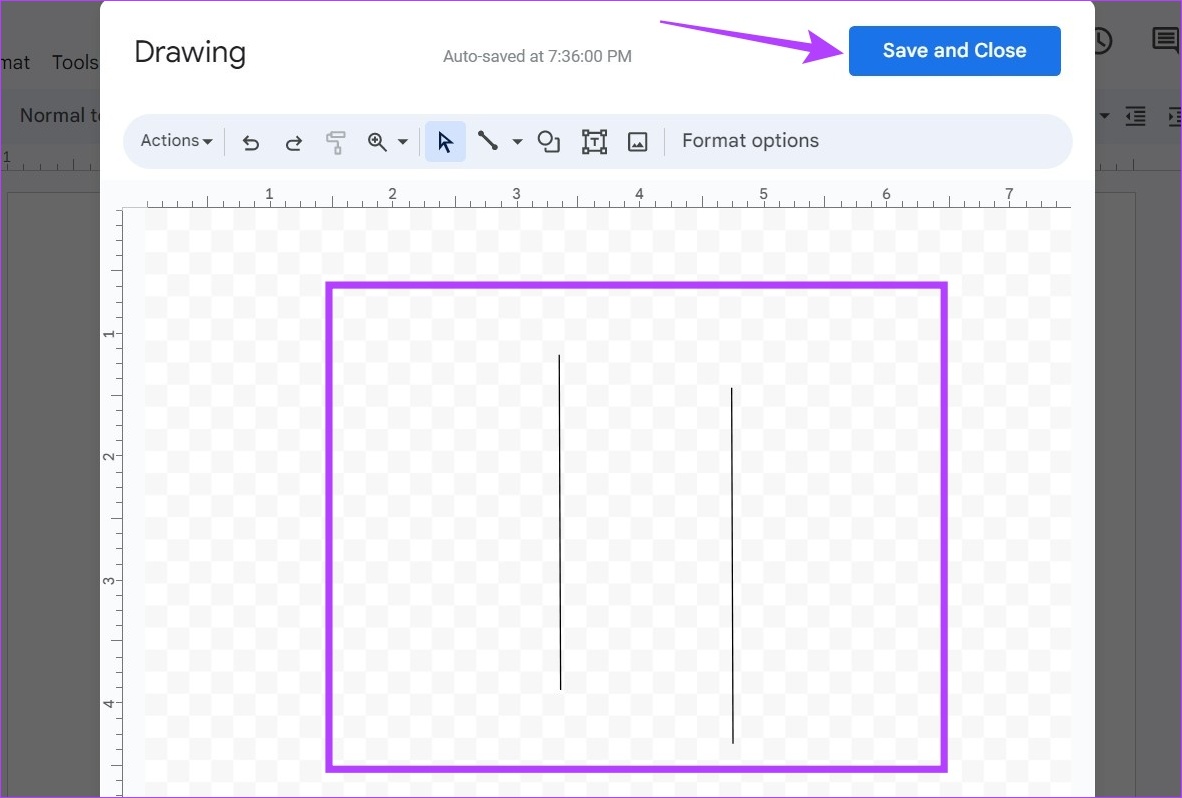
This will insert the vertical lines in Google Docs and close the Drawing window.
FAQs for Adding Lines in Google Docs
Yes, you can remove or add lines in Google Docs. To remove the lines, simply select them and then use the backspace key to delete them. If you wish to edit the lines added using the Drawing tool, click on the line, and once the Edit option appears, click on it to reopen the Drawing window and edit the line as per requirements.
Adding lines on Google Docs using the Paragraph styles menu allows you to change the line color.
Add Lines in Google Docs
While Google Does has all the necessary functions already available, it can take some time to figure out exactly how they work. We hope that our article helped you understand how to add horizontal and vertical lines in Google Docs.
You can also check our guide on how to add or remove strikethrough in Google Docs to make your documents eye-catching.
Was this helpful?
Last updated on 26 April, 2023
Read Next
 Top 8 Ways to Fix Vertical or Horizontal Lines on Android Screen
Horizontal or vertical lines appearing on your phone screen are a bad omen.
Top 8 Ways to Fix Vertical or Horizontal Lines on Android Screen
Horizontal or vertical lines appearing on your phone screen are a bad omen.
 How to Solve Vertical Blue Lines Appearing on Laptop Screen
Reliability is one of the reasons why professionals opt for macOS over Windows.
How to Solve Vertical Blue Lines Appearing on Laptop Screen
Reliability is one of the reasons why professionals opt for macOS over Windows.
 6 Best Vertical Monitors for Coding, Designing, Text Editing and More
These days, the demand for vertical monitors has grown a lot.
6 Best Vertical Monitors for Coding, Designing, Text Editing and More
These days, the demand for vertical monitors has grown a lot.
 5 Best Ergonomic Vertical Mouse To Buy in 2024
Are you struggling with wrist pain from endless hours of clicking and scrolling?
5 Best Ergonomic Vertical Mouse To Buy in 2024
Are you struggling with wrist pain from endless hours of clicking and scrolling?
 How to Add or Remove Strikethrough Text in Google Docs
Google Docs is an incredibly streamlined word processor, providing a compact user interface for a distraction-free writing experience.
How to Add or Remove Strikethrough Text in Google Docs
Google Docs is an incredibly streamlined word processor, providing a compact user interface for a distraction-free writing experience.
 How to Scan and Add a Document into Google Docs
Attaching a scanned file to any document was a challenging job when smartphones weren’t mainstream.
How to Scan and Add a Document into Google Docs
Attaching a scanned file to any document was a challenging job when smartphones weren’t mainstream.
 Top 4 Ways to Add Captions to Images in Google Docs
While Google Docs manages to win hearts with its simplistic design and an easy-to-use interface, it also misses out on some key features here and there.
Top 4 Ways to Add Captions to Images in Google Docs
While Google Docs manages to win hearts with its simplistic design and an easy-to-use interface, it also misses out on some key features here and there.
 How to Add and Remove Line Numbers in Google Docs
The line numbers in Google Docs are similar to page numbers.
How to Add and Remove Line Numbers in Google Docs
The line numbers in Google Docs are similar to page numbers.
The article above may contain affiliate links which help support Guiding Tech. The content remains unbiased and authentic and will never affect our editorial integrity.